


New Built in for Our Kitchen
We decided the plate rack that was existing to our kitchen wasn't providing enough storage for us so we decided to take it out and replace it with a built in cabinet. I love original details in a home, but this was the only original detail left in our kitchen. I had to think long and hard about removing it, but in the end, we really needed the storage.
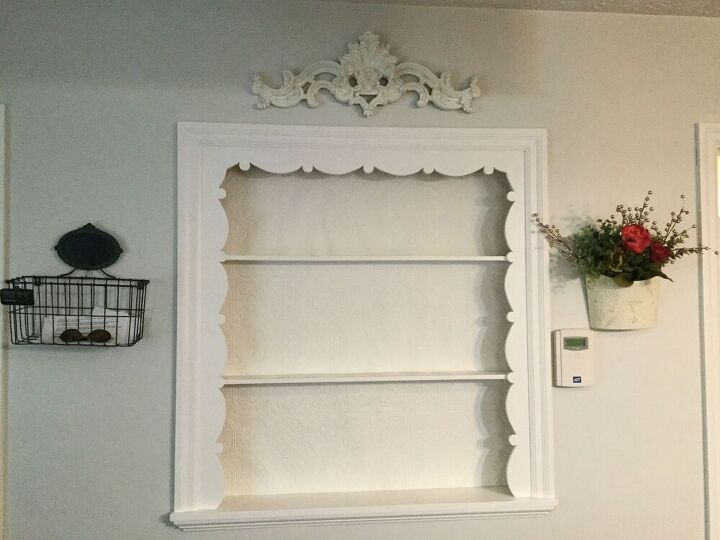
Here is what our plate rack looked like cleared out. Not much storage offered here as you can see. I do love that decorative trim... no worries, I kept some of the trim to figure another project out with.
We removed the plate rack, demo was quite easy. Then we took measurements of the hole in the wall that was left behind and accounted for the depth of the 3/4" plywood we used all around the space.
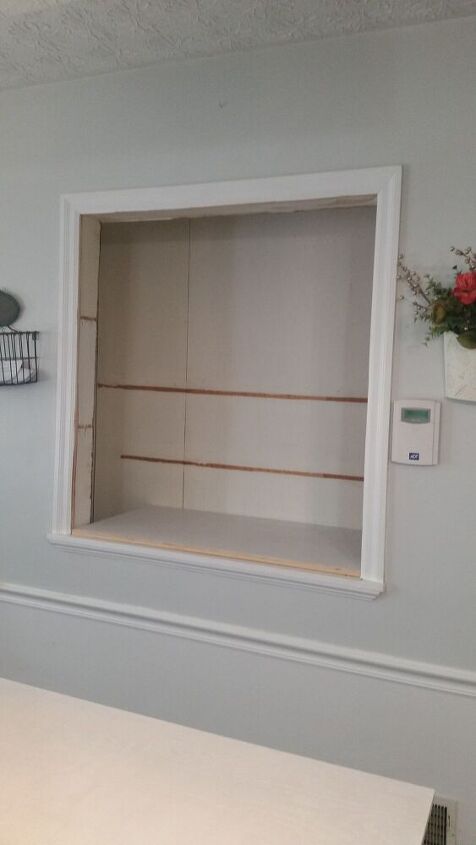
Here is what was left after we removed the plate rack. As you can see, the hole in the wall was quite large and the small pantry behind the plate rack really did provide us with quite a large cabinet.
The cabinet is 20" deep, we had a small, pretty much unusable pantry that ran behind the plate rack so there is where the extra space came from.
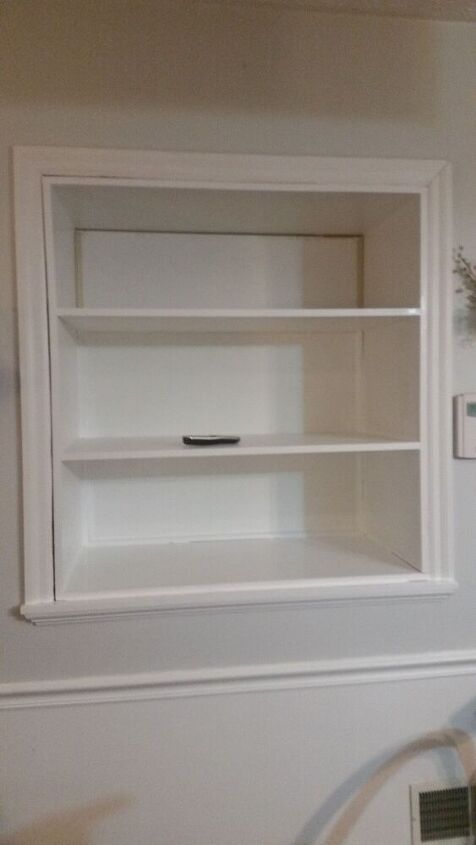
We made a box first and screwed the cabinet walls together. We used 1 1/2" wood screws for this cabinet. Once the box was built, we added shelves to the cabinet, again using 1 1/2" wood screws.
After the cabinet was constructed, I painted the cabinet white, I used Benjamin Moore paint from our local paint store. The seams in the corner had a small gap so we decided to add trim to the corners to give it a more finished look.
My husband put the cabinet up to the existing hole in our wall and pushed it in. At first the cabinet went in smoothly and then became harder the further in he pushed. He did need to take a rubber mallet to hammer it in place.
We added the doors I painted to the cabinet, and lastly we added the decorative screens to the doors. The drawer pulls I purchased from Hobby Lobby, they have awesome prices on drawer pulls and I liked the cottage look they had.
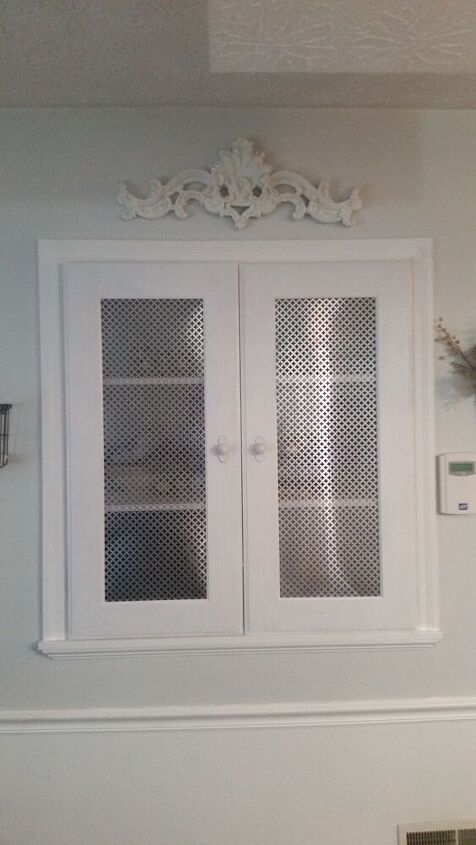
Here is what the finished cabinet looks like. We actually purchased the doors from Raw Doors online. You can visit their site and give dimensions and see what the doors will look like. They add the holes for hinges for you so no worries figuring that out. We added the decorative screen to the inside of the doors to give a cottage look. If you would like to see more pictures of this project, decorating, and other home projects, jump over on the blog at www.VintageStyleGal.com. Thanks for checking this project out.

Comments
Join the conversation
-
'Such a smart decision to make better use of this wall space to gain floor-space-saving, yet easily accessible storage. The doors you chose have just enough opaque-ness that almost anything could be shelved behind them, without having everything on show the way it would be with clear doors.
-
Great job to get a bit more space. Looks wonderful. Love the screened in doors.


Frequently asked questions
Have a question about this project?
Where did you get the decorative screens to insert into the doors? Are they the same as the ones sold for constructing radiator covers?