


Our Super Easy Table Made With Wood Scraps and Hairpin Legs

I do all sort of projects in my craft room and it feels like I never have enough work surface area, half the time my ironing board is enlisted! I've had this set of hairpin legs from Amazon for awhile waiting for that super easy table top to appear. You know how sometimes you are looking for materials for one project and you find objects that spring up a whole other project?
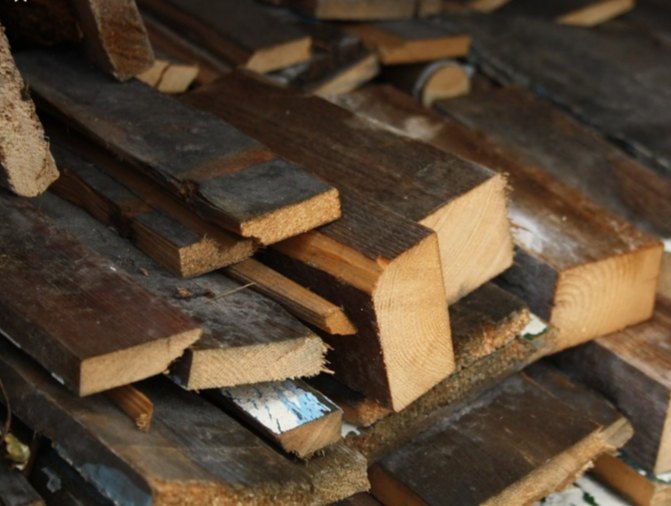
Yep, that's what happened when I went to the scrap pile looking for wood to make a bird feeder, a table top jumped out at me! Well not literally but two four foot pieces of weathered 2 x 10 planks did, cha-ching!
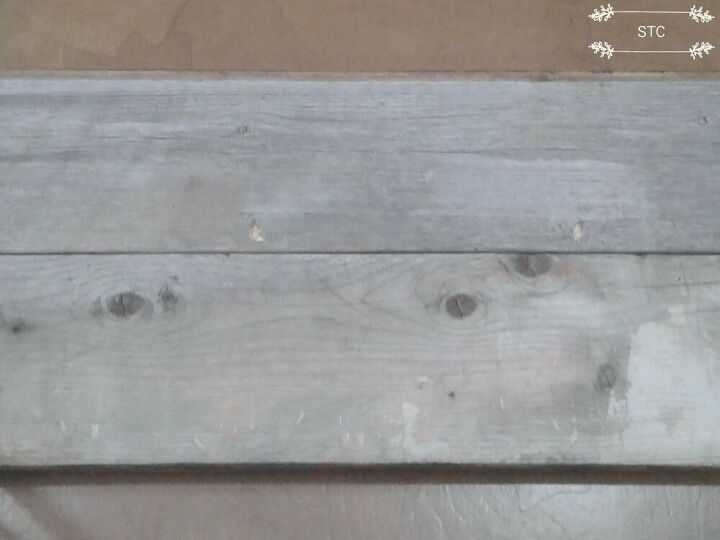
I didn't get a chance to do before photos because in no time my husband had the table whipped into shape but here's how the boards looked when placed together.

The two planks were secured together underneath with a couple of screws driven in at an angle of course making sure the screw doesn't pop through to the top side.
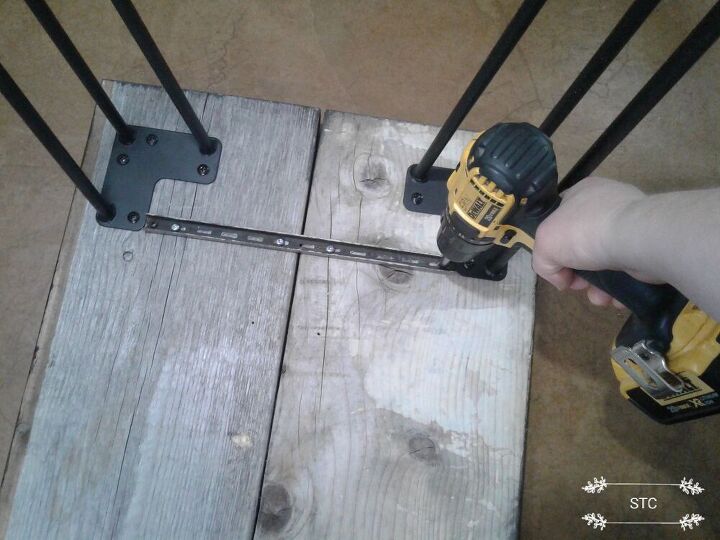
The real reinforcement came with these two recycled steel shelf strips that were screwed on each end front sides facing down. They have a strip of slots that you hook brackets into the and lay your shelving on top, like you'd see in a library or a store. * We used what we had but another option to support and secure two boards would be to add wood strips diagonally underneath.

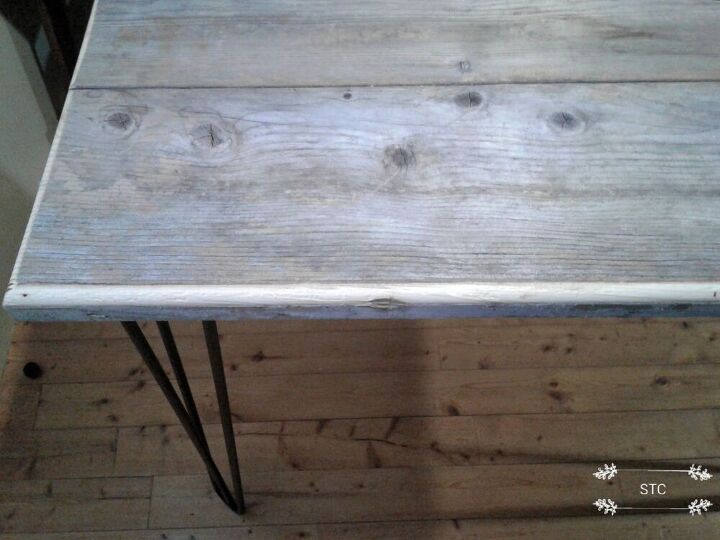
Here is the underside completed its secured, reinforced and the hairpin legs screwed on at the four courners, easy peasy right?
Flipped over here's the view, she ain't pretty...yet! The entire top outside was given a slight makeover with a router bit to soften the sharp right angle edges.
I had intended to just sand smooth the weathered gray wood for my table top but the routering had revealed the unweathered wood and I didn't care for the two tone look. Now to come up with a plan B??
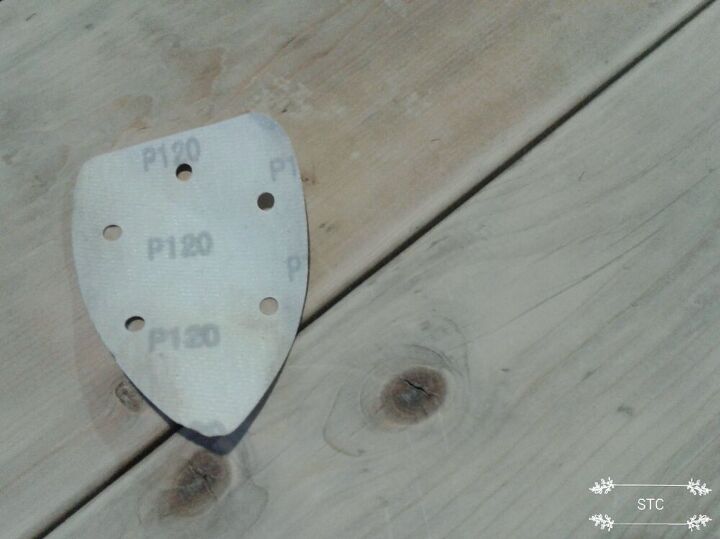
To the sander I had to go using a 120 grit pad on my mouse sander I managed to get the boards in a more even wood tone. My goal was to have a weathered, rustic wood top now this was looking too....finished! How do I fix this?
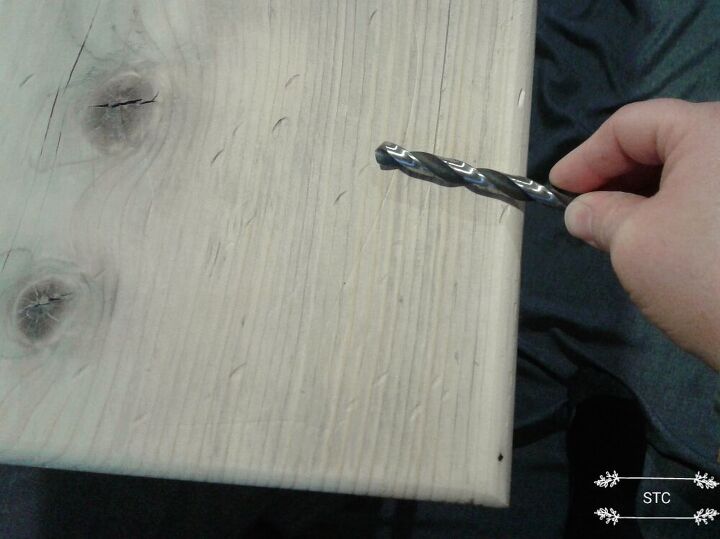
Distress with whatever I can find, some folks use chains to slam into the wood...I couldn't find any! So I dug around in our garage and grabbed this drill bit not knowing what I'd do with it but I'd try something!
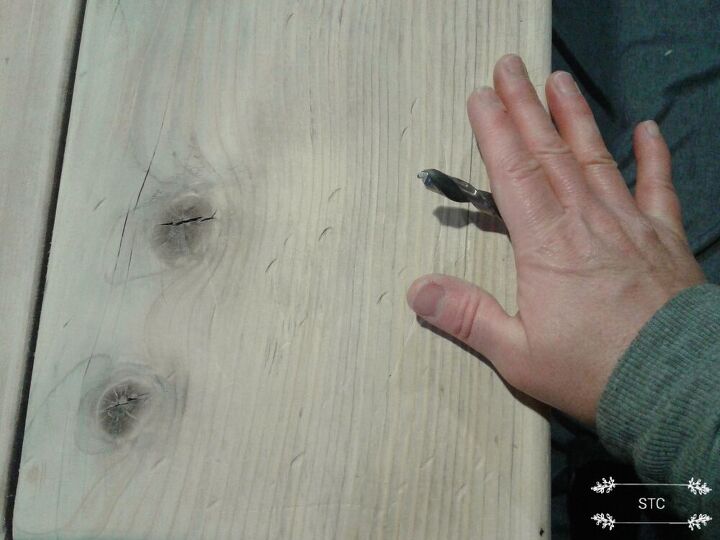
I put my flat hand against it and rolled and pressed along the edges, it gave me some markings but I wanted more! Back to the garage... it was hammer time!
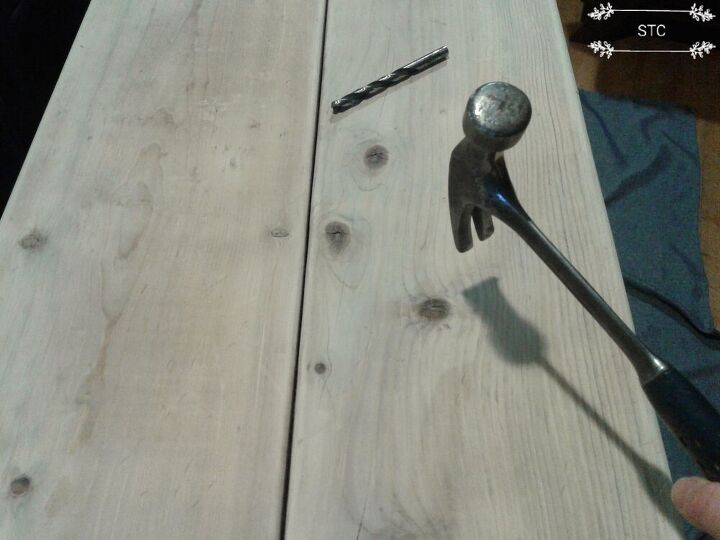
I used the claw side to give the table some dings and dents here there and everywhere, I can't say it wasn't fun because it was!
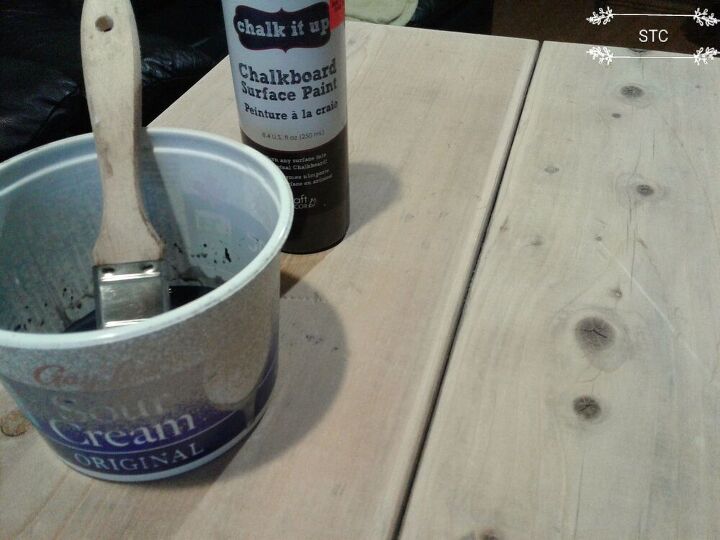
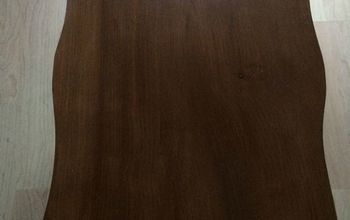
Next was the staining, I wanted dark but not an oil based stain so I chose my chalkboard paint and added water to it at about a 1:1 ratio.
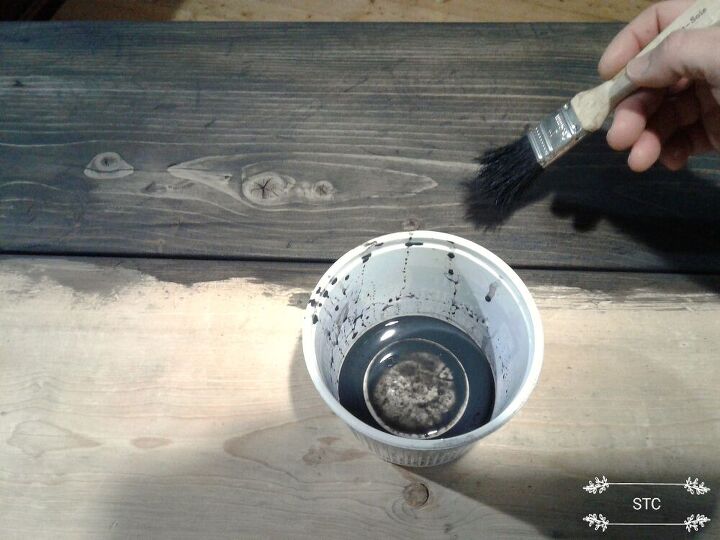
I applied the mixture with a brush but a lint free rag like an old t-shirt would work fine as well. I made sure to get stain into all of my dents and dings, this will highlight them in the finished look.
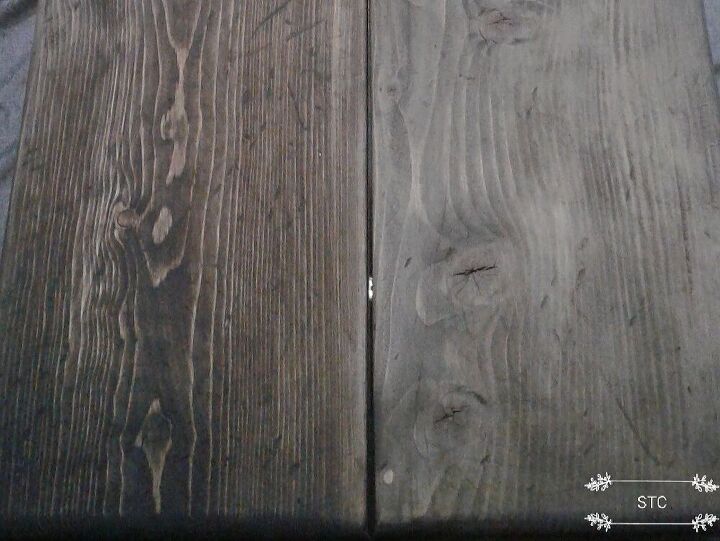
It will dry a lighter shade of course, seen above the right side is dry and the left isn't. Your wood type and it's grain will grab the stain at different rates so keep this in mind when you see variations of color intensity.
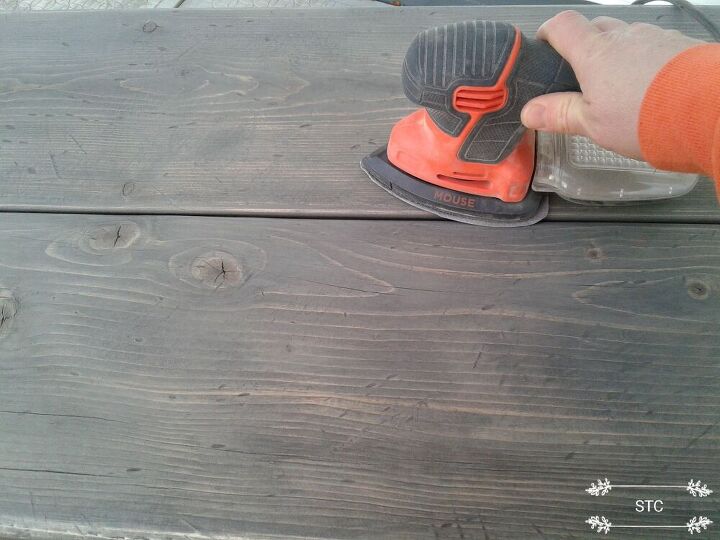
When you apply stain to porous wood it will cause tiny fibres of the wood to pop and that will cause the surface to have a rough finish. I added a 180 grit pad onto my sander to give the entire top a smooth finish and an added bit of extra distressing to the edges.
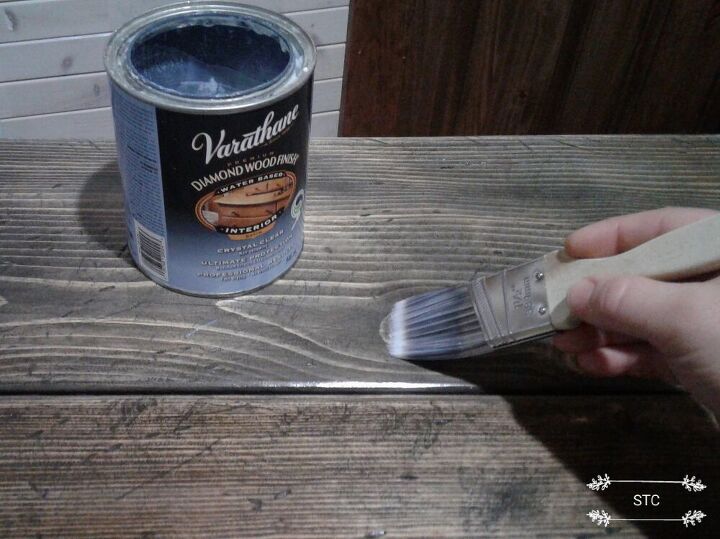
Last but not least, poly the top to seal your wood finish and protect it for years to come. I did four coats on my table, drying time is minimal where this product is water based so it didn't take too long in total.
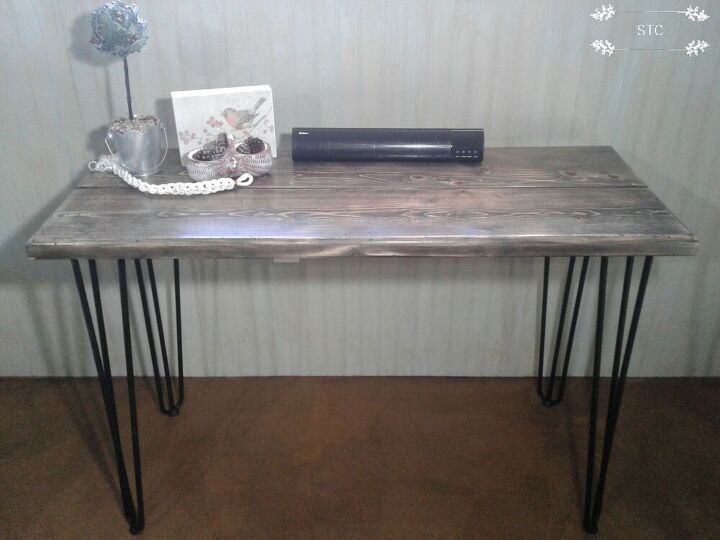
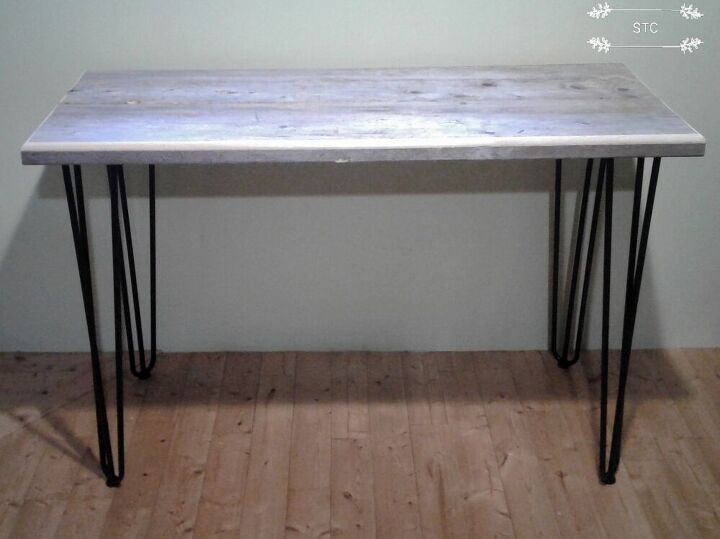
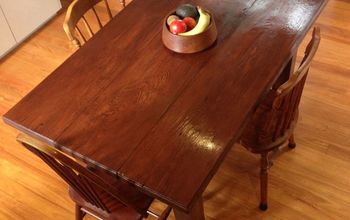
Here is the finished table placed in my craft room all ready to rock and roll well... more like drip and splatter onto! "No, I'll be careful with it for the first week ahahaha that's a laugh", said no crafter ever!
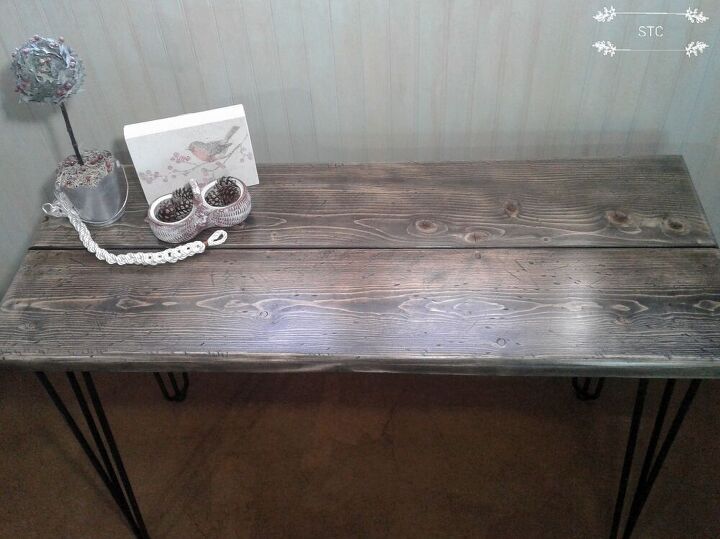
Pretty sweet if you ask me with all of that graining and distressing to catch your eyes. But now another problem has popped up...."where do I sit?" Hmmmm...to another junk pile I go, the forgotten furniture stored in my She shed!
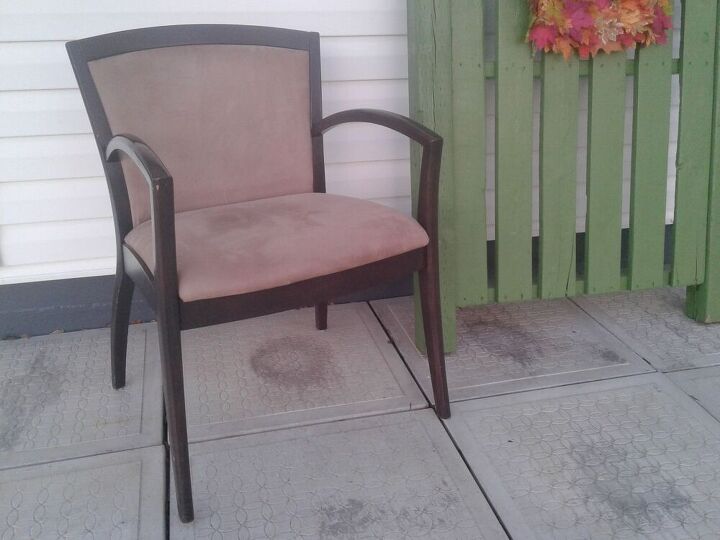
Yep, I hauled out a chair alright but she's gonna need to lose the brownie frownie look! You just met....the next project so stay tuned to see how this will go! Thanks everyone, and see you at my next posting!
*Cost reflects "hairpin legs only" since all other materials we already had on hand.
Resources for this project:
See all materials


Comments
Join the conversation
-
Your table turned out beautifully
-
Having pieces of lumber that needed a purpose - you did those pieces up handsomely. , , , and thriftily . Good for you.


Frequently asked questions
Have a question about this project?