


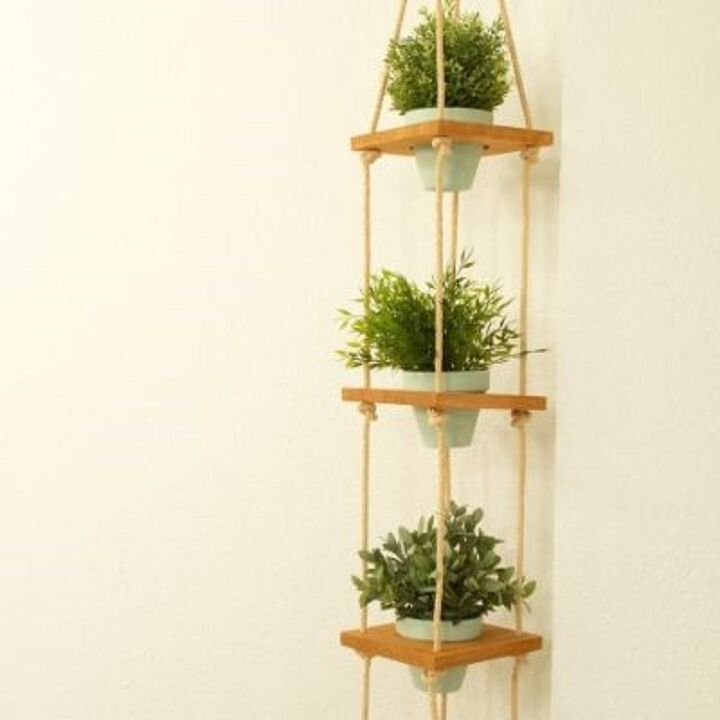
Homemade Hanging Wood and Rope Planter
If you like to decorate with plants as much as we do but you no longer have a free space … now is the time to put them vertically! Find wood, rope and some paint and make yourself a hanging planter as cool as this one. Super simple!
WHAT DO YOU NEED?
Tools- Masking tape
- Squad
- Pencil
- Sandpaper
- keyhole saw
- Drill
- Scissors
- Rope
- Pots
- Wood
- Spray paint
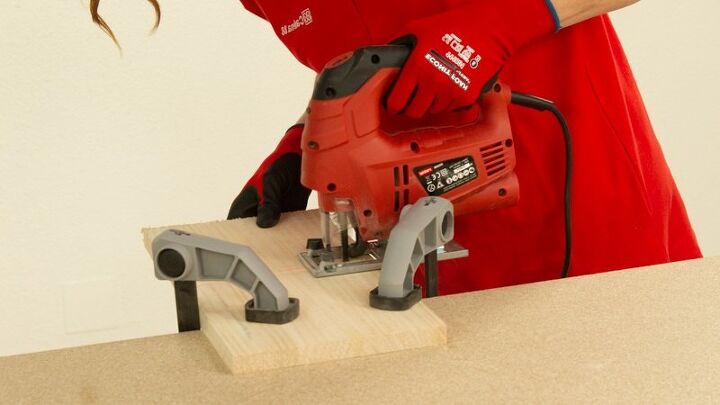
1. Cut the wooden boards
The first step in creating your new homemade hanging planter is to make the square supports that, joined by ropes, will serve to hold the pots. Create as many as you want, adjusting the height of the planter to the space you have. In this case, as it is designed for a room with a fairly high ceiling, it consists of five levels. If yours is lower or just fits you more, you can do it with fewer floors.
Start by measuring the diameter of the tops of the pots you are going to use. Add about 8 centimeters to that measurement and make wooden squares – as many levels as you want your planter to have – with sides of that length. The idea is that each wooden base is slightly larger than the total diameter of the pot.
To cut, use a jigsaw and a specific saw blade for wood, selecting a medium speed so as not to damage the material. If you need to, fix the wood with a sergeant to make the job easier.
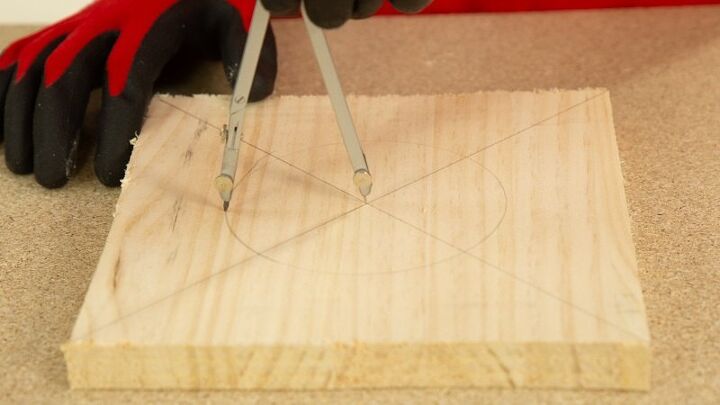
2. Create a circle in the center of the supports
It is time to create the hole in each piece of wood to fit the pots.
With the help of a square, draw two diagonals from corner to corner to mark the center of the wooden squares. Then, use a compass to trace the circumference that you have to open, taking as a reference the diameter of the pot and subtracting a few centimeters. The idea is that the thick part of the pot is supported by the wood.
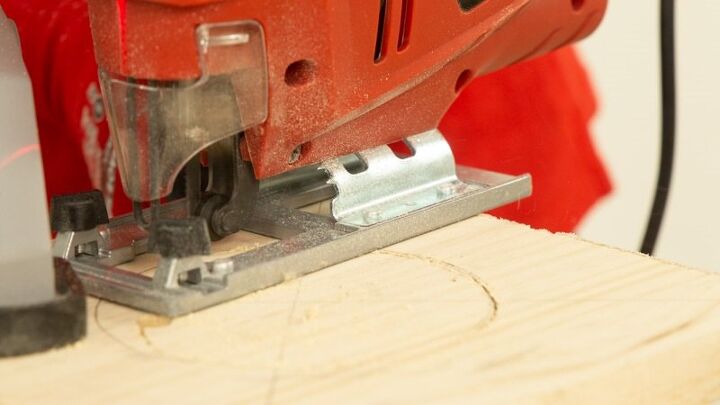
Once you have traced the circumferences with the compass, use a drill to make a hole through which you can pass the blade of a jigsaw. Use this tool to cut the circumference and open the gap in the pieces.
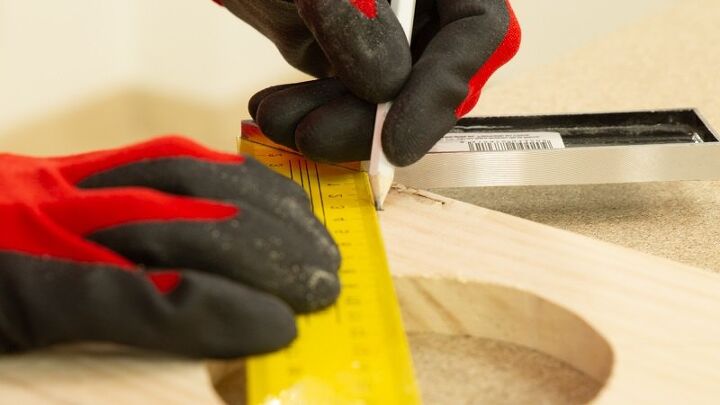
3. Create the holes to hang the homemade hanging planter
It is time to make the holes to pass the rope. You have to do four per piece, all at the same height. In this way, once hung, the pieces will be straight and aligned.
Take advantage of the diagonals marked on the wood and mark four points on each board about three centimeters from the corners. Drill the holes with a drill and a bit of a similar diameter to the string you will be using.
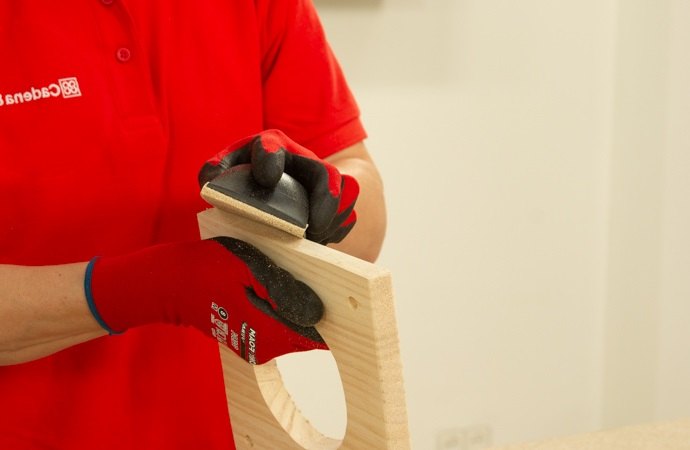
4. Sand the pieces of the hanging planter
There are no more holes or cuts to be made, so it is time to sand all the pieces very well. This way, you will be able to eliminate any remaining dust or chips that may have appeared after cutting the wood.
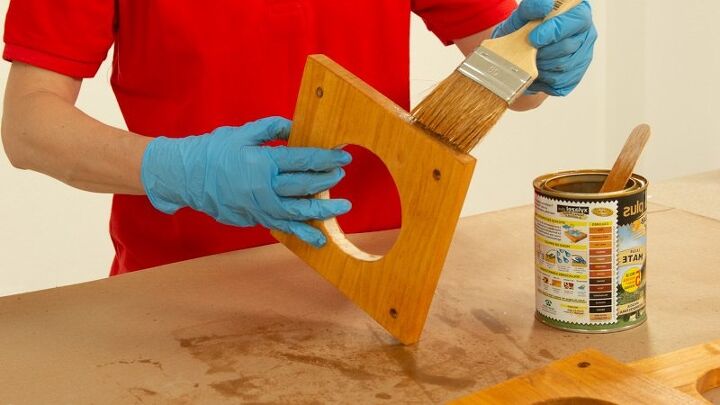
5. Paint the wooden pieces and the pots
Decorate! We have decided to apply a varnish to the wood, which protects it and gives it a touch of color, revealing the beta. For the pots, instead, we have used spray paint.

When you’re done, let the pieces dry.
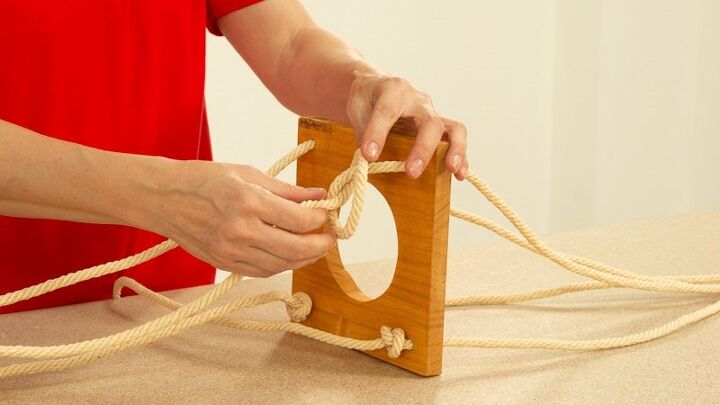
6. Attach the rope
When everything is dry, it is time to assemble the hanging planter. To do this, cut two lengths of string that are twice the length you want the planter to be from one end to the other. If, for example, you want the pot to be one meter high, each section should be two meters.
When you have the pieces of rope, fold them in half and tie them together at their centers with a knot. Do this in such a way that a loop is created at the top, which you will later use to hang the planter from the ceiling. When you’re done, you should have four lengths of rope tied together at the knot.
When you have the knot, put some masking tape on the ends of each length of rope so that you can thread them through the holes in the pieces of wood without fraying the rope.
Then go passing the four pieces of rope through the holes in the pieces of wood and secure with a knot at the bottom. Make sure all the pieces of wood are straight. When you’re done, cut the excess string.
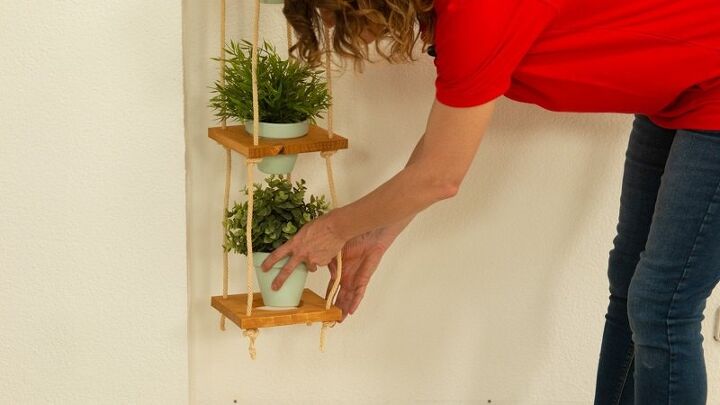
7. Hang the structure from the ceiling and place the pots
To hang the structure, make a hole in the ceiling and insert a plug that will support the weight of the structure. Insert a socket into it and hang the planter. Place the pots and voila!


Comments
Join the conversation
-
I like the way that water from the upper plants can water the lower ones. The last plant can have a saucer attached to catch the excess!
-
I've always liked these. I'm not sure I could ever get it level. That's why I haven't tried it! Looks great!


Frequently asked questions
Have a question about this project?
What is a "squad" and what is "Seargent"???
It would really help to have photos of the string-tying steps. I can't understand your directions, and I guarantee many will have trouble with the different shelves being unlevel.