


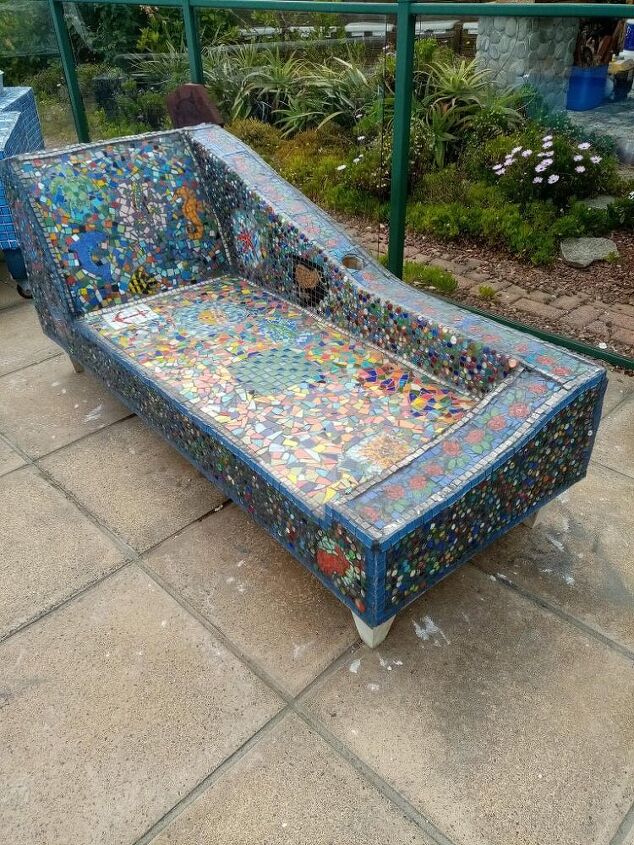
Mosaic Chaise

I was out in Orewa and saw a very interesting Mosaic chair, I thought that something similar would look nice around the pool. Who knew that mosaics were so hard and so time consuming. I was hoping to get this done over the xmas break, but life got in the way what with waterpumps breaking down and visitors etc.
Then COVID struck so it went on the backburner for a while as I was an essential worker and didn't have a lot of free time
Fortunately I then had a fall and had to have my hip replaced -- so plenty of time!!
Supplies:Timber (4x4, 6x1, decking, exterior ply)
Nails (lots of)
Ceramic and Mosaic tiles
Tile cement
Grout
Lots and lots of patience!!!
The Base
My first idea was to buy a chaise and strip off the upholstery and use the frame as a basis, this unfortunately wasn't viable for a couple of reasons.
1. A shop bought chaise probably wouldn't be strong enough and the structure was unlikely to be weatherproof
2. Stripping off the upholstery takes ages (see my post about la-z-boys)
3. This is probably the most important - I couldn't find one at a reasonable price
So best I build one myself! I mean how hard can it be right?
Building the Frame
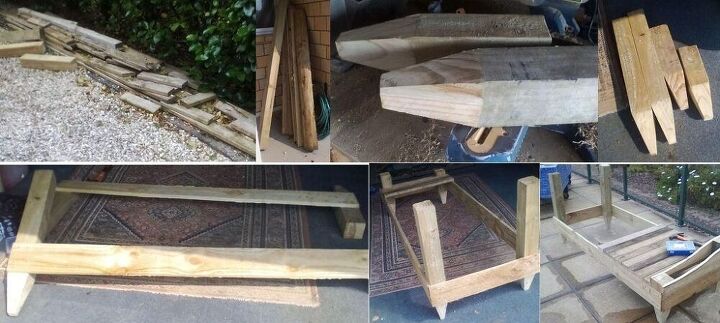
I had some timber lying around, plus I bought some more, all of the stuff I used is exterior grade stuff ( H3.1 and H4).
Most of it was pretty chunky too, 4x4s, 6x1s, 30mm decking timber and exterior ply plus lots of nails!
The legs were made from 4x4 (basically a fence post)The two legs at the "head end" were initially cut at 600mm (2 feet)
The foot end rear leg was 450mm (18 inches) and the foot end front leg 300mm (1 foot)
However these may be trimmed later as I want it to look right
Because they looked really chunky I tapered the bottom of them with a 10 degree taper using a chop saw (compound mitre saw)
I joined the two front and two back legs using the 150x25 (6x1) planks which were 1.8m (6 feet) long
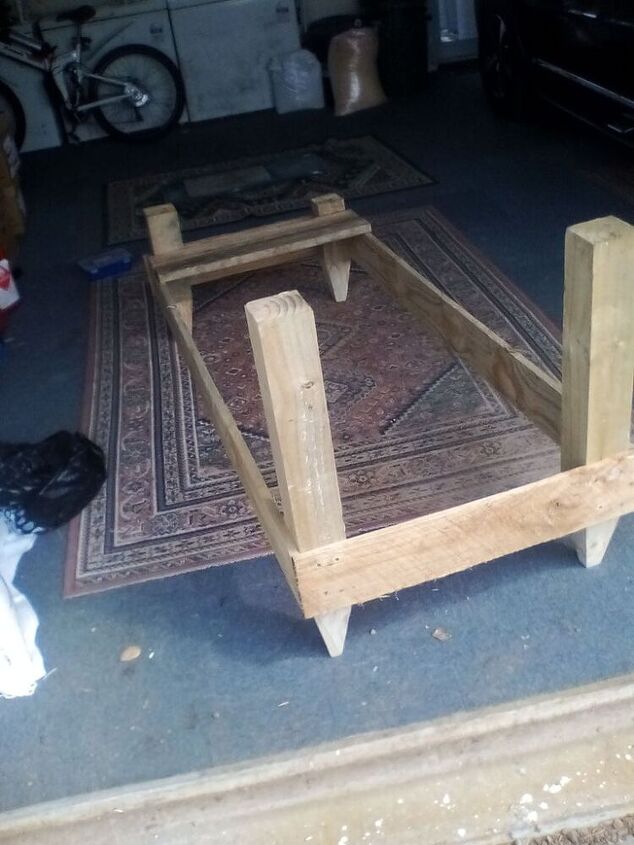
These were actually fence palingsI then joined the two sets of legs with a 750mm (2 foot 6) piece of the same to make a base.
Blood was drawn for the first time (but not the last by a long chalk) doing this when I "smacked myself upside the head" with a piece of wood! (I am not a clever man!!)
This bit was done in the garage as it was hot and sunny outside
Building the rest of the seat
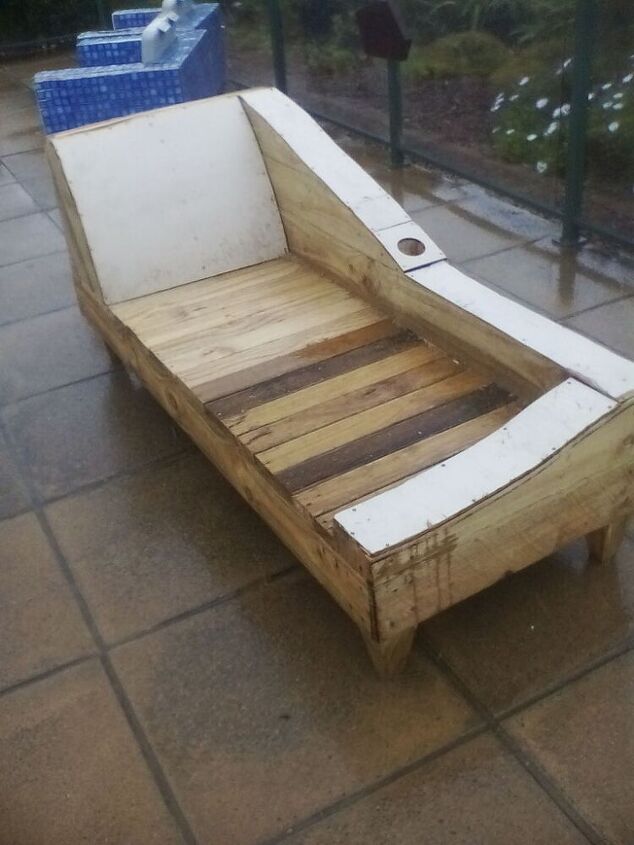
At this point I thought it wise to decamp to where it was going to end up before it became too heavy to move.
I then paneled the seat with decking timber and built up the sides to the shape I wanted with 6x1.
The back and foot end were double skinned to make an arm rest and hide the 4x4s.
Finally I infilled with strips of exterior ply and made the shaped back rest of bent ply, bent over shaped pieces
I also made a cup holder at this point as somewhere to put a drink might come in handy!!
By this time the weather had taken a turn for the worse so I finished for the day
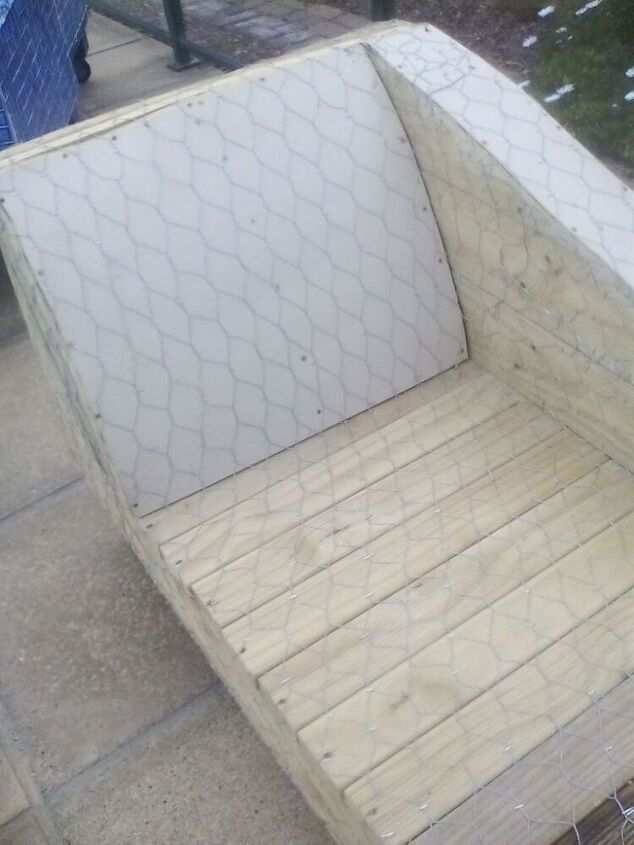
Prepping for tiling
I rounded off all the corners using a grinding disc on my angle grinder, blood was once again shed, I must put the safety guard back on the grinder!!
I then stapled on chicken wire on all the wood to give the tiles a key, this used about a thousand staples!
Tiling
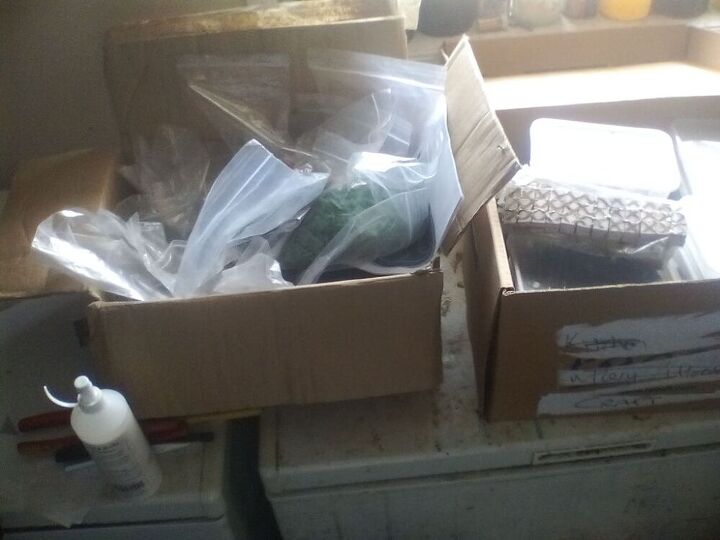
Using Facebook and TradeMe I begged and bought both ceramic and Mosaic tiles, a lady in South Auckland sold me several boxes of mosaic tiles cheaply (I think it was a hobby she lost interest in) and a lady in Parakai gave me several boxes of ceramic tiles that had been sat in her garden for a couple of years
These are just two of the seven boxes that I got
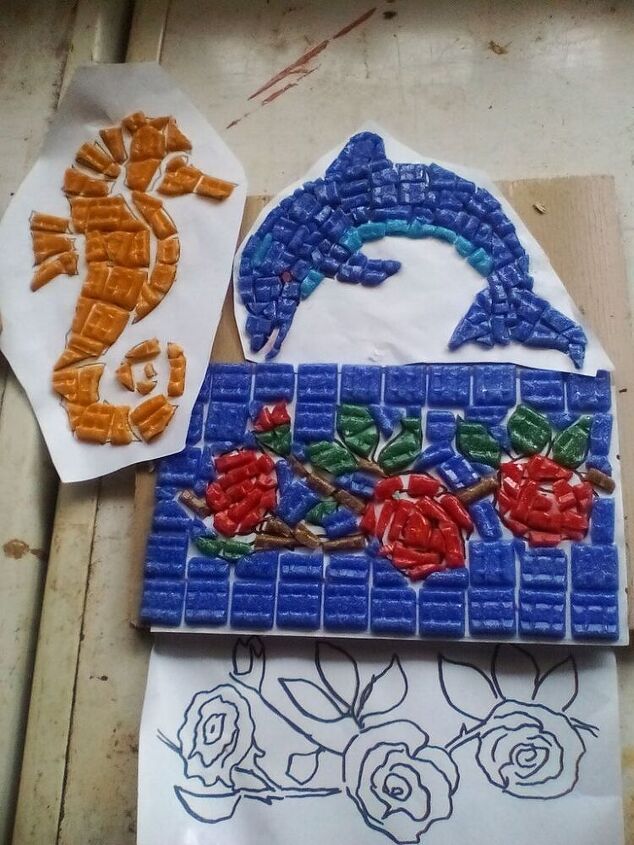
Mosaics
I printed lots of pictures of the interwebs for mosaics and started making these up indoors by using PVA glue to stick the ceramics on, this way I can do them in relative comfort sitting down inside and then cement them into position a scrub the paper off (I hope) then grout
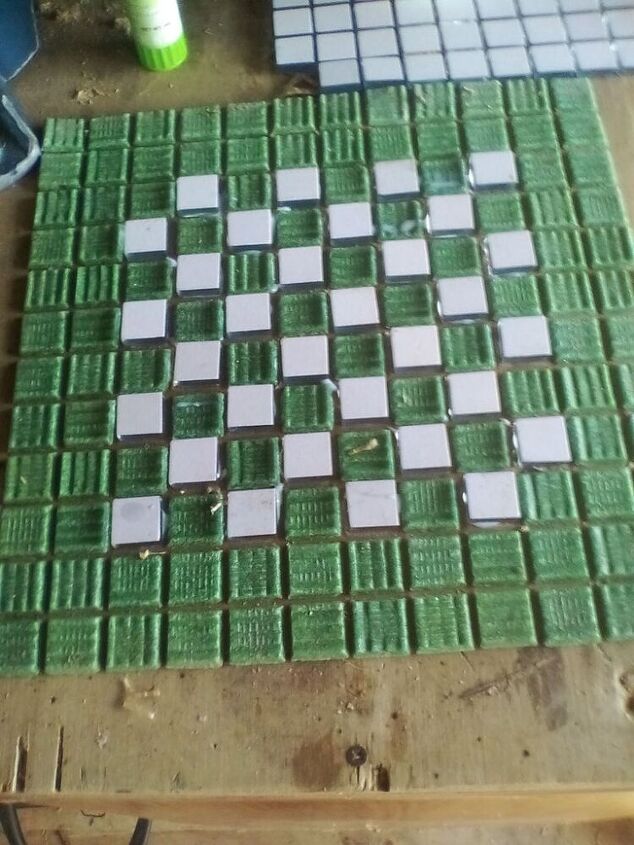
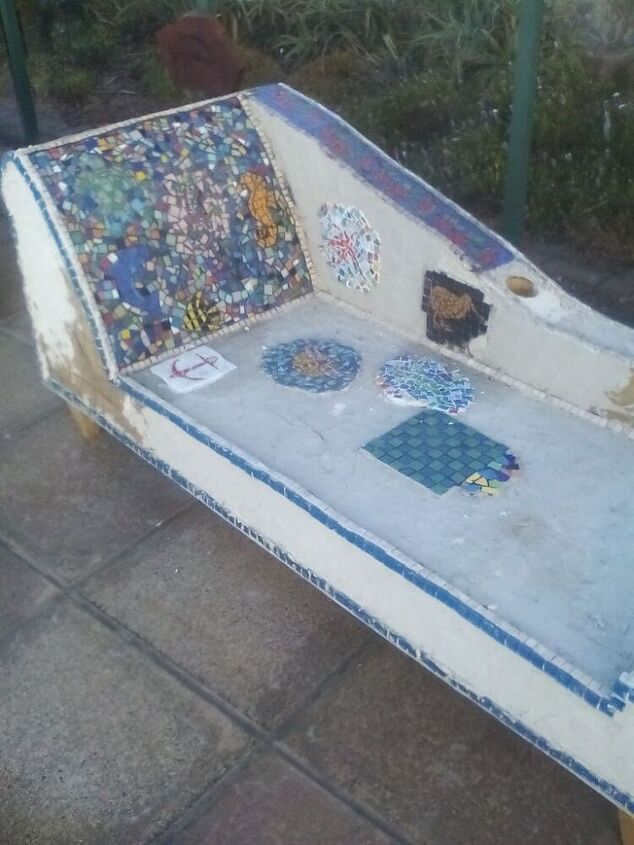
Putting the Mosaics in position
The first few mosaics I made I used PVA adhesive to stick the tiles to the paper, I found that this made it really difficult to remove the paper, so as an alternative I used a glue stick (prittstick) this was much better.
Around this point I realized that doing mosaics is really time consuming and this wasn't going to be completed before I was due back to work.
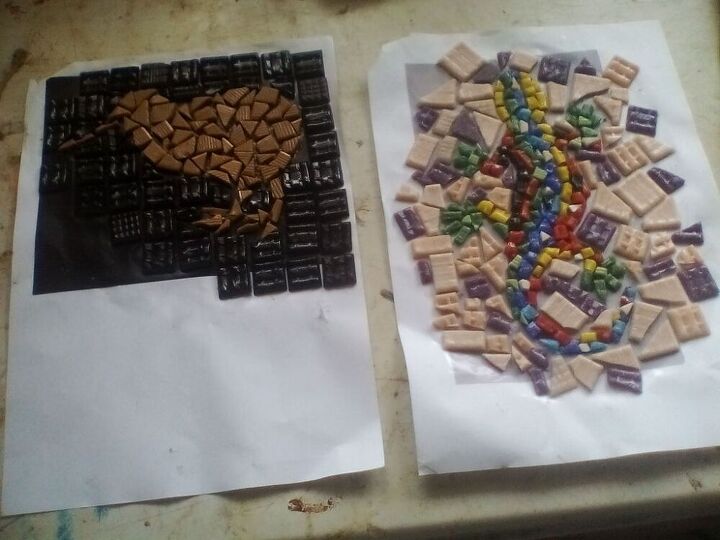
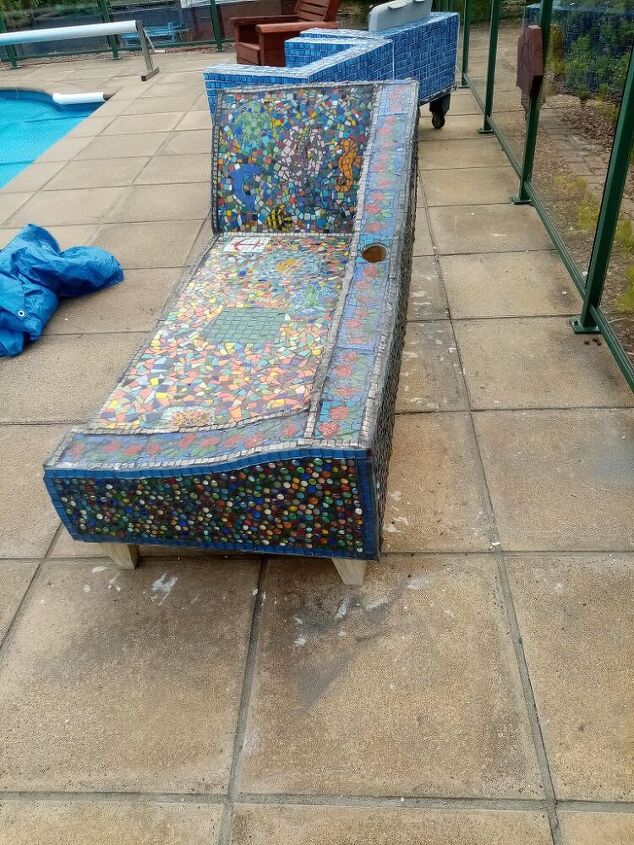
However if you look closely to you can see the nautical/kiwi theme to the mosaics
On the backrest is a blue dolphin, a green turtle, a black and yellow angel fish, a multi colored gecko and an orange seahorse, on the base is a red anchor, a green gecko, a red dragonfly and a chessboard and on the site a brown kiwi and a red starfish, along the top rail are briar roses.
Finishing
Shortly after xmas COVID hit and as an essential worker I didn't have a lot of time what with working in managed isolation, running the farm and doing some other projects, however over xmas 2020 I was recovering from an operation so decided the time was right.
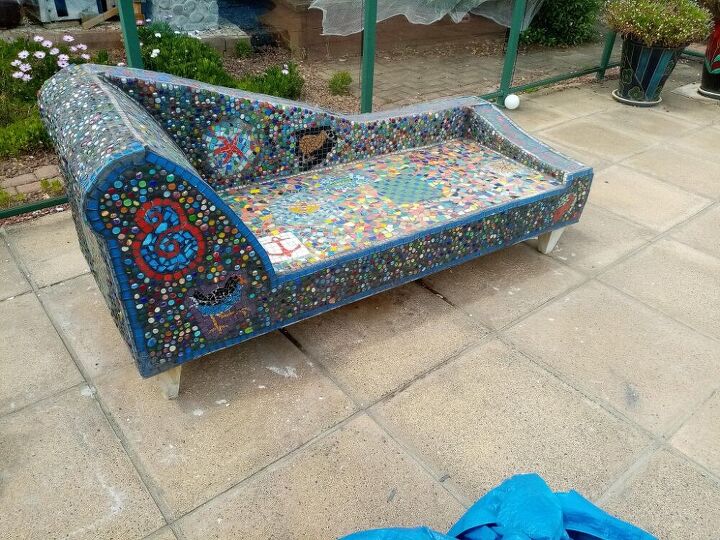
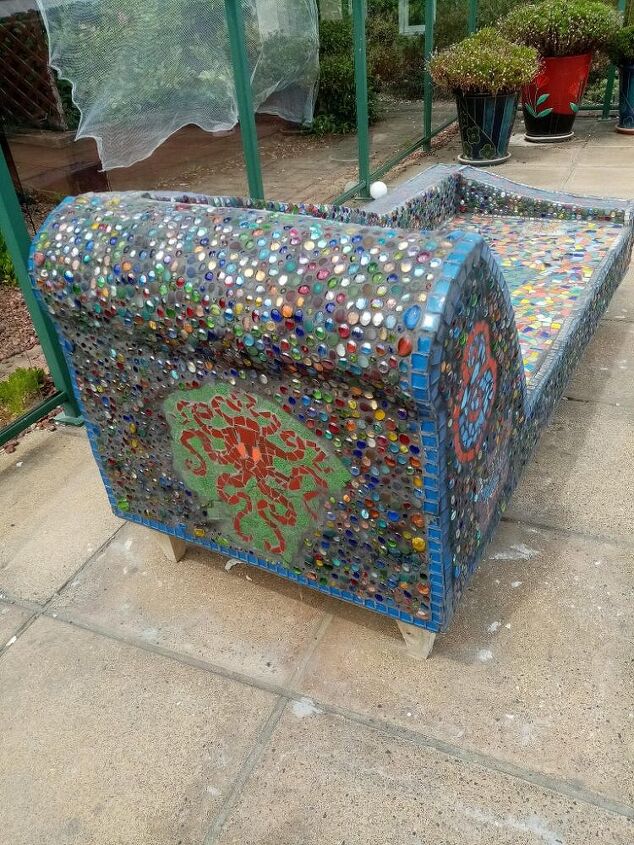
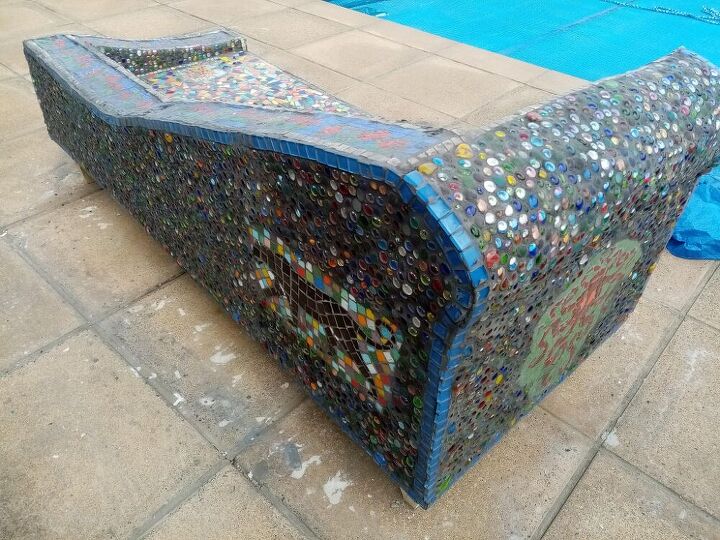
When I got the mosaic tiles the lady gave me about 40 kgs of "Dollar store gems", so I decided to use them.
I then grouted the whole thing and polished it, there is a little bit of clean up still to do but I can do that while sitting on it with a cold beer.
I'm guessing that this weighs between 150 and 200 kgs -- that Mutha ain't going anywhere
Total cost about $450 NZ and my dignity!! :-)


Comments
Join the conversation
-
This is absolutely gorgeous! I bet it is heavy to move! You are an artist! What an art piece!
-
Absolutely gorgeous...almost too lovely for words! You have more patience than I do. Congratulations and kudos for sharing.


Frequently asked questions
Have a question about this project?
Does the cup holder have a drain hole in the bottom?
Did you slope the seat to drain out to the edge?
It rains/snows about 36” per year here and I would worry all that hard work would be “unraveled” with water damage.
That is an awesome, artful piece. But I'm wondering, does it get hot to sit on in the sun?
Wow 😮