


Lamp Makeover

How to add height and width to old thrift store lamps.
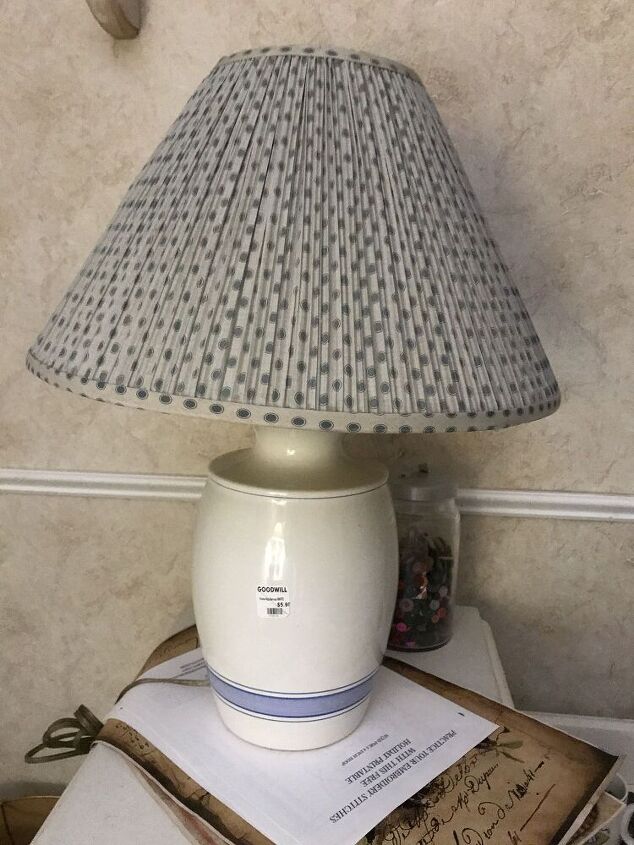
I purchased two thrift store lamps for $5.98 that I thought would look nice with paint and new shades. I painted them white before I realized they were way too small for our bedroom night stands.
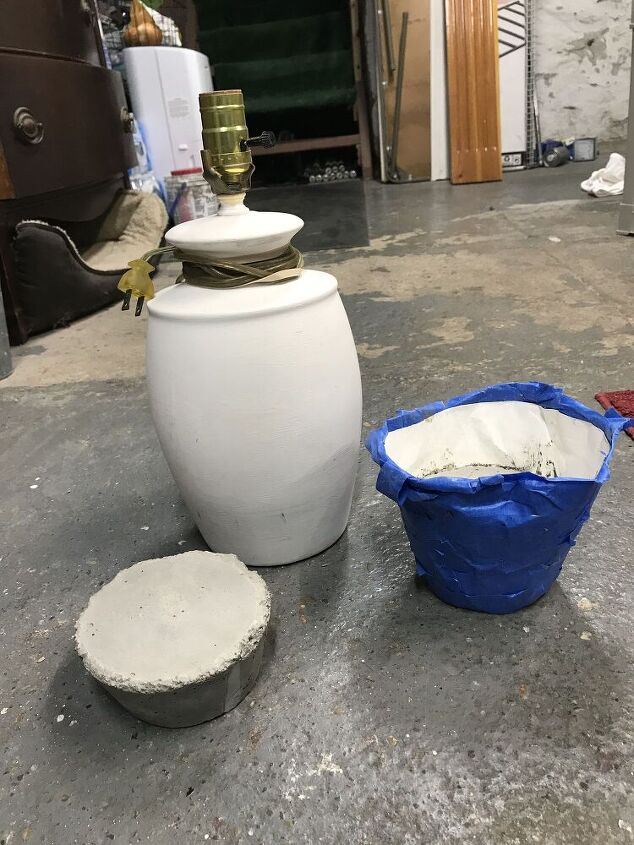
I decided to make concrete bases to add height.
I made two molds for my concrete bases out of paper and painters tape.
Once my molds were made, I prepared my concrete mix. I mixed 2 parts concrete to 1 part masons sand with water. The mix was the consistency of smooth peanut butter. I filled my molds then tapped them gently to bring any air bubbles to the surface. (I could of inserted dowels in the wet concrete to leave a hole for the lamp cords- I decided to skip this step since I didn’t care if the cords ran out the back rather than out the bottom.) I peeled off the molds once I was sure the cement was cured.
This is how the bases looked when I took them out of the molds.

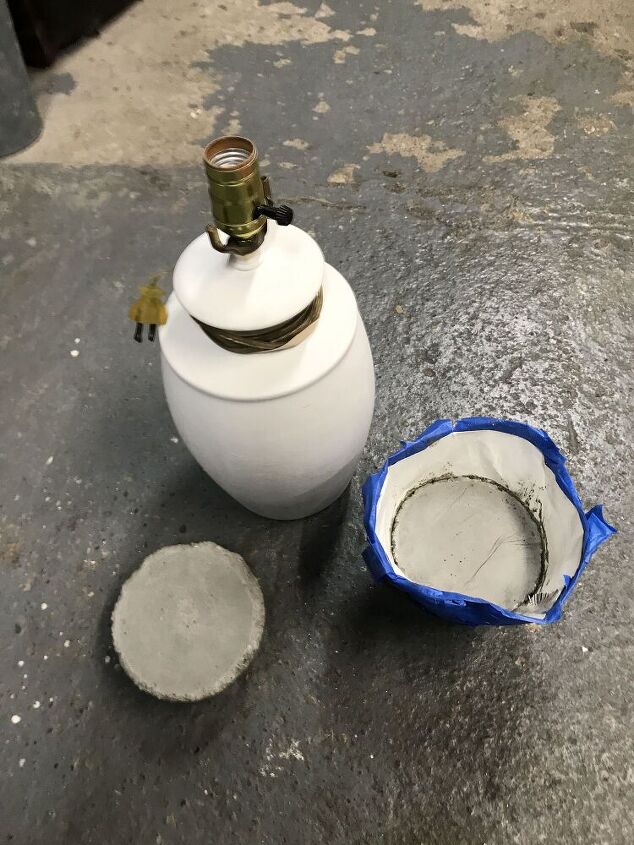
I dry fitted the bases first before smoothing and shaping them.

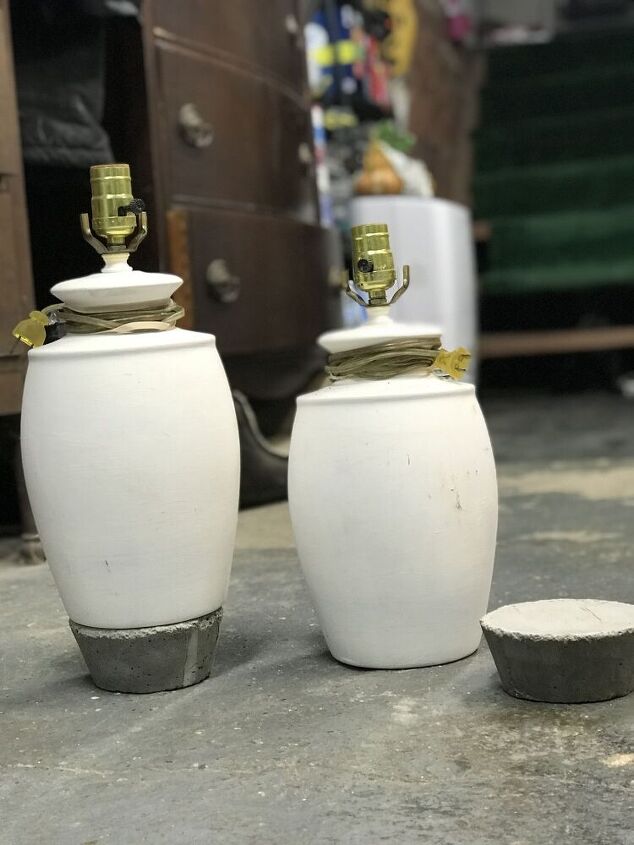
I used my mouse sander to smooth and shape the sides and bottoms.
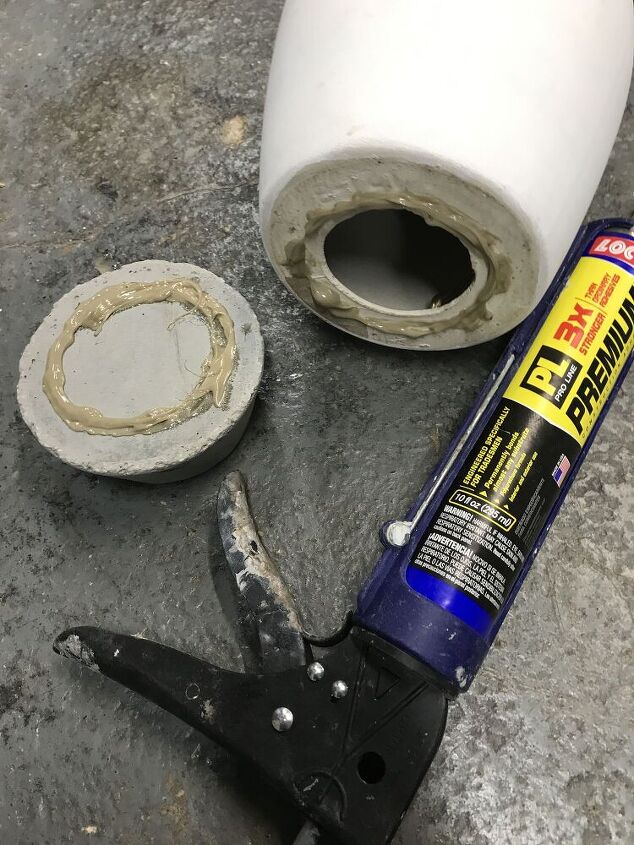
Once I was satisfied with the shape of the bases, I glued them on with construction adhesive. I waited several days for the adhesive to dry.
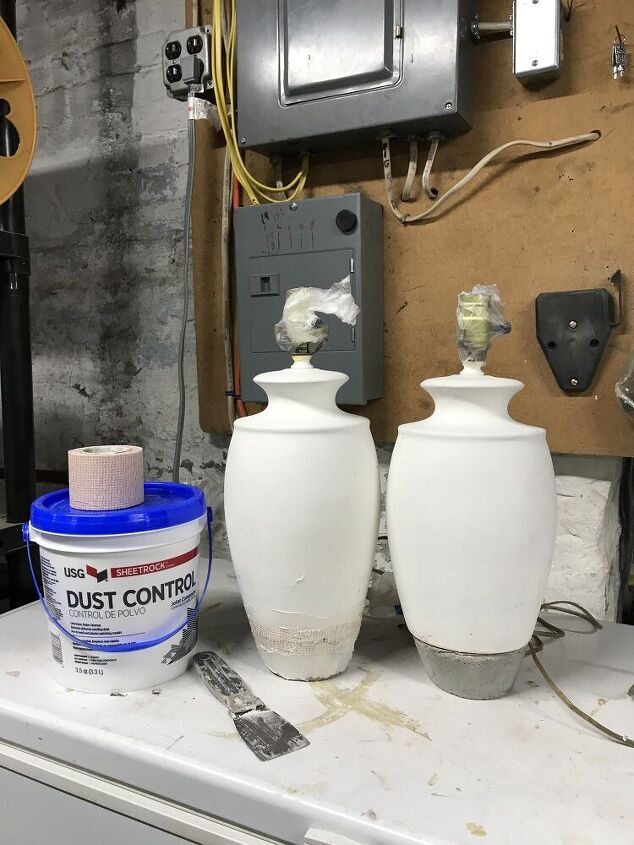
I then used drywall tape and mud to fill in the gap between the bases and lamps. I waited about a day for the mud to dry. Once the mud was dry, I smoothed out the dry mud with a sanding block.
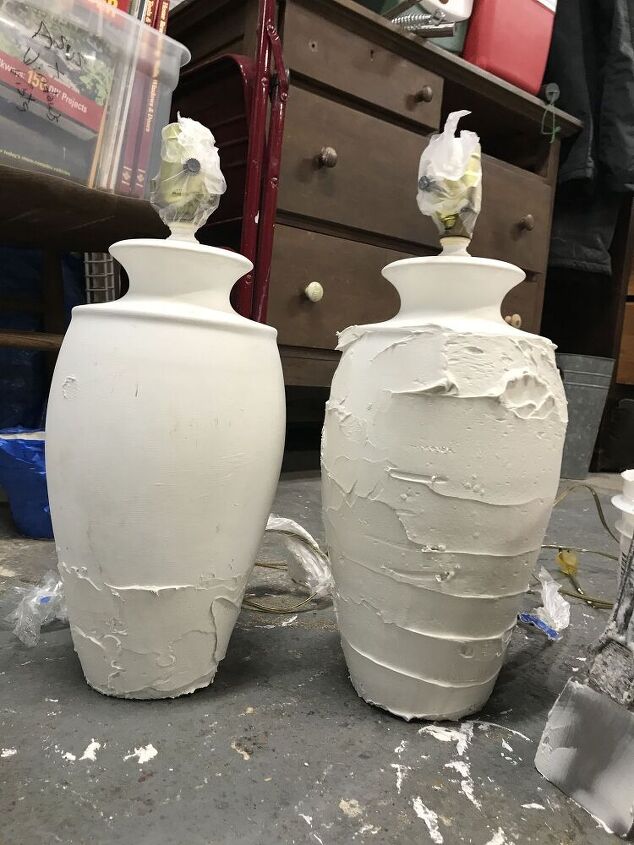
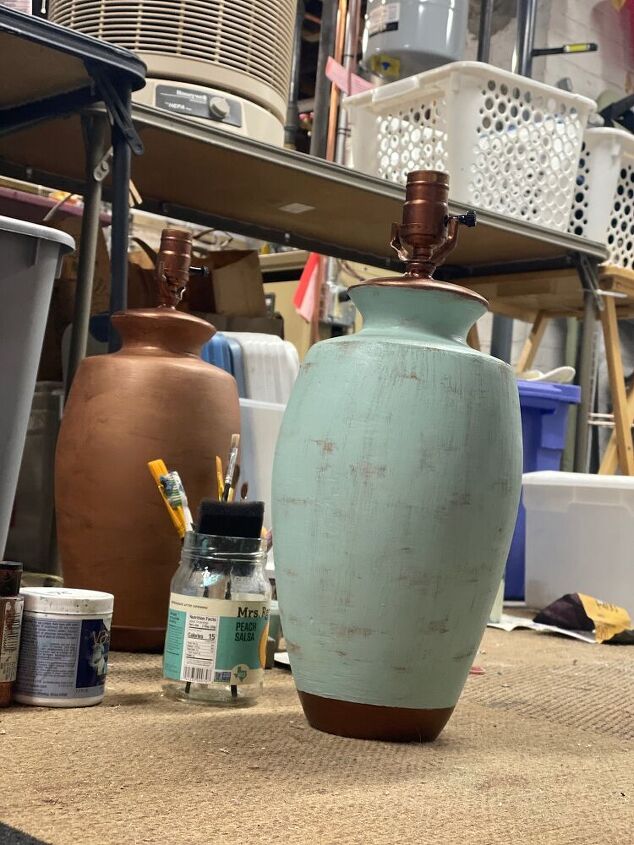
To add width to the lamps, I applied three layers of mud to the lamps from the bottom to just under the bulb sockets. With each layer, I used a putty knife to smooth the wet mud then let dry. I also sanded each layer smooth with a sanding block. I didn't take photos of the smoothed and sanded layers. (It did take several days for each layer to set up.)
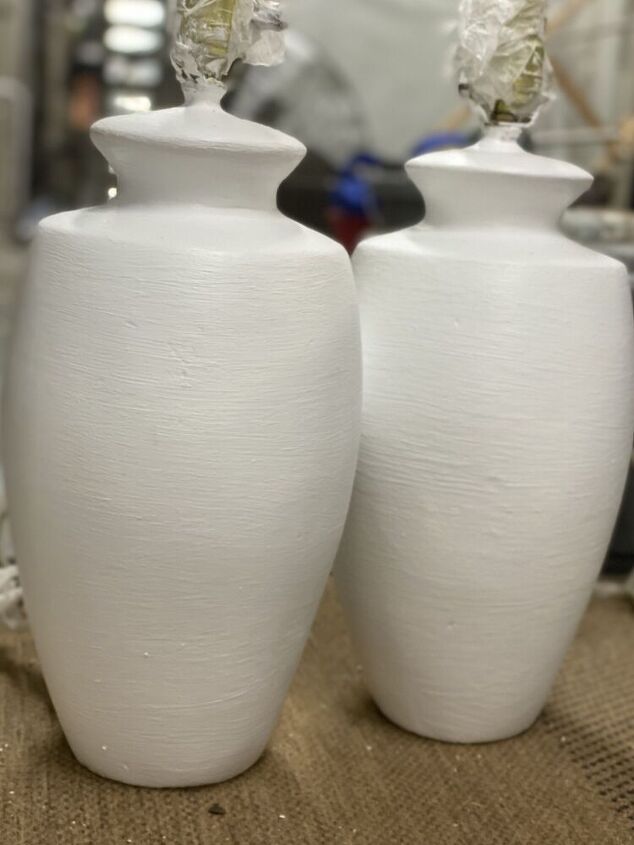
I applied one more very thin coat of mud then used a hair comb to add texture. I also made sure the mud was nice and smooth under the sockets and around the top portion of the lamps. Once dry, I used a wet sponge to smooth out any bumps that I missed on the top portion of the lamps. I then painted the lamps with white primer.
Once the white primer was dry, I used gold paint to apply a base coat. I waited about a week for the base coat to cure. Once I was sure the base was cured, I mixed up several colors of acrylic craft paint until I was happy with the the top coat color. I applied the top coat then waited a week for it to cure. Once the top coat was cured, I distressed the surfaces using fine grit sand paper. I then dry brushed a different shades of paint to add a bit more interest.
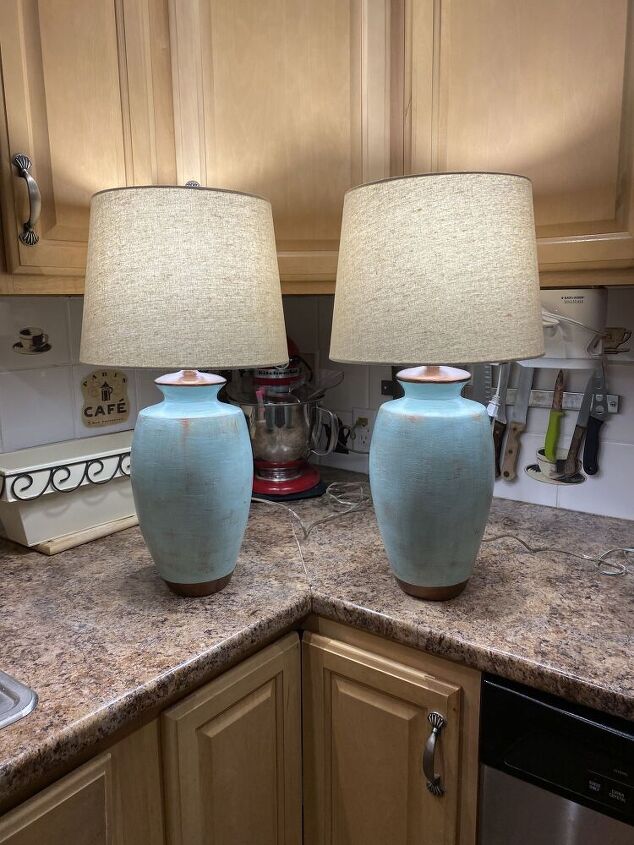
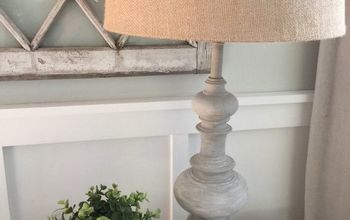
Here are my finished lamps with new shades. I like how my lamps turned out. I’m sure it would of been quicker and easier to buy new lamps, but since I only paid $20.00 for the shades, I think it was worth my time. I forgot mention where I got my inspiration from. I got my ideas from looking at a few lamp styles that are pictured below.
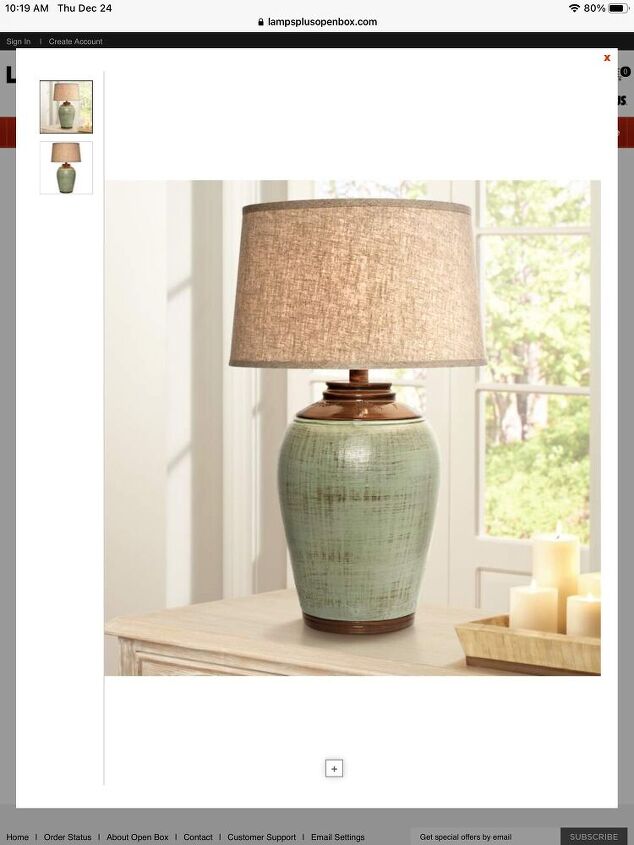
I liked the colors and textures of this Pottery Barn Lamp.

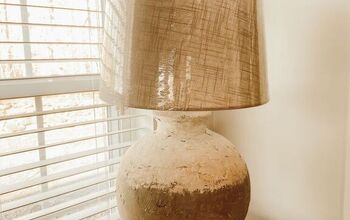
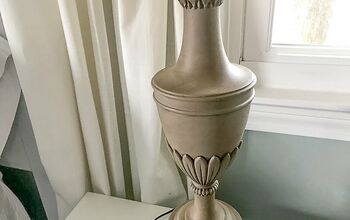
I liked the texture and shape of this lamp.
Resources for this project:
See all materials


Comments
Join the conversation
-
I didn't see where you left the opening for the electric cord
-
Brillant


Frequently asked questions
Have a question about this project?
I just love how these turned out. Great eye for design. 💜
How do u paint bathroom floor tile