


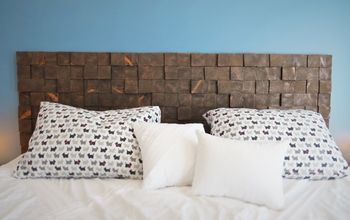
DIY Wood Block Headboard

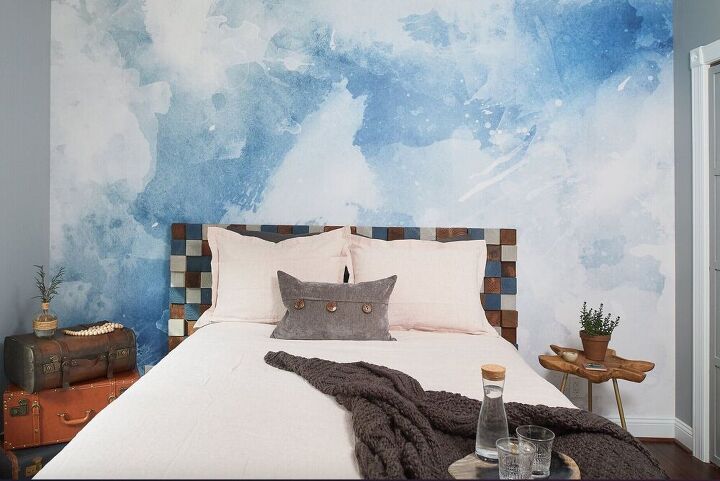
I made a quick and easy DIY headboard out of wood blocks for our guest bedroom last week so today I’m finally getting around to sharing it. I rode the struggle bus trying to find a headboard that would be inexpensive yet looks good with the wallpaper we added to the space. This is what I came up with.
What we used to make the headboard:
Plywood cut to size- 76 x 34 for a queen size bed with 7 inches on either side (so I can add lighting)
3 - 4 x 4 posts
3 - quarts Varathane Wood Stain in Iron Navy, Sunbleached and Grey
Wood Screws
Wood Glue
That’s it!
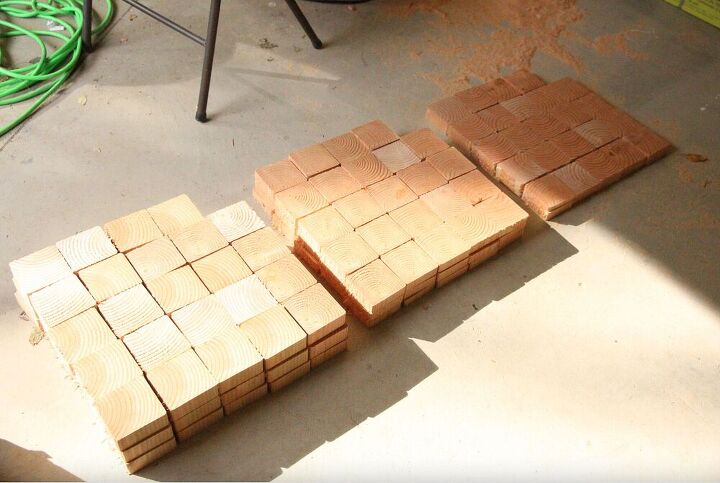
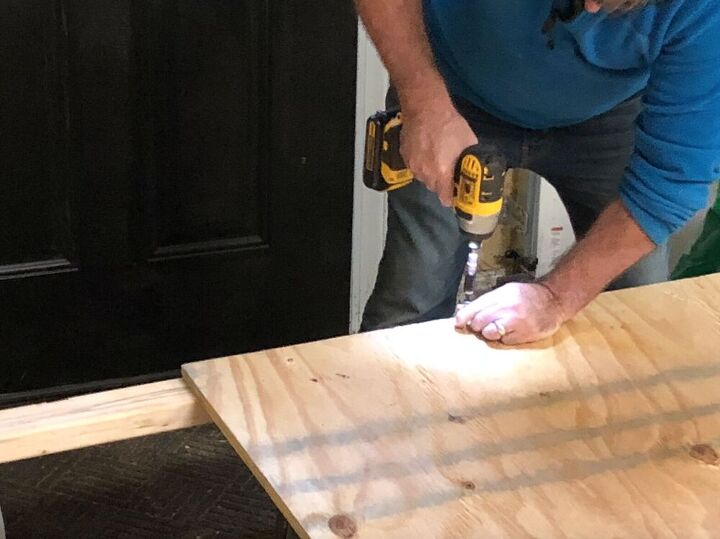
To begin we used the saw to cut the posts into three sizes. 1/2 inch, 1 inch and 1.5-inch pieces. Stacking them by size as we went.
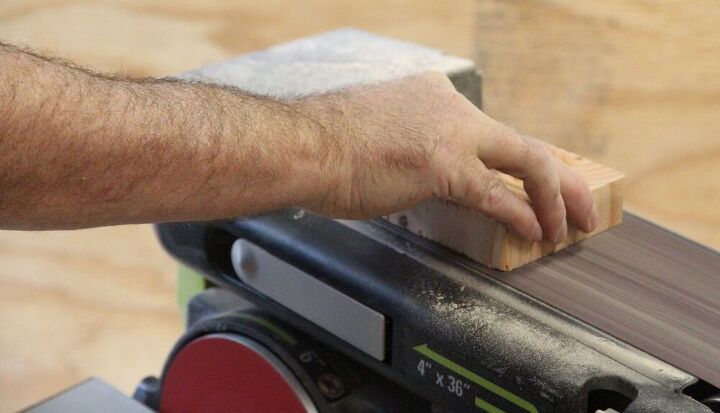
Next, we (totally meaning my husband) used a sander to smooth the blocks. We used an electric sander to make quick work of them. He then took a sandpaper block to finish smoothing them.
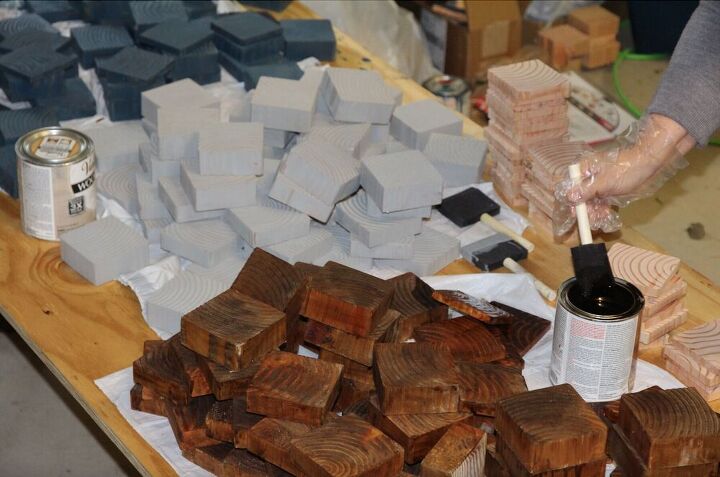
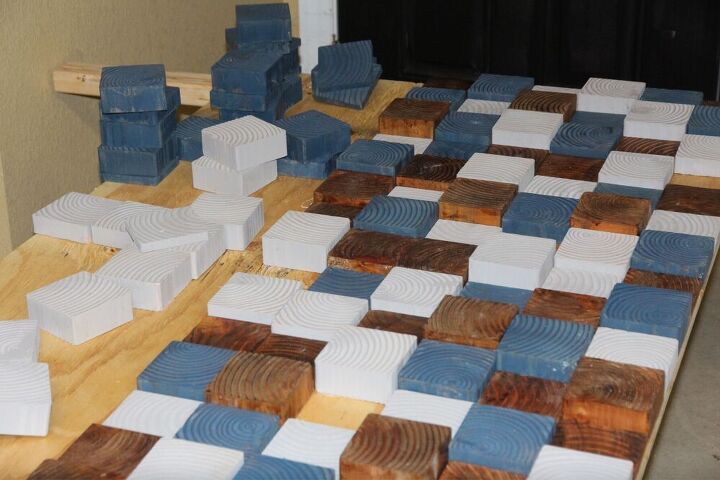
Now it was time for the fun part! I stained all the blocks. I chose Varathane wood stain because It dries fast and covers easily. The colors are Navy, Grey, and Walnut. It took two coats to get the coverage I was looking for. We stained three sides because of the different depths.
Next, we cut a piece of plywood the size we wanted for our queen size bed. We went with 64 inches wide and 30 inches tall. So we had our base. We then attached (using wood screws) two 1 x 2 posts cut to the height we needed for the plywood.
Finally, we started to glue the wood blocks to the plywood in a random pattern. A quick tip here. Push the blocks firmly in place so that the glue has solid contact with the blocks and the plywood. Stand back every couple of rows to make sure you are keeping the colors and heights mixed. We placed books on the glued blocks overnight to let the glue set. We painted the edges of the plywood a light brown.
So every DIY I do, there is usually that moment when you think,…how could I miss that?!?!?! Ours was when we realized we could have made this much easier on ourselves if we had made the math work, and the blocks would have filled the plywood divisible by four. But nope, not how we roll. So we had to trim one block on every row to make it fit. Sigh.
Finished headboard!

Love all the texture!
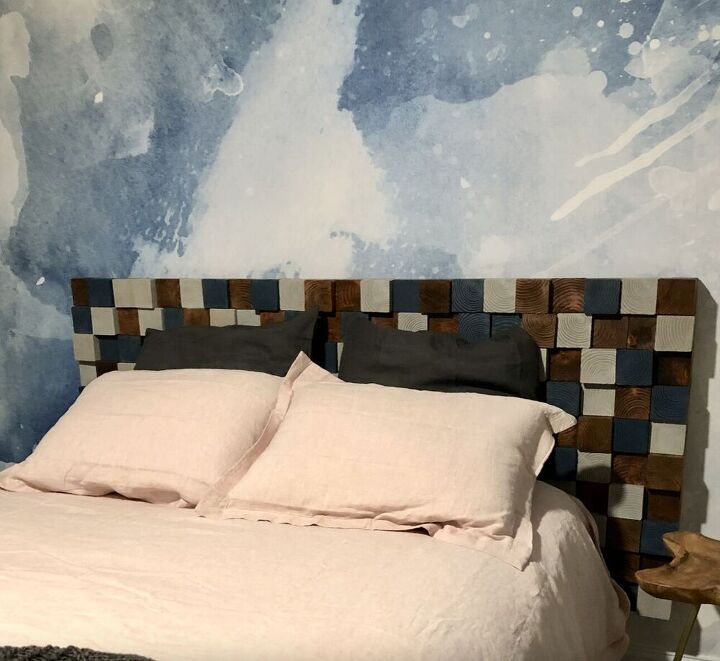
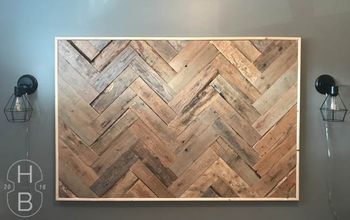
This would also make a great piece of wall art!
You may also be interested in:
DIY Mid Century Wood Accent Wall


Comments
Join the conversation
-
Good morning Libbie, hubby and I are over the moon with your beautiful headboard... well done 👏
-
Gorgeous! Love it!


Frequently asked questions
Have a question about this project?
Could you tell me about the wall behind the bed? Painted? Wallpaper?
can this project be done for a king size bed? If so, how do you calculate the appropriate amount of wood needed? Thank you.
Sharon
I have the same question as Tiffany. Love the wall of clouds how was it done?