


DIY Clothes Rack

This one is for all the renters and small space dwellers out there, I feel you! It’s hard to find ways to make your lifestyle work in a place you can’t change to suit your needs. This is especially true when it comes to storage.
This DIY clothing rack fits in the corner and makes use of what is usually an empty, purposeless space in your room. Open it up to hang your clothes – fold it and put it away when you don’t need it!!

Read on to learn how to build this DIY clothes rack 😃 All you need is some thin lumber board and a couple of brass hinges!
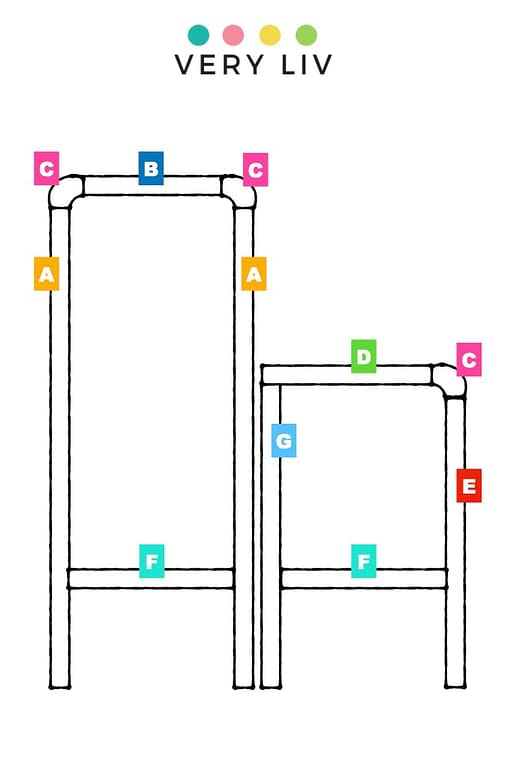
To start, cut the lumber boards into the following pieces. You’re cutting into boards that are 4.5cm (1.7″) wide and 2.5cm (1″) thick so I’m only providing the length needed below since the width and the thickness don’t change.
- A: (2 pieces) 141cm / 55.5″
- B: (1 piece) 32cm / 12.6″
- C: (6 pieces) 9cm / 3.5″
- D: (1 piece) 41cm / 16.1″
- E: (1 piece) 91cm / 35.8″
- F: (2 pieces) 41cm / 16.1″
- G: (1 piece) 95.5cm / 37.6″
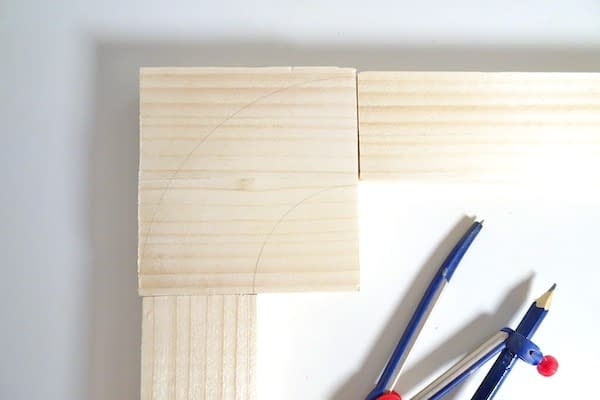
For the C pieces, the idea is to get wide wooden squares using the same lumber boards you’re using for all the other pieces so you don’t have to buy a different width of lumber.
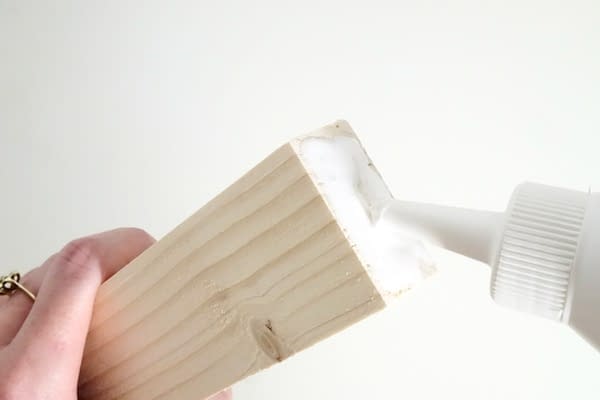
Cut 6 lengths of wood 9cm (3.5″) long. Take 2 pieces and apply wood glue to the edges. Press the pieces together with clamps to obtain a square of wood. Repeat with the other 4 pieces to get 2 other squares. To make the rounded corners, use a compass to draw the curve, like in the picture above. Cut out the 3 curved shapes with a jigsaw.

Now that you have all your pieces ready, use a pocket drill kit to make pocket holes in all the places indicated in the plan above. Check out my blog post if you need a little help with drilling pocket holes!
Once all your pocket holes have been drilled, you can assemble the wooden frames like in the woodworking plan I provided above. For the F pieces, which are the supporting boards at the bottom of the frames, their placement is subjective. I put mine 35cm (14″) away from the feet but you can place them slightly lower or higher to suit your taste!
To assemble the frame, apply some wood glue to the ends where the joints meet. Press the boards together with a clamp and insert screws into the pocket holes.
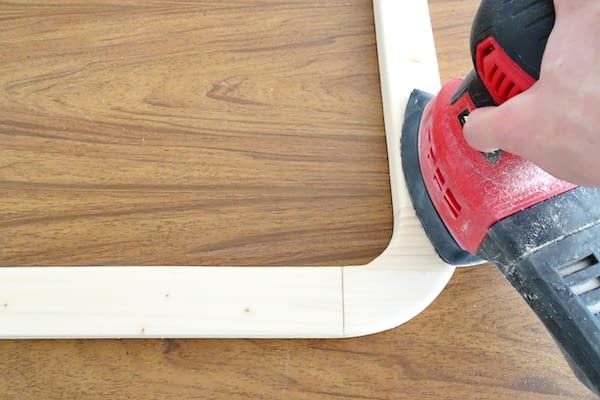
Sand the 2 frames down. You want to achieve smooth and rounded edges. Make sure you sand away all the letter marks you made on the wood.
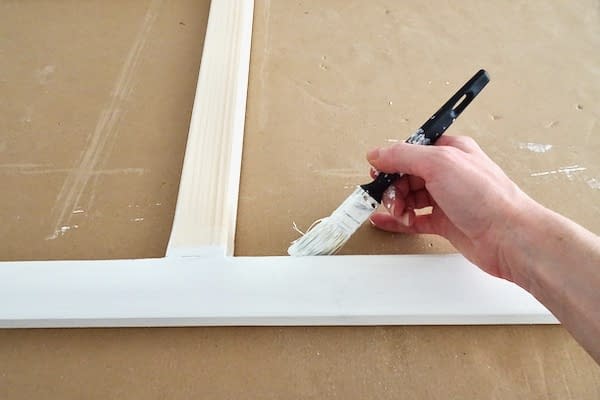
I painted the frames white except the lower supporting posts (the F pieces) to show the natural wood grain.
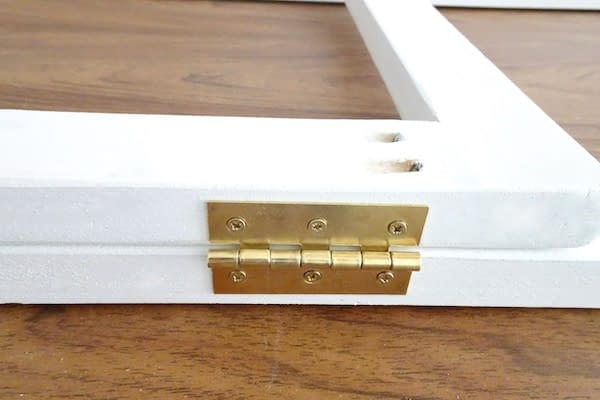
When your painted frames are dry, place them on top of each other with the “good” side facing in (that’s the side without the pocket holes). Make sure they are exactly on top of each other, check the position of the feet and sides for alignment. Screw in the two hinges.
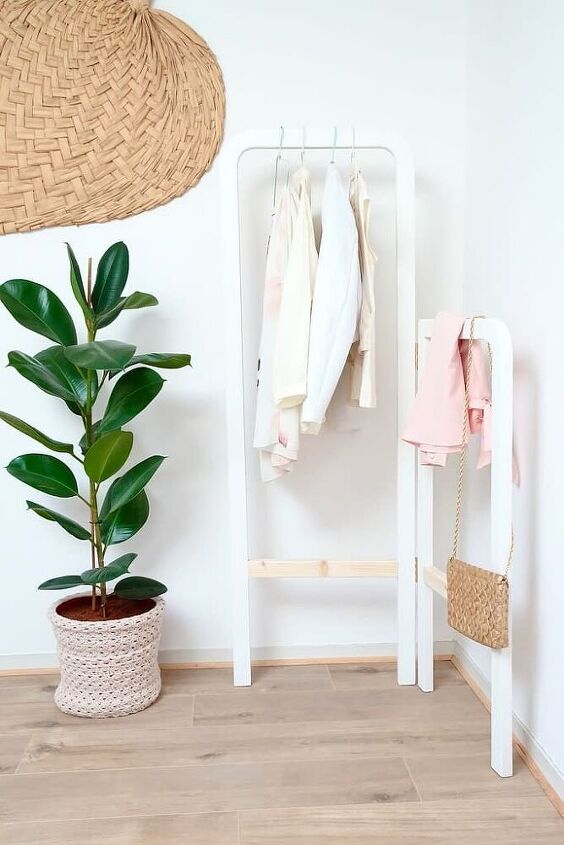
And voila! Your DIY Clothes Rack is done, place it upright and open it up to start hanging your clothes. In my home, it lives in our second bedroom and we’re wondering how we ever lived without it! What do you think of placing in the entrance? That would especially useful for renters who can’t drill into the wall to put up coat hooks.
Check out veryliv.com for more easy DIY ideas!
Resources for this project:
See all materials


Comments
Join the conversation
-
I need this for my upcoming garage sale. Thanks.
-
I love it!!!


Frequently asked questions
Have a question about this project?
Would this be possible using PVC pipe? Just rough up the top piece on top so the hangars won't slip.
Do you recommend leaving the two sections at 90 degrees when in use for stability, or can it be closed for more room when walking past it?
Also, could you mention the option of filling the screw holes with wood filler (or making your own with the wood shavings/sawdust and wood glue) and sanding smooth for a more finished look? Then you could use a clear wood sealer to let the natural beauty of the wood shine through.
BTW, this is a brilliant idea! My jaw dropped when I saw the beauty and simplicity of your project!! I'd also love more pics, please.