


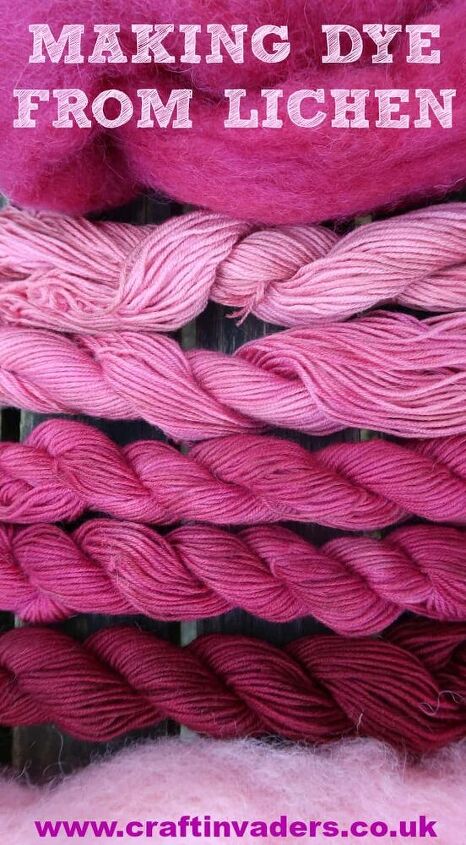
Making Dye From Lichen
Throughout history, people have dyed their textiles using familiar, locally available materials and archaeologists have discovered evidence of textile dyeing dating as far back as the Neolithic period. Plants, invertebrates and minerals are all sources of natural dyes with the majority derived from plant sources such as roots, berries, bark, leaves, lichen and fungi.
As well as dyeing textiles for clothing, natural dyes can be used in lots of homecrafts - you'll find a few ideas at the bottom of this post.
There are a vast number of plants from which you can obtain dye. I have always presumed that most of them would produce decidedly earthy colours compared to the bright synthetic dyes we take for granted in modern life. I could not have been more wrong.
Please note that not all lichens produce a dye so please do your research before you forage for them. Many grow exceptionally slowly, so it is essential to gather responsibly to avoid damaging colonies. We currently have two lichen dye projects on the go.
Ochrolechia Tartarea
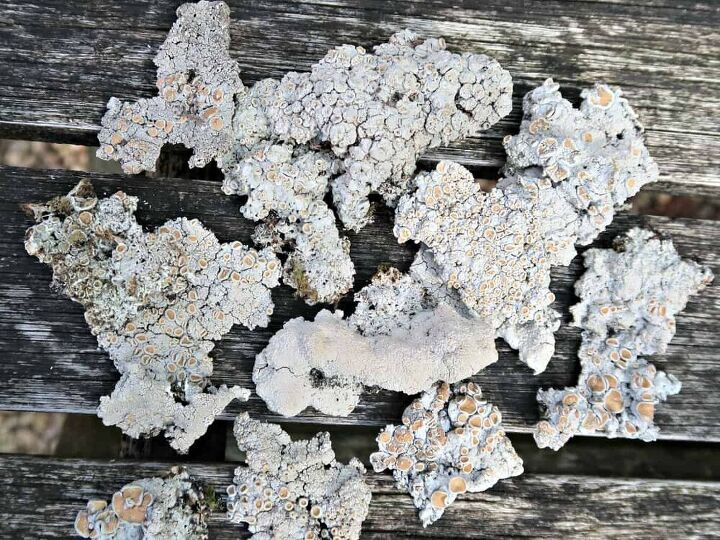
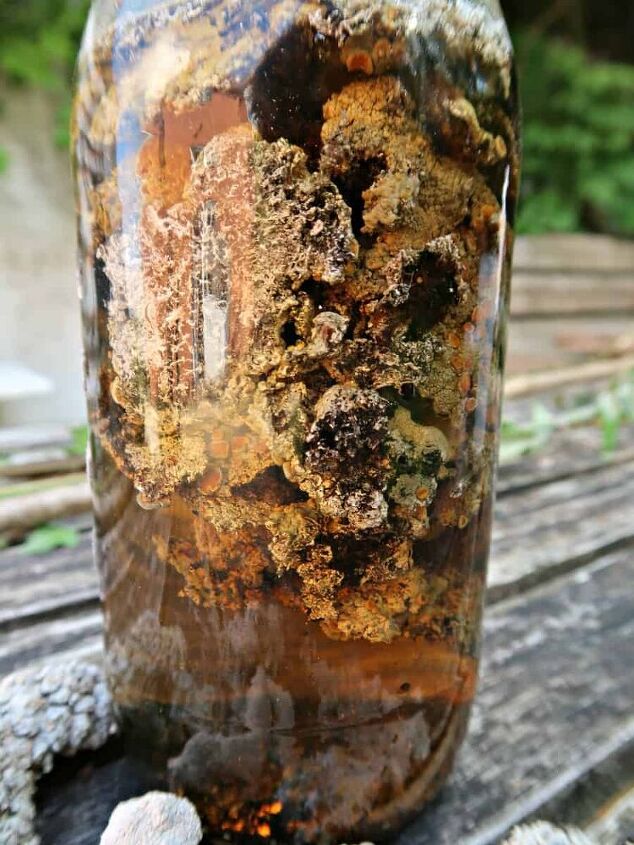
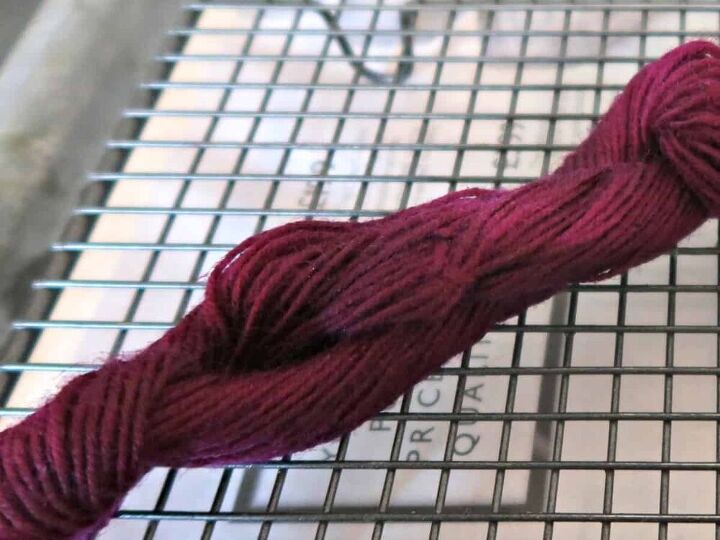
Also known as Cudbear, this lichen was traditionally used in the Highlands of Scotland to produce a vivid purple dye. Growing almost exclusively in the far North of Scotland, the sample I used I purchased from a lovely lady at the Wilderness Gathering who is an expert on Natural Dyeing. This lichen needs to be fermented in an ammonia solution to extract the intense colour which can range from bright pinks and purples to maroon.
Evernia Prunastri
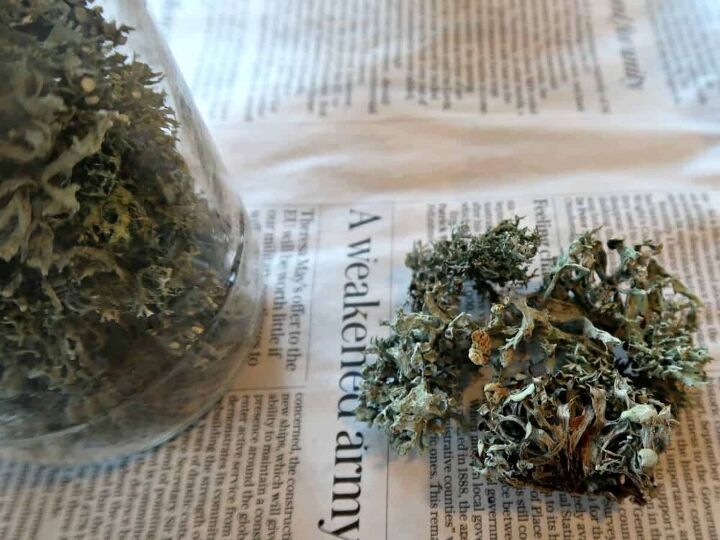
More commonly known as Oakmoss this widespread lichen is found growing throughout the northern hemisphere. Used extensively in perfume production it can often be found on the ground beneath oak trees making it an easy lichen to gather. I collected the jar full that I’ve used in the dye below from the ground during my dog walks. I typically find a couple of pieces each day.
Utilizing the ammonia method outlined below it yields a lilac/purple dye, alternatively, a yellow colour can be prepared by just boiling the Oakmoss in water.
Preparing lichen dye
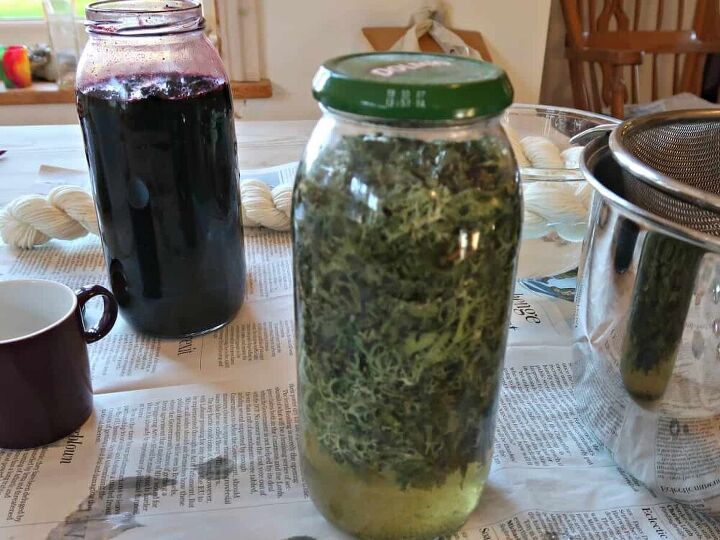
Half fill a glass jar with the lichen.
Add a mixture of one part ammonia to two parts water.
Oxygen is required for the chemical reaction to take place, so the advice is to fill the jar three-quarters full with the solution and to remove the lid to replenish the oxygen every so often.
Keep the jar in a warm place and shake vigorously each day.
The dye should be left to ferment for at least three months to achieve an intense dye colour.
To use the Lichen Dye
Pour half of the lichen dye liquid through a strainer into a saucepan.
Return the strained lichens to the jar and top up with a new ammonia/water mix – you should get another couple of batches before you lichen is ‘spent’.
Add water to your dye pot and submerge the material you are dyeing (having prepared it by soaking in water first). Bring to the boil and simmer gently for about an hour or until you achieve the colour you want.
Remove your dyed product and leave to dry. A new wet item can be added to the pot once the dye has cooled and the process repeated.
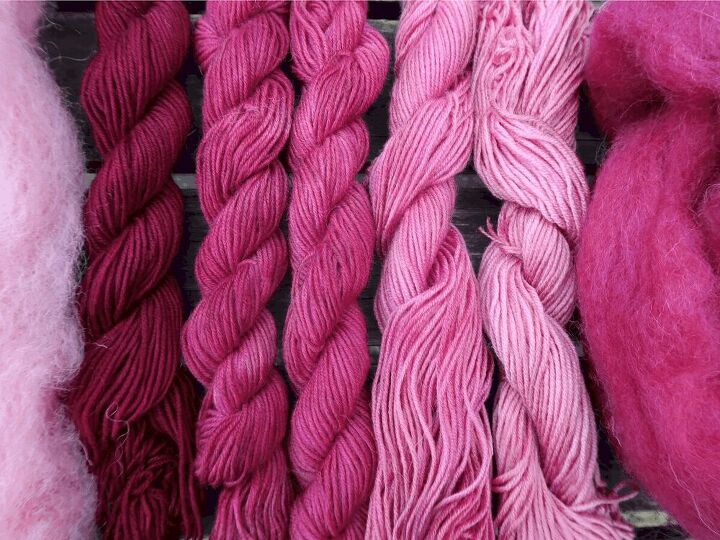
Each subsequent dye will be lighter as the dye pot becomes exhausted resulting in a colour variation. Our photos show this in the three darkest skeins.
The lighter ones were achieved by popping the wool skeins in the bath for a minute or two before removing them.
You can get a beautiful ombre effect on linens by carefully folding them into the dye pot and then slowly removing them over a period of time. Perfect for making napkins and cushion covers.
The dye we used for all the skeins, and the unspun fleece came from the Ochrolechia Tartarea lichen. The Evernia Prunastri is still steeping, and we will share our results from that in a future post.
Lichen dye does not need a mordant. The colour will fix and should not fade. Some lichen dyes are photo-sensitive so the dyed item will change colour when exposed to intense sunlight. I hope to experiment with one of these lichens soon.
Here's some ideas for using these beautiful natural dyes...
Uses for home-dyed fabric:
They are colourfast so are perfect for dying cushion covers, duvet covers and tablecloths.
You can get a beautiful ombre effect on linens by carefully folding them into the dye pot and then slowly removing them over a period of time. Perfect for making napkins and cushion covers.
You could also dip dye the bottom edge of a plain white lampshade to add an amazing pop of colour.
Home-dyed yarns can be used in all sorts of exciting ways to decorate the home.
Making pompoms for rugs and wreaths
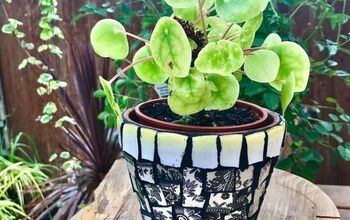
Decorating pots and planters like our DIY Orchid Planter
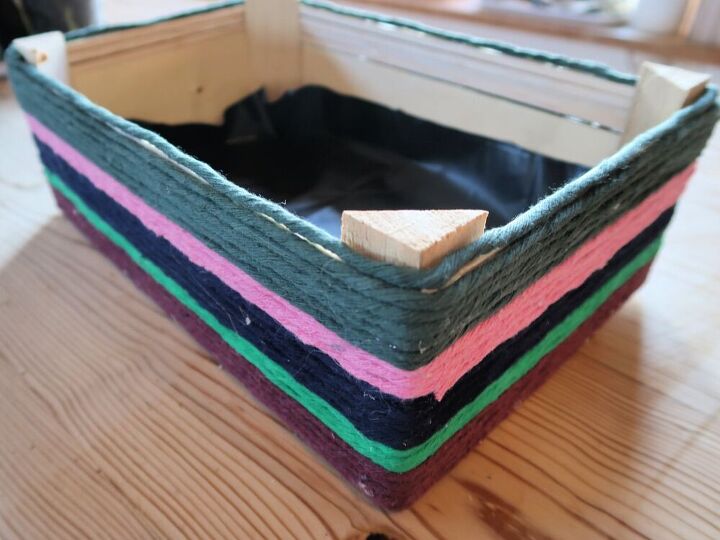
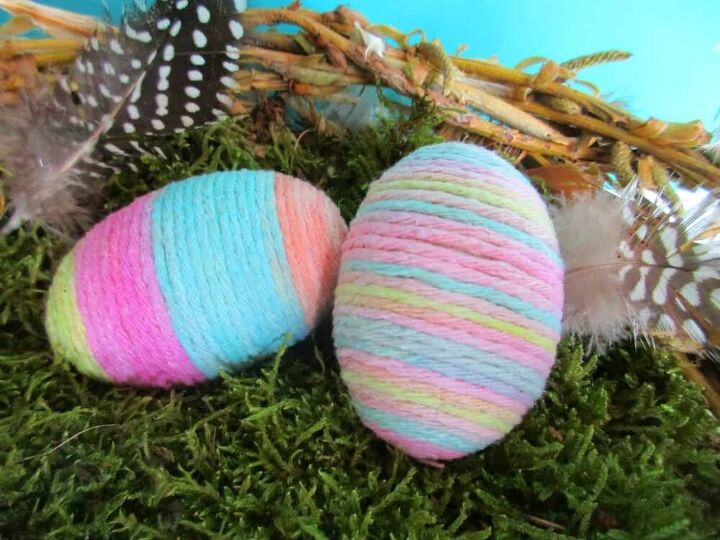
Wrapping old mirror and picture frames to give them a new look or wrapping wooden eggs to make cute Easter decorations.


Comments
Join the conversation
-
Wow! This is amazing! Who would have thought such a strange looking organism could produce such a vivid colored dye! Isn’t nature so cool?! I was also shocked to learn years ago that avocado pits will produce a very pretty pink/purple dye. I’d much rather use natural/organic dyes than all the chemical ones on the market. My daughter was born with a lot of allergies that cause rashes/hives so we always had to be super careful what we bought for her.
Thanks also to @Robyn Garner for the information on the Cyanobacteria.
-
Simply amazing!


Frequently asked questions
Have a question about this project?
Can this be done with Litchen from any tree?
You said you used amonia. What was used before as a chemical fermentor?
And do you think these dyes would work on pine needles for baskets?