DIY Faux Pottery Vase

I think it's safe to say that beautiful handmade pottery (or what looks to be handmade pottery) is a trend that's here to stay for awhile. But it's also an EXPENSIVE one. One medium sized beautiful pottery vase can cost $100+. No thank you!! I've seen tons of techniques out there on how to recreate this look, and there are so many tutorials it's hard to know who came up with the idea! I've seen so many different ways to accomplish this, that I kind of just mish mashed together what I remembered from various tutorials, and came up with my own steps, which I'm sharing with you today!
Come follow my BLOG for more easy and fun DIY project!
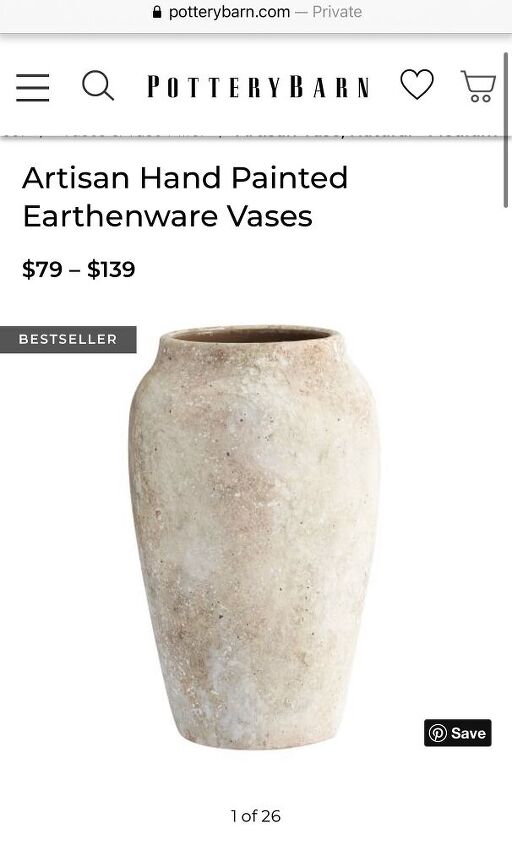
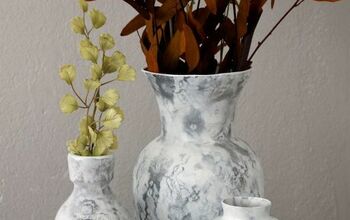
Above is the Pottery Barn pottery vase I was looking to replicate. The coloring is lovely and it has so much movement and texture. But YIKES on that price! I had a crazy inexpensive PLASTIC vase in my garage that I had ordered for another DIY that I never ended up completing. I almost just tossed it in my Good Will box. But then I figured I could upcycle it to make it look more like pottery, and less like plastic, for WAY less money! Best part, this project was FREE because I already had all the materials on hand! WINNING!
BEFORE: This is the plastic vase I started with
Step 1: Be sure your vase is generally clean. Wipe on joint compound or stucco patch with your hands and a haphazard type way. I used stucco patch because it's all I had and it worked great! Next time, though, I will try this with joint compound for a slightly smoother look. Cover the entire vase, and then allow to dry. Use sandpaper or a sanding black to sand off any really bumpy spots of your joint compound/stucco patch. Wipe off with a dry rag.
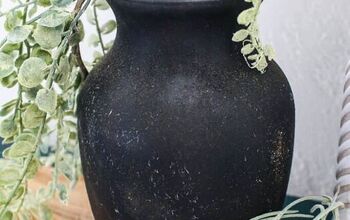
Step 2: Paint the entire vase with black or white paint. I chose black because I wanted the inside to be dark, but it really doesn't matter. You could even paint it brown. I do recommend giving the entire thing a once over with paint BEFORE you start layering on other colors because it will really seal your stucco patch or joint compound properly.
Step 3: Use your foam brushes to dab on different neutral colors. I mixed various neutral toned acrylic paints to create different shades of brown, terra cotta, cream, grey, etc. Allow to dry between coats.
Step 5: My last couple of layers were predominantly white or white mixed with just a TOUCH of brown. Just keep adding layers of color until you like what you see. Once my vase looked how I wanted, a splattered a few dots of black paint on top. I loaded up black paint on my foam brush, then used my finger and ran it over the tip of the brush to create a splatter effect. There were spots I splattered a bit too much black. If this happens, just allow to dry and then sab on a bit more of your white or off white paint.
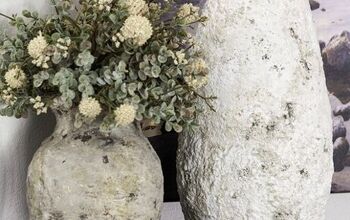
Step 6: Allow to dry for at least 3-4 hours. If you like how it looks as is, you can always just stop here! OR, you can whip up some mud in your backyard and rub it onto your vase. Allow to dry, then rub off as much or as little as you like with an old rag. (Unfortunately I did not take a photo of this part, but it really is SO easy. Apply mud, let dry, wipe off, that's it!)
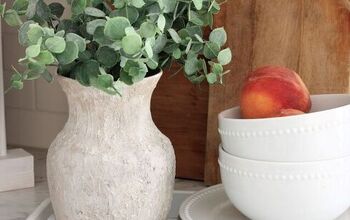
Step 8: Let your newly created pottery vase sit for about 1 hour just to be sure everything is good and dry. Then spray with a matte polycrylic to seal. And that's it! Add some fresh or faux florals and style away! Your beautiful faux pottery vase will fool all your guests, and I'm betting you spent next to nothing to create it! That's a win win if you ask me! :)
Let me know if you try this faux pottery vase project in the comments below! It's a quick and easy project and you can save a vase or two that you might have otherwise tossed! When we can upcycle what we have, not only do we save $$$ in our wallet, but we often also help save the environment from excess trash, and contribute to less consumerism! No need to always buy new when we can save what we've got! I hope you enjoyed this quick craft, and I hope I'll see you over on my blog in a couple weeks for a full Spring home tour!
Enjoyed the project?
Resources for this project:
See all materials








Frequently asked questions
Have a question about this project?
Love this! If I use a glass vase as my base, do I follow the same instructions?
TY
I love it. It looks beautiful great job
Nice! I'm more curious about your end table...the wood is absolutely GORGEOUS!!!! Did you "do" the end table yourself..?