


Oui Jars Transform Into Faux Depression Glass

When a friend contacted me to see if I would like a large bag of Oui yogurt jars, I jumped at the offer. I’d been seeing many different ideas on using them for projects. Better yet, she had already cleaned them and…..she delivered! I couldn’t wait to try adding a transparent color to them!
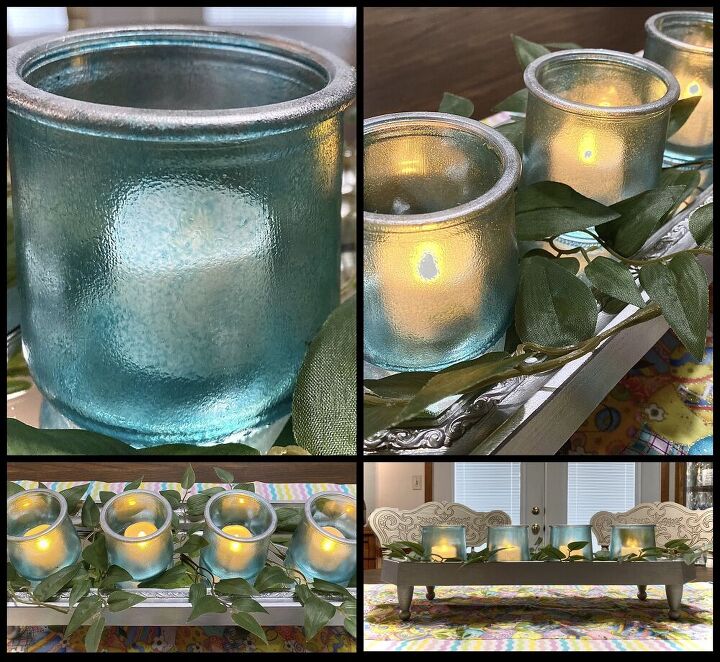
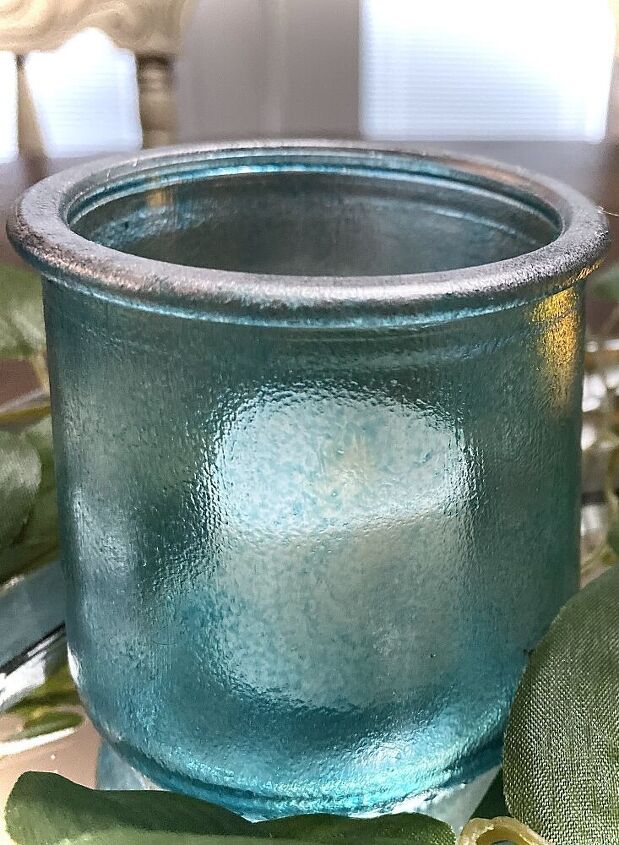
I am a crafter who likes quick results but still want to produce a quality product as I usually sell my creations. Except this one. The final result reminds me of depression glass and is so beautiful! I loved my project so much I kept it for myself. 😌 I do have more jars, though. 😏
My friend’s jars were already cleaned, but I have read that it can be a little difficult to remove the label and the glue around where the foil lid was. Some have found soaking them for 30 minutes worked. Others report using Goo Gone, and an emery board on the lip will remove stubborn glue there.
I had watched some tutorials that just seemed too time consuming or I know wouldn’t work for me (coloring the inside of the jar, or spray paint, or painting it on are a few techniques that come to mind.)
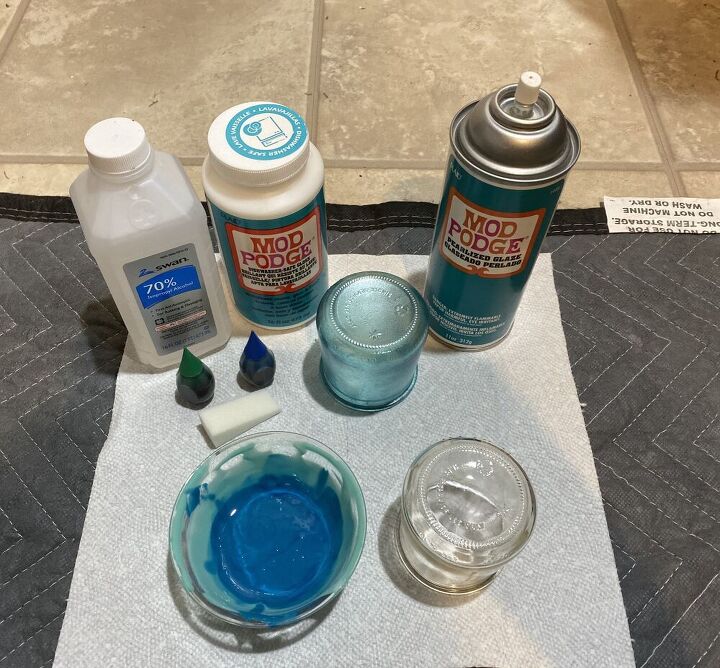
I have painted glass with a special technique and baked it before with excellent results, but I have also skipped the baking and used what I call my magic finishing spray and the finish becomes as hard as rock and passes the scratch test even before curing. My magic spray is shown in the photo above: Mod Podge Pearlized Sealer. I usually purchase mine on Amazon. It is hard to find in craft stores.
This technique I’m using here has worked for me so well when using chalk style paint on glass (and metal) I thought it should work well with Mod Podge and food coloring. And it did!!!
If your jars are free of glue and have been washed thoroughly, it is time to create some faux depression glass! Here are the supplies I used:
Step 1: Wipe down your clean jar with alcohol to make sure there are no oils on it. Try not to touch the surface of the jar with just your fingers now. Use a paper towel to pick it up.
Step 2: I used the dishwasher safe Mod Podge. Again, I usually purchase from Amazon because I’m not close to big craft stores, but this is normally available there. I do not use this type because I think these will be dishwasher safe afterwards. I don’t. I’m not recommending washing them at all. Dust them or use a damp cloth, but avoid hand washing even. These also are used for decoration only, in my opinion, not for food. I use it because it is glossy and I think not as thick or sticky as regular Mod Podge. Any glossy should work, though. As you can see it looks rather opaque, but trust me the glossy dries clear. Matte will not.
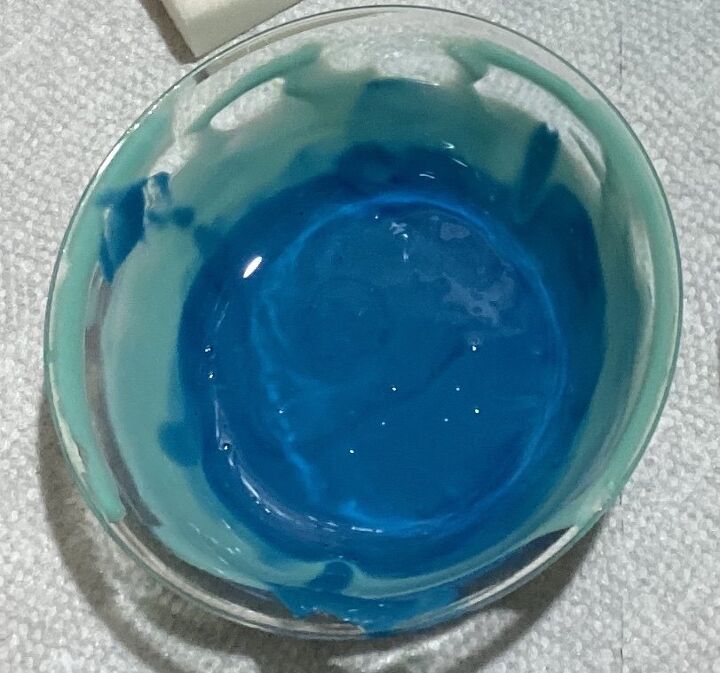
Mix your Mod Podge and food coloring. This is tricky because as you can see the color I mixed looks nothing like the jar does when dry. It is a little trial and error. I was going for the look of the teal colored vintage insulators. In the photo I realized I had to much green at first so I added more blue. This color ended up being perfect.
So…. I would suggest you try a couple of tablespoons of Mod Podge and about 4 drops of blue food color. You might not even need any green.
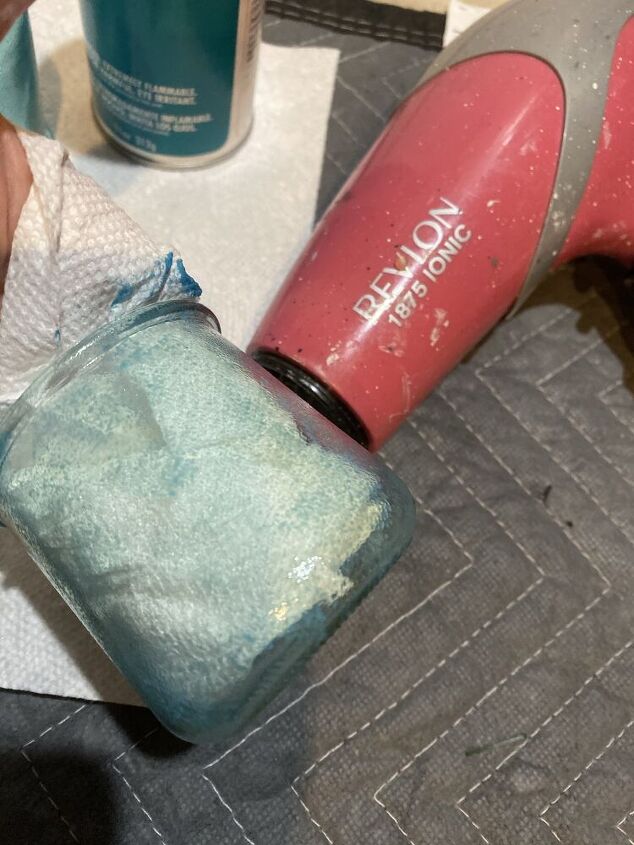
Step 3: I wrapped my hand in a paper towel and put my 4 fingers inside the jar. The reason for doing this is that the paper towel and my fingers made a snug fit and the jar didn’t move on me. Also, it kept my hand from getting too hot when I used the blow dryer to dry my coat of Mod Podge/food color combo.
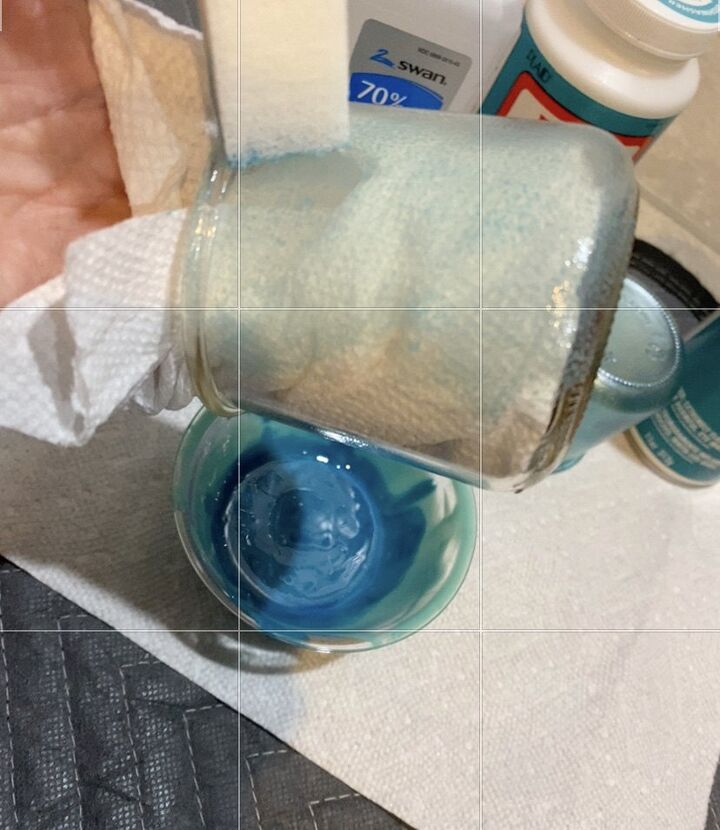
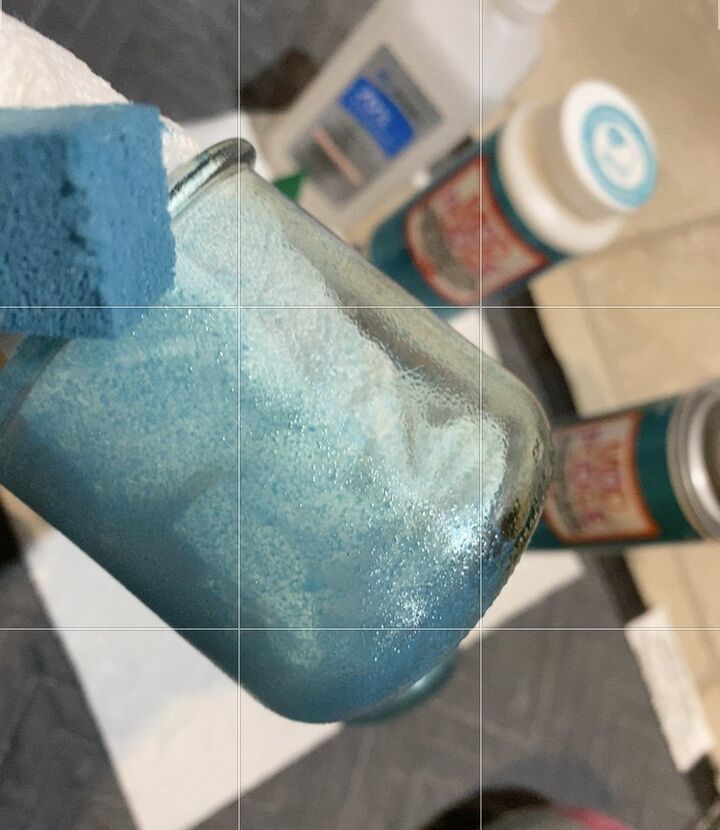
My trick to get a really neat texture on glass is to daub on what you are applying onto the surface with a makeup sponge (like you are stenciling.) I buy these at Dollar Tree. Best of all, I just throw them away when finished. I just daubed the mixture all around, turning my hand to reach all the jar sides. Don’t worry about the lip. I later daubed some metallic silver on it.
Step 4: I mentioned I was an impatient crafter, so a hair dryer is my best friend. I made passes of heat and shots of cool air, finishing with the cool air and not getting too close to the jar, until I felt it was dry enough to do a second coat. It will be a bit tacky, but that’s ok. (I’m just showing the hair dryer here. I couldn’t take a pic and dry at the same time, so I’m not really drying that close!)
I then applied a 2nd coat. You can see the 2nd coat makes it a bit darker when applying, but once dry you can really see the difference.
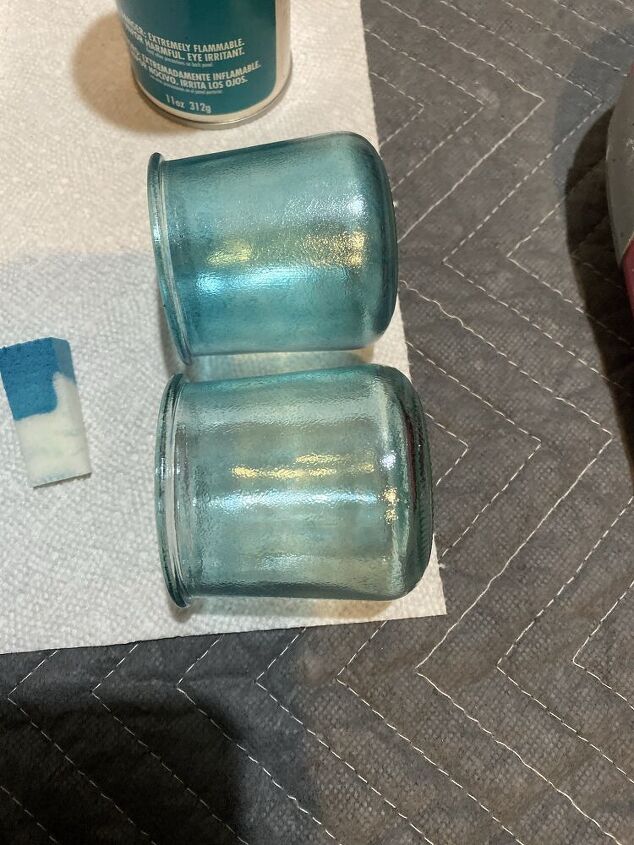
Step 5: Use the hair dryer again, getting it as dry as possible. I admit, I rushed it a bit. It was still a bit tacky. But, truthfully, I think Mod Podge always stays a bit tacky. 🤷🏼♀️ You could wait awhile to see if it goes away, or you could be impatient like me and move on to sealing it. 😬
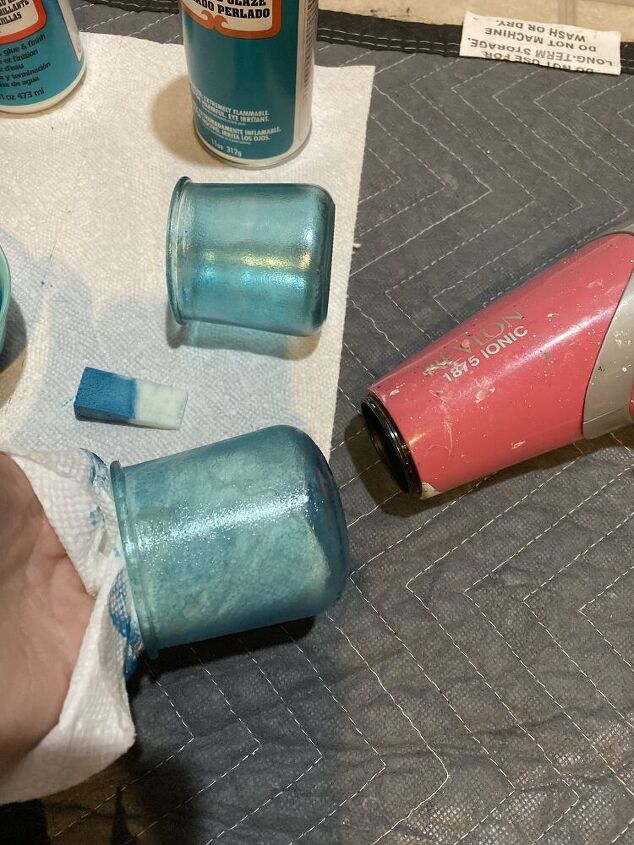
Step 6: Now is the time to seal your jar. I missed taking a photo of this step but I basically turned the jar upside down on a piece of plastic, and sprayed all around with the Mod Podge Pearlized Glaze sealer. Again, don’t worry about the rim. I recommend wearing a mask for this step and have good ventilation. It doesn’t take long for this to dry to the touch. Just a couple of minutes. But then I used the hair dryer on it, too. After about 15 minutes, lightly try the scratch test. Hopefully, you will not get any scratch marks. And it will continue to cure and get harder.
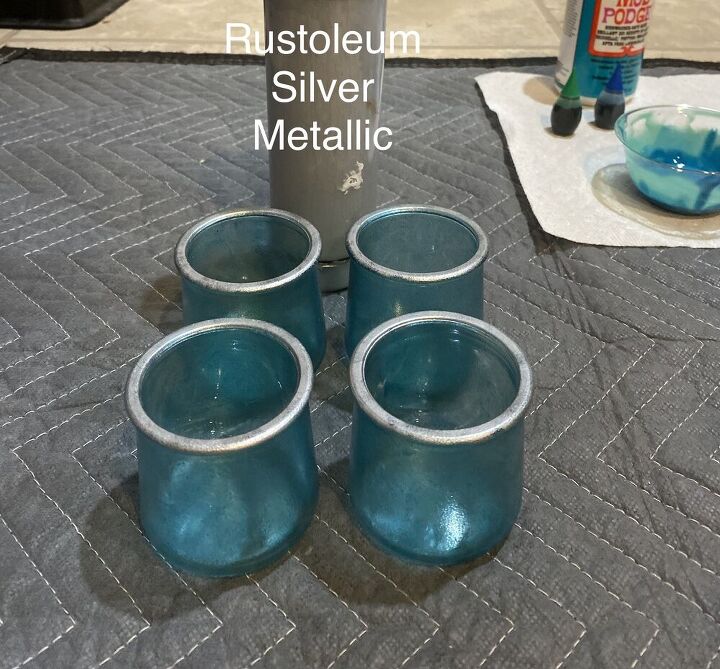
Step 7: Final Step: Use another makeup sponge and daub over the rim lightly with a metallic silver to give it a vintage look as well as a finished look. I use Rustoleum metallic water-based paint I got from Menards. But any will work.
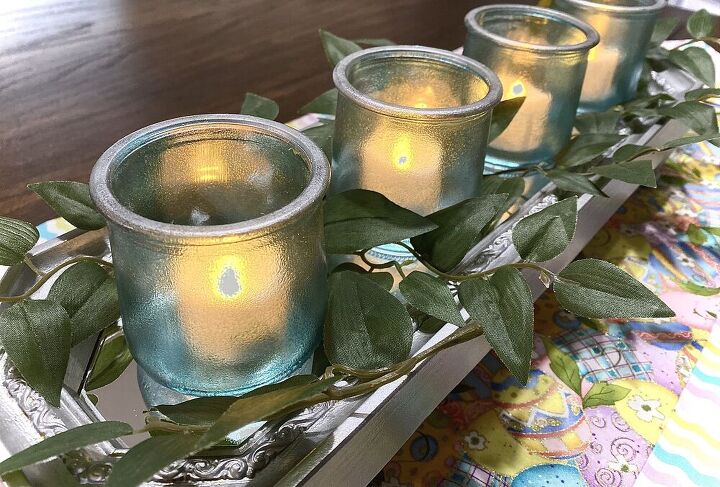
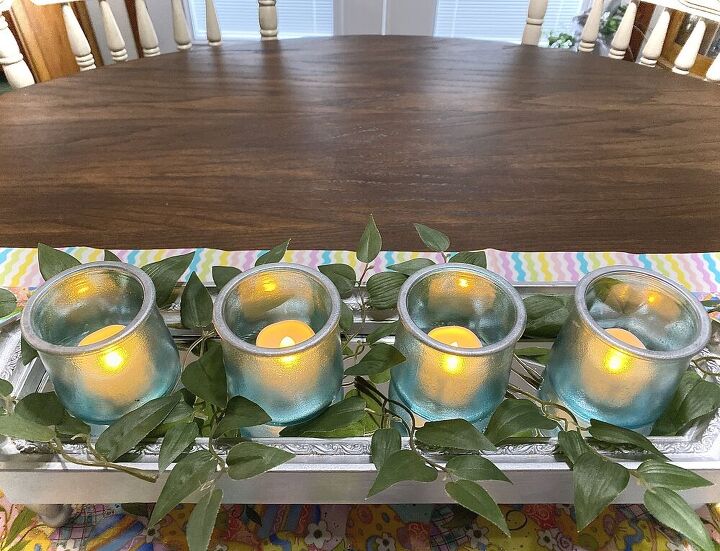
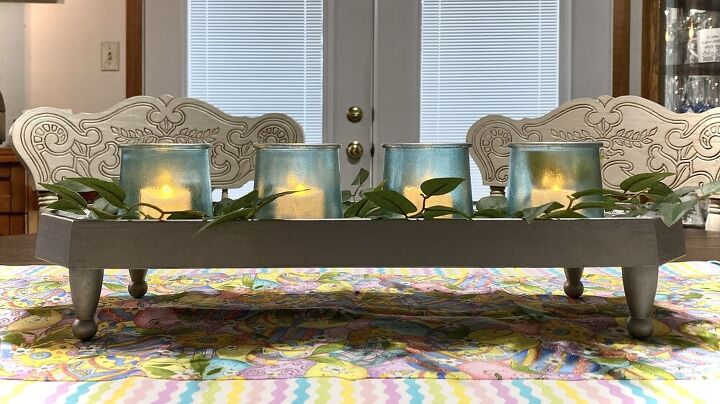
And now for individual photos! I can’t tell you how pretty this is on the table. I used timed battery operated votives that stay on 6 hours and automatically go off and back on again at the same time as I first turned them on. Again, I found these on Amazon.
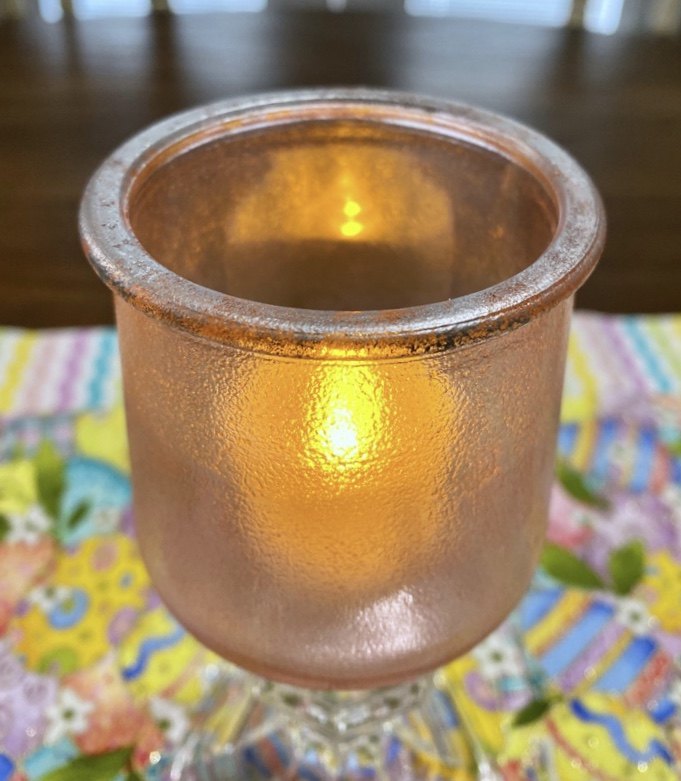
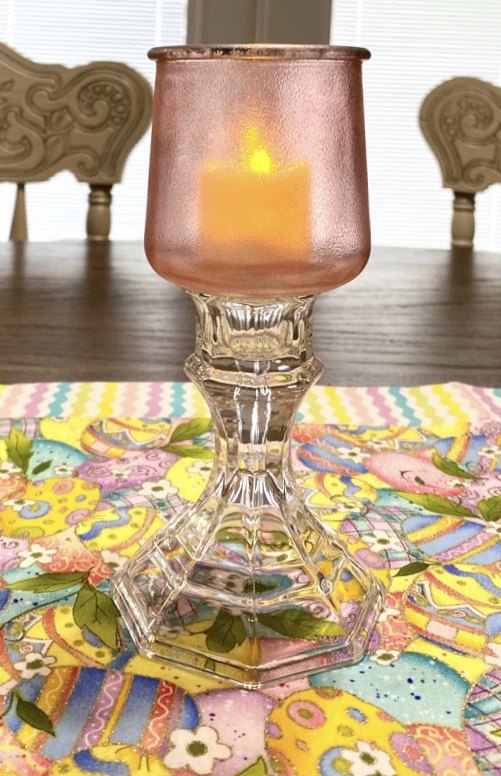
I loved doing this so much, I just had to see what the red food coloring would do, so I tried a couple of tablespoons of the Mod Podge and about 4 drops of red food coloring. Beautiful! Although, if doing it again, I would use less drops for an even lighter pink.
Oui French Yogurt jars are the best! Can’t wait to make more projects with these jars!
Comments
Join the conversation
-
FYI you can buy sea glass spray paint from Rustoleum
-
you can twist wire for a hanger or macramé a hanger for these.
They are cute for storing small things too.


Frequently asked questions
Have a question about this project?
Can you surreal votive candles? I have sworn off buying unnecessary plastic items. Thanks.
I would like to do your project, but I can't print out 19 pages. Do you have just the written instructions separate?