


$5 Faux Shiplap | Sharpie Shiplap
I don’t say hate very often . . . but friends, I hated this wall. It needed something. But there was one problem, I didn’t want to spend much on this project because in a few years it’s going to be coming down. What to do in the meantime? how about some faux shiplap? And I don’t mean all the hacks you see out there that cost a little less. . . I mean faux shiplap with a sharpie that costs about $5.
The story of this wall
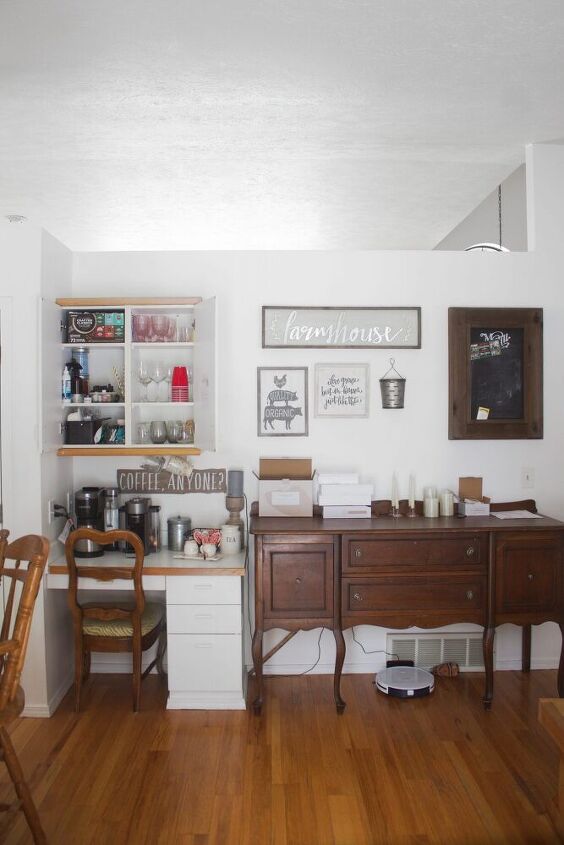
This poor wall had been neglected and was in need of some love. When we moved in three years ago it was the first wall I decorated. In fact, I had purchased all the pieces for a little gallery wall before we even moved in. It was my pride and joy statement wall. But, over the years I’ve stolen the portraits for other projects, and never seemed to replace them. So it looked sad, not cohesive at all, and there were holes in the wall everywhere.
Also, can we talk about this weird desk thing that was super popular next to kitchens in houses built in the ’90s? Maybe I would have loved it more if it wasn’t cheap lament? Since we were already redoing the wall, why not get rid of the desk too? And do you know what would look better in that desk area? A coffee bar of course! I mean, that’s what we were using the space for anyhow.

Demo Day!
If I’m being perfectly honest here, I was originally going to just leave up the dest and Sharpie Shiplap around it. But, I just can’t leave well enough alone. I’m addicted to add-ons in all my projects. It’s horrible and ends up costing me more money each time, but it always turns out better in the long run! So, we added on the removal of the desk area. And it would have been all glitter and unicorns except . . .
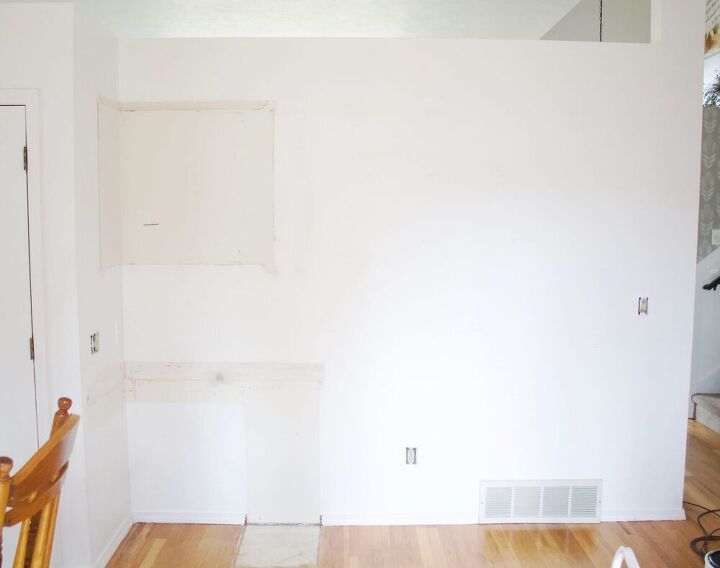
The space below the desk drawers hadn’t had flooring placed under it. Ugh. And now we’re left with a missing piece of floor. Lovely. That’s another problem with adding on to easy projects, you’re opening up a can of worms. Sometimes it’s in your favor, sometimes not!
Thankfully, I received a lot of suggestions over on Instagram, and in the end I think we’re going to make a new built-in for this wall that includes a mini fridge for our commonly used drinks, and place it in that spot. Stay tuned for that later! For now, I’ll be throwing a rug over this space and pretending it’s not there. 😉
Preparing the wall
Obviously we had a bit more work to do to prepare this wall than is probably normal. If your wall is in good shape and the paint is nice, you can start on the sharpie part right away.
Not only did I have to mud and sand the part of the wall behind the desk, the paint was scratched from the buffet table next to it for so long, and it had lots of holes from many different decor and portraits being hung and re-hung, so a fresh coat of paint was a must.
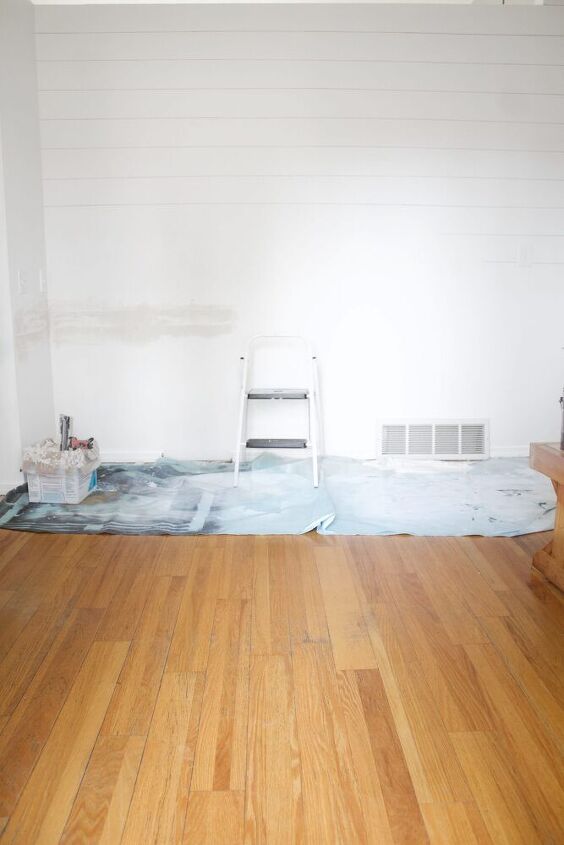
After all the prep and painting, we were ready for the shiplap!
How to make faux Sharpie with a Shiplap
What you’ll need:
- A few sharpies (I actually went through 3 to make this wall)
- A level
- Yardstick
Start at the top
Common shiplap boards are about six inches wide, so that’s what I went with for my wall. When applying real or faux shiplap, it’s always important to start at the top. Inevitably, your wall won’t be the correct height to end with a full board. Most often you’ll have to finish with a board (or marker line) that’s not six inches like the rest of the others. It will be most noticeable at the top of a wall, versus at the bottom where visually it’s not as easy to spot.
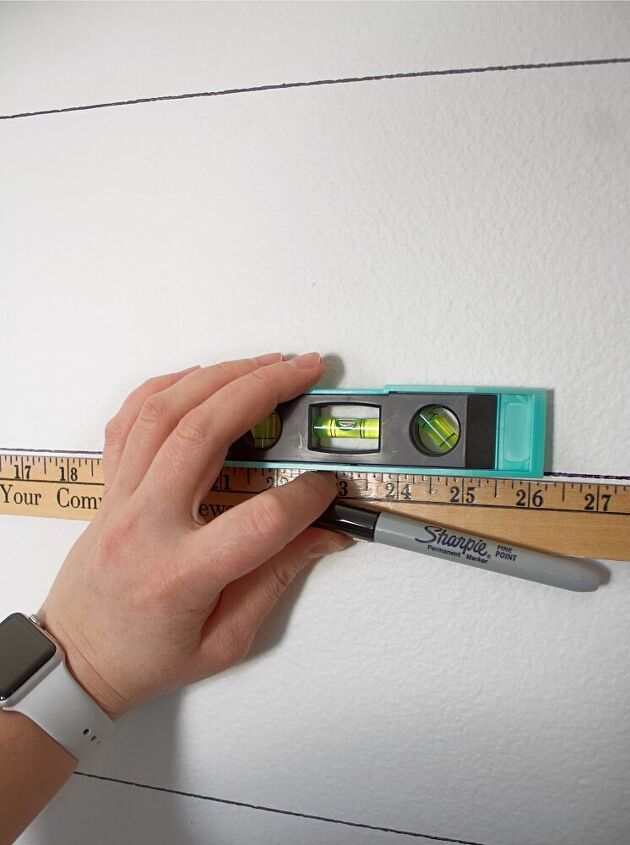
YOUR WALLS ARE NOT LEVEL, SO USE A LEVEL
This is the sad truth friends, and if you’ve done a lot of remodeling in your home you’re well aquatinted with the fact that walls are never straight. Houses settle, and that means your walls do to. It’s one of the most frustrating things when applying wallpaper, shiplap, or any kind of feature wall project.
Save yourself from just going down 6″ and drawing a line, another line, and another and standing back and seeing your whole wall looks crooked. Yes, that can easily happen. Instead, work with six inches, but us a level and draw according to that, and not just starting at the top of the wall.
I’m hoping I make sense here.
Once you use the level you’ll catch on fast. I promise.
Start at the top of the wall, marking a small dot every few feet, 6″ down. Then, line up those dots with a yardstick, place a level on top and use that as your guide even more than those dots. You’ll see that you’ll be adjusting the yardstick up or down from the dots a tad bit, and that’s okay. Once you do the top line it will be easier to keep the others even.
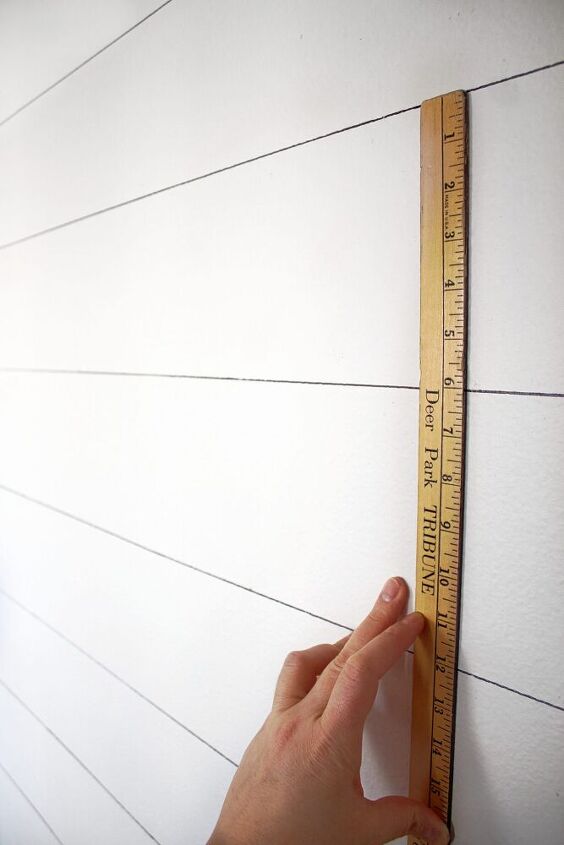
If needed, cover up the dot’s not drawn over with a bit of paint.
Then just keep going.
Until . . .
You’re finished.
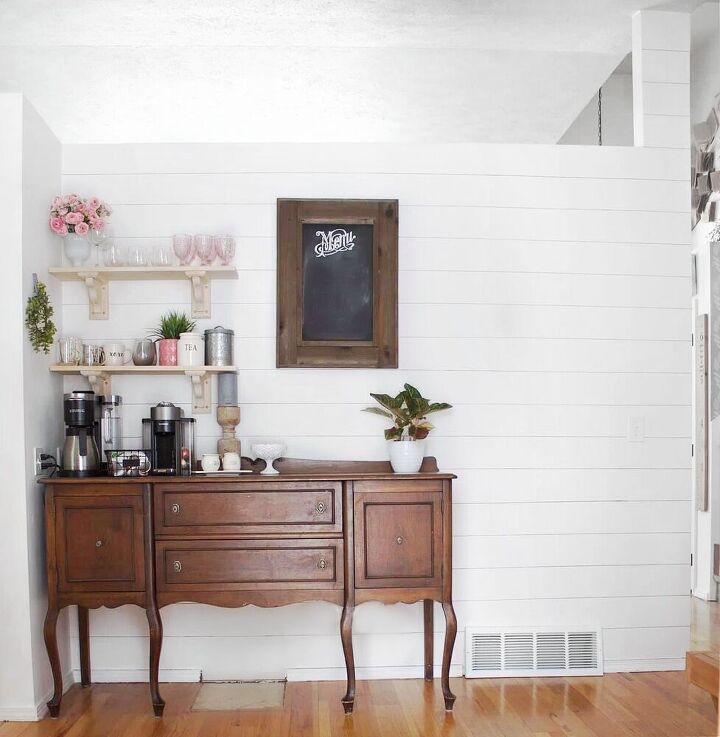
Talk about a transformation! A sharpie, and some shelving completely made over this space. So warm, cozy, and inviting. It makes my sleepy morning eyes light up when I walk around the corner and see this new, happy space.
And the faux Sharpie Shiplap looks so good friends! We have textured walls, and I almost think it helped add a bit more character to the lines.
And if you want to do real shiplap, make sure to check out my post How Not To Shiplap A Wall where I share the details on how to do it perfectly!


Comments
Join the conversation
-
Looks amazing
-
Just a reminder sharpie bleeds through so if you ever wanna repaint the wall, you’d have to use a lot more layers especially for lighter colors


Frequently asked questions
Have a question about this project?
I am doing this!! It’s so awesome!
I want to know why your marker doesn’t look dark black on the wall. It looks a little faded, almost gray. Did you do something to achieve That lik?
I think it's wonderful! Should there be some vertical lines or is your wall short enough for the length of the "boards"? How cheap and shortsighted was the builder (a Man, of course) to put the desk in before the floor??
How did you avoid the marker leaving marker blobs on your wall ? This happens when you start or continue a line where you left off.