


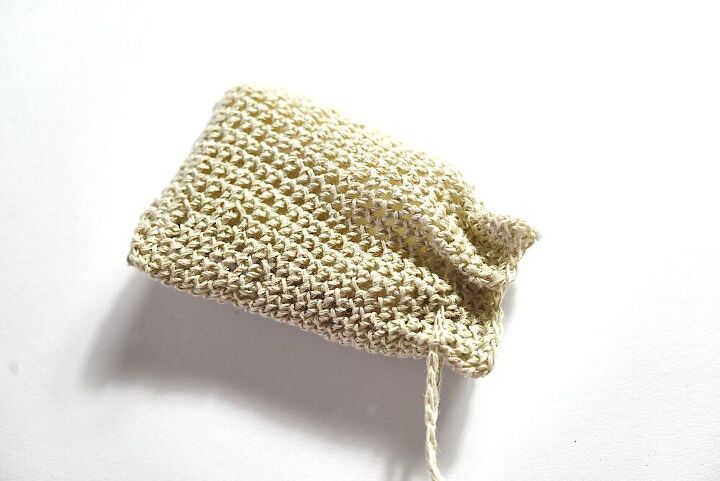
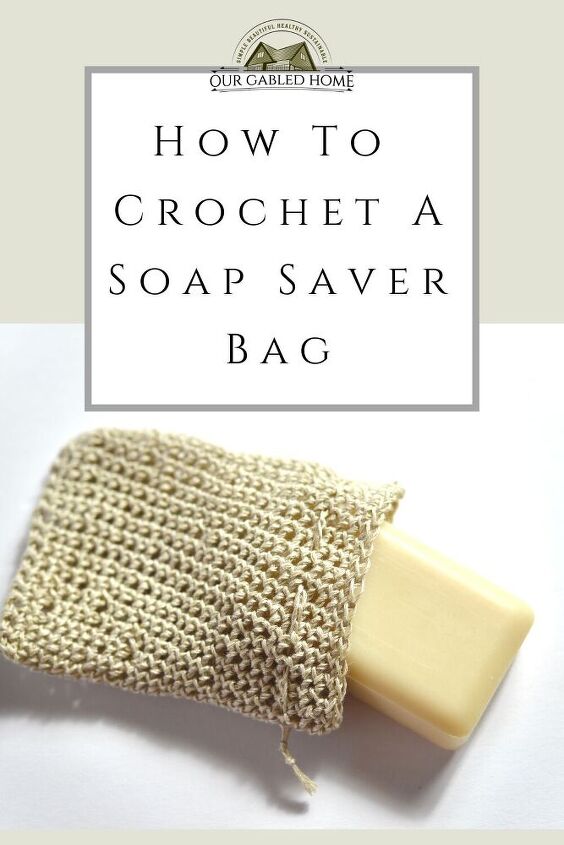
How to Crochet a Soap Saver Bag

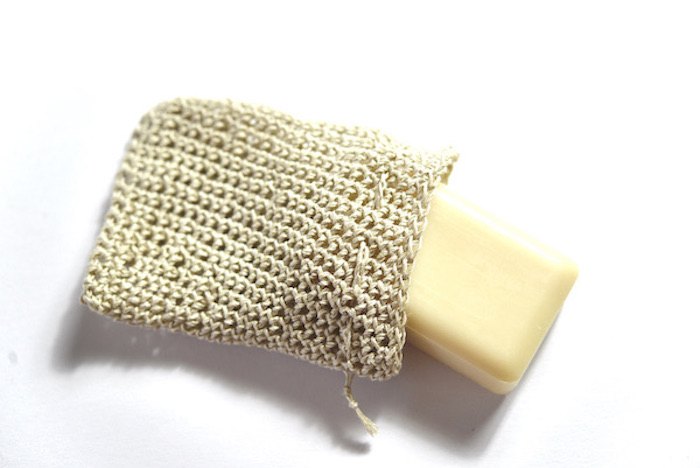
In this tutorial, I am showing you how you can crochet a very simple soap saver bag for your new bar soap or those little leftover pieces.I don’t know about you but I don’t like to waste anything. Not even little pieces of soap!
That is why I love these soap savers so much!
You can either use these soap savers for your new bar soaps so they don’t get all goey. Or your can use them for these little leftover pieces of soap that would otherwise literally go down the drain.
I like to think of myself as frugal by saving every piece that is still good to use!
This post contains affiliate links, which means I make a small commission at no extra cost to you.
Soap Saver Bag supplies:
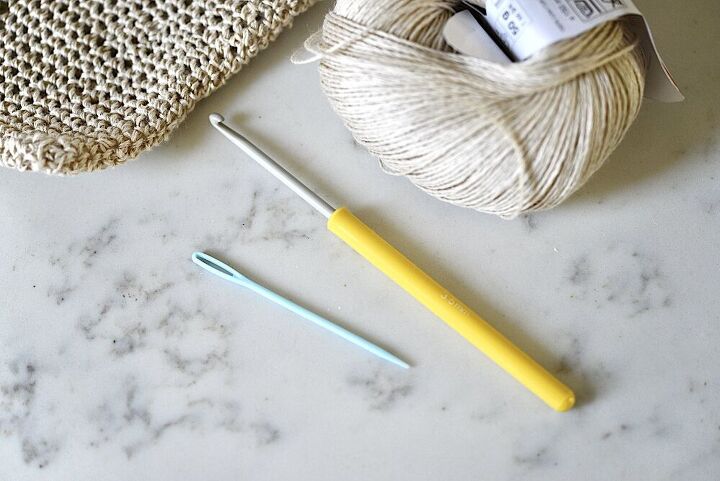
Yarn
Most of all you need some yarn.
I chose a 100% linen (flax) yarn that is both very durable but also getting softer with use. If you have followed me for a while you might know about my obsession with linen.
Cotton yarn would be a great choice or a cotton-linen blend. Some people like to use whatever yarn they use for their dish cloths.
However, I would say, simply use whatever you have at home.
Other supplies:
Since this is a crochet project, you will need a crochet hook. Make sure that it is the appropriate size for your yarn. If in doubt, you can always check the label. However, it doesn’t hurt to go slightly bigger than what is says. You want this to be rather loose than a very densely crocheted bag.
Lastly, you will need a darning needle. Regular sewing needles will be too small here.
How to crochet:
If you’re now thinking that you would love to make this cute little soap saver but don’t know how to crochet, please check out my tutorial that teaches you basic crochet stitches. It’s perfect for anyone wanting to learn how to crochet and make simple projects such as these cute farmhouse potholders.
How to crochet this soap saver bag:
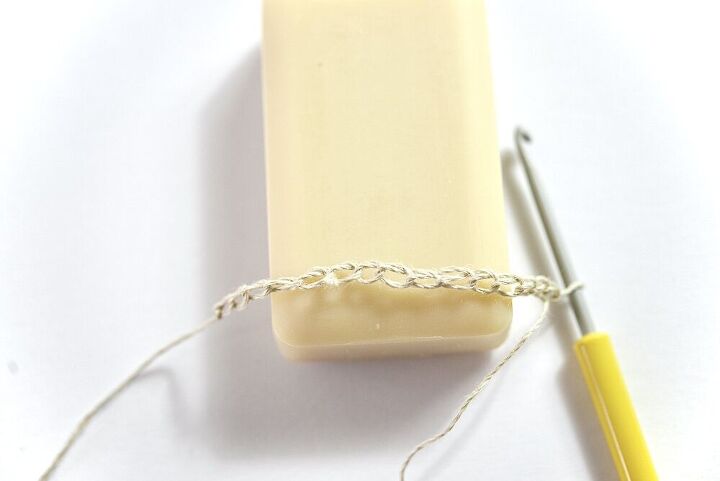
Casting on:
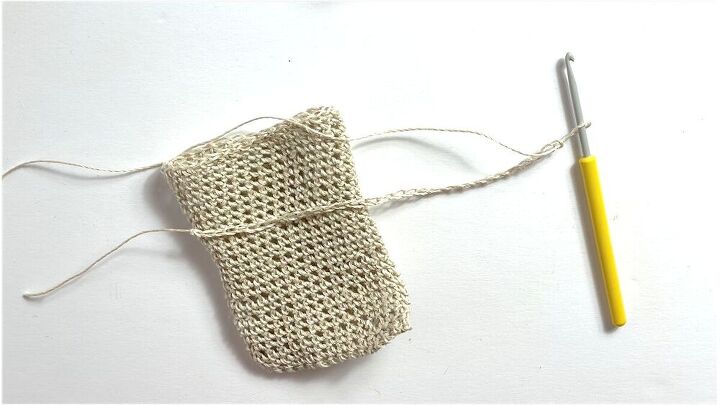
Start by casting on chain stitches. I needed 15 stitches for my 3.5 oz soap bar. You will want to check your gauge, though, with your yarn, your crochet hook, and the size of your bar of soap.
Ideally, the length of your chain will go over the short side of the soap bar and the sides. I like my soap saver to be generous in size so I went a bit bigger than what I needed.
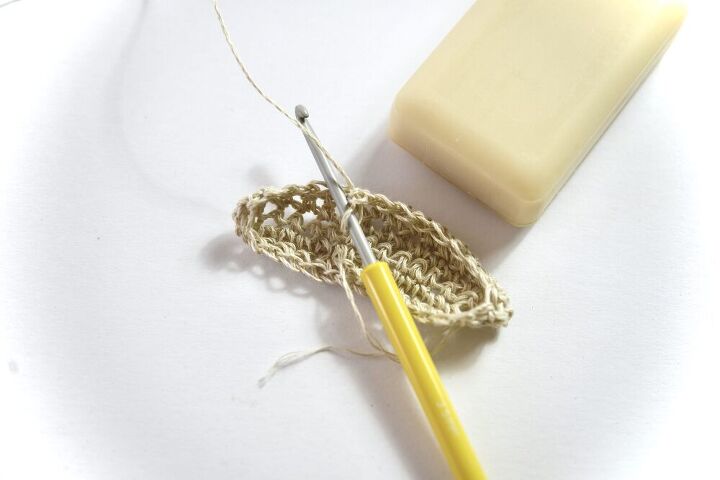
Crochet 3 rows:
Using the single crochet stitch, crochet 3 rows. You will now have a rectangle.
Creating the bottom of the soap saver bag:
At the end of your third row, insert your crochet hook into the first stitch of the first row and pull the yarn through. Make a single crochet stitch. Continue by going down the first row. This will create the bottom of your soap saver bag. It will also let your crochet in a round.
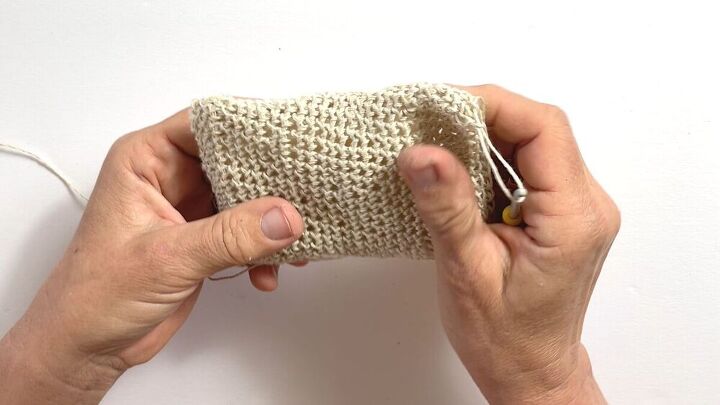
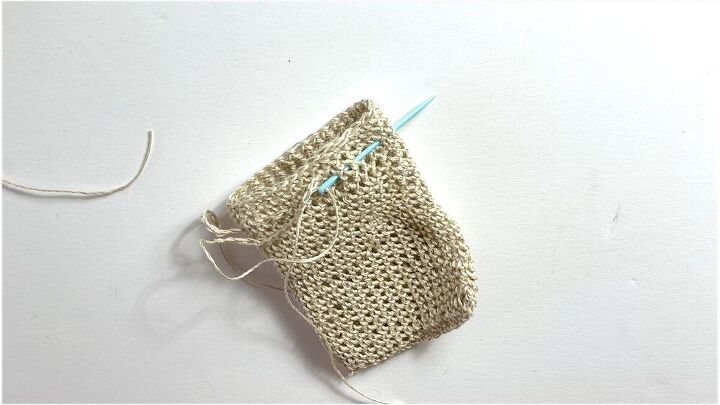
Crocheting the body:
Simply keep going, still using the single crochet stitch until you can easily place your bar of soap in this bag. By easily, I mean that your bag is at least a few rows longer than your bar soap.
Generously, snip off the yarn and weave in the ends.
Making the draw string
To make the draw string, use the chain stitch. You will need a little more than twice as many stitches as you cast on for the body of the bag. Then cut off the end and pull the yarn through.
Attaching the draw string:
Insert the cut off yarn of your drawstring into your darning needle. The body of your bag will have small holes. Insert the darning needle into those holes about 3 rows from the top of the bag. I like to go into every other hole. Go all the way around, gently pull the drawstring through and tie it together at the ends.
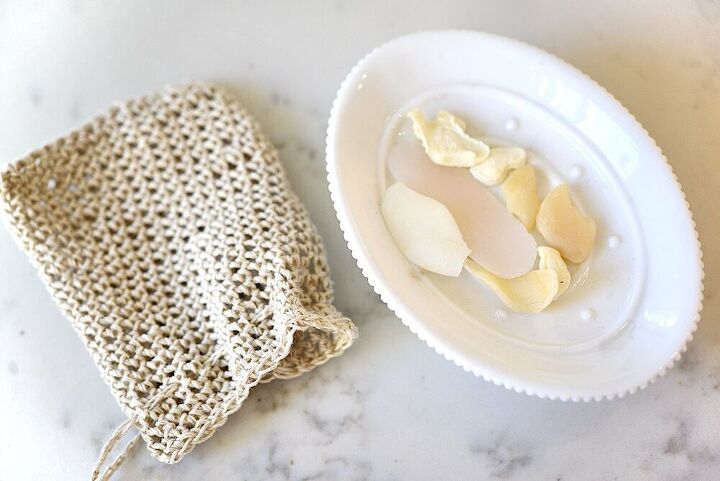
How to use your soap saver bag:
You can use it for any new bar of soap. With the drawstring, you can hang the bag from a hook in your shower. Then you will have no more gooey bars of soap lying around.
Of course, you can use this soap saver by your kitchen sink or anywhere where you might be using bar soap.
You can also use it for all these little pieces of soap that might have collected over time.
Shop THIS POST:
Linen Yarn: https://amzn.to/3b124n2
Linen cotton blend yarn: https://amzn.to/3dUk2JM
Cotton yarn: https://amzn.to/3bRPPsc
Crochet hooks: https://amzn.to/2NQNi9R
Darning needles: https://amzn.to/3sCK7kU
What do you do with your leftover soap pieces? I’d love to hear from you in the comments!
Pin For Later:
Resources for this project:

Comments
Join the conversation
-
Nice! I am so glad you like these and thank you so much for your sweet comment ~ Anja
-
Yes very much thank you


Frequently asked questions
Have a question about this project?
Why are you saving soap scraps? Even if you collect them what are you going to do with them? You can’t use them together because of the different fragrance my give you a allergic reaction.
I LOVE that you used the linen yarn, it adds a classy feel to the project. I might have used cotton yarn instead, if the linen yarn was hard to find or more than I wanted to pay. Nice job !!!