


How to Make Linen Beeswax Wraps

Ever since I first saw beeswax wraps I thought I could make them myself. That is what I did over 2 years ago (you can see that post here).
I still use them a lot but I needed different sizes. This time around, I thought it would be fun to use one of my favorite fabrics: linen!
This post contains affiliate links, which means I make a small commission at no extra cost to you.
We all need to wrap or cover foods periodically. And we all know that plastic is not the best or healthiest material to use in the kitchen.
Ever since bees wraps were available, I was sold! However, they can be pretty pricey. Or if you buy them at Trader Joe’s, they don’t tell you the “ingredients”.
Since I like to know what’s in my beeswax wraps and since they are surprisingly easy to make, it is a no-brainer for me.
Plus, I get to make exactly the sizes and shapes I need!
This is the method I used for my original post. I find this the best choice if you have a lot of beeswax wraps to make. It might also be one of the less messy ways to do it.

I like using a hot iron if I am just making a few beeswax wraps. You don’t need to wait for the oven to have the right temperature. Also, this is a pretty quick way to make them.
For full disclosure, I need to mention that I have not yet tried melting the beeswax and then using a brush to get it on the fabric. What I have heard, though, is that it can be messy. Maybe one of these days I’ll give it a try.
Linen: This time around, I choose linen for my fabric (read more here why I love it so much). It is a bit more hefty than regular cotton fabric and naturally stain, odor, and bacteria resistant. You’ll want to wash it before you use it. I often use linen from an affordable Ikea table cloth (which is actually a linen-cotton blend that I used for my popular cross-over apron). Target also has a linen table cloth. Or use any linen or cotton fabric you like.
Just like beeswax linen is naturally anti-bacterial, so this is a double-whammy in my book!
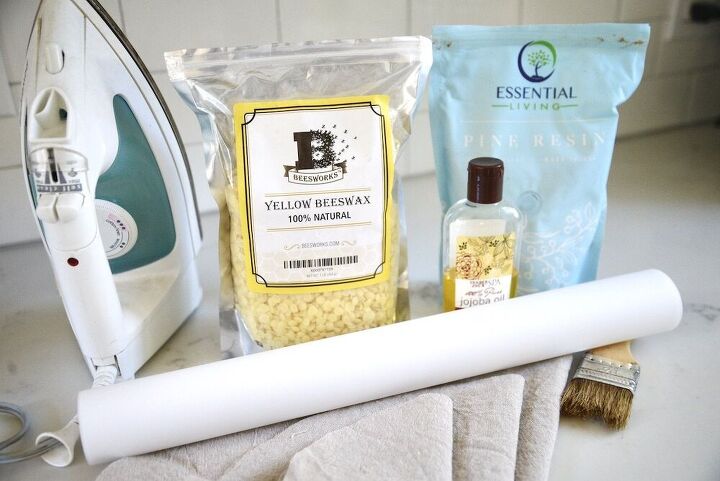
Beeswax: Obviously, you need beeswax. Many people make their wraps only with bees wax. I, on the other hand, like to include 2 other ingredients:
Pine resin: Pine resin is what gives these wraps their stickiness – or clinginess. If that is what you’re looking for, I recommend including pine resin.
Jojoba oil: Adding a bit of jojoba oil to this mixture makes the wraps more pliable. I have used it in my original beeswax wraps and still use it when I make more.
Since I’ll be using the hot iron method, you’ll need that, too.
Parchment paper to have a work surface that is non-stick and easy to clean up. And possibly a pastry brush. I have not had much trouble cleaning it but I like to have one that I am only using with beeswax.
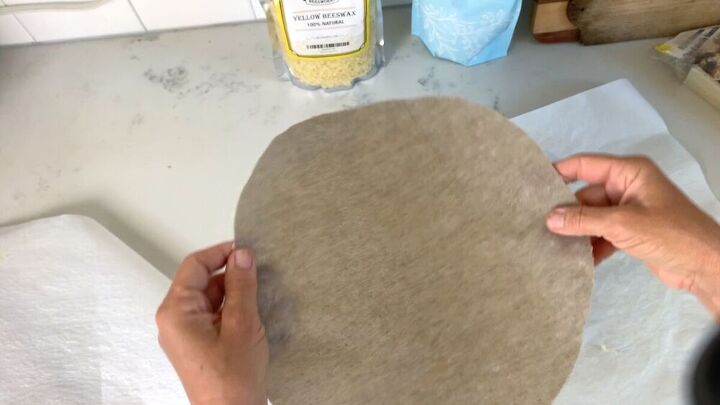
Cut out the linen in the shapes and sizes you need.
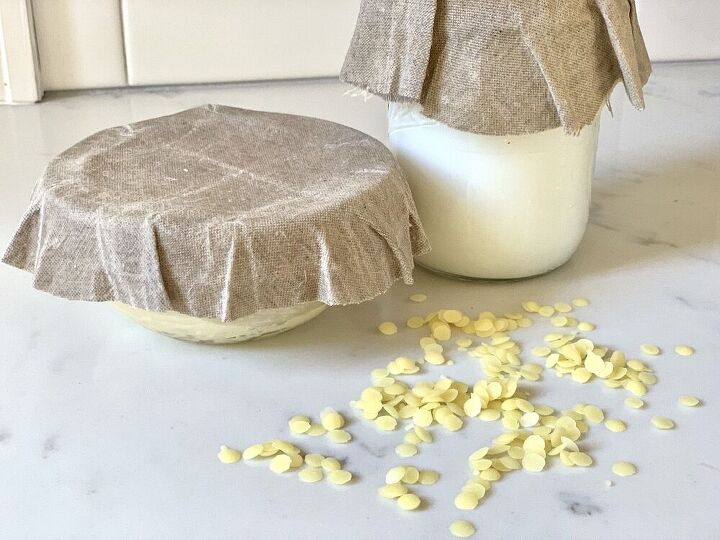
Round is great for covering bowls and jars while square is better suited for wrapping things like cheese or sandwiches. I like to place my jar or bowl upside down on my linen, add a good bit for the hangover, and cut that out. If you wanted, you could serge your edges. I have never done it and my beeswax wraps still look fine.
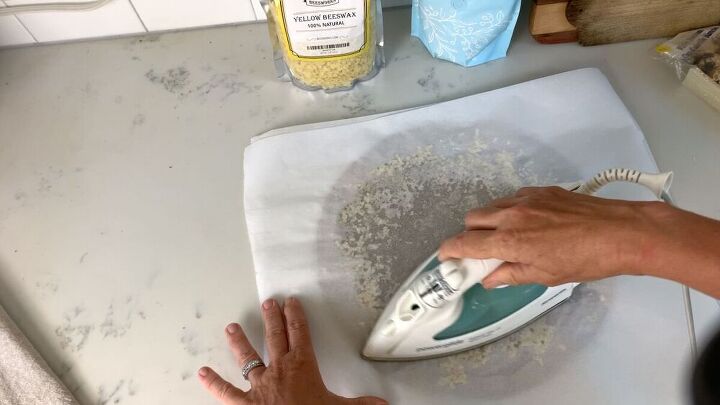
Find a suitable area to make these. An ironing board works great or some work table. I did it on our quartz kitchen counters but that may not be the most ideal surface.
Place the parchment paper on your work surface and turn on the hot iron. I used the cotton setting (the hottest) but you could try using a lower temperature if you’re not sure.
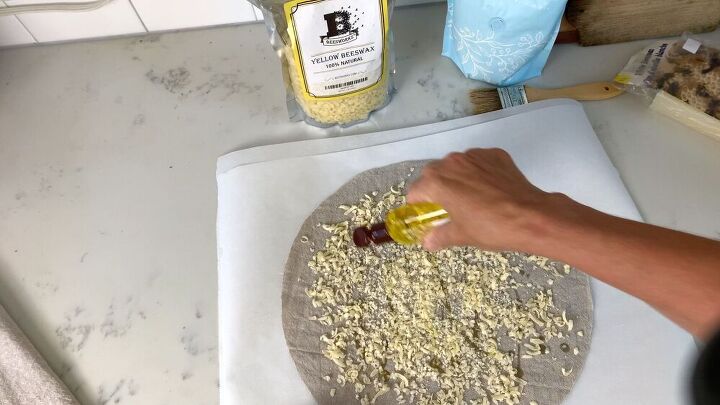
Put the cutout linen on top of the parchment and sprinkle with beeswax. The ratio here is 2:2:1 for the beeswax:resin:jojoba oil.
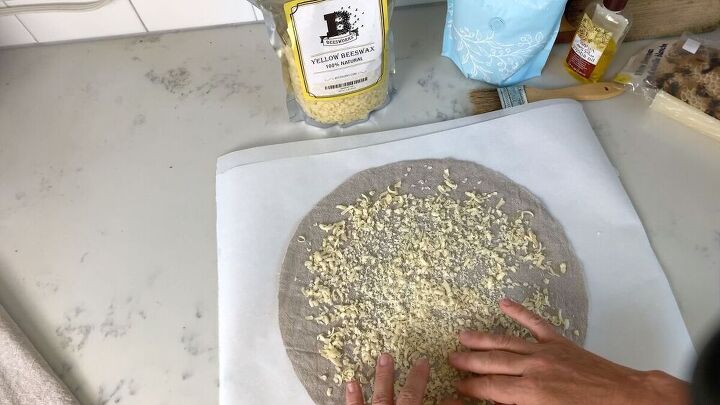
I just eyeball things but adding about a similar amount of resin and then squirting some jojoba oil on it.
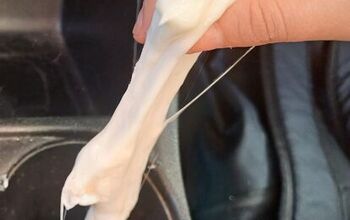
Now put a second layer of parchment paper on top and start ironing. The idea is to melt everything and gently distribute the wax mixture with the pressure of the hot iron. Don’t worry about letting it go beyond the edges of the fabric. But do avoid letting it get on your hot iron – it’s a sticky mess.
Working fast, peel the top parchment off, then the beeswax wrap, and wave it in the air to cool it down.
And that, my friends, is all!
If you have more wraps to make you simply repeat. If you found some of the waxy mixture on the parchment, you can peel that off and place it on your next piece.
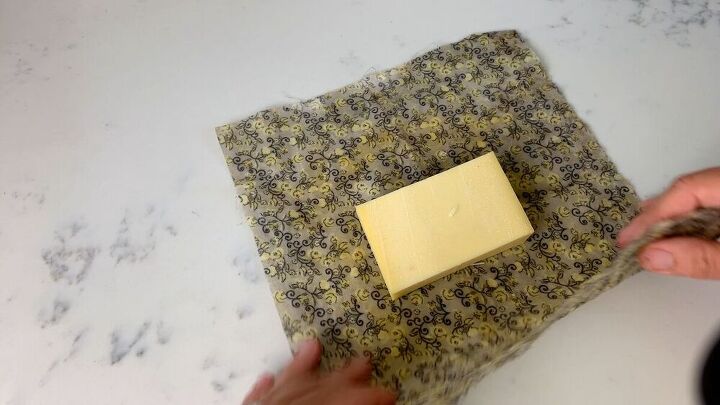
Once you have a few of those wraps, you’ll find more and more uses. I like to use them to cover my kefir jar (it allows some air flow). Beeswax wraps are perfect for wrapping cheeses or veggies.
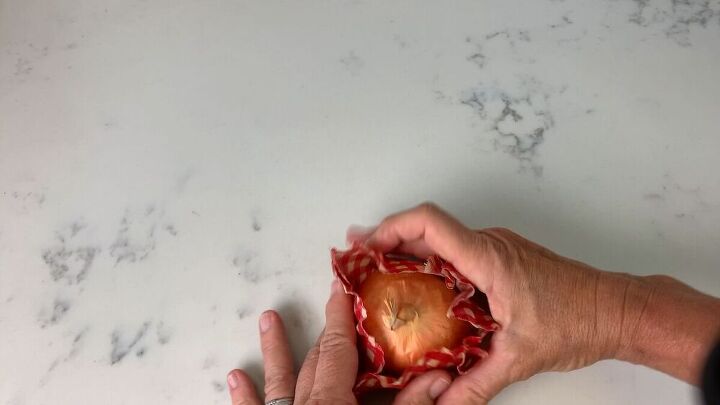
Since onions have a strong smell, I have a dedicated wrap that I only use for onions.
You can wrap sandwiches or bread in your beeswax wrap.
It is also the perfect cover for a bowl in which you’re letting dough rise (whether that is yeast or sourdough). I have a favorite enamel bowl for bread making and made a wrap large enough for this bowl.
Especially when you’re using these wraps as a cover for bowls or jars, you’ll be using the warmth of your own hands to soften the bees wax and gently press it onto the sides. With the added resin, it will stay there!
I still have the bees waxwraps I made over 2 years ago and I use them all the time! Some have visible creases in them but they are still going strong.
If the bees wax is wearing off, I would simply add some more, and use the hot iron method.
Since you are only using natural ingredients you could put old ones in the compost but I personally would rather see if I can bring them back to life.
Linen fabric (or this one from Target)
Beeswax
Pine resin
Jojoba oil
Hot iron
Parchment paper
Pastry brush

Comments
Join the conversation
-
Nice! Thanks for sharing!
-
When I first saw the picture with the gingham circles, I thought it (the beeswax) was shredded cheese, and the project was making mini-pizzas.


Frequently asked questions
Have a question about this project?
Thanks. I had gotten some from groove a few years back but never really got into them. And I just moved so who knows where they were - so this might be a summer project for me and the kiddo once we’re done unpacking.
my main thing is. How do u clean them and keep them going fresh??? I’m pretty sure I ruined atleast one of mine by trying to wash it cause it got dirty
I definitely will make these! What fabrics are naturally anti-bacterial? Does it have to be linen/cotton blend or will 100% cotton work? Thanks!
How do you clean the wraps after use