


How to Make a Simple Ladder Trellis
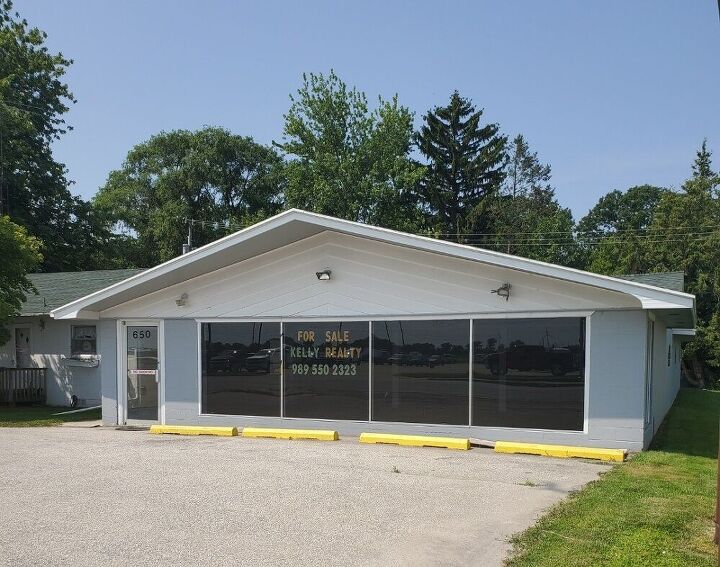
Two years ago, I purchased a building, but I wasn’t in love with the exterior. Not only did it lack curb appeal, it was poorly insulated and the single pane glass windows leaked air and water.
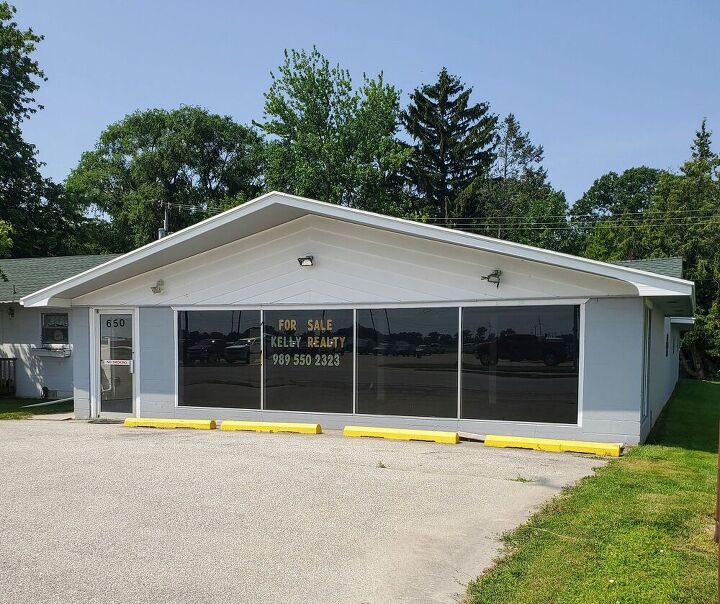
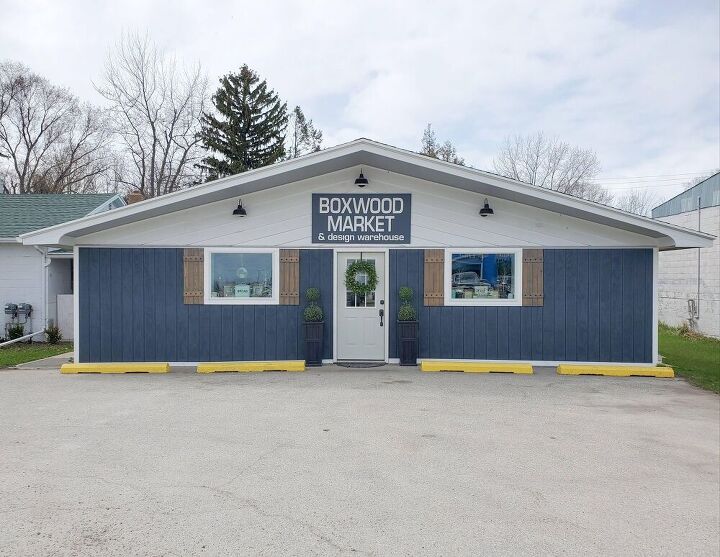
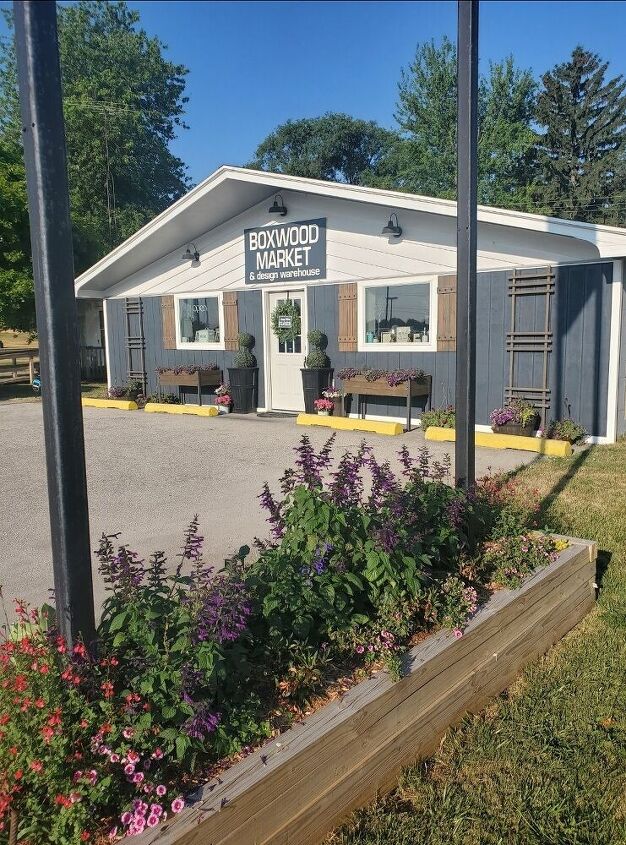
We couldn’t center the new windows the way that I would have liked and I was limited on size due to structural supports. I thought a modern ladder trellis would be perfect to balance the negative space on each side of the windows.
Materials Needed:
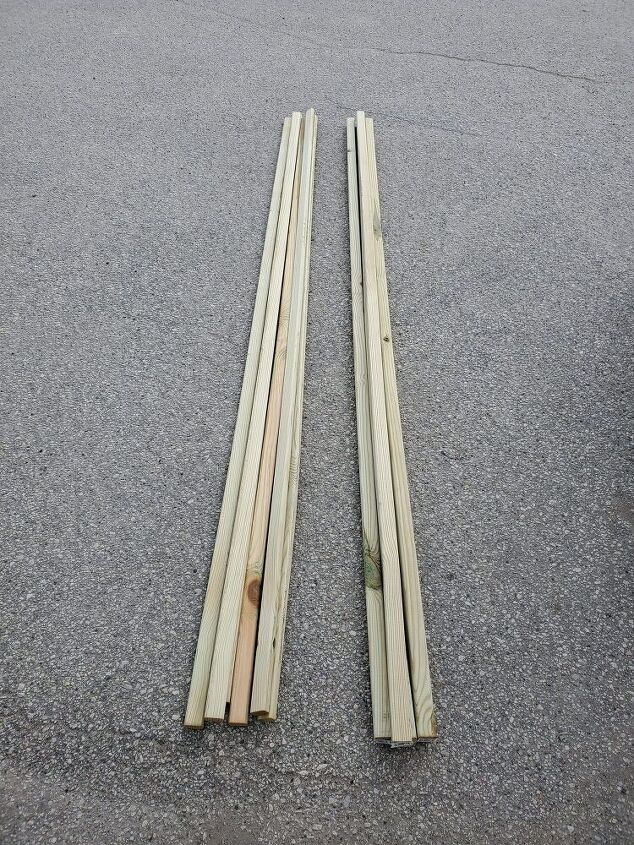
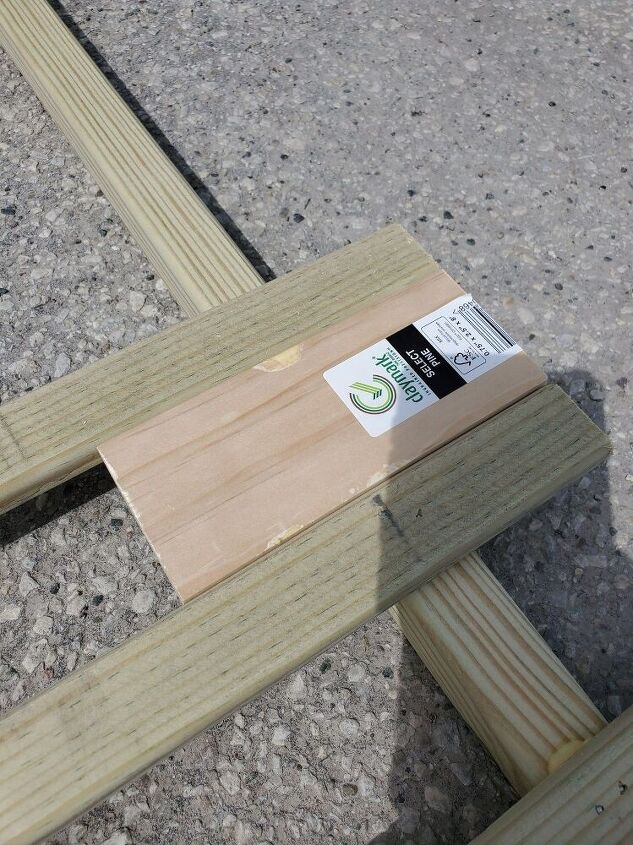
- (4) 2x2x8 pressure treated boards
- (5) 1x2x8 pressure treated boards
- wood glue
- 2″ brad nails
Tools Needed:
- Saw
- Nail gun
- Spacers
Directions:
The trellis were super easy to make. It only took 20 minutes to make two of them.
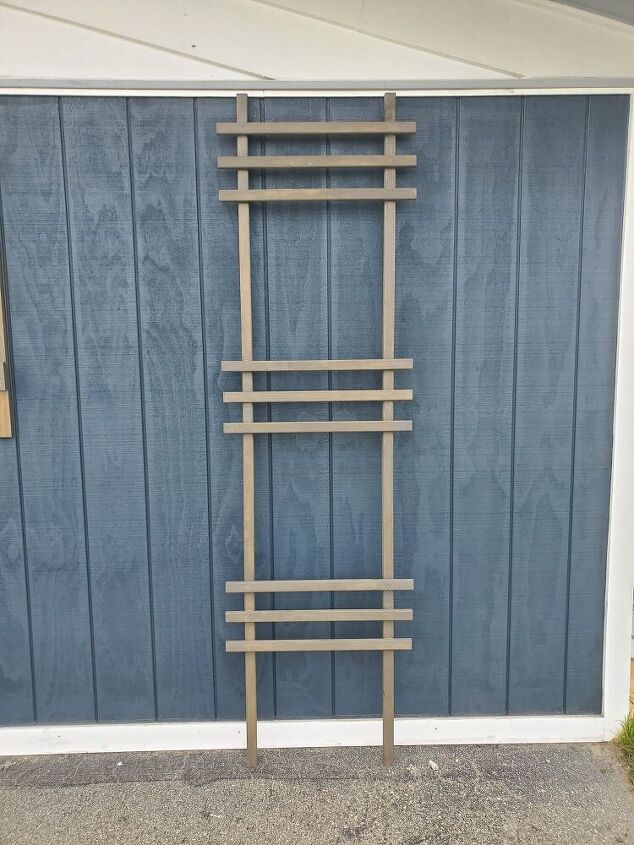
I determined that they needed to be 7ft tall to fit the area where I wanted to place them. Then I cut my (4) 2x2s down to 7 ft and I decided to cut 18 cross pieces out of the 1x2s at a width 23.75″.
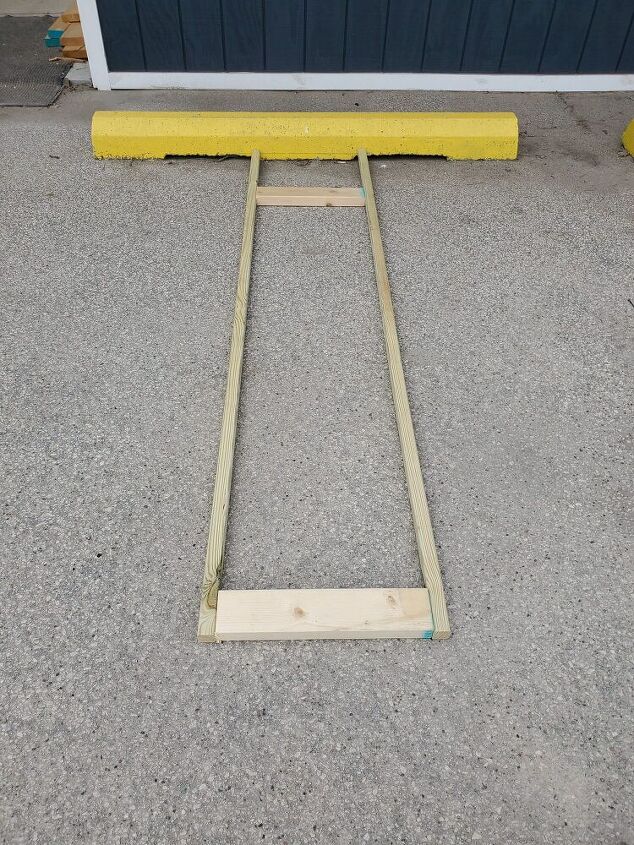
I wanted a more modern ladder look, so I decided to do three sections of three boards. I started by lining up my two uprights and putting spacer blocks between them to keep them square.
I then put the cross pieces over top of my uprights. I used a second set of spacer blocks to make sure they were evenly spaced.
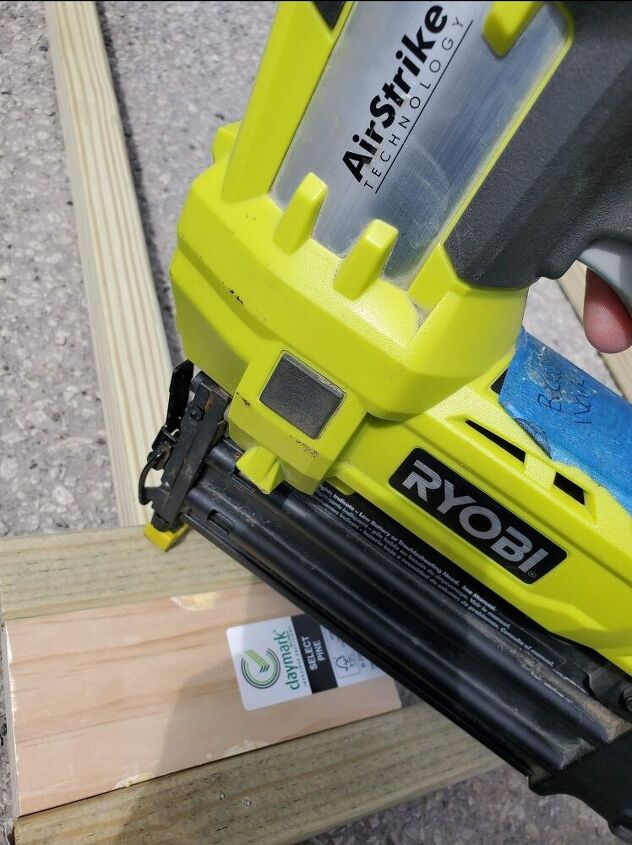
I added wood glue and then nailed the pieces in place using my brad nailer.
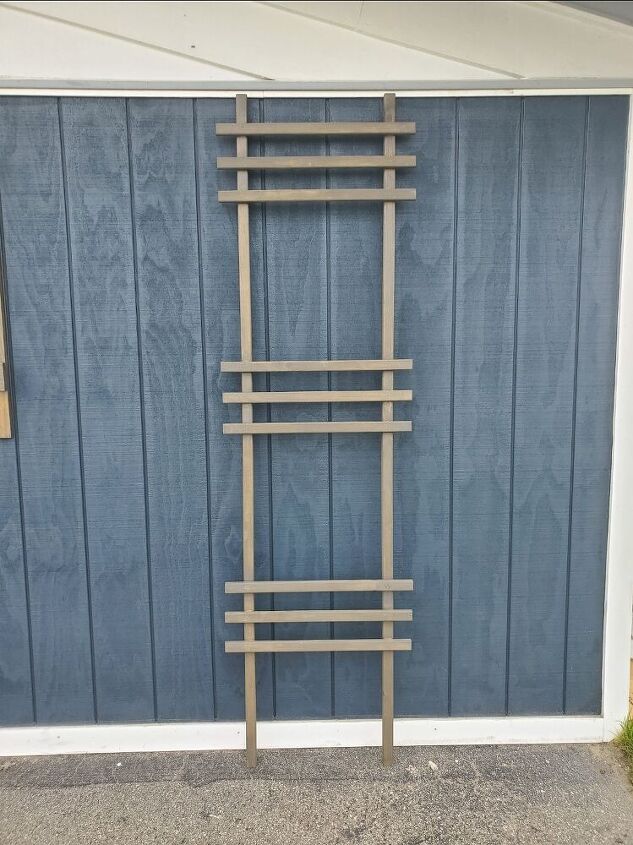
Once all 9 cross pieces were attached, I let the glue dry and then stained it with Briarsmoke stain and sealed it with spar urethane.
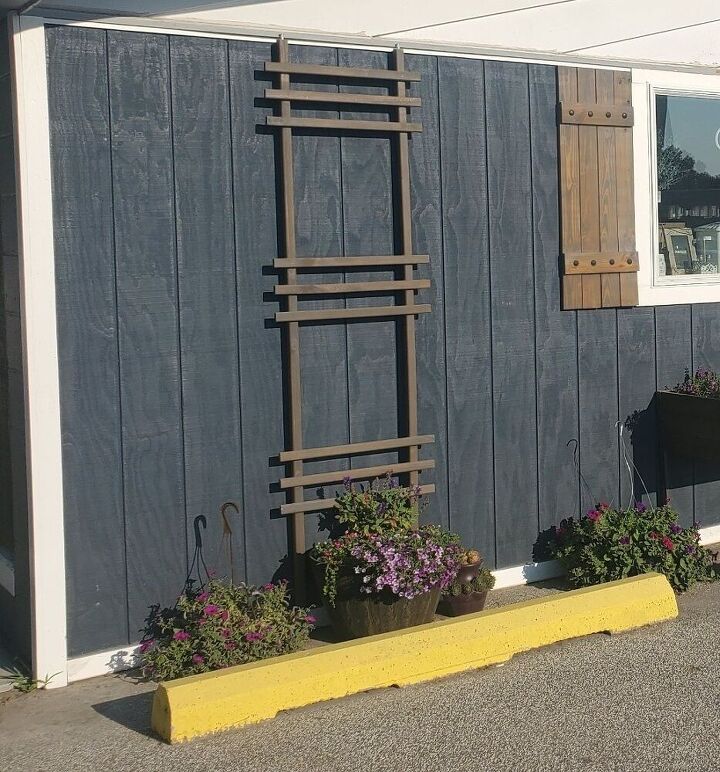
I left a bigger space towards the bottom so that I could put a planter I front of the trellis.
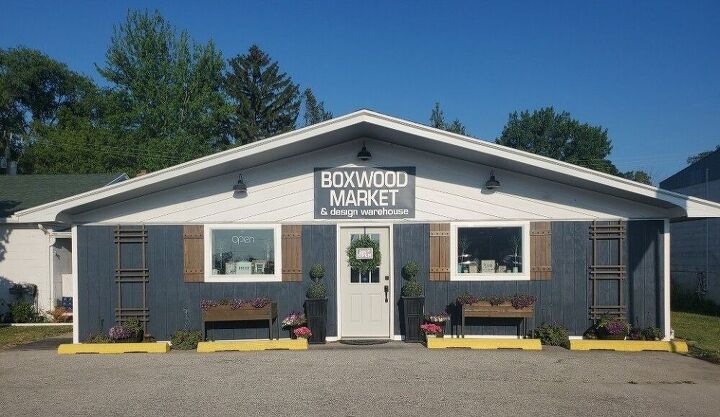
This project was super easy, but really helped to balance the negative space on each side of the windows and I can’t wait to add some solar lights and to vines to them!
I hope you’ll try to make one too!
Resources for this project:
See all materials


Comments
Join the conversation
-
Great improvement! I would definitely stop in!!
-
A lot of bag for a little buck 💰
looks adorable 😊


Frequently asked questions
Have a question about this project?
What does Boxwood Market and design warehouse sell?
I think the first 3 windows, even just the first two windows should have been kept and updated to conserve heat and AC and to use to make window scenes for decor. The road is not close to the building and you could have made seasonal decor room changes like the way high end stores such as Bergdorfs and Saks do with their windows, which might have brought in customers if they could see the window dressings from the street. Your building looks so familiar is it in NH?
I’m in Michigan also. Are you anywhere near Grand Rapids??