


See How We Added Warmth With a Diy Wood Shim Accent Wall

Hello!
Today I am sharing a quick and easy DIY we did in the Airbnb. I recently added some warmth to our TV niche with wood shims!
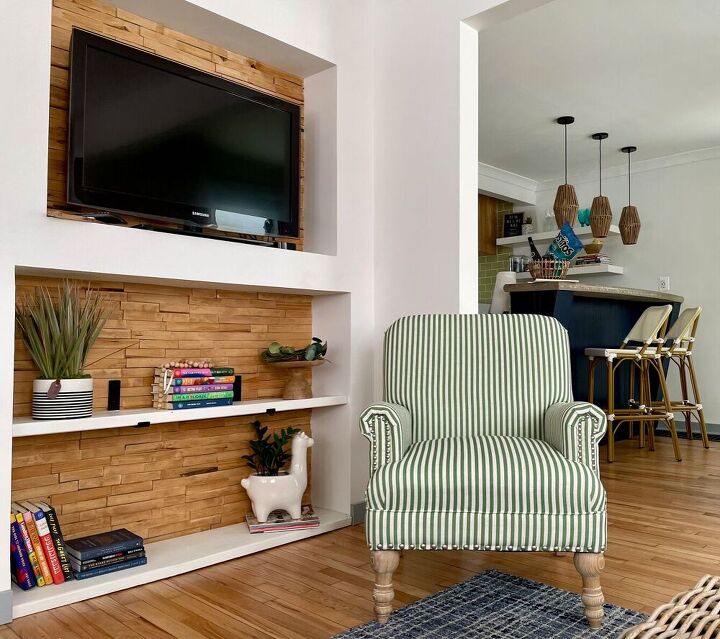
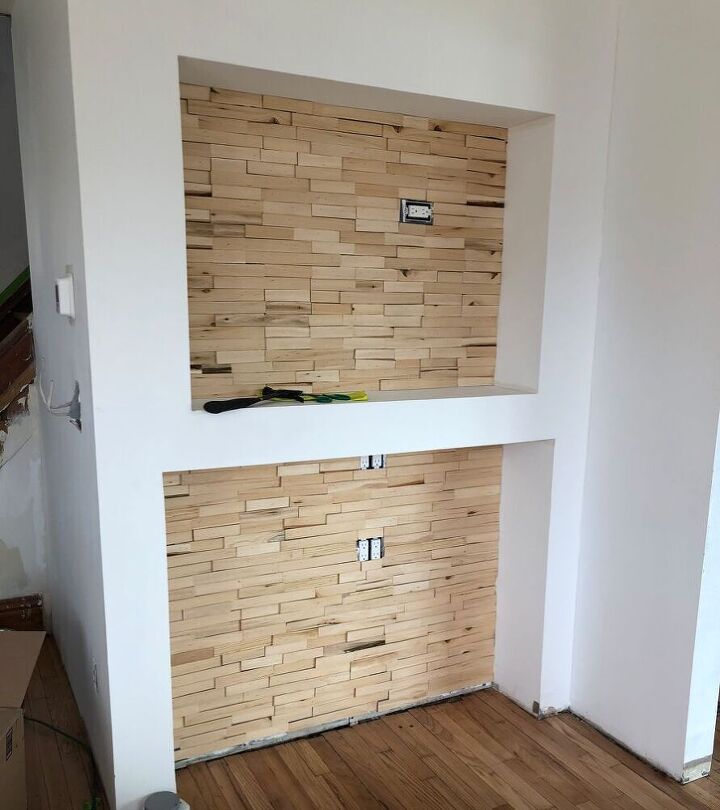
We inherited a rather cold TV niche in the Airbnb (not complaining as it was a blank slate). A quick reminder this was a distressed property that we bought on Auction.com and was filthy when we got it. See the entire Reno here. If you have followed me, you know, I love a good DIY wood accent wall!
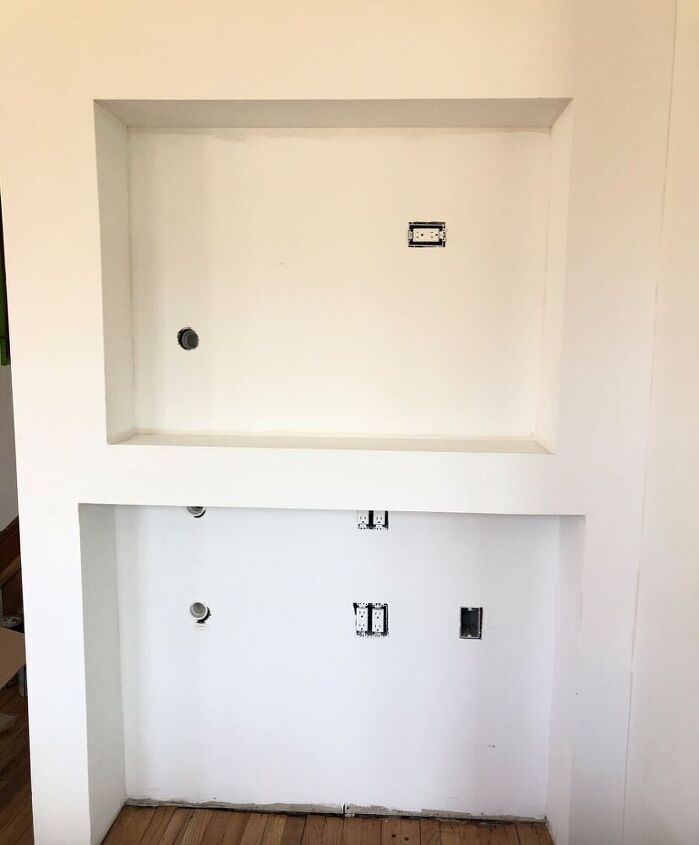
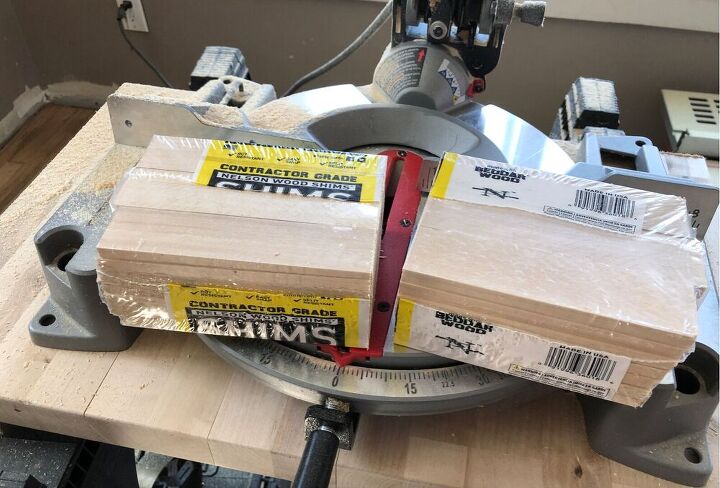
At first, I was going to paint the inside walls with SW Naval as the downstairs of the space was going to be filled with blues and greens. That idea went by the wayside when I ended up painting the bar area located to the right instead. I thought wood would warm it up nicely, but then I remembered that I had ordered waaaaay too many shims from Home Depot (we are taking advantage of curbside service during the pandemic), and I had ordered 10 packages of extra-long shims instead of one.
So instead of returning the extra shims, I thought I would use them up! We began with cutting five packages in half to give us a variety of lengths. I then painted the back of the niche so that if any areas showed through the shims, it would not be white. I used the Naval paint I had on hand. We then capped off some of the random holes left for cords, I am guessing. Next, I dragged out our trusty pneumatic nailer and some wood glue.
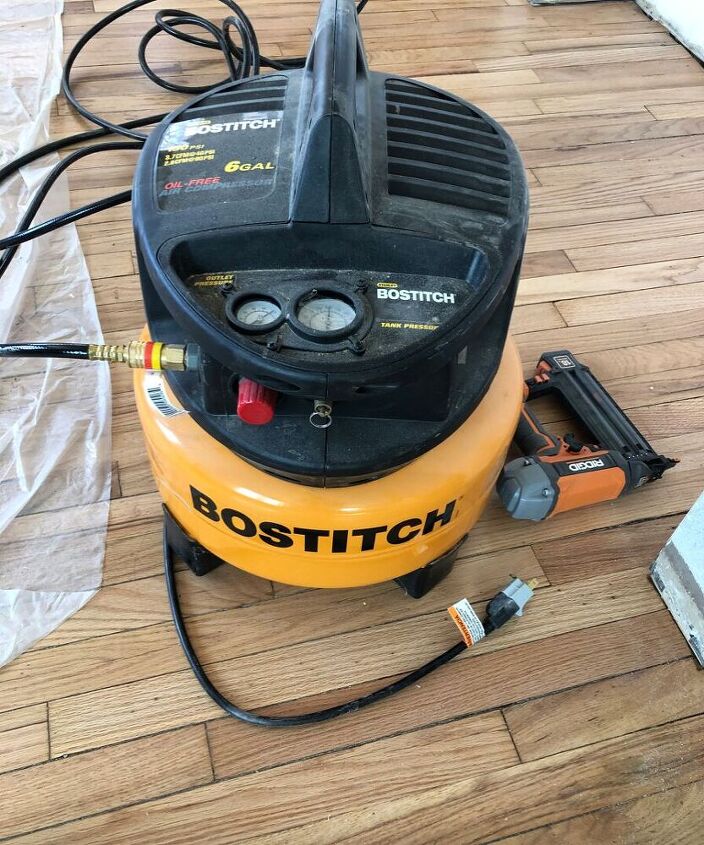
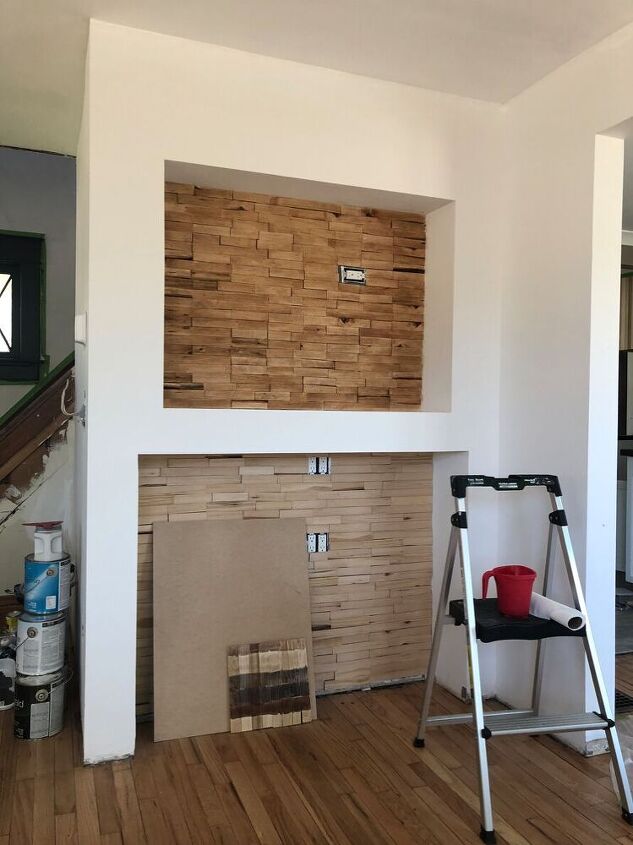
I started nailing from the top (knowing the TV would cover any mistakes) and worked my way down. I slightly overlapped the shims as I went. I also choose any pieces that had knots or irregular grain so that they were in places that would show. I liked the character in those shims. Because my sizing was off, each row needed one shorter piece that I cut to size at the end. A few pieces around the outlets needed a touch of glue because they stuck out a bit.
You can see below some of the blue peeking through in the picture below.

Ta Da! Finished shim wall.
I ended up capping off the outlets in the bottom half and shimmed over them. We don’t need them at the Airbnb, and they can be removed if the next owner of the home wishes.
In the end, I decided on staining the shims. I had leaned toward painting them when I started. But I do love the warmth of wood. So I stained them with Minwax stain weathered oak.
Here are a few words of advice- basically, what I would do differently :) if you are thinking of making your own shim project. I would have stained the shims before attaching them to the wall. Staining after is time-consuming and I would paint the wall behind to match whatever color the shims will be. But, since I wasn’t sure they sat for a bit before I figured out what I wanted.
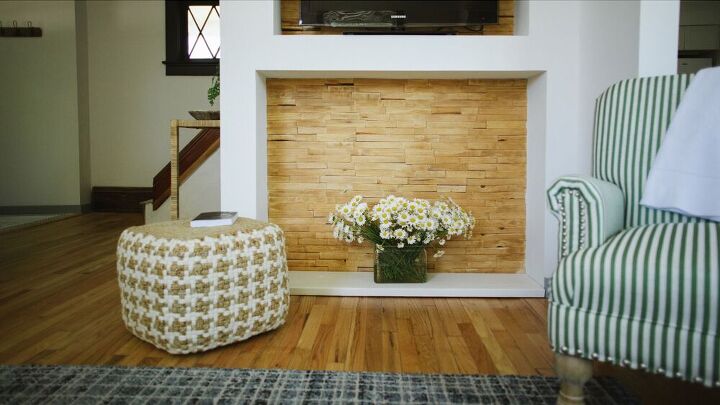
We are going to add a shelf soon so it can hold books and such for our Airbnb guests. Hop over to the blog to see how we converted this foreclosure into a lovely airbnb. https://www.alifeunfolding.com/blog-1/2020/8/27/we-bought-a-foreclosed-property-and-turned-it-into-a-short-term-rental


Comments
Join the conversation
-
Can I use glue for cement wall?
-
Beautiful!


Frequently asked questions
Have a question about this project?
I love your shim project! It really added to the room. I also love your green and white stripe chair; where did you find that beauty??
Looks terrific!!
Hey - do you think you could have turned that bottom opening into a faux fireplace? Not that I would - I DO like what you've done, but I did picture the faux fireplace for a second when I was staring at the end photo.
Keep up the good work.
How did you cover the outlets? I would like to try this as a accent wall!