


DIY Office Organizer From an Ugly Old Door

An old ugly door has never been more beautiful that this one. Well, it had an encounter with a can of black paint, but it was only for a short time. I mean, it only took a few minutes to apply a coat of paint, but the result is astonishing. And the small additions are only accessories – it’s like a little black dress that needs the right necklace to turn from dull to wonderful.
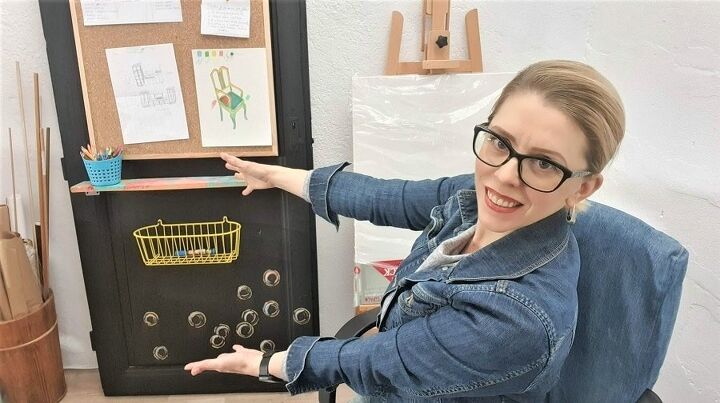
Now it beautifies my creative office and helps me keep my projects in sight.
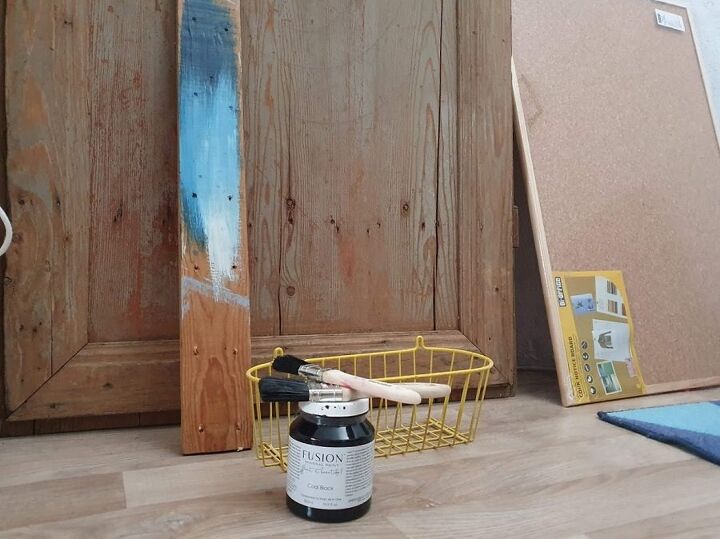
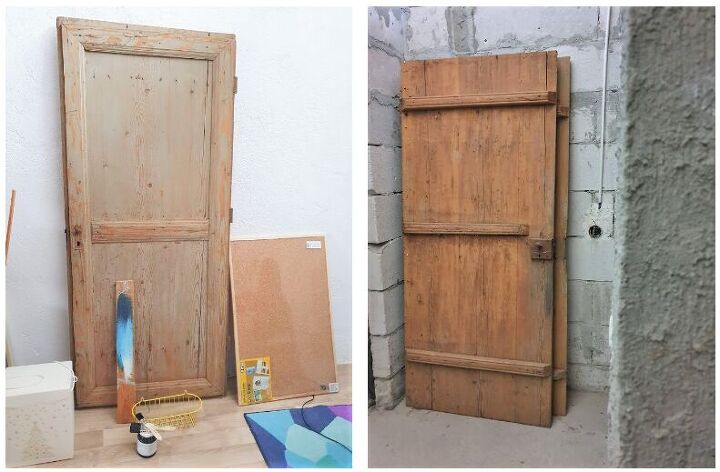
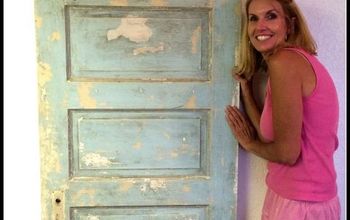
Let me show you what I’ve started with… It’s an ugly old door that I’ve recovered from a very old house that was about to be demolished. I also used some Fusion Mineral Paint (the color is Coal Black), a piece of wood for a 5 in wide shelf (you can see the marks of a few previous paint tests on it), and a bit of paint in different colors.
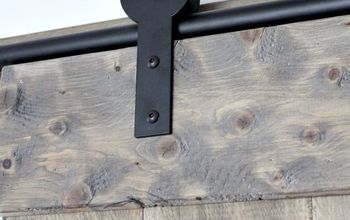
I also had a couple of metal brackets from Ikea (a leftover from a previous project) and used them for fixing the shelf. A tiny yellow metal basket was useful for this project, too. Since my door was supposed to turn into an office organizer, I also grabbed a cork board to hang on the upper half of the door.
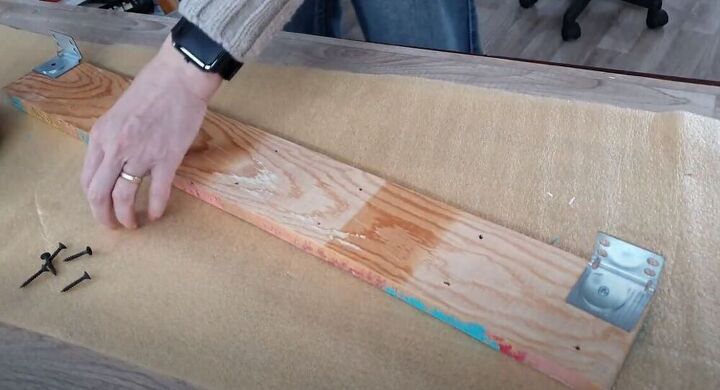
The wood was old but the good part was that it didn’t have any bugs, so I only cleaned it and sanded it to remove the dirt and the debris. I should have used a filler to cover the holes, but let me tell you one thing: that old door was sooooo old and ugly that I haven’t had much faith this project would succeed.
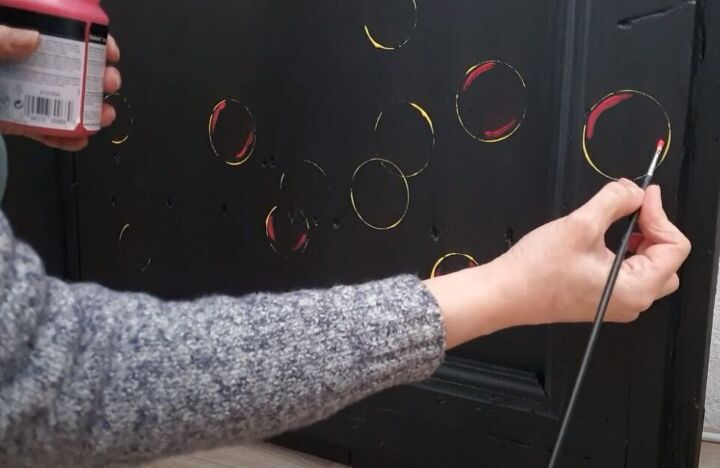
Next step after sanding was painting the door black, and since the paint has a very good coverage, one coat was enough. Once the black paint dried out, I took a round cookie cutter and dipped it in paint, and started to stamp yellow bubbles on the door.
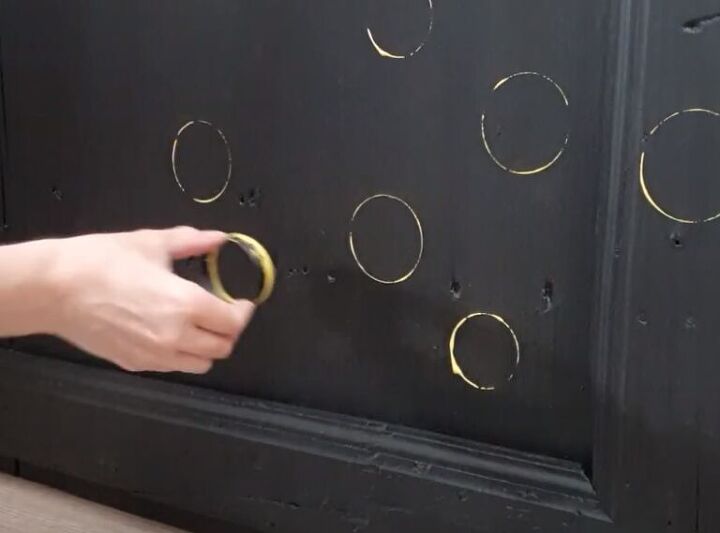
With pink and coral paint, I added a few details to the bubbles, to make them look real and give them a bit of spark.
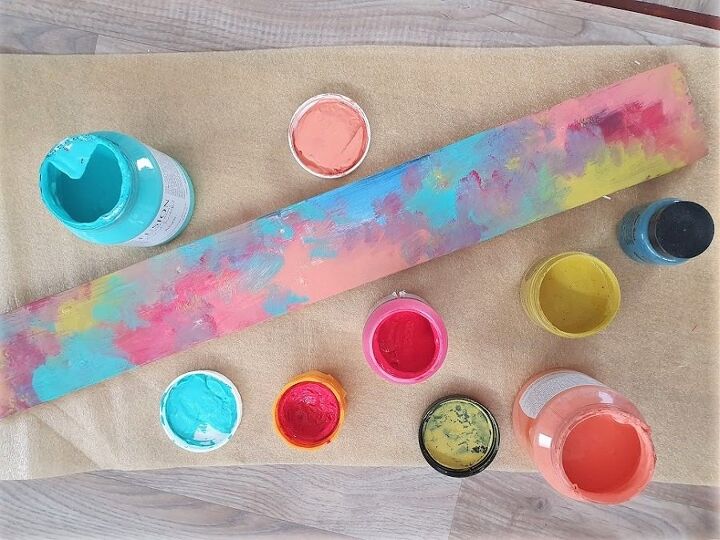
Then I painted the wood board in different colors – Azure and Coral from Fusion Mineral Paint, Brazilian Bird from Autentico, and Opera Rose from Galeria – without a pattern or specific plan in mind. It was more of a freestyle, because I wanted to make it look like a painter’s palette.
The next step was to fix the shelf on the door, but I had to fix the brackets first. Then I attached the wood shelf to the door with a couple of screws, living enough space to hang the cork board above it.
Hanging the board was a child’s play, because every cork board has its own hanging system that is very easy to use. With a couple of screws, I fixed the cork board on the upper side of the door, just above the shelf, then I added the yellow basket below the shelf (as a storage bin for markers). I also have a video about this project on my blog HERE.
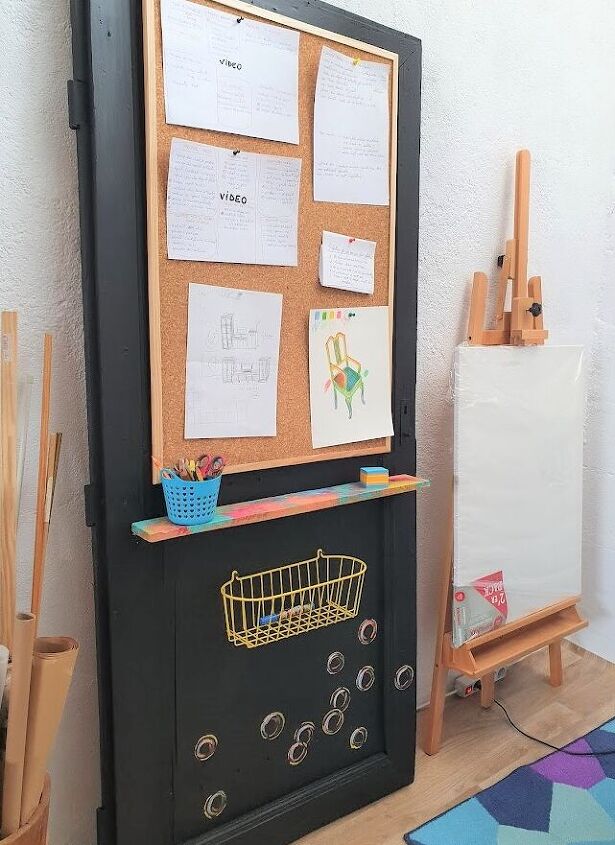
I might have gone through a few operations to acquire this look, but the projects was really simple and fun overall. This door really fits in my new office space, and helps me display my plans and have my video projects on sight.
I hope you’ll find this project inspiring. If so, follow me for more DIY advice here or on my blog!
Resources for this project:
See all materials


Comments
Join the conversation
-
Love the bubbles! When it's affixed to the wall, put some flowers in the hinges!
-
Very creative, love it!


Frequently asked questions
Have a question about this project?
How did you fix the door on the wall?