


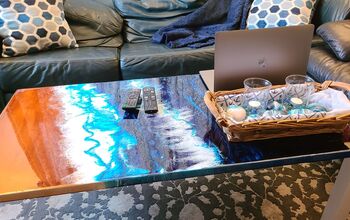
How To Make Ocean Art With Epoxy
Hi Everyone! In this HomeTalk tutorial, learn how to epoxy ocean art using reclaimed sinker cypress wood and an Upstart Art Resin Epoxy Kit.
Oftentimes, there are several things which are difficult to fully explain with words and images, so be sure to check out the video tutorial.
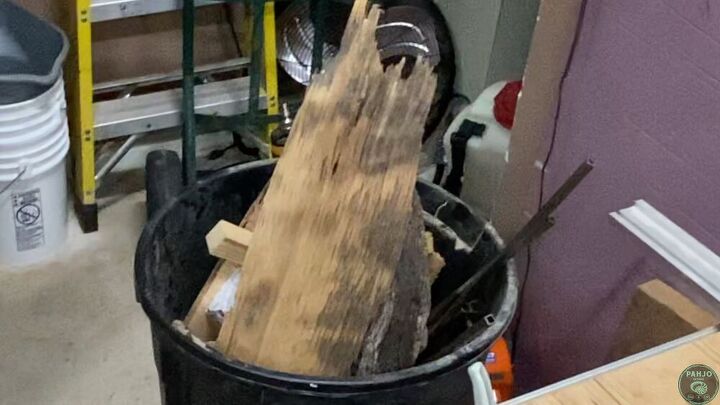
Step 1: Locate Wood for Project
I used a piece of reclaimed sinker cypress wood, which was in very rough shape. However, sinker cypress is a beautiful wood species once sanded and cleaned. In addition, it is rot/pest resistant.
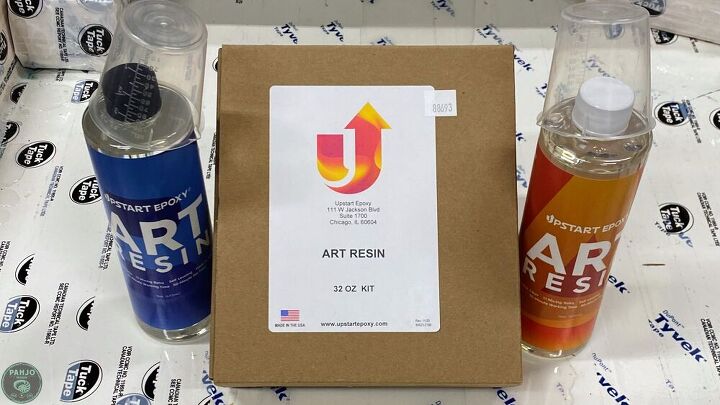
Step 2: Type of Resin
The resin art kit by Upstart Epoxy contains the epoxy resin, mixing containers, stir sticks, mica pigments, and other items listed below.
- 64 ounce Kit of Epoxy Resin (32 oz of Part A, 32 oz of Part B)
- 25 Mica Powder Packs (Sold as a separate kit)
- Mixing Containers
- Stir Sticks
In addition to the ocean art kit, I used nitrile gloves, face mask, heat gun, orbital sander, plastic cups, tuck tape, razor blade scraper, and Odie’s Oil wood finish. These materials are listed at the end of this HT post, so no worries.
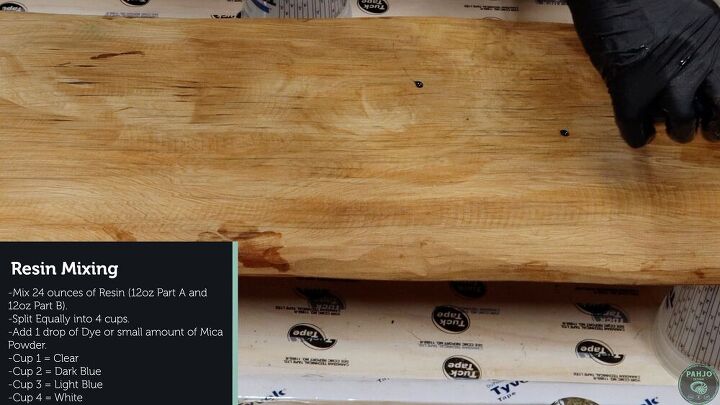
Step 3: Mix Resin
To start, I wrapped a scrap piece of plywood in tuck tape and suspended the reclaimed cypress on top of wood blocks also covered in tuck tape. Resin doesn’t adhere to sheathing tape, so it makes cleanup very easy as you will see at the end of this project.
This epoxy resin is a 1:1 mixing ratio - 1 part A to 1 part B. I mixed 24 ounces of resin - 16 ounces of part A and 16 ounces of part B.
Then, I split the mixed resin evenly into 4 cups (6 ounces per cup).
I recommend using 3 cups when mixing 2-part epoxy. Pour part A in the first cup, pour part B in the second cup, and pour these 2 cups in the third cup. If you use one cup and pour too much part B, the mixture is ruined.
Once the 2-part epoxy is thoroughly mixed, add a small amount of blue mica powder, mix, and repeat if necessary.
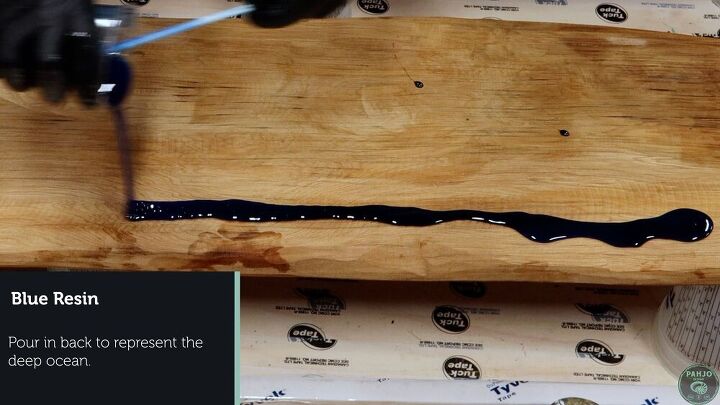
Step 4: Pour Blue Epoxy
The blue epoxy represents the deep ocean. I poured it evenly across the back of the wood.
I want the blue epoxy to roll off the back of the wood. If it doesn’t, I gently move it with my finger tips while wearing gloves. A heat gun works as well to move the epoxy.
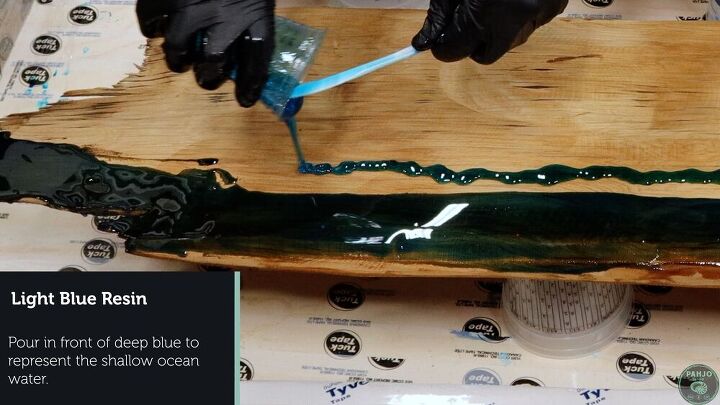
Step 5: Light Blue Epoxy
I repeated the mixing process above and poured the light blue epoxy in front of the dark blue epoxy.
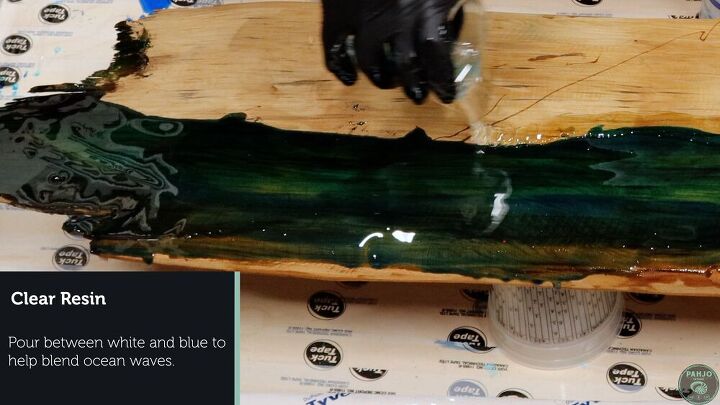
Step 6: Pour Clear Epoxy
The clear epoxy is a step that most people mix when they attempt to create ocean art. The clear epoxy helps separate the white and blue epoxy. It also makes it easy to create realistic looking waves.
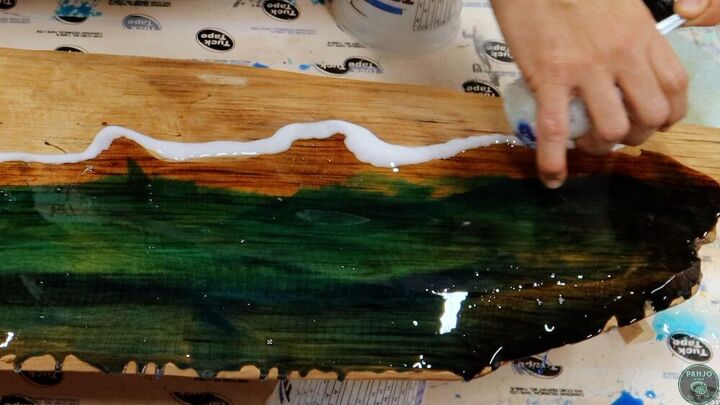
Step 7: Pour White Epoxy
Pour the white epoxy in front of the clear epoxy.
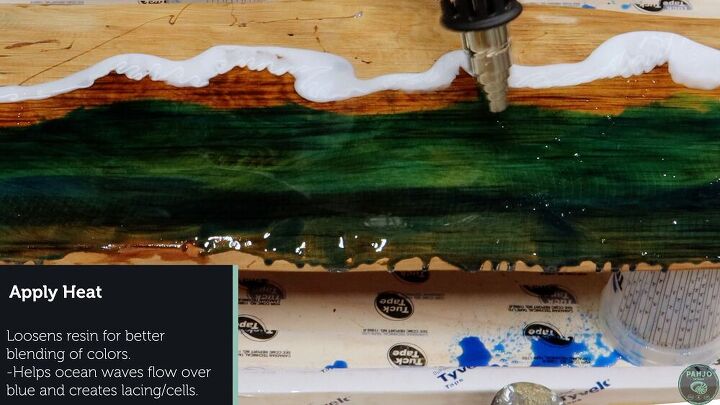
Step 8: Apply Heat
Before I make ocean waves, I heat the blue and light blue epoxy with a heat gun or torch. I prefer to use a torch, but I didn’t use one on this project b/c I didn’t have any lighter fluid left.
The heat loosens the resin for better blending and movement.
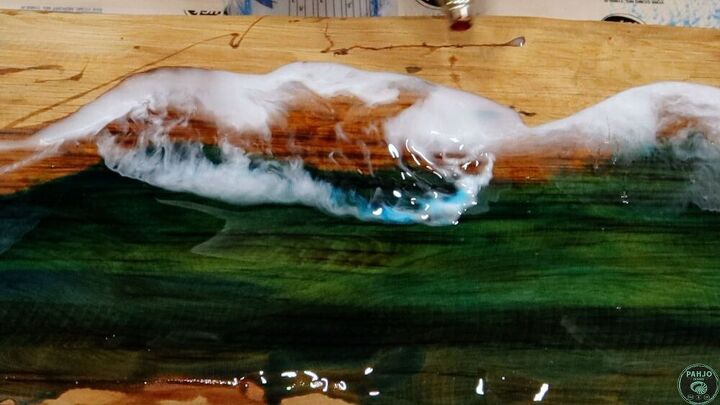
Step 9: Create Ocean Waves
Ok, now for the fun part of this project.
After I heat the epoxy, I use my heat gun to push the white epoxy over the clear and into the blue epoxy. It’s very important to not overdo this task however tempting it may be. I simply push the white epoxy as far as I want it to go and keep moving down the line.
If I move the white resin with the heat gun too much, it will eventually blend into the blue resin. Once it blends, it doesn’t look as good.
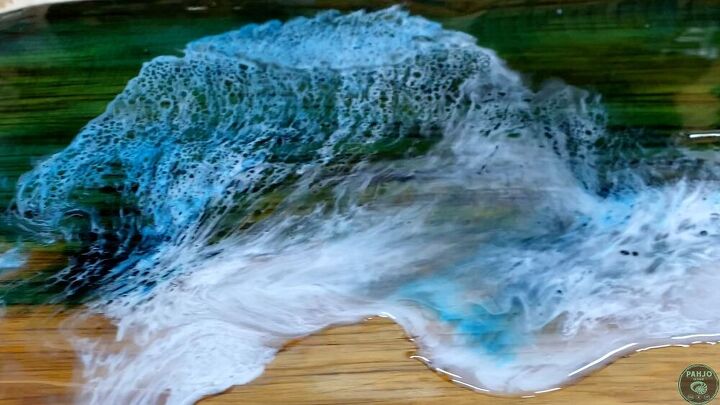
Step 10: Epoxy Effects
To create cool lacing effects and resin cells, pass a torch over the epoxy and leave it.
Allow the resin to completely cure according to the manufacturer's instructions.
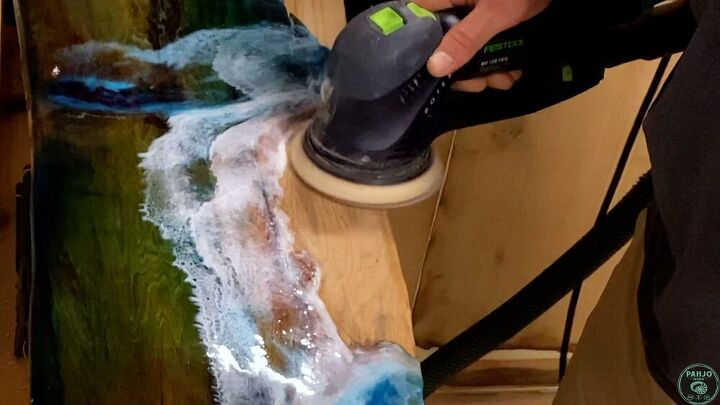
Step 11: Sand Bare Wood (Optional Step)
I prefer to leave a little bare wood in the front of my ocean art pieces as it represents sand for lighter colored wood species. Plus, it just looks more realistic.
As a result, I sand the bare wood and apply a wood finish.
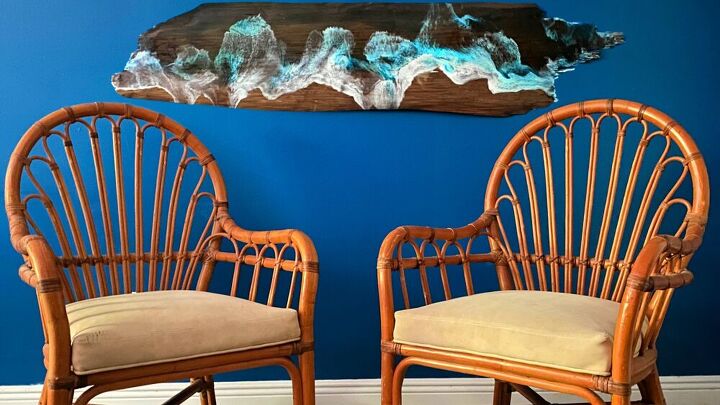
Conclusion
I really enjoyed this project and using the Upstart Epoxy Art kit. The epoxy resin performed really well and the colors in the kit were perfect.
In closing, I hope this HT tutorial provided you with value and the tips/techniques help you with other resin and /or woodworking projects. Please leave a comment down below if you have any questions.
Resources for this project:
See all materials


Comments
Join the conversation
-
Stunning,creative ,one -of- a -kind beautiful!
-
Wow 🤩


Frequently asked questions
Have a question about this project?