


Pool Noodle Headboard

If you've ever shopped for furniture you know things can add up pretty quickly! My best friend recently purchased her first home and wanted to move in with some fresh pieces. We found an upholstered headboard online for $800!! Yikes! After looking at it for a bit, I decided to spend a few bucks and try to make it myself
Hometalk Recommends!
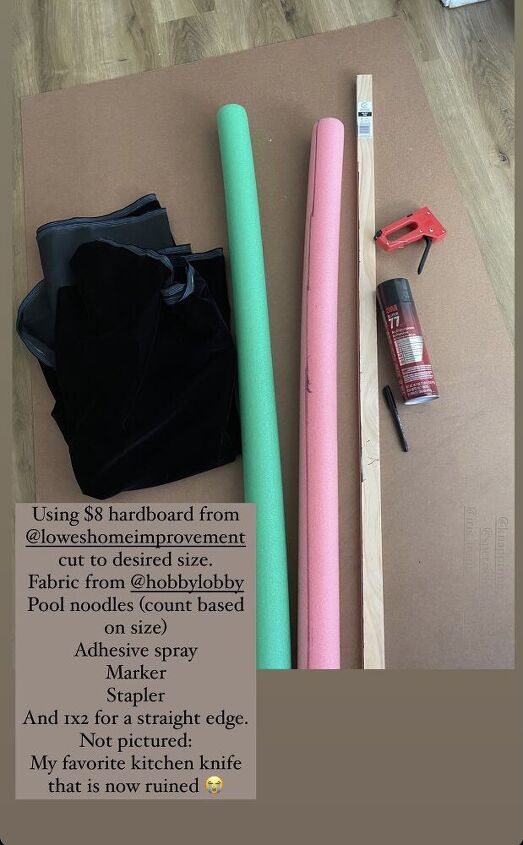
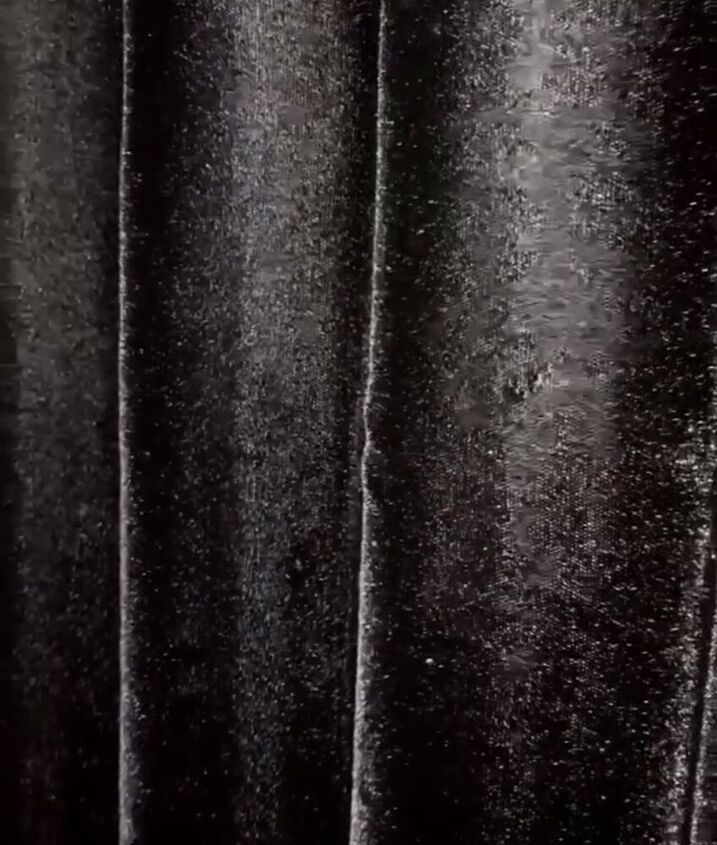
We picked up some hardboard from Lowes and had it cut to her desired size (totally up to you). We then hit the swimming aisle of Target and got 20 thick pool noodles. They carry two sizes and she preferred the larger ones. Lastly, a quick stop at Hobby Lobby for this yummy black velvet fabric (add 2-3 inches to your board size to determine fabric dimensions).
The rest of the supplies I had at home.
- 3M adhesive spray
- Staple gun
- Marker
- Sharp knife or box cutter
- Scrap 1x2 or straight edge to draw a straight line.
DIY Pool Noodle Furniture

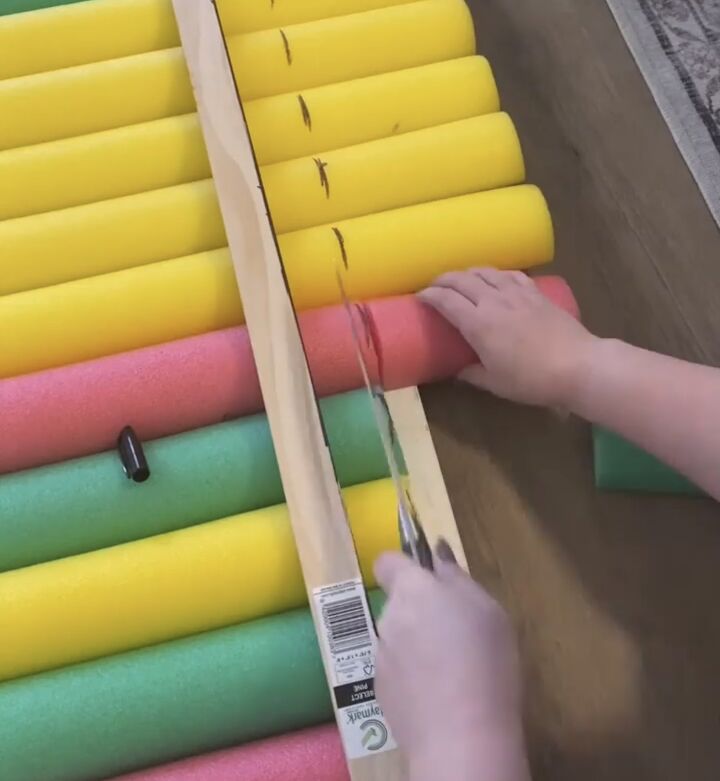
You'll start by using your marker and straight edge scrap to make a perfectly straight line down both long sides of your noodle. This will ensure all noodles are the same thickness. Then you will cut down both lines to split your pool noodle in half.
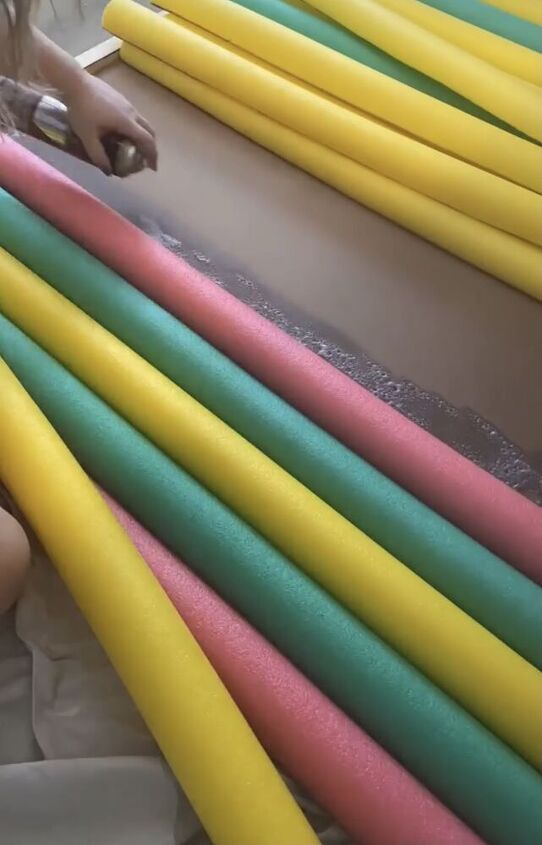
Once they are all cut you will lightly spray your hardboard (small sections at a time cause it dries quickly) and add your your noodles.
Then cut off the excess material.
I don't have a photo of me installing the fabric unfortunately. It is quite simple to explain though. Lightly spray one noodle at a time and lay over the fabric. Use your marker end to work the material into the creases. Repeat for each noodle and let dry. When dry flip it over and staple the extra material to the back of the hardboard.
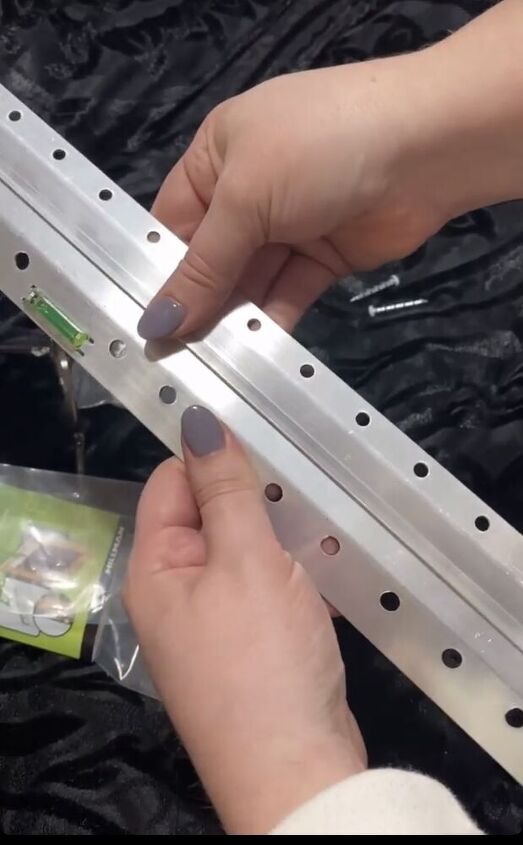
Optional step: I used this French cleat from Lowes to attach the headboard to the wall. Follow instructions on packaging for proper instal to your wall.
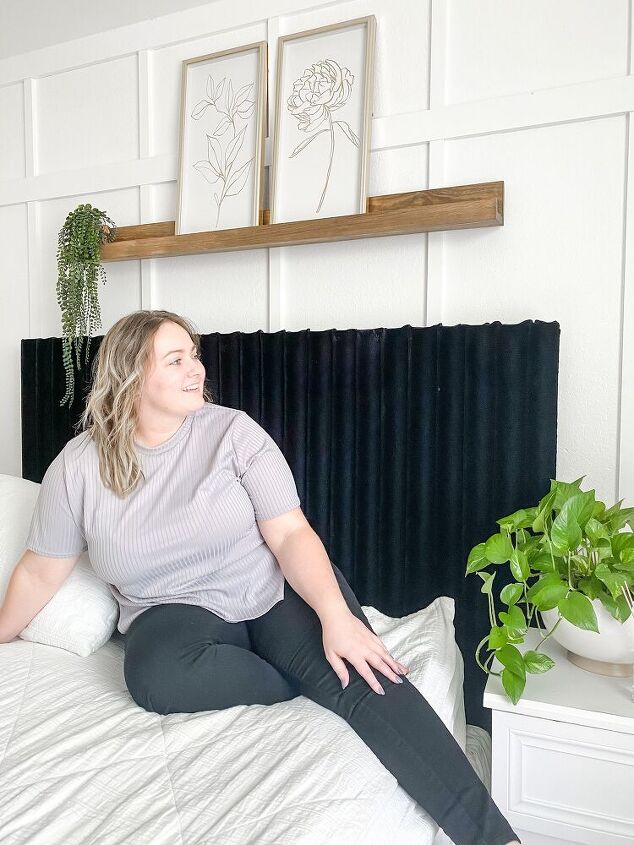
Thats it!!! This project was so fun and cost less than 1/4 of the price of the one we saw online. If you'd like a video tutorial I have one available on my Instagram @beingjsmith. Scroll through my highlights for "HEADBOARD". Id love for you to give me a follow while you there so you don't miss many other projects like this.
Resources for this project:
See all materials


Comments
Join the conversation
-
Oh, quickly, also they work well for hiding cords in behind the couch (mine sits in middle of room). This one I did cover with fabric to go with my decor.
-
I’m sorry Renee!!! I have typed out a reply to you along with pictures three times and (unless I’m just not seeing it) it won’t post!


Frequently asked questions
Have a question about this project?
Do you know that little bugs loves to hide in pool noodles! How does one prevent bugs to live inside these noodles?
Nice project. I’m wondering if an electric carving knife would have been easier to cut the noodles? I’ve used them for cutting foam quite often and it really worked well and much less time. Just a suggestion. Thanks for sharing!
How do you hold the noodle so the straight edge will give you two equal halves? How do you measure? Thanks