


Staircase Project develops mind of it's own
3 Months
Advanced
Stairway To Moi...
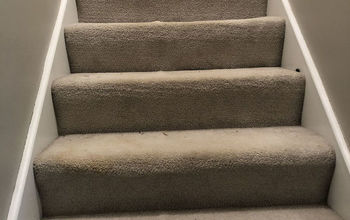
After pulling up and purging that staircase carpet, I stared at a bare nail infested staircase waiting to be beautiful...
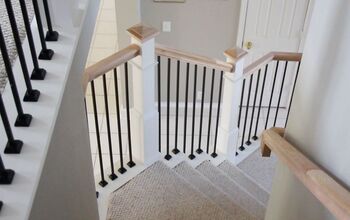
Certainly glad to post only finishing photos as this project had some messy moments. It's now a real treat enroute to the entertainment room or bedroom.
After pulling up the carpet, I had no idea what I'd do for a new look but granted myself unlimited creative license. Certainly had the energy reserve for it!
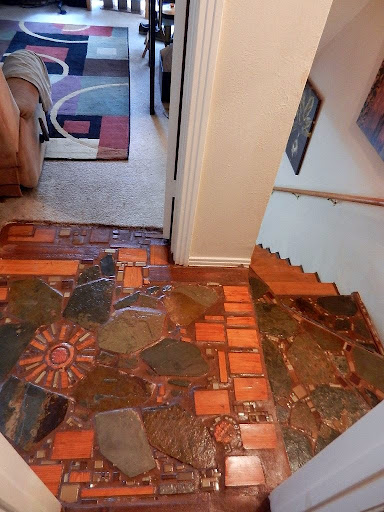
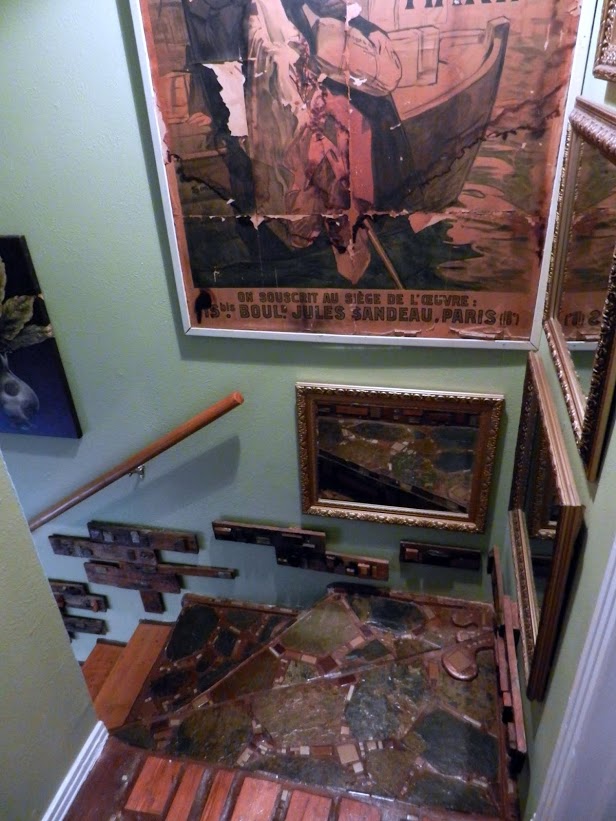
I hand formed all tiles from portland cement and carved out with a dremel tool. Thank God for Dremel or I'd be finding another hobby real quick! I simply pour half-inch thick layers of cement on boards, allow drying for thirty minutes and carving out the basic shape or design. Once fully dry, I further carve and detail the pieces with a dremel tool.
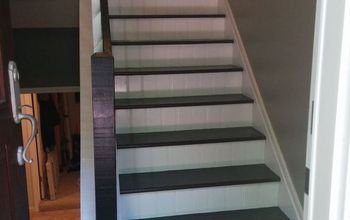
For steps, backer or cement board applied to face of each step before applying mortar for tile and grout. I used a pre-mixed nutmeg colored tile grout. After securing tile with mortar, huge amounts of mortar filled in tile surrounding surfaces. Once dry, I used several layers of semi-gloss sealer to lock it in and bring out the colors.
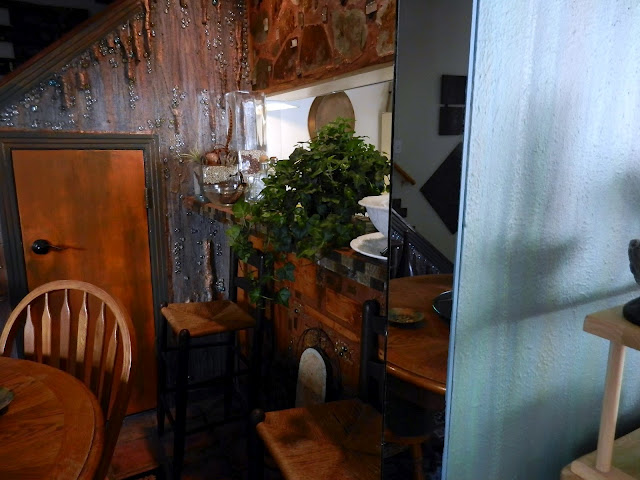
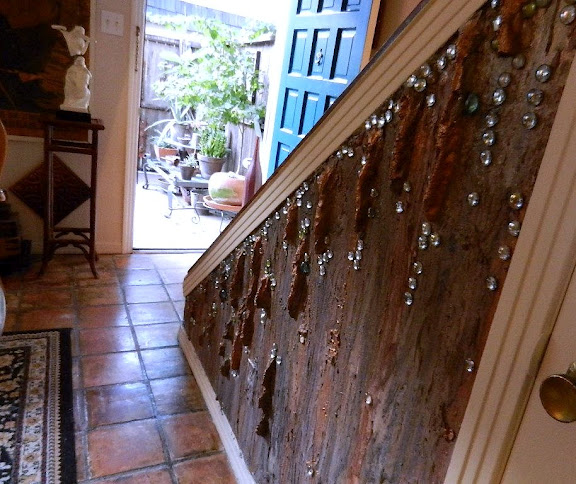
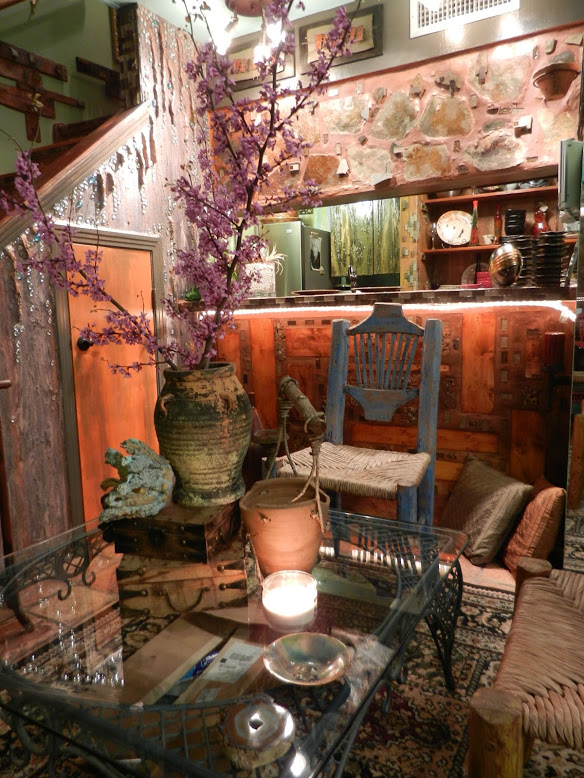
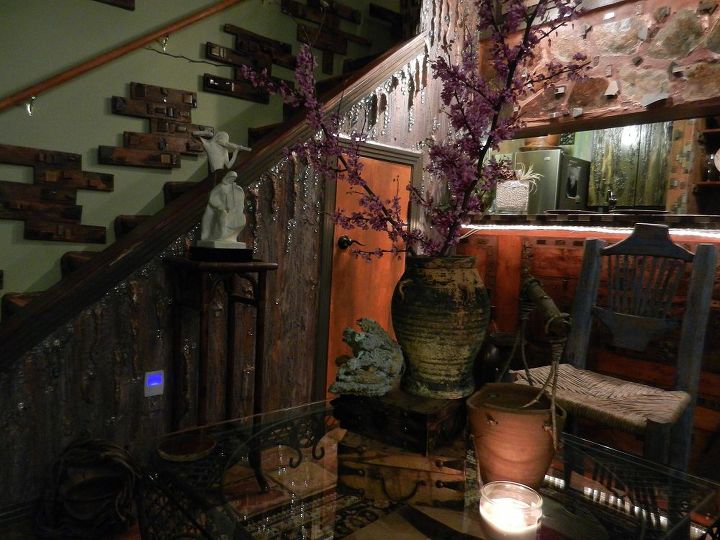
The staircase wall was covered with a thin layer of mortar to create a rough surface. Two more very thin layers applied with finishing detail. No tools were successfully used in creating this effect other than my bare hands. Yes, it came down to just using my hands. The gloves also had to go, as they would not hold up very long before tearing. Once the icicle effect was completed, I hot glued the glass beads and finished the wall with several layers of sealer.
The connecting kitchen bar was done like the stair steps. However, I combined wood and hand formed cement tiles on the face of the bar. The bar top is stepping stone and glass tile. I've used the same techniques into the kitchen and onto the fireplace.
Now I'll take a week break before completing finishing touches. Hopefully these photos will provide a glimpse of my desperately needed change. Enjoy!
More of my home DIY projects here: http://www.hometalk.com/cfuh8s3qsd/posts
After pulling up and purging that staircase carpet, I stared at a bare nail infested staircase waiting to be beautiful...
Certainly glad to post only finishing photos as this project had some messy moments. It's now a real treat enroute to the entertainment room or bedroom.
After pulling up the carpet, I had no idea what I'd do for a new look but granted myself unlimited creative license. Certainly had the energy reserve for it!
I hand formed all tiles from portland cement and carved out with a dremel tool. Thank God for Dremel or I'd be finding another hobby real quick! I simply pour half-inch thick layers of cement on boards, allow drying for thirty minutes and carving out the basic shape or design. Once fully dry, I further carve and detail the pieces with a dremel tool.
For steps, backer or cement board applied to face of each step before applying mortar for tile and grout. I used a pre-mixed nutmeg colored tile grout. After securing tile with mortar, huge amounts of mortar filled in tile surrounding surfaces. Once dry, I used several layers of semi-gloss sealer to lock it in and bring out the colors.
The staircase wall was covered with a thin layer of mortar to create a rough surface. Two more very thin layers applied with finishing detail. No tools were successfully used in creating this effect other than my bare hands. Yes, it came down to just using my hands. The gloves also had to go, as they would not hold up very long before tearing. Once the icicle effect was completed, I hot glued the glass beads and finished the wall with several layers of sealer.
The connecting kitchen bar was done like the stair steps. However, I combined wood and hand formed cement tiles on the face of the bar. The bar top is stepping stone and glass tile. I've used the same techniques into the kitchen and onto the fireplace.
Now I'll take a week break before completing finishing touches. Hopefully these photos will provide a glimpse of my desperately needed change. Enjoy!
More of my home DIY projects here: http://www.hometalk.com/cfuh8s3qsd/posts
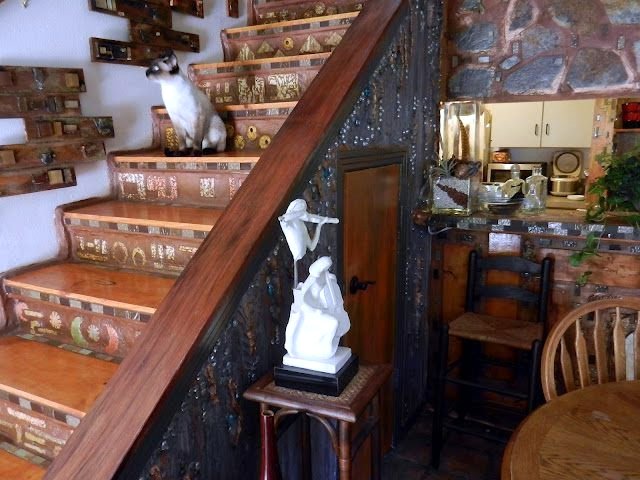
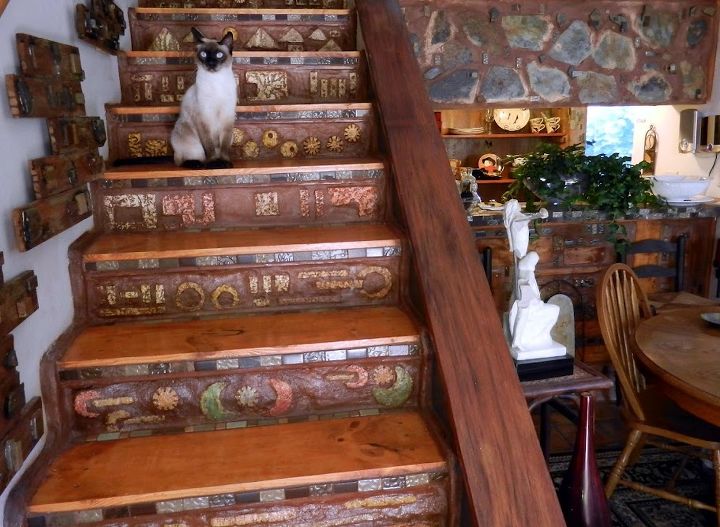
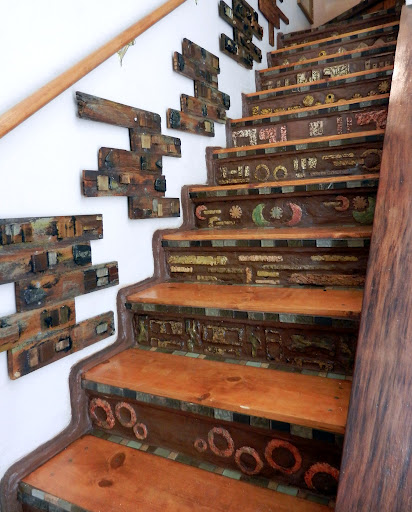
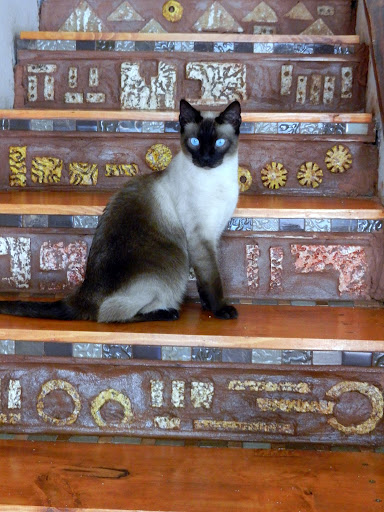
Staircase-I hand formed all tiles from portland cement and carved with a dremel tool. Risers combined with portland cement and nutmeg colored grout.
Staircase-I hand formed all tiles from portland cement and carved with a dremel tool. Risers combined with portland cement and nutmeg colored grout.
Staircase-I hand formed all tiles from portland cement and carved with a dremel tool. Risers combined with portland cement and nutmeg colored grout.
Staircase-I hand formed all tiles from portland cement and carved with a dremel tool. Risers combined with portland cement and nutmeg colored grout.
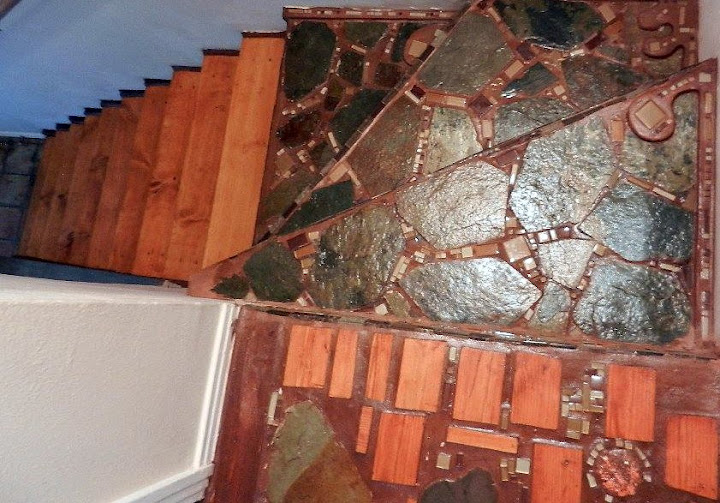
Staircase-I hand formed all tiles from portland cement and carved with a dremel tool. Stone work is standard patio stone combined with odds and ends in left over wood. Risers combined with portland cement and nutmeg colored grout.
Staircase-I hand formed all tiles from portland cement and carved with a dremel tool. Risers combined with portland cement and nutmeg colored grout.
Staircase-I hand formed all tiles from portland cement and carved with a dremel tool. Risers combined with portland cement and nutmeg colored grout.
Staircase-I hand formed all tiles from portland cement and carved with a dremel tool. Risers combined with portland cement and nutmeg colored grout.
Staircase-I hand formed all tiles from portland cement and carved with a dremel tool. Risers combined with portland cement and nutmeg colored grout.

Want more details about this and other DIY projects? Check out my blog post!
Comments
Join the conversation
2 of 32 comments
-
Amazing!
-
and people think MY house is weird. WOW....my kinda house !


Frequently asked questions
Have a question about this project?
love the stairs but want to know about the wall below them, how did you accomplish that?