


Revamping vintage finds
All this make-over took was a bit of milk paint in a vibrant color, some dark wax, and some time...it's one of our favorites
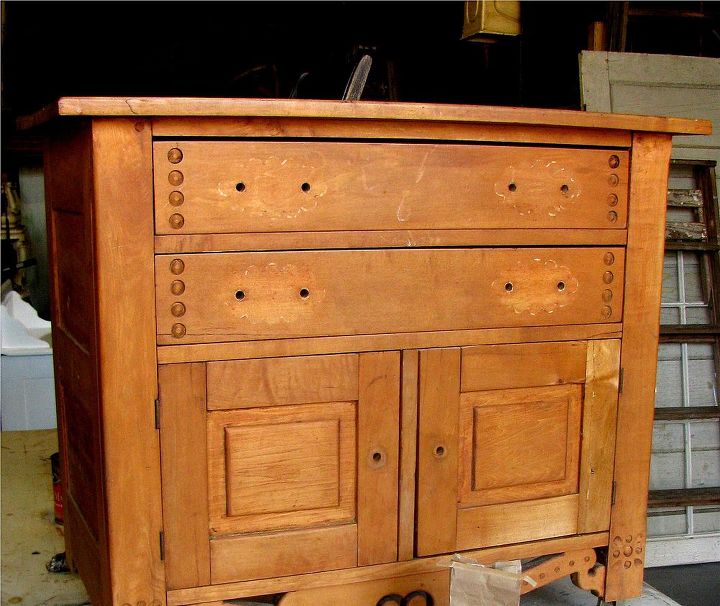
Before (minus original hardware). All this cutie needed was a good cleaning!
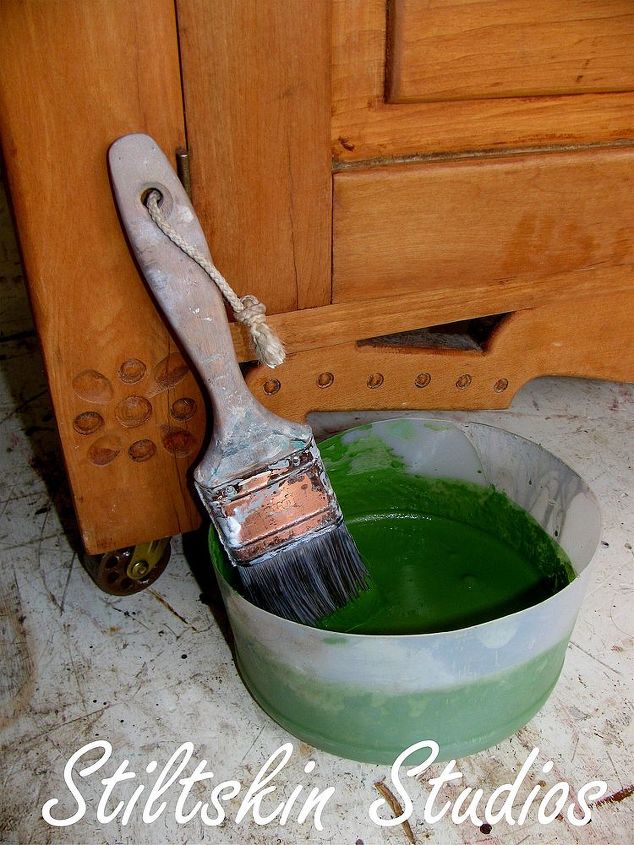
We chose a vibrant green for this piece...something fun to really bring out all the clever little details
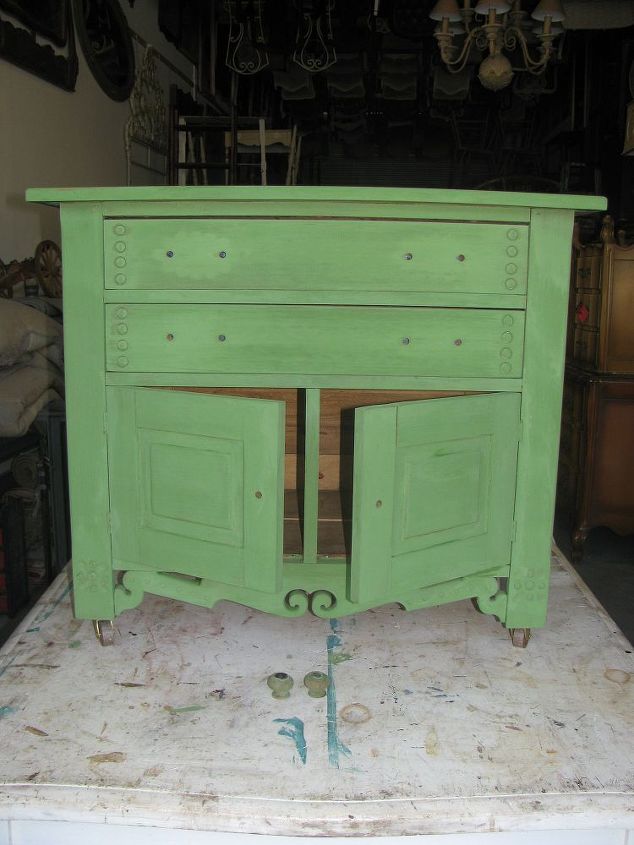
After two coats of milk paint, but before waxing
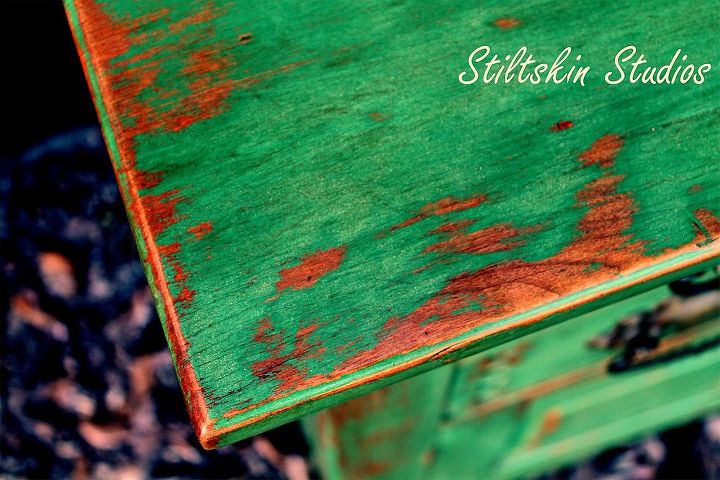
after distressing
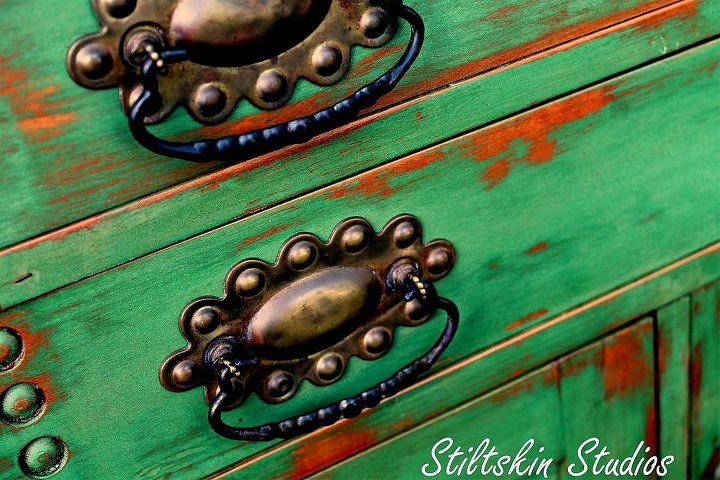
isn't the hardware on this piece fantastic?
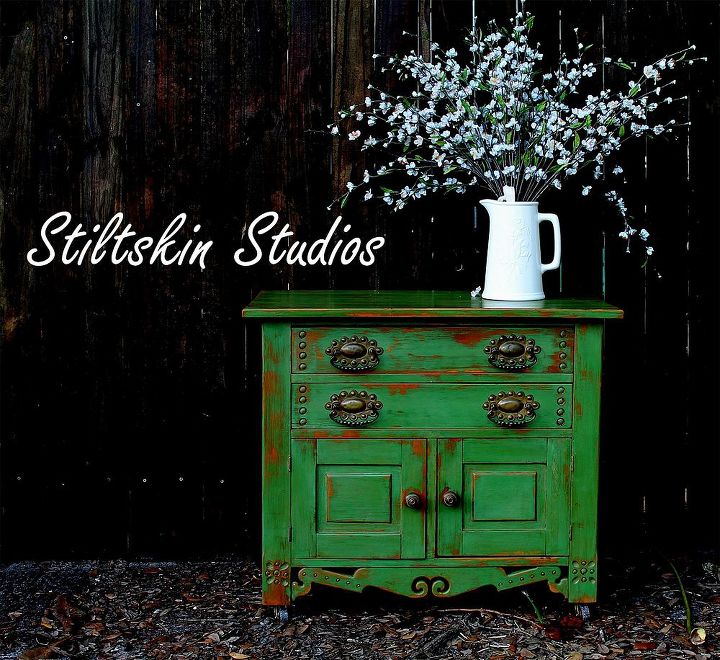
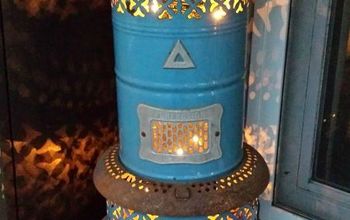
All finished, including two coats of wax to really bring out the color

Want more details about this and other DIY projects? Check out my blog post!
Comments
Join the conversation
2 of 31 comments
-
I bought an old house. I kept seeing a "hutch" in the army green kitchen cabinets that lived on one side of the room. I removed some cabinet doors, got a bit happy with a jig saw, created some side panels from the reclaimed doors, added some doo dads, blobbed some brown paint on several spots, added crackle, repainted it GREEN . . . and then antiqued it. My friends all thought I was crazy, but voila . . MASSIVE hutch! The kind that cost about $8k. Now, I'm flipping the house and the first question I get asked is . . . "Soooo, does the antique sideboard convey with the house?" I too love to mix painted with regular antique wood pieces. It's all about style. IF you have an eye you can combine them for a jaw dropping effect . . . if you can't, then keep with the matchy-matchy look. It just may suit you best afterall. Well done on your piece it's an AWESOME JOB!
-
absoluetly love it gorgeous hopefully i can do this !


Frequently asked questions
Have a question about this project?