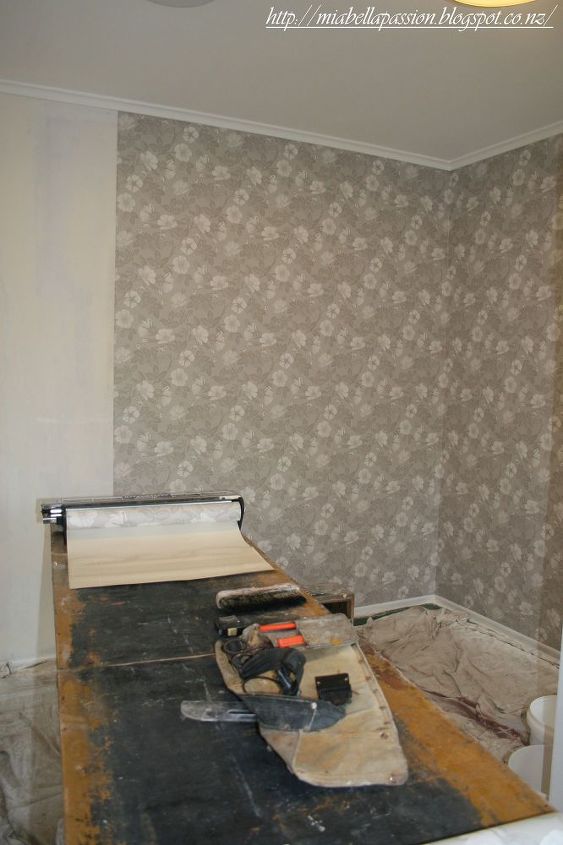
Wallpapering Lessons...

The Pink Bedroom Makeover...
and five lessons learned by a rookie about wallpapering!
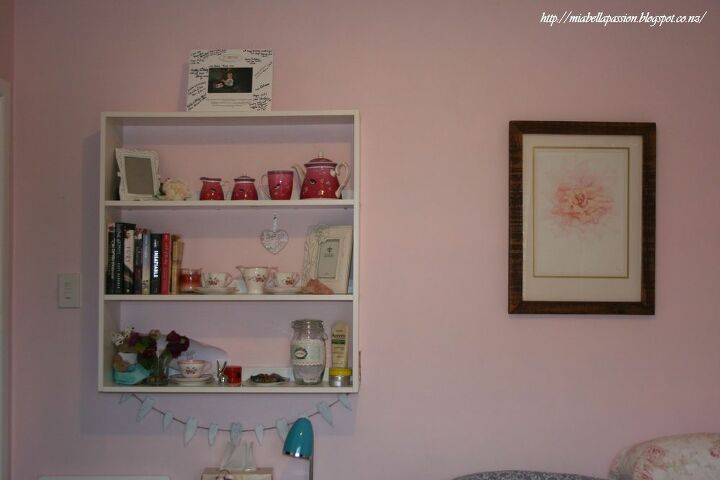
I love pink...but it was time for change.


Which meant saying goodbye to the pink painted walls in this bedroom.


A trip to the the décor shop,


and an armful of gorgeous (and rather expensive) wallpaper, I'm good to start!


Or so I thought!


Now this was the first lesson of the pink bedroom makeover.


Never - EVER- buy the wallpaper first: thinking 'how hard can it be to you hang it yourself!
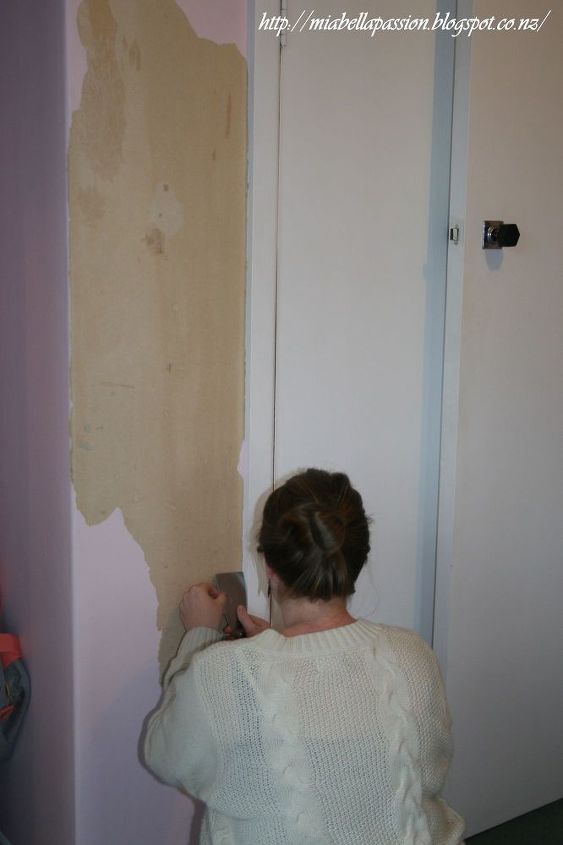
The stripping of layers of paint began!


Layers is an understatement!


I remember 28 years ago choosing the prettiest Laura Ashley wallpaper


to put up on the walls...
- I even found a little snippet of what that looked like...


Then in the years following the room was updated with layers of mauve paint,


ragged with pink, became blue, and then lime green..


to be returned once more to the glory of pink!


Work that out folks!


wallpaper...and then...FIVE layers of paint.


Which actually turns into TEN layers of paint with a double coating!


Thank goodness someone whispered in my ear that adding a large cap of fabric softener to the soaking water helps soften the old glue. (You just soak the wall with it and leave for ten minutes before scraping.) That's lesson number two! It really works!


I have a moment of happiness!
Underneath all that paint was OLD plaster board. Time to call in an expert for a little advice...this is where lesson number three happened.


If you have an old house with old style plasterboard, get a professional tradesman to advise pre wallpaper preparation requirements.


Best to do this BEFORE stripping so you can calculate your costs accurately.
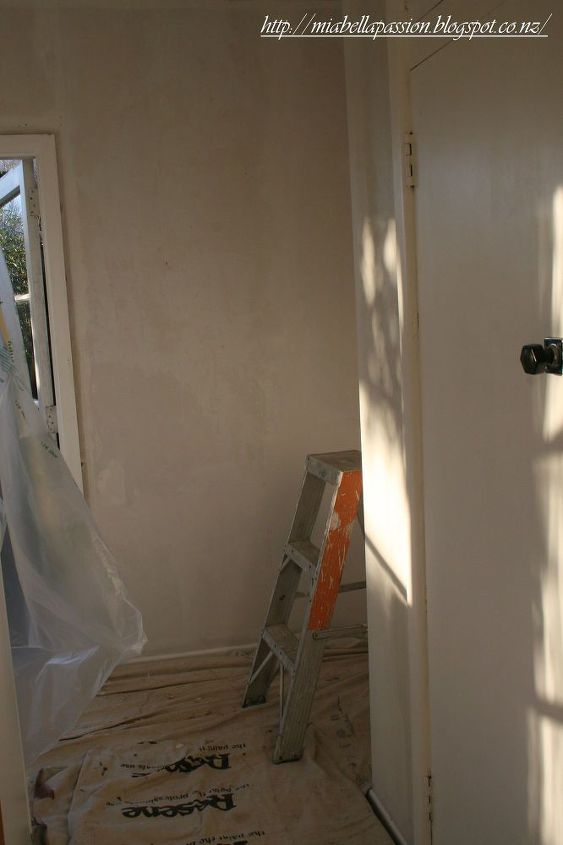
And what happened next was...'


The professional tradesman stayed!


I was shattered from the stripping process...and crying because of the cost.


Which leads to Lesson number Four:


Always do your homework and costings before doing any home upgrade, especially if your home is an older style, even if you think it will be easy and cheap to do!


DO NOT ASSUME ANYTHING!
So my darling Tradesman rescued the situation....He painted the walls with a special sealer.


Two days later:He plastered the gouges and evened up the walls. Sanded when dry, and wallpapered.


But because I had pre-bought the wallpaper, we were 1 roll short.


Once again my clever master tradesman resolved the situation,


matched and cut in a few inconspicuous places,


which thanks to his skill and my busy pattern you really cannot tell.


So that is lesson number five:


Always buy an extra roll of wallpaper. Especially if you pre buy on sale as I did! That way you will have a enough to do the job, and for future repairs.


Now it's time for the fun part - (the job I should really stick to - décor styling)


It's time to dress the room!


Pop over to Mia Bella Passions blog for the whole story and more pics via the link below...
Tracey Lee Cassin
Want more details about this and other DIY projects? Check out my blog post!
Go
Frequently asked questions
Have a question about this project?
Comments
Join the conversation
 1 comment
  • Hannah V Hannah V on Aug 19, 2015
    Very nice! Thanks for sharing your tips! :) I love wallpaper and how it can totally transform the look of a room.
Next