


How to Make a DIY Self-Watering Planter Box & Bonus Summer Garden Hack
Growing flowers can be a joy, but keeping them watered can sometimes feel like a chore. That's where a self-watering planter box comes in handy.
In this guide, I'll walk through the steps to create your own sub-irrigated planter using simple materials and tools you might already have at home.
Plus, I'll throw in a bonus outdoor summer project to protect your newly planted flowers using waste bins from the dollar store.
This post was transcribed by a member of the Hometalk editorial team from the original HometalkTV episode.
Hometalk Recommends!
Tools and Materials:
- Waterproof container (such as an old metal tub)
- Milk jugs
- Builder plastic
- Duct tape
- Stapler
- Cedar strips
- Old window screen
- Screws
- Exacto knife
- Metal ruler
- Plastic bottle
- Drill
- Potting soil
- Plants
- Wire baskets
Hometalk may receive a small affiliate commission from purchases made via Amazon links in this article but at no cost to you.

1. Gather Materials from Recycling
Before you begin your self watering planter, rummage through your recycling bin because you're going to need to upcycle a few plastic bottles for this DIY.

Find yourself 4 milk jugs and a plastic drinking bottle to get started.

2. Waterproof the Container
First things first, let's ensure our container is waterproof.

Place a milk jug inside the tub and mark the tub just above the jug level.

Drill drain holes on the sides of the tub.

Roll out heavy gauge builder plastic, and cut it to fit inside the tub.

Secure it with duct tape.

Staple the plastic at each corner.
After the tub is lined, puncture holes in the plastic where the tub drain holes are located so that the water can drain out.

3. Creating the Screen
Now, create a screen to separate the soil from the water.

Place a milk jug inside the tub and measure just above it.

Cut cedar strips to create a square wood frame.

Add additional strips to fill in the sides.

Then attach old window screen to the top with screws.

4. Making the Water Reservoir
Next, make a water reservoir using milk jugs.

Then flip the jugs around so the cuts face down.

Holding two milk jugs together, trace around the spout of one jug onto the other.

Then cut the circle out with an X -Acto blade.

Repeat for each jug, remembering that the cut side should face downwards.

Attach all the milk jugs by pushing the pouring spouts into the cut holes.

Lay them down horizontally.

5. Assembling the Feeder Tube
Now it’s time to create a water feeder tube. Use a felt pen and the top of the drinking bottle to mark around one of the milk jugs and cut out the hole.

Slice off the bottom part of your water bottle

Insert the drinking end of the bottle into the jug.

Drill holes along the tops of the milk jugs for plant roots to gravitate towards once filled with water.

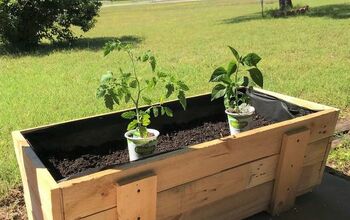
6. Planting and Testing
Add about 1 inch of potting soil to the bottom of the tub, then place the milk jug reservoir inside.

Twist off the feeder tube, set it aside, and place the screen on top of the reservoir.

Cut a feeder tube hole through the screen and reattach the feeder tube.

Add soil under and on top of the screen until it is deep enough to plant flowers.

Fill the feeder tube with water

Ensure the irrigation system is working by checking that water seeps out through the drainage holes in your tub.

Remember to periodically check the feeding tube and top up with water as needed.
Ready to take your gardening skills to new heights
Bonus Summer Project: Protect Your Flowers with Waste Bins

1. Prepare the Flower Bed
Clean up the flower bed by removing dead debris and weeds.

Use a half-moon edger to create a sharp edge and plant flowers.

2. Use Dollar Store Garbage Cans
Cover each newly planted flower with a dollar-store garbage can for protection against wildlife and harsh weather.

These bins are easy to lift for inspection and can remain until the flowers are stronger.

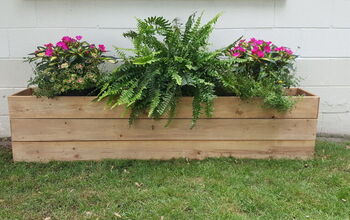
How to Make a Self-Watering Planter
Congratulations! You've created a sub-irrigated planter box that takes care of your flowers with minimal effort.
Plus, you learned a neat new trick to protect your plants from critters.
Let me know how your project turned out in the comments below!

Comments
Join the conversation
-
Seems like the plants will be soaking in to much water.


Frequently asked questions
Have a question about this project?