


$102 Fireplace Facelift

by
Catherine
We've been focusing on doing low cost, high impact projects in our latest renovation project (we've been calling it on Instagram) to make the rest of the house feel less like a construction zone. The living room fireplace was a perfect place to start!
.
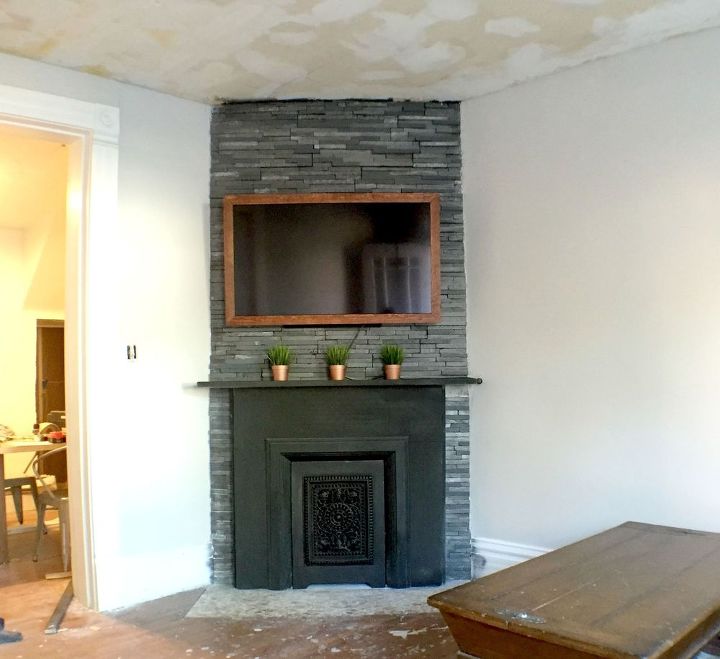
This is what it looked like when we purchased the home (sans the dirty blue carpet that we ripped out right after closing).
.
This is what it looked like when we purchased the home (sans the dirty blue carpet that we ripped out right after closing).
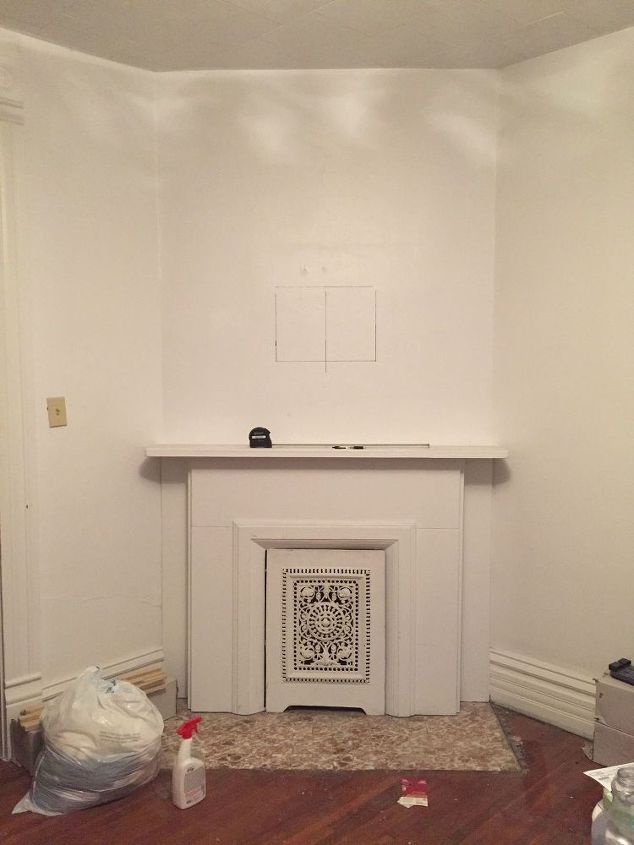
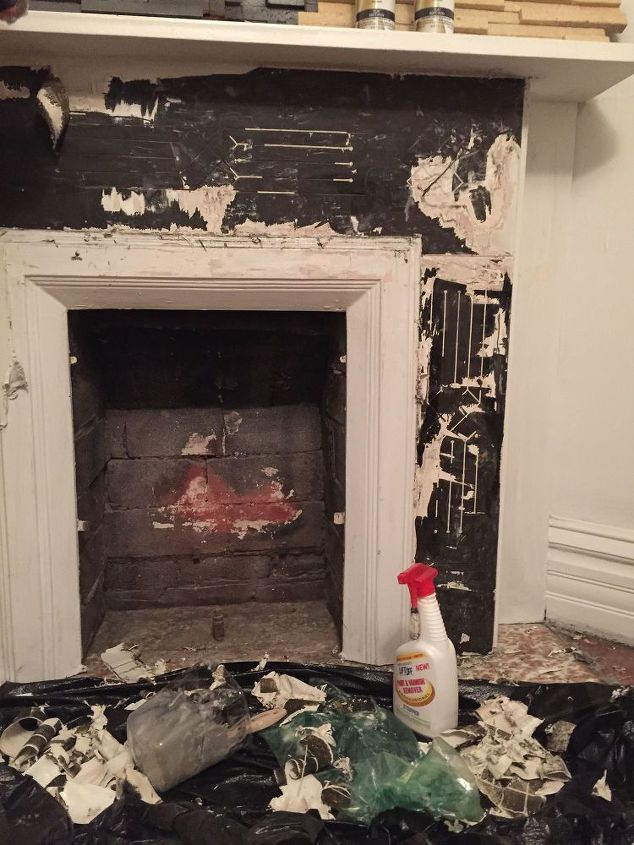
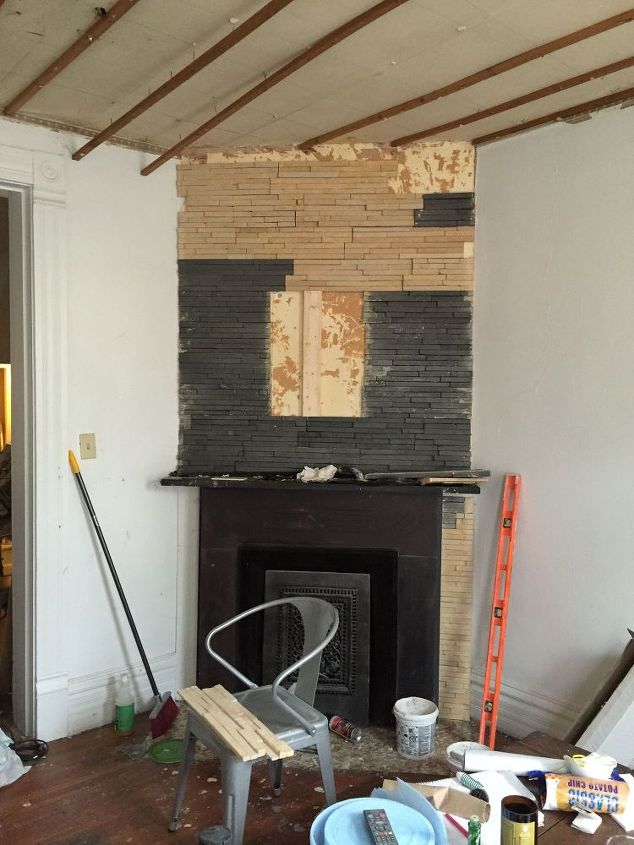
It was screaming for some love, it was just a matter of what kind of love. We started by stripping the paint off of the mantel, expecting to find some nice wood that we could refinish. What we found was even better: carved slate!
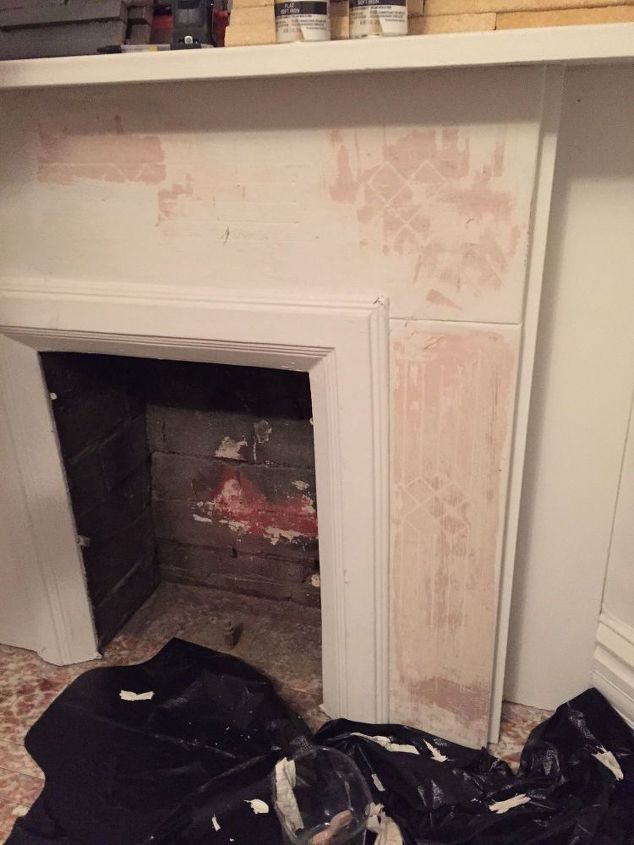
All of the carvings were filled with paint, so we didn't even know they were there until we started taking off the layers.
Next, Bryan and I debated on what to do with the space above the mantel. Add molding? Add some sort of stone for more texture? We couldn't decide, until we stumbled upon this ledger stone on clearance for $2 per square foot. Even though the yellowy color wasn't what we were in the market for, it was something that could easily be fixed with some spray paint.
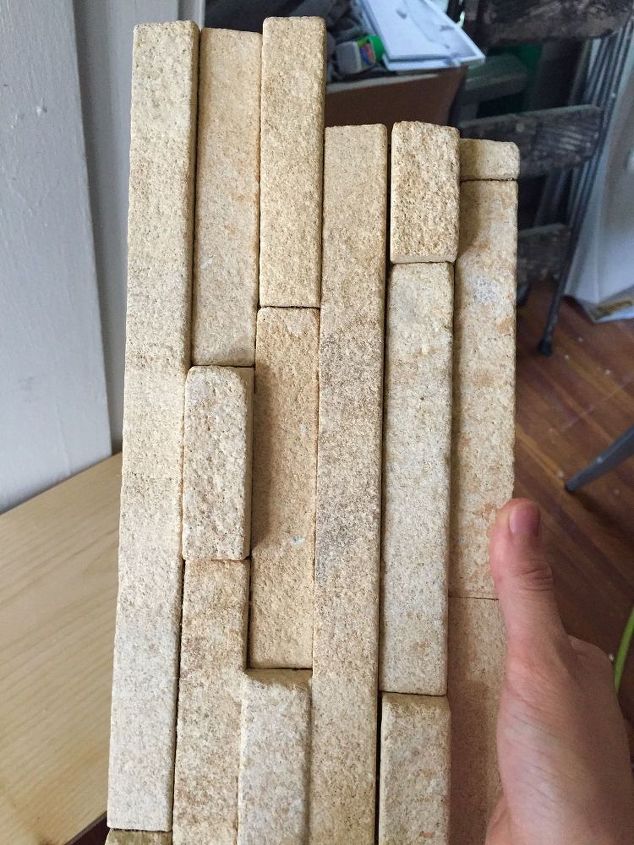
We bought 6 boxes (36 sq ft), which ran us about $75. We also got a few cans of Rust-Oleum Flat Soft Iron spray paint to turn the yellow into grey. Fun fact: the slate grey version of the ledger stone cost 2-3x this amount per square foot!
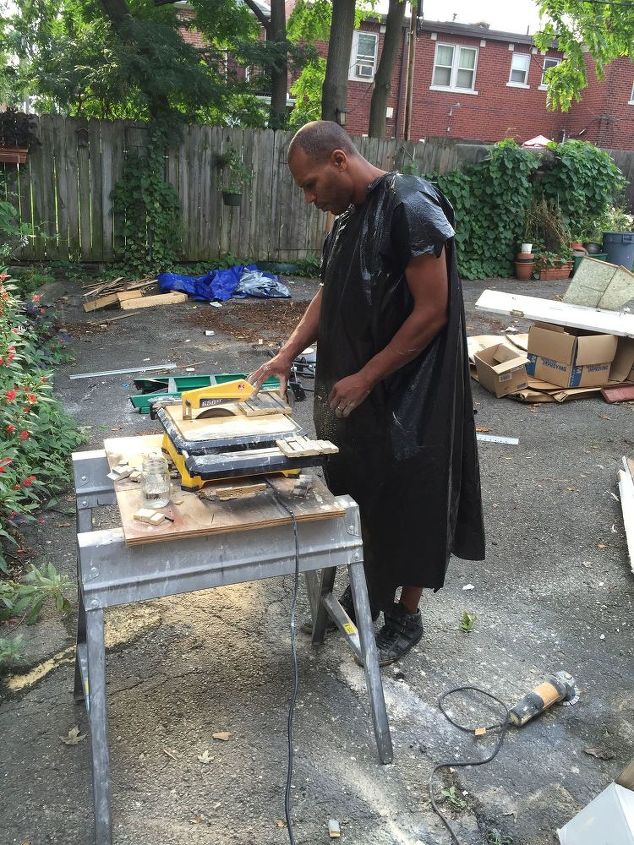
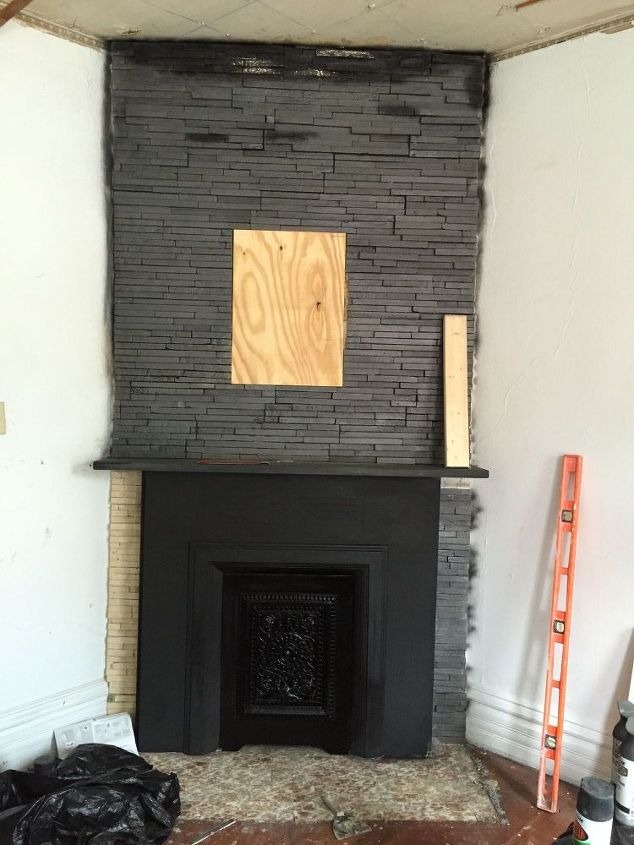
The stone went up quickly. We started by spray painting the pieces outside before installing them, but then quickly realized they got messed up during the wet cutting/installation process. So we saved the rest of the painting until the stone was on the wall.
This is what it looked like painted.
Next, to give it a bit more variation, we covered some pieces with smudged white chalk and others with Benjamin Moore "Grey" in a matte finish.
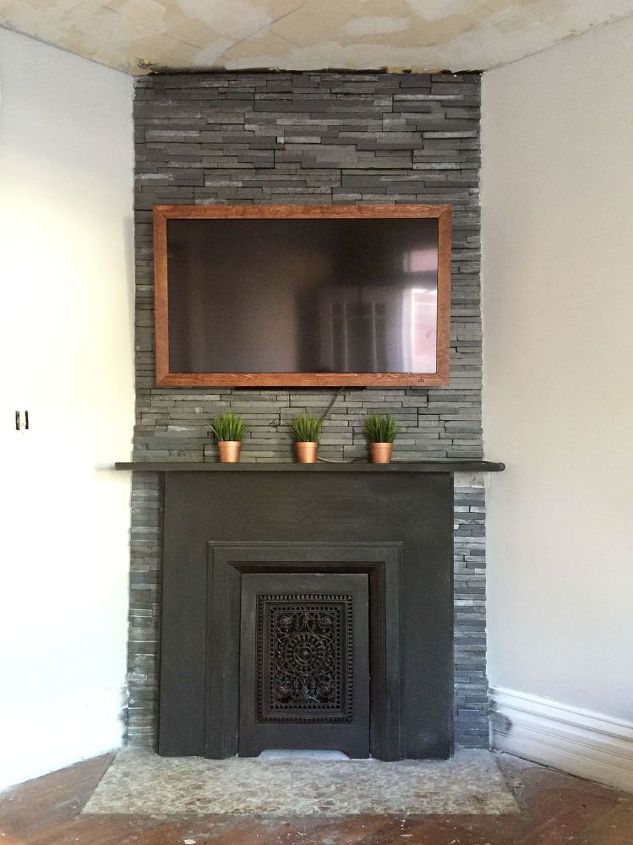
For about $40, we made the frame for the TV. The warmth of the wood looks really great against the stone, which was an unexpected bonus. We'll share the DIY tutorial for it in our next post.
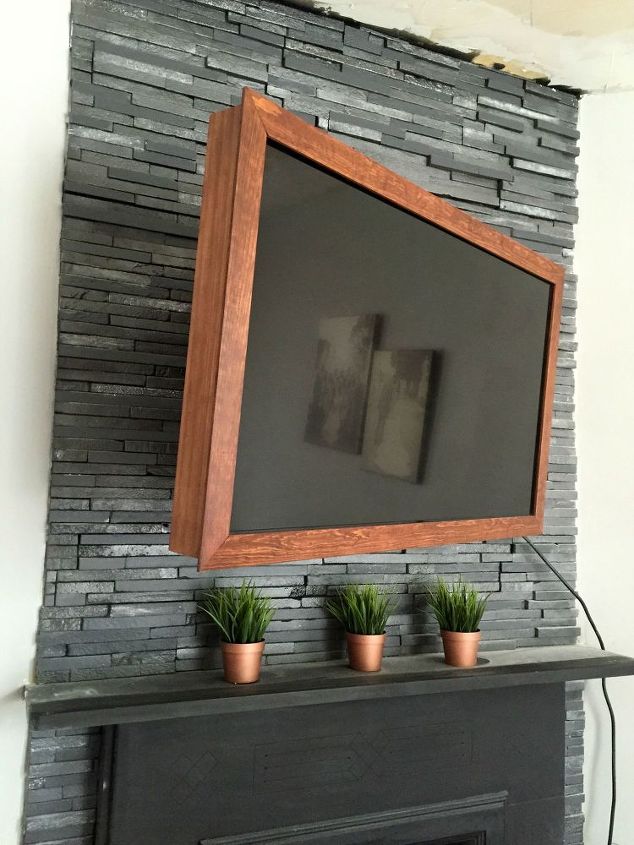
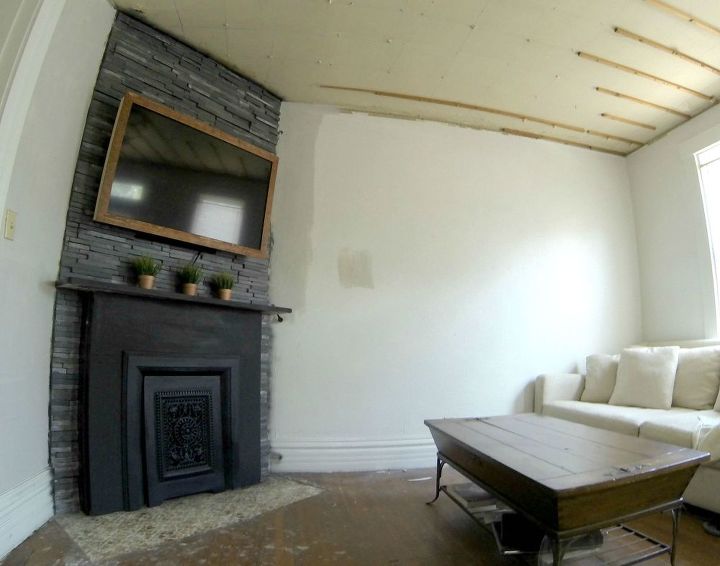
We still have lots of work to do as you can see, but it's a small step toward having a home that's finished and clean and not a construction zone! By using some resourcefulness (and some good old spray paint!), we were able to achieve the look of a high end fireplace for a fraction of the price.
Want more details about this and other DIY projects? Check out my blog post!
Comments
Join the conversation
2 of 121 comments
-
Stunning! Thanks for sharing!
-
Wasn't sure if I was going to like this one - but it turned out great. The old details of the fireplace still shine and the simple topiary is perfect. Really good job combining the old and the new.


Frequently asked questions
Have a question about this project?
What did you do with all your tv components like cable box, dvr,router, WiFi.