


New DIY projects

Watch video tutorials
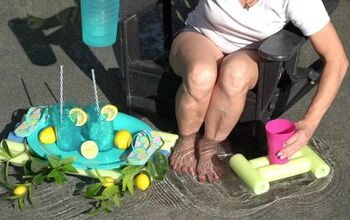
3 DIY Pool Noodle Tricks: Raft, Cup Holder & Floating Candles
There are so many cool things you can do with pool noodles and I want to show you three of my favorites today: a mini DIY pool noodle raft for drinks, a DIY floating cup…

6 Genius Pool Noodle Furniture Ideas You Need to See
Move over expensive furniture stores, pool noodles are taking over! Forget just using them in the pool, these colorful pool floats are now being transformed into surprisi…

Crafts With Pistachio Shells: How to Make a DIY Diya For Diwali
Crafts with pistachio shells are both unique and beautiful. I want to share with you how I created this stunning diya using pistachio shells. It's a fun and creative way…
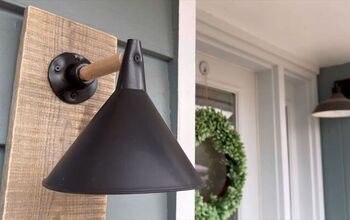
How to Create Unique Wall Sconces With a Plunger and Funnel
Looking to add a touch of personality and style to your home? In this step-by-step guide, I'll show you how to create unique wall sconces using everyday items you probabl…
Answer DIY questions
These hometalkers need your help! see all
I've seen some amazing projects on here using gold Rub 'n Buff on faucets and other bathroom fixtures, and I want to try it myself. But do I need to seal it with polyuret…
If you were planning a kitchen makeover on a budget, which change would you make first?Here are the options:A) Installing a new backsplashB) Upgrading appliancesC) Instal…

I have some gorgeous translucent washi tape and I want to use it to label items. Has anybody written on washi tape before? If so, what type of pen/ink works best to stop…
I've seen a lot of great ways to do DIY flocking on your Christmas tree to give it a new look for Christmas, but I'm worried about the mess. What is the least messy way t…
Has anyone tried flocking a tree using corn starch & plaster of Paris?I saw it on line but didn't get the measurements of the two ,can anyone help???? Thank You Ann
Browse new projects


Watch video tutorials
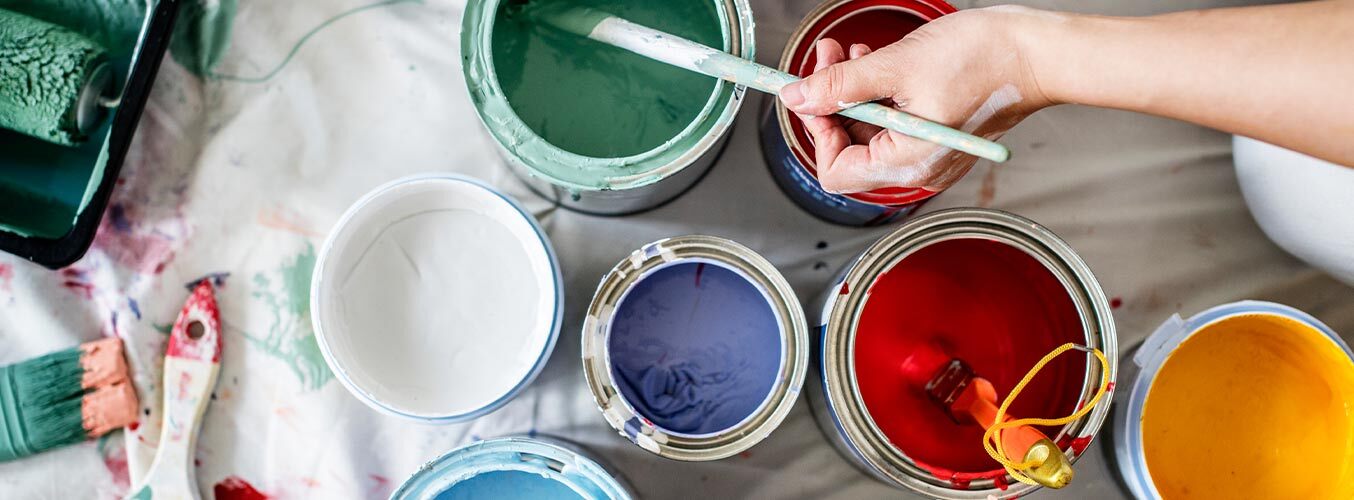
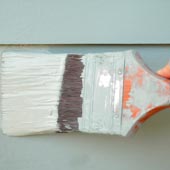
How to Keep a Paintbrush From Drying Out: 5 Important Hacks
As a DIYer, one of the first things I learned to do was paint and also how to keep a paintbrush from drying out. I paint a lot and there’s no way I want to clean my brush…

How to Makeover a Dresser With a Faux Wood Grain Paint Technique
In this tutorial, I will guide you through the process of achieving a stunning faux wood grain paint finish on furniture. Whether you're looking to revamp an old dresser…
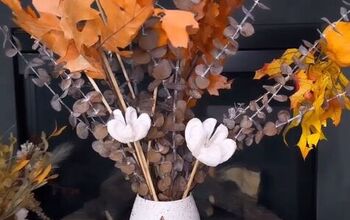
How to Create a Cute DIY Fall Vase Decor Piece For Autumn
Transforming a simple vase into a stunning fall vase décor piece is easier than you think! In this step-by-step tutorial, I’ll guide you through creating your own DIY fal…
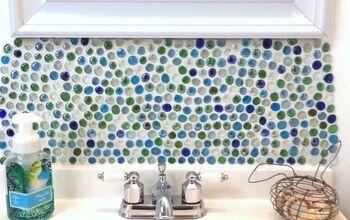
11 Glass Gem Crafts & DIY Decor Ideas For Your Home
Glass gems, those little treasures you might use as vase filler, hold a surprising amount of potential. These versatile stones come in a kaleidoscope of colors and sizes,…
New DIY projects


Watch video tutorials

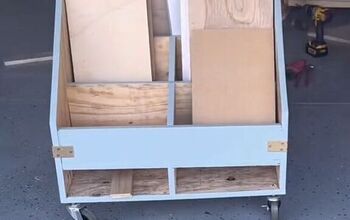
How to Craft a Stylish DIY Laundry Room Shelf
Say goodbye to wasted space in your laundry room with my innovative DIY laundry room shelf project.Using tension rods and simple materials, you can create a stunning stor…
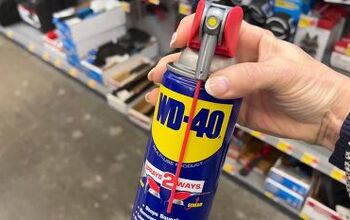
How to Make Your Home Shine | Brilliant WD40 Uses
If you're looking for a versatile solution to common household problems, look no further than WD-40.This trusty can of magic isn't just for squeaky hinges; it has a myria…

How to Create an Easy Board & Batten Accent Wall For Beginners
Are you looking to spruce up your walls by doing easy board and batten? I can show you how! It's super easy, especially for beginners like you and me.So, what exactly is…
Answer DIY questions
These hometalkers need your help! see all
I wanted to breath new life into my 15 year old articial Christmas tree. Instead of replacing it ,I was curious if flocking or spray snow would adhere to the branches.
Has anyone sucessfully diy spray painted or chip brush primer painted a standard artificial green wreath? Looking for suggestions and successful alternative tips to the $…
Does anyone know how to keep a flocked tree from shedding? Hang an ornament or brush against it and powdery, dusty flocking falls off. It's a beautiful 6-foot tree and th…
Hi, I'm thinking of having a flocked Christmas tree this year, but I know that some tree flocking is poisonous to cats. How do I know what kind of flocking to use that wo…

Any ideas for easy thanksgiving and christmas decorating
Browse new projects

Watch video tutorials
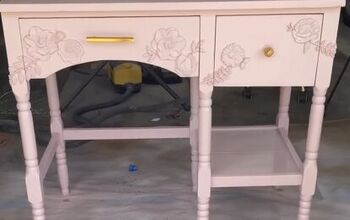
How to Do a Desk Makeover in a Few Easy Steps
Today, I'm excited to share with you how my desk makeover was done. I transformed an old desk into a pretty pink princess dream. Let's dive into the details, shall we?

Café Chic at Home: How To Create Your Own DIY Coffee Bar Cabinet
Imagine sipping your morning brew in a cozy corner of your home, next to a gorgeous beverage station crafted entirely by you.With coffee stations becoming a must-have fea…

9 Stunning Pool Noodle Wreaths For Every Holiday & Season
Pool noodles aren't just for poolside fun! This guide dives into the world of pool noodle wreaths, transforming these colorful tubes into cute decorations for your door.…
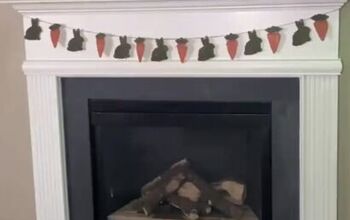
How to Make a DIY Spring Garland For Your Mantel
Let's make a DIY spring garland together, featuring cute bunnies and carrots! It's super easy and fun, and you'll love the charming result. Here's what you'll need and ho…