


7 Cute Snowflake Crafts to Make For Winter & the Holidays

When winter comes, everything turns snowy and beautiful. Have you ever looked closely at a snowflake? They're like tiny pieces of art, each one different from the next.
In this roundup, we're going to learn how to make all sorts of cool things inspired by snowflakes. It's a fun way to bring some winter magic into your home!
Whether you love making things or just want to try something new, these snowflake crafts are for you. Let's get started!
For even more ideas, see Hometalk's ultimate guide to DIY Christmas decor here.
Snowflake crafts
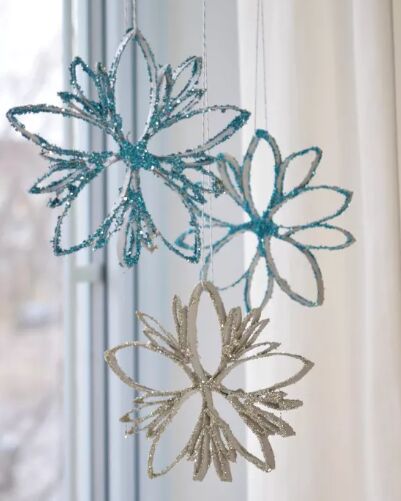
1. Toilet roll tube snowflake
Here are Recreated Designs's steps to create glitter toilet paper roll snowflakes:
- Press down firmly on the toilet paper tubes to flatten them. This creates a level surface for cutting.
- Use scissors to cut the flattened tube into sections, about a quarter of an inch wide.
- Arrange the cut sections into a snowflake shape. Use glue to secure them together.
- Apply faux snow to one side of the snowflake for a wintry effect.
- Use metallic paint, like silver, to give the snowflake a festive touch.
- Thread clear string through the snowflake for hanging. Secure with knots.
- Hang the finished snowflakes on curtain rods for a delightful holiday decoration.
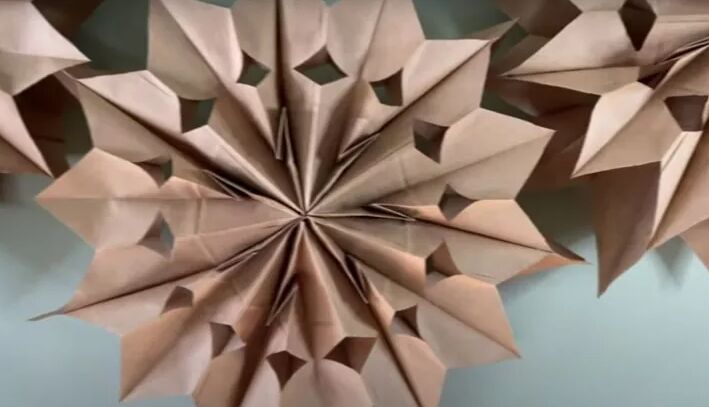
2. Paper bag snowflakes
Here are the steps to create a rustic paper bag snowflake from Meredith - Arts & Classy:
- Collect seven brown paper bags, ensuring the smooth side is facing up.
- Use a glue gun to attach the bags by putting a line of glue across the bottom and making a thin zig-zag towards the opening.
- Cut a V shape from the center outward, then add small triangles on each side above the crease.
- Open up the paper bags by pulling down from each side to reveal the snowflake.
- Join the ends of the snowflake with hot glue and hold them together until dry.
These charming snowflakes make lovely wall decorations and can also be hung from a Christmas tree using fishing line. Experiment with white paper bags for a different look.
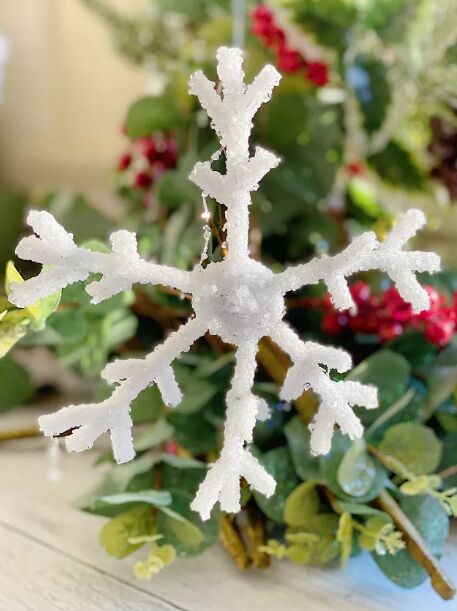
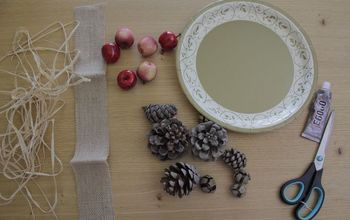
3. Crystal snowflakes
Here are the steps for making crystal snowflake ornaments by My 100 Year Old Home:
- Cut and twist pipe cleaners into snowflake shapes (4"-5"). Smaller sizes recommended.
- Tie each snowflake to fishing line for soaking.
- Mix Borax with boiling water in a sealed container (1.5 cups Borax per 8 cups boiling water, or 3 tablespoons per cup).
- Hang snowflakes in Borax solution, ensuring no contact. Leave overnight.
- Check periodically. If not crystallized, check later.
- Allow to dry on dowels or hung.
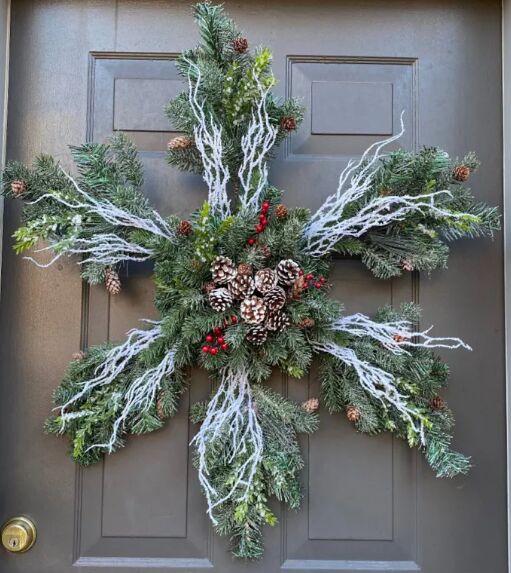
4. Snowflake wreath
To create this unique DIY snowflake-shaped wreath, follow these steps:
- Start with an 8-inch styrofoam round and six identical branches from a craft store.
- Secure the branches into the foam using a Steelpix machine or wood wired sticks.
- Use four extra stems to fill in the center space of the wreath.
- Cut the branches into smaller pieces and attach a steel pick or wood wired stick to each.
- Fill the center with the cut greens, leaving space for pine cones and berries.
- Use snowy picks if you can't find white branches.
- Add two pieces of snow branches to each point of the snowflake shape.
- These branches, along with the icy greenery, create a snowy effect.
- Finish the center with pinecones and berries.
- Create a hanger for the wreath following detailed instructions provided in another post.
- Hang your finished snowflake wreath on your front door to welcome holiday guests.
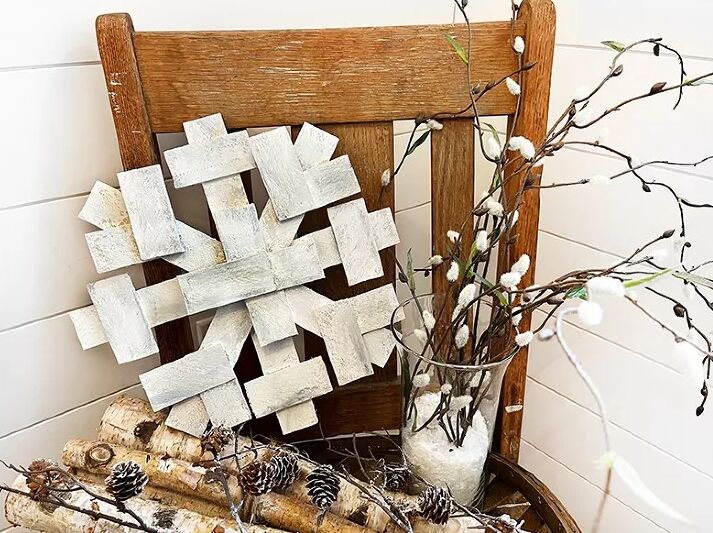
5. Wood shim snowflake
To craft a wood snowflake decoration like these by Craftidly | Dawn Stewart, follow these steps:
- Begin by gluing four 12-inch wood shims in a star shape at the center.
- Measure and mark sixteen 3-inch pieces on the shims for the decorative ends of the snowflake.
- Use a small hand saw to cut out the marked pieces, and smooth the edges with sandpaper if needed.
- Attach the cut pieces to the snowflake base using wood glue, following the provided design guide.
- Apply weight or clamps to hold the pieces in place while the glue sets.
- Paint the snowflake with white chalk paint, then add accents and depth with acrylic silver paint.
- Customize with your choice of colors, glitter, or decorations to match your decor.
- Optionally, attach a loop of twine to the back if you'd like to hang it up.
This large, 12-inch diameter snowflake decoration is versatile and can be displayed on a mantel, porch, or as a wreath alternative on the front door. It's also a great choice for winter weddings.
6. Hanger snowflake
To create a DIY hanger Christmas snowflake, follow these instructions from Chas' Crazy Creations:
- Gather 8 hangers, white pipe cleaners, a hot glue gun, and snowflake decorations.
- Pair up 2 hangers with the long sides next to each other, and secure them together using pipe cleaners. Repeat this for 4 sets.
- Connect the hanging ends of the hangers with pipe cleaners for all 4 sets to form the snowflake shape.
- Align the centers of all hangers and reinforce with hot glue.
- Strengthen the outer edges of the hangers with hot glue.
- Attach a large snowflake to the center of the hanger snowflake using hot glue.
- Decorate the perimeter of the hanger snowflake with smaller snowflakes to cover the outer pipe cleaners.
- Finish by hot gluing small snowflakes over the center pipe cleaners.
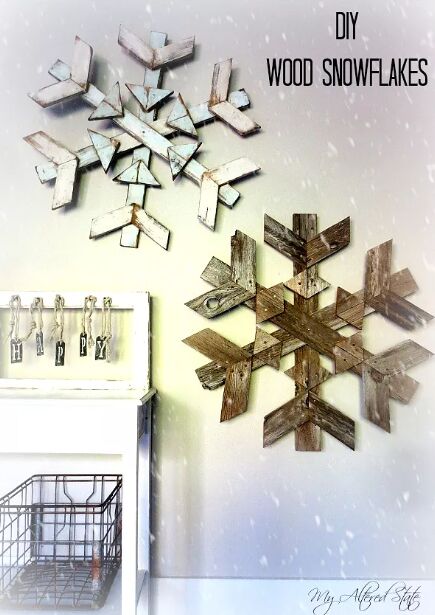
7. Wooden snowflake
To create a DIY wooden snowflake like these by MyAlteredState:
- Gather materials: 3 arms (33 inches long), 12 V pieces (6 "V's" at 6 to 8 inches long, at a 30° angle), and 12 triangles (6 bigger triangles, also at a 30° angle).
- Optionally, paint the pieces before assembling.
- Attach the V-shaped pieces to form the arms of the snowflake.
- Attach the triangles to complete the snowflake's intricate pattern.
- Stack the assembled arms together.
- Drill a center hole and secure the snowflake to prevent twisting.
Snowflake crafts
We hope you've enjoyed creating these wonderful snowflake crafts as much as we did! Let us know your favorite snowflakes in the comments.


Frequently asked questions
Have a question about this project?