


How to Make Festive Glitter Toilet Paper Roll Snowflakes
Are you looking for a fun and easy art and craft project using paper products? Look no further than creating these gorgeous glitter toilet paper roll snowflakes!
With just a few supplies, you can turn those empty toilet paper rolls into beautiful snowflake ornaments to elevate your winter decorations.
This post was transcribed by a member of the Hometalk editorial team from the original HometalkTV episode.
In this article, I will explain how to make snowflakes with toilet paper rolls in a simple to follow step-by-step process and provide some helpful tips along the way.
So, gather your supplies, and let's get started!
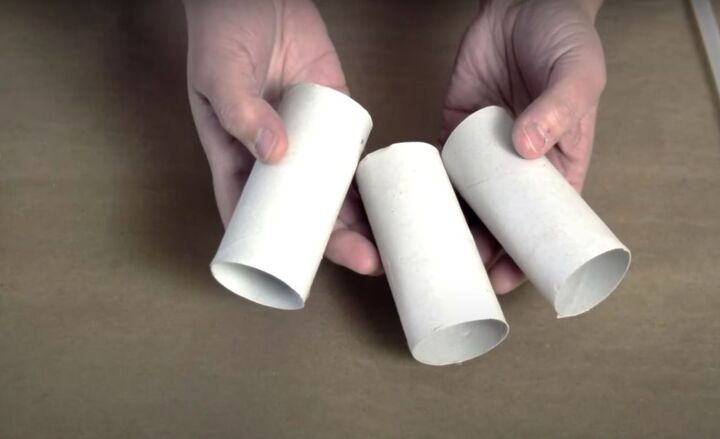
I used white toilet paper rolls for my snowflakes but you can use brown ones and paint them with your favorite white paint.
You can also use cardboard tubes from paper towels or other craft supplies you have on hand instead of toilet paper rolls.
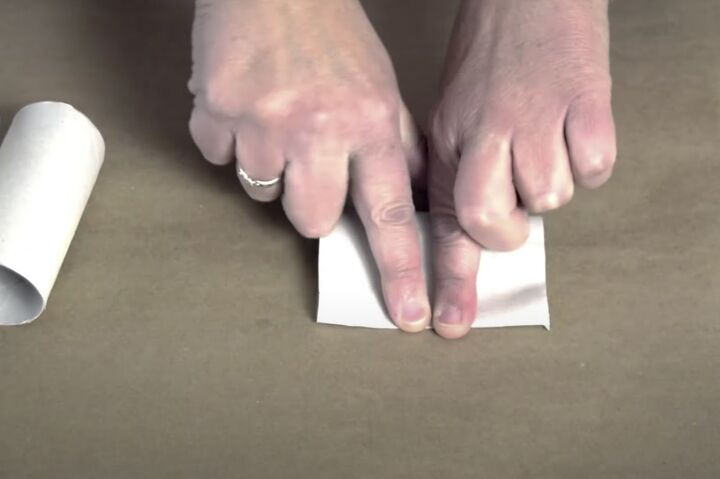
1. Flatten the Toilet Paper Tubes
Flatten the tube by pressing down on it firmly with your hands and smoothing out the edges as much as possible. You can use your fingertips or the flat edge of a ruler to help achieve a level surface. This step is important because it will make it much easier to cut the tube into smaller sections.
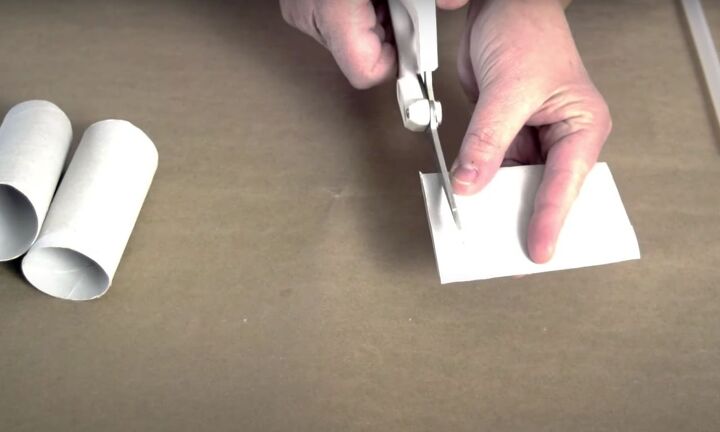
2. Cut the Tubes into Sections
To cut the toilet paper tube into sections, use a sharp pair of scissors. Start at one end of the tube and make a cut that is about a quarter of an inch wide. Repeat this process all the way down the tube until you have several sections.
Make sure each piece is roughly the same size so that your snowflake design looks even. If you're having trouble cutting straight, you can use a ruler or a piece of tape as a guide to help you make clean, uniform cuts.
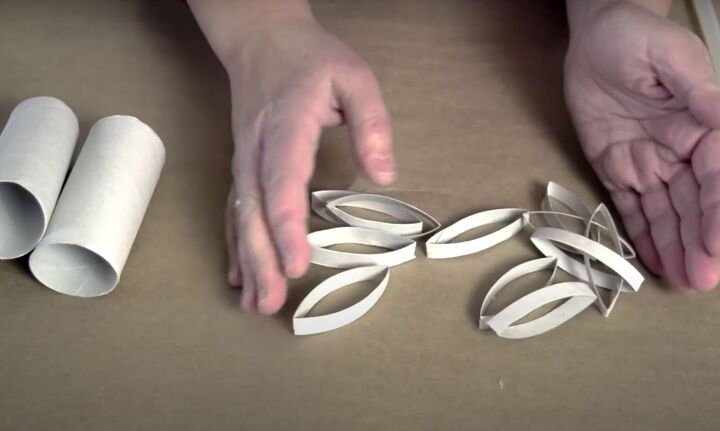
3. Assemble the Snowflake
You should now have a good amount of strips to create your toilet paper roll glitter snowflake.
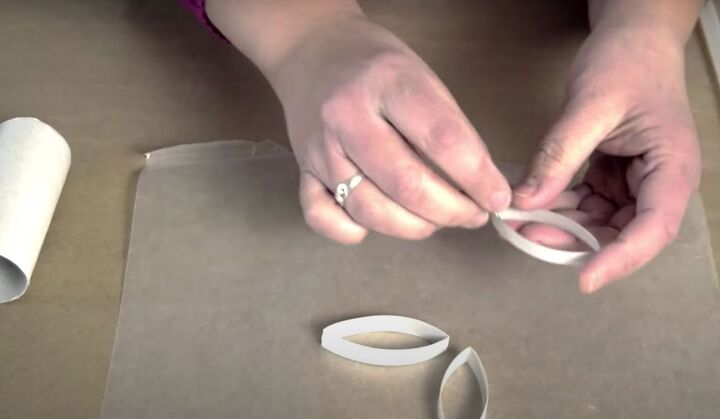
To assemble my DIY snowflake, I started by laying out a sheet of wax paper on my table. If you do not have wax paper you could also use some plastic wrap.
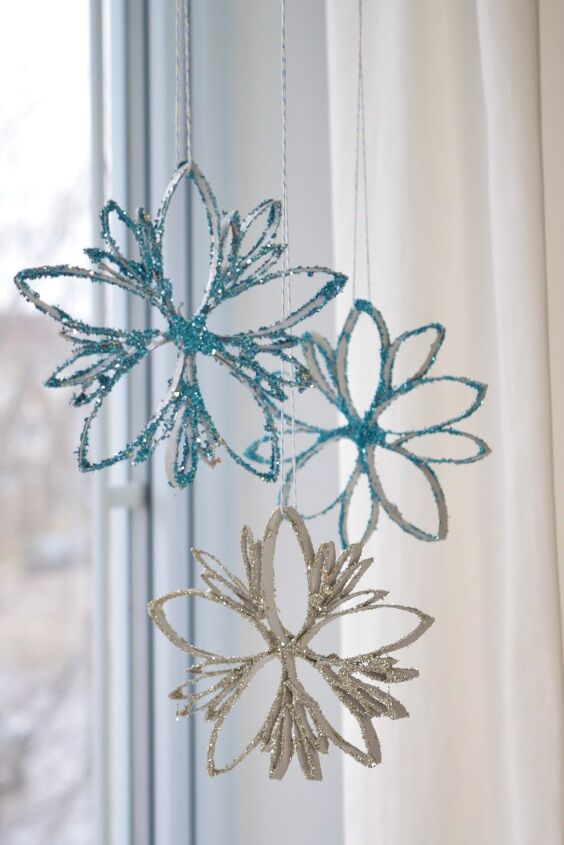
I experimented with the number of strips to use as my base and found that six strips were too crowded, so I settled on five, even though snowflakes usually have six sides. This made a big difference in the overall look and feel of the snowflake.
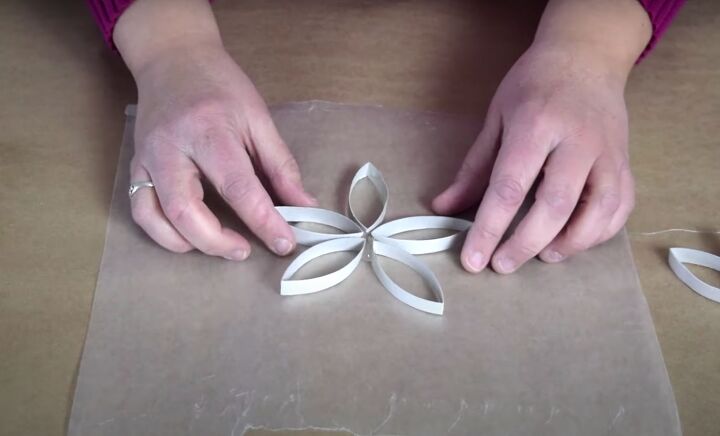
I secured the five pieces together by adding a dab of glue onto the sheet of wax paper and stuck one point of each strip into the glue, essentially creating a floral pattern. This would be the base that I could continue building my snowflake on.
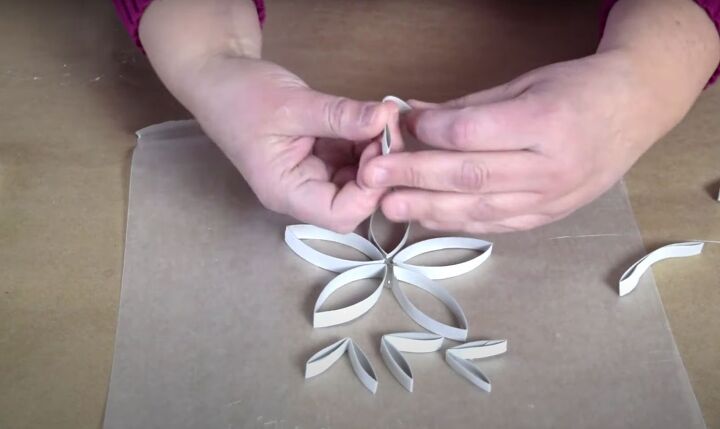
After the larger sections of the snowflakes had dried in the glue, I began adding smaller pieces of toilet paper rolls to build up my design.
To make the smaller pieces, you can either fold the larger sections in half or cut them. These little sections will help create the intricate complex patterns that makes snowflakes so special.
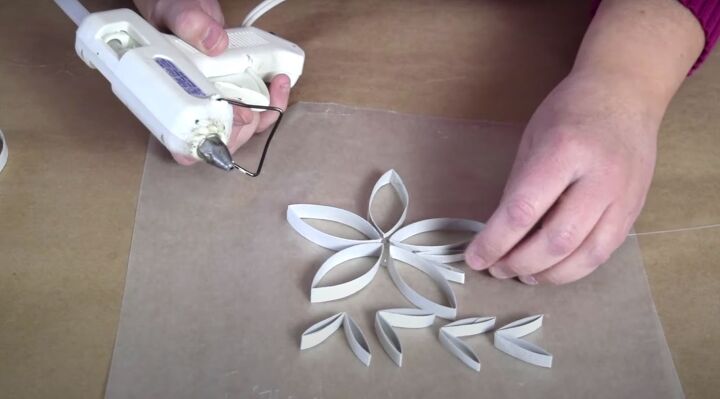
After preparing the smaller pieces, I applied a small amount of hot glue to each and inserted them between the larger pieces.
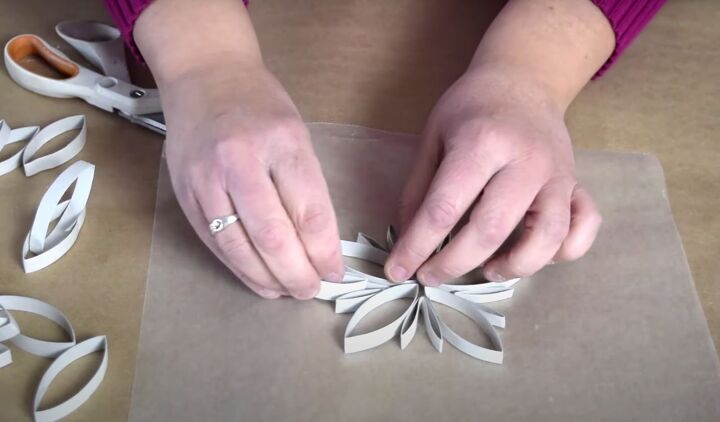
I also added a second layer of the smaller paper tube pieces inside the first to make the snowflakes fuller.
When building your snowflakes, remember not to make them too large. Five or six sections are perfect for each.
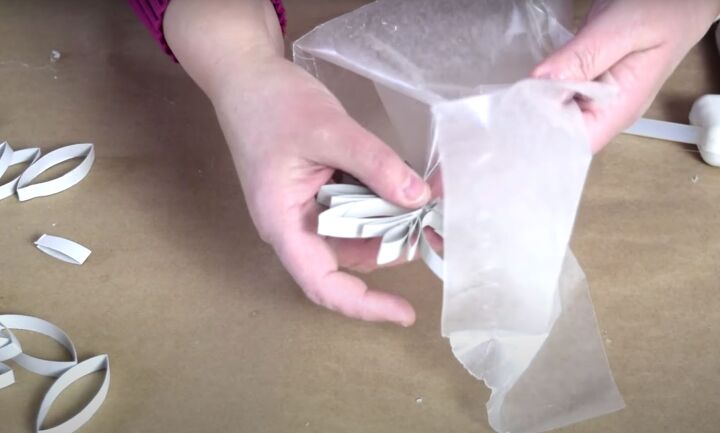
When I finished assembling my snowflake, I gently peeled it off of the wax paper so I could start embellishing it with glitter.
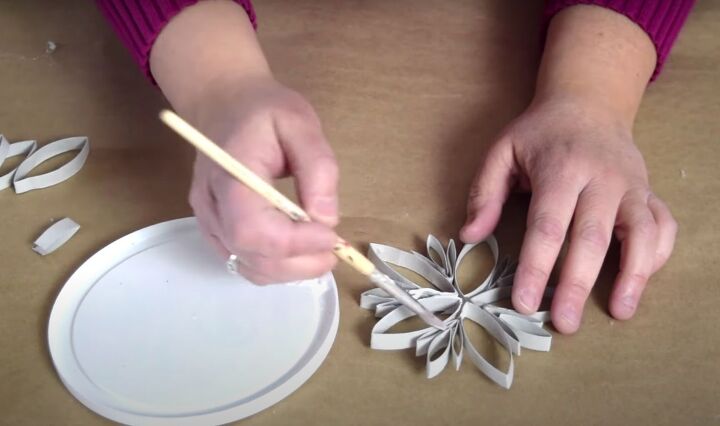
4. Add Glitter
Use a small paintbrush to apply a thin layer of white craft glue along the edges of the snowflake. Spread the glue evenly to avoid any clumps.
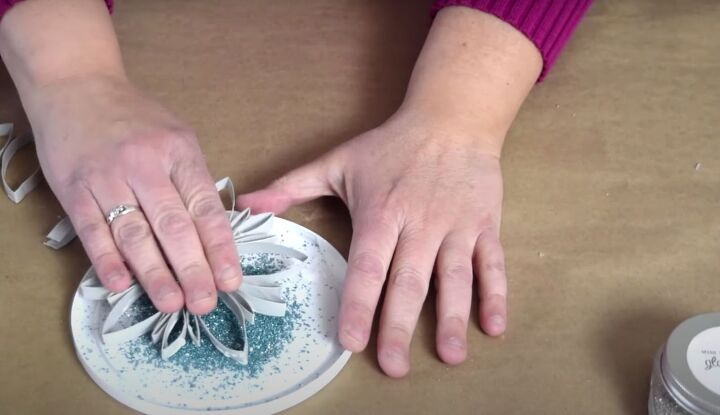
After you have finished applying the glue to the edges , it is time to add to make your snowflake sparkle. Pour a generous amount of glitter onto a paper plate.
Dip the sticky side of the snowflake into the glitter, ensuring that the glue is completely covered. Then, repeat the process on the other side of the snowflake. Be careful not to miss any spots, as this will affect the overall appearance of the snowflake.
5. Hang the Snowflake
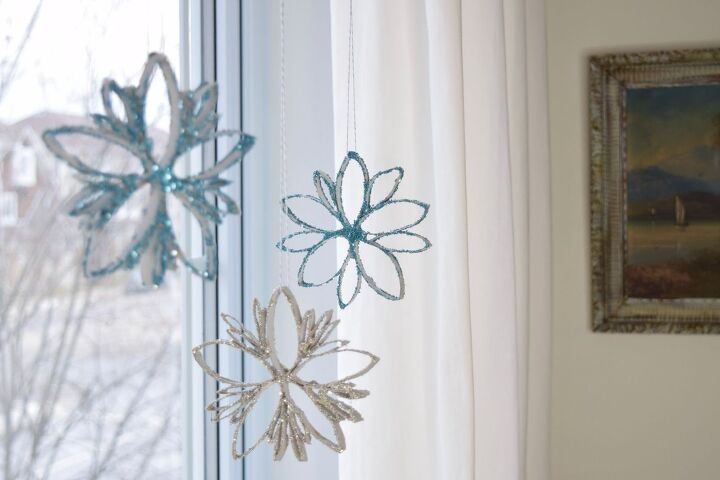
Once you have crafted a few of these beautiful snowflakes, it's time to display them. Simply attach a piece of butcher's twine to each snowflake, and knot them over your curtain rods.
This effortless display will bring a delightful touch of winter magic to your windows.
Toilet paper roll snowflake instructions:
Making toilet paper roll snowflakes is a fun and easy Christmas craft that you can do with your kids. They make beautiful decorations for your home and are a great way to recycle those empty toilet paper rolls.
With just a few supplies and some creativity, you can make your own festive glitter snowflakes. Try it out today and let us know how it goes!
DIY toilet paper roll ideas


Comments
Join the conversation
-
Kudos to you for being so clever!
-
Very cute and easy to!


Frequently asked questions
Have a question about this project?
Were your tubes already white? Or did you paint them? If not what brand?