Blah Dresser to Fun Travel Trunk

Julie Lipari
by Julie Lipari
My friend gave me a tall dresser with a matching long dresser to play with. I had been wanting to try to figure out how to replicate an idea I saw on Pinterest of a dresser made to look like an old travel trunk.
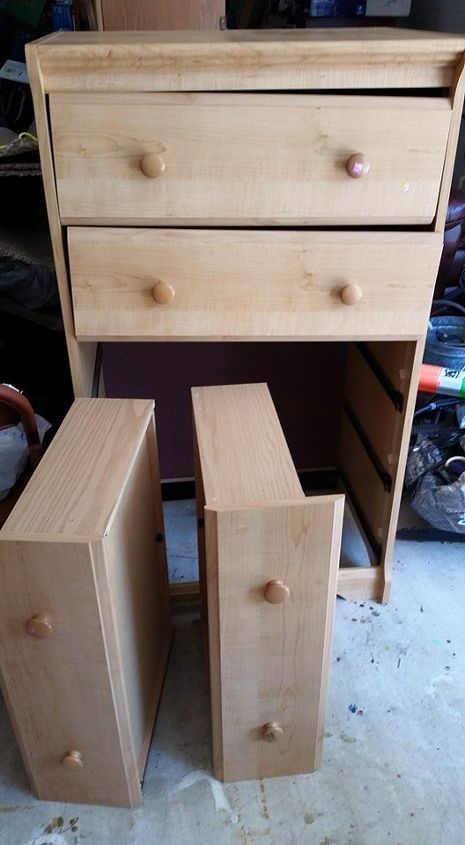
Before of the tall dresser
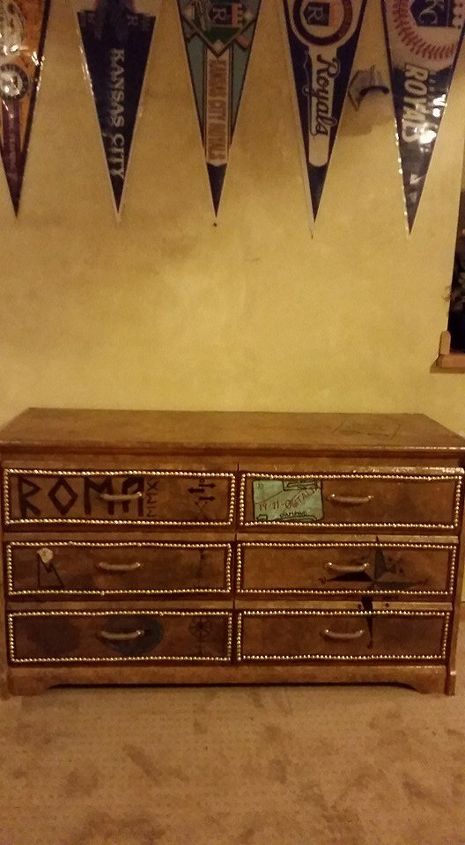
I started out creating the leather look by painting over this laminated wood with a tan latex wall paint. Using regular tissue paper (no sparkles or colors) I folded the tissue several times and torn the edges off the paper to avoid having any lines on my project. I then crumpled up the tissue, reopened it and placed it on the wet paint and rolled out the same color latex paint over the tissue, adhering it to the drawer and allowed it to dry. You can go on youtube and find step by step instructions under faux painting leather with tissue. Once it's dry, I used a sanding block to lightly sand off the extra tissue hanging off the drawer.


The next step is to take a leather colored latex paint and mix it lightly with a paint glaze (3 part paint to 1 part glaze). I applied this paint to the top of the tissue paper finish with a sponge brush. After it was dried I used Midnight black Unicorn Spit to shade the brown to give it more of a leather look. I found the Unicorn Spit stain took well to the tissue paper without bleeding.


If you are not aware of Unicorn Spit, get ready! It is an amazing product that was developed as a water based wood stain but seems to work well on glass, tile, wood and now tissue paper faux leather!


Using a homemade projector, I found images on google of passport stamps and travel images and projected them onto my project. Outlining them with a sharpie and filling them in with Midnight black, Zia Teal and Molly Red Pepper Unicorn Spit. Because the stain is water based, I used Miniwax polyurethane with a clear satin finish to seal everything in place. One coat was enough for this project.


Leather colored fabric cut into strips 2 inches wide served as my leather strips. I ironed the fabric down to a 1" strip and used tack strips purchased from JoAnne's Fabrics to tack down the fabric onto the drawer. I was afraid the laminate would crack but it didn't.


Finally, I went to my local Habitat for Humanity and found brass drawer hardware. Using twine and craft glue, I wrapped the hardware with the twine. This dried very quickly so I was able to put the pulls on the drawers the same day.


Time: 1 week


Cost: $63. for fabric, 4 rolls of tack strips, paint & hardware


Difficulty: moderately tedious but still sane.


Finished tall dresser
Finished long dresser
Frequently asked questions
Have a question about this project?
Comments
Join the conversation
2 of 5 comments
Next