


Kitchen Makeover on Budget

When we bought our 50's ranch house two years ago we loved the potential each room had to offer. This was our first time buying a house and with a very limited budget, we decided to make smaller, impactful changes to get the look we love. Since the kitchen is the heart of our home and is connected to every living space, making it over was a priority. I'm always dubious when I see the word "budget" in makeover posts because I feel like their budget is no where NEAR my budget. So I'm going to tell you right up front... our budget was $2500. So with that in mind, we knew big changes like new cabinets, a range hood (with vent up to the roof), installing recessed lighting, getting new appliances and tile were NOT in the picture. But I knew with some tenacity, hard work, and online resources, we could get a kitchen we loved.
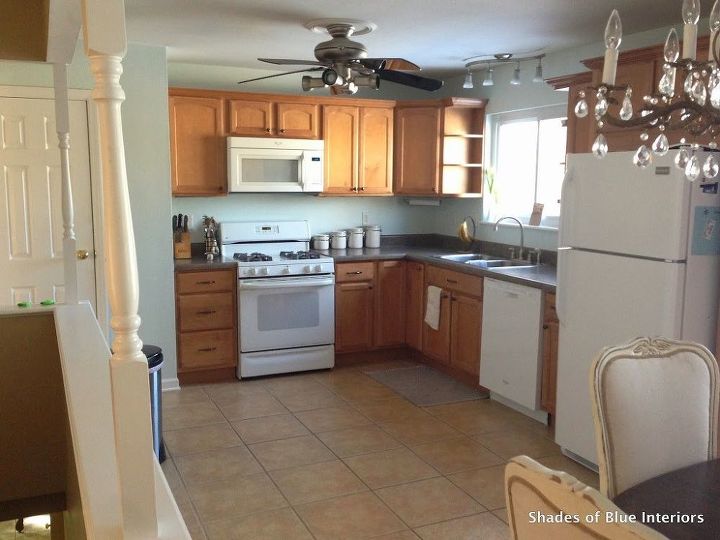
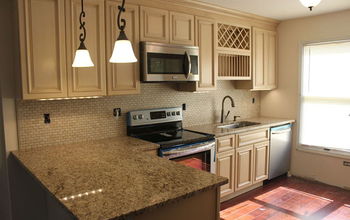
Here is what the kitchen looked like right after we moved in and painting the walls a pale blue (SW Timid Blue). The fridge as you can see is different (it was a loaner while ours was being ordered) but that was not included in the budget because it was covered by our purchase price. I painted the cabinets white a few months after that but it sat mostly untouched until last fall. I decided I wanted the kitchen to be done before the holidays and got to work.

And here is what it looks like now! I love this space so much now and we spent a lot more time here, especially with the island. My three little kids go here first to eat breakfast in the morning, and for after school chats and snacks.
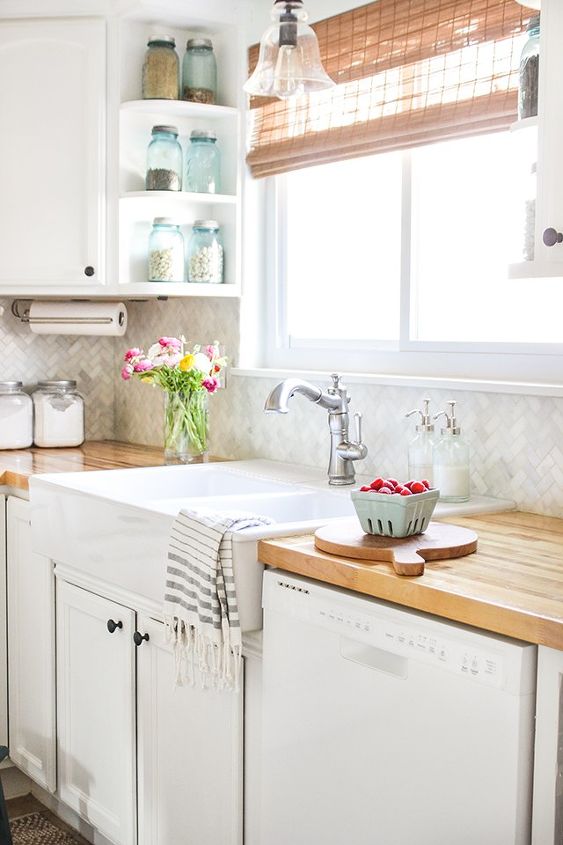
While the counters were being installed it was the perfect time to get the farmhouse style apron front sink I've been pining over for years and replaced the faucet to a single handle one. Since the old stainless steel sink was still perfectly usable, we donated it with the year-old faucet that and disposal to a family we know that was needing it.
After the counters and sink were installed, I installed the backsplash. This was quite the chore to do solo (hubby is back in school for his MBA and was studying for finals), but the change it made was incredible. I love the look of this herringbone marble and because it was so light colored, I used a grout with a build-in sealer, so it will clean up easily and won't stain (Fusion Pro grout).
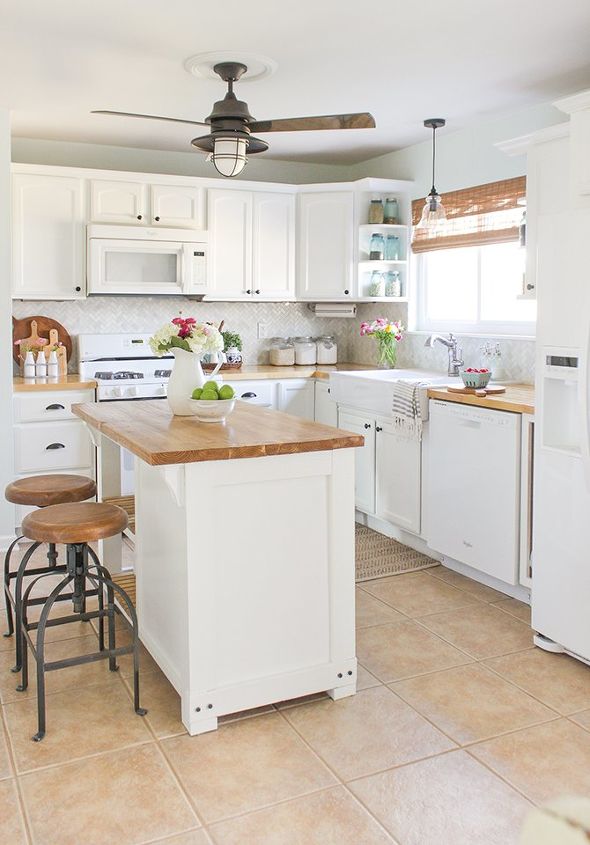
The next step was to build the kitchen island. I designed it to fit our space, provide some additional storage (with a couple of shelves) and hide our trashcan with a tilt-out trash storage. Tutorial and free downloadable build plans are on my blog.
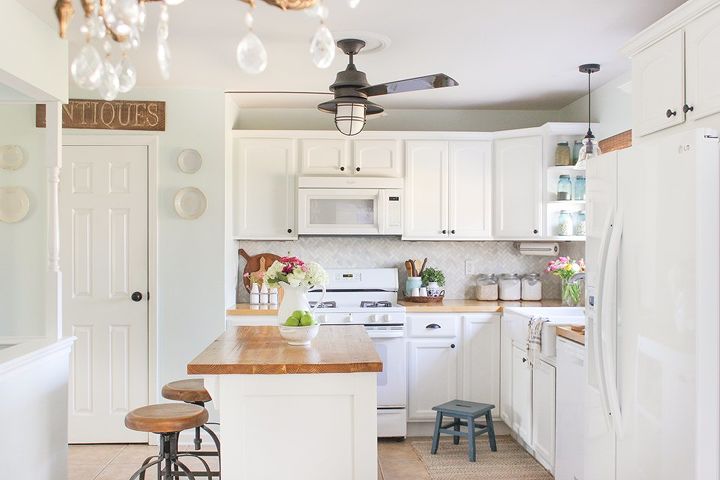
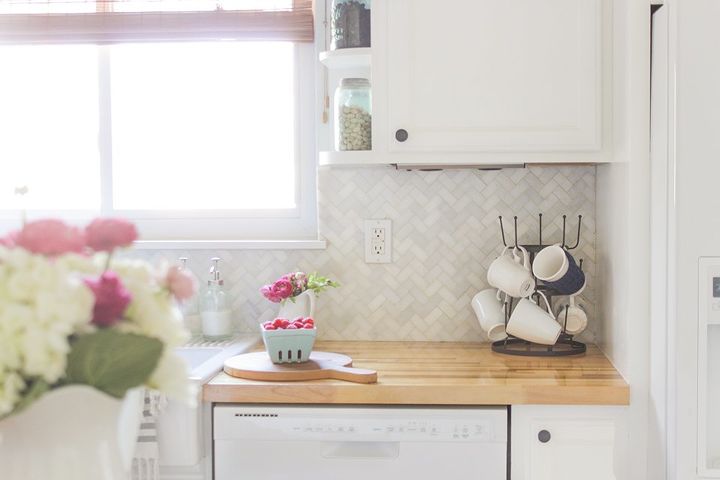
Another important change that needed to be made was changing out the ceiling fan/light fixture. I found one that had the perfect farmhouse/industrial feel and funny enough, is an outdoor fixture! The last thing that needed to be done was styling. My favorite part. :) I added fresh flowers and fruit, white ceramic pitchers, bowls, and canisters, and then gave the grout on the tile floor a good scrubbing before I called it finished! Head to my blog post below for more pictures, complete source list and links to all the tutorials (butcher block counter installation, tile backsplash installation, and building the kitchen island).
Comments
Join the conversation
-
Love it. I put ceiling fan in my kitchen. This is great when it gets hot in there.
-
The white + wood mix is amazing. Love this kitchen! What would you call this style?


Frequently asked questions
Have a question about this project?
Well, a question, why did you put in ceiling fan. They dry or cool your food to quickly. I have not seen anyone do this in many years. We all took them down. Just saying. Otherwise, a good job.
If I were to take a pic could you help design