


A Craigslist Furniture Bedroom Makeover
2 Materials
$1
1 Minute
Easy
I could never possibly "finish" decorating a room because for me, decorating is an ongoing process and an expression of how I feel at any give time. So nothing is ever "done" it's just in transition! And my guest bedroom is no exception, as it recently got a little makeover. My guest room is often used by the grandparents or by the kids when they have a friend sleeping over and with very tight quarters, twin beds just made more sense for us. The room is visible from the main part of our house and so I wanted it to look nice, but it rarely gets used so I didn't want to spend a lot money on furnishing and decor. I was able to use mismatched Craigslist furniture {painted black} with accessories and bedding from Target, IKEA, and HomeGoods to get the look I wanted at a price I could afford. You can find a full list of sources, including what paint was used in THIS POST, but below is a photo of how the room looked a couple of weeks ago For the second part of the room's makeover, all I did was add some blue blankets and turn the bedding down so that the blankets were exposed. I also added a rug and painted the IKEA frames above the bed black (instead of white). It's amazing what a dramatic impact these small changes had on the room! You can find more photos and details by clicking on the blog post link provided. :)
Craigslist furniture painted black and paired with pops of blue and white for a dramatic and cozy space!
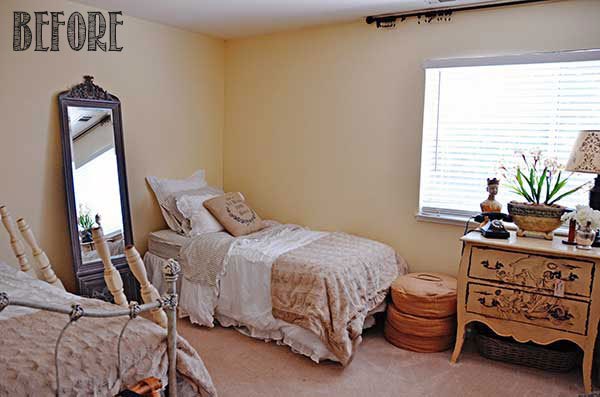
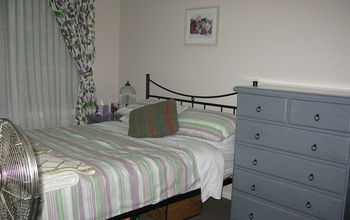
The BEFORE. My guest room was basically a storage area with no personality.
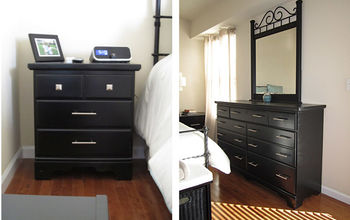
This is the guest room after Part 1 of it's makeover, with its Criagslist furniture painted black.
Here's the room today! Just a few small tweaks and the room looks dramatically different!
The inside of the cabinet holds a combination of decorative and useful items. You can see my tips for decorating shelves by clicking HERE
I added pencils and paper for guests inside the cabinet.
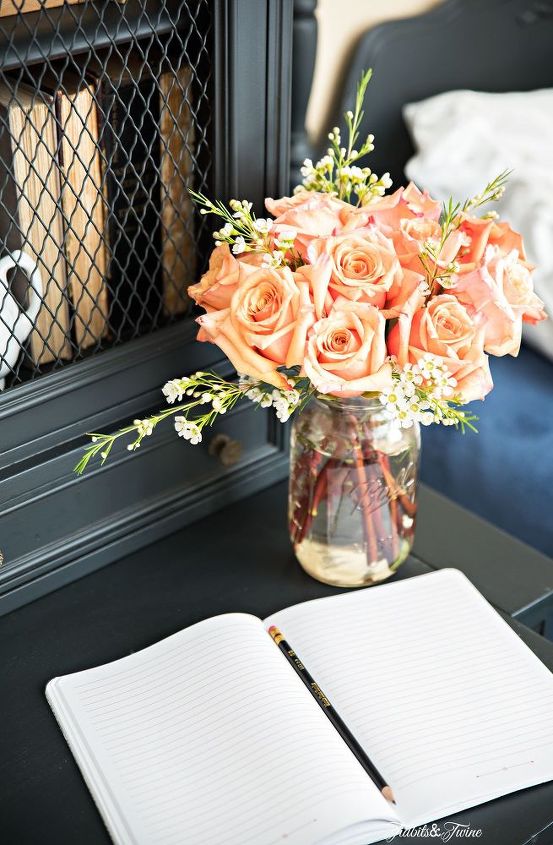
The top of the cabinet slides forward to become a small writing desk.
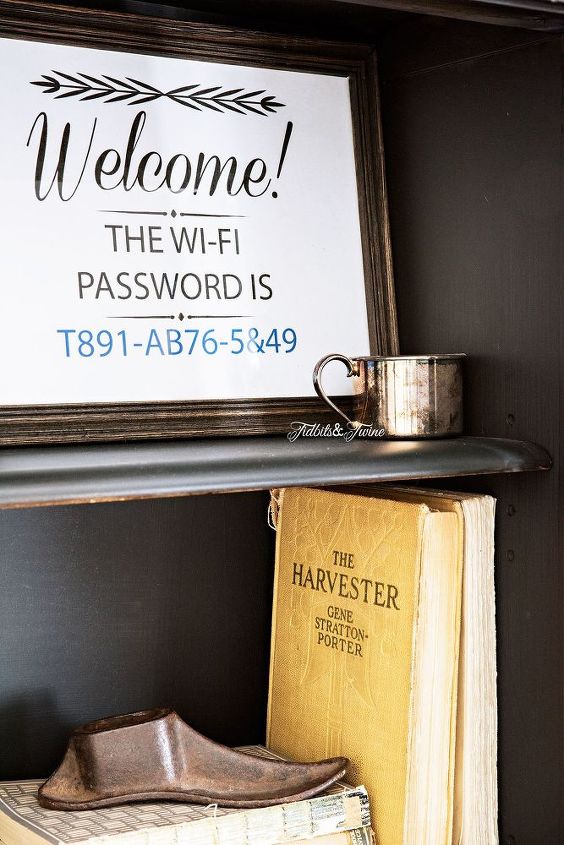
I framed the wi-fi password, as that is a common question from guests! You can download this printable for FREE at the link below so that you can print and frame your own password sign! To see more photos and get source details, click on the link below.

Want more details about this and other DIY projects? Check out my blog post!
Comments
Join the conversation
2 of 70 comments
-
I would LOVE to know what color the hutch is painted. It is rich and lovely 😍
-
I would love to paint my cabinet if I only knew the shade of blue. It’s exactly what I’ve been looking for.


Frequently asked questions
Have a question about this project?
Where did you purchase the wire in the doors? I have a similar piece and the glass is gone. This is so much prettier than chicken wire.
What color of black did you use? Beautiful!