


Jack and Jill Bathroom Reveal: Small Budget With Big Changes

$600
We took the original 1990s Jack and Jill bathroom and gave it a much needed update for very little money. It went from being a very generic bathroom with brass fixtures and oversized mirrors glued to the walls to one busting with a personality of its own. The navy vanity was a hit when I shared the makeover on some paint forums and many people commented that they would have never thought to use navy for a vanity, but they loved it. It's a bold yet elegant color and it can mesh with just about any other color. It really made a statement in the bathroom and my youngest loves it.
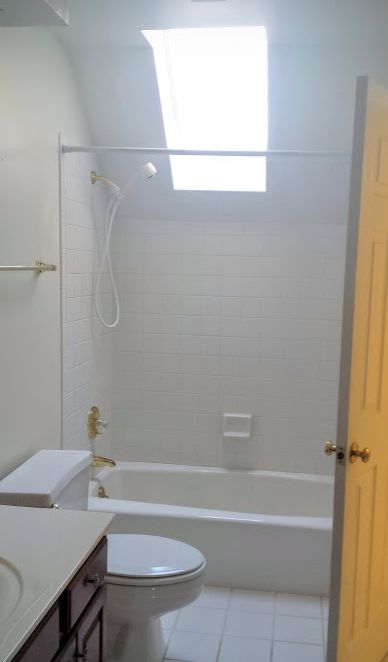
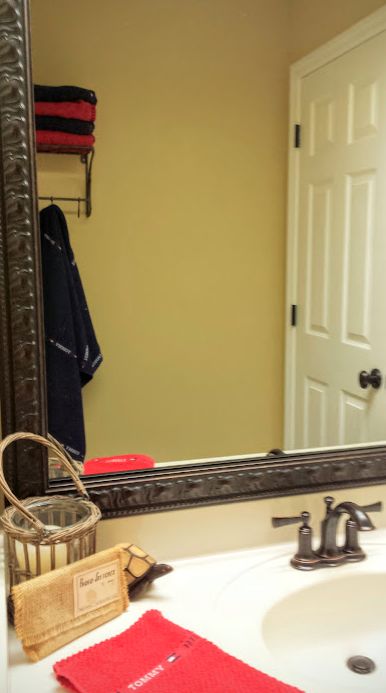
It's a Jack and Jill bath and this is what one side of the bathroom looked like when we moved in. Although the 20+ year old fixtures were outdated, the cabinets and tile were in excellent shape. They weren't my style but they were clean and I could live with that.
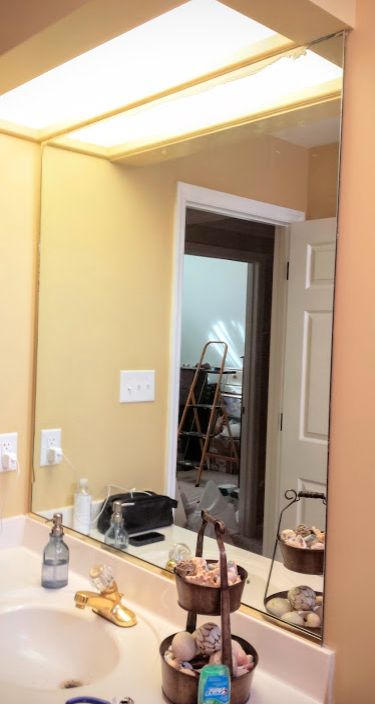
The mirrors were oversized and brass trimmed and as you can see they were screaming 1990s.
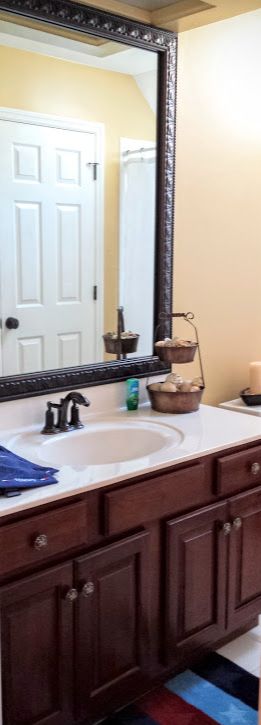
We framed the brass trimmed oversized 1990s mirrors to give them a more current look. We also changed out door hardware, hinges, and sink faucets to oil rubbed bronze.
Here's the other mirror and vanity... The walls were painted to match our son's connecting bedroom.
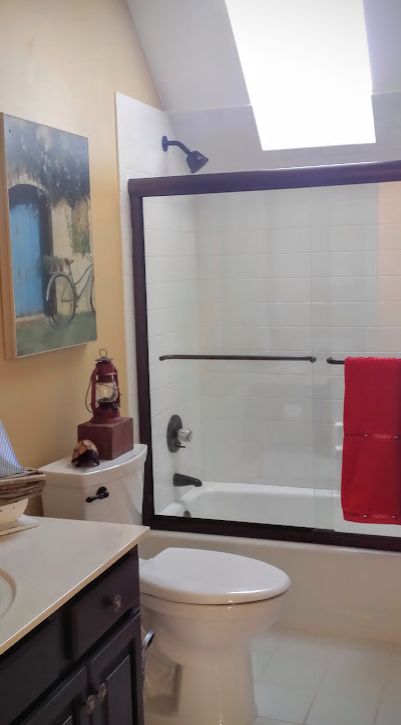
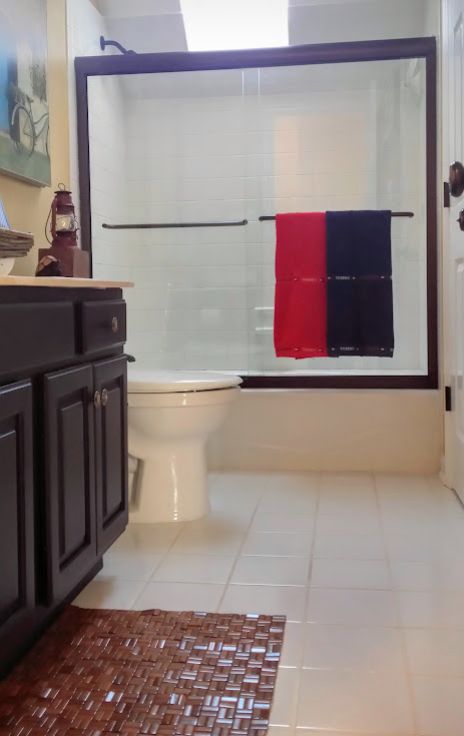
We decided to add shower doors in hopes of keeping the water inside the shower where it belongs! We were worried about water leaking down to the ceiling below since our little guy was leaving the shower curtain open at times because he was scared with it closed. The natural light coming through the skylight and glass doors really made the room much brighter. We painted the brass fixtures in the tub to match the ORB in other parts of the room.
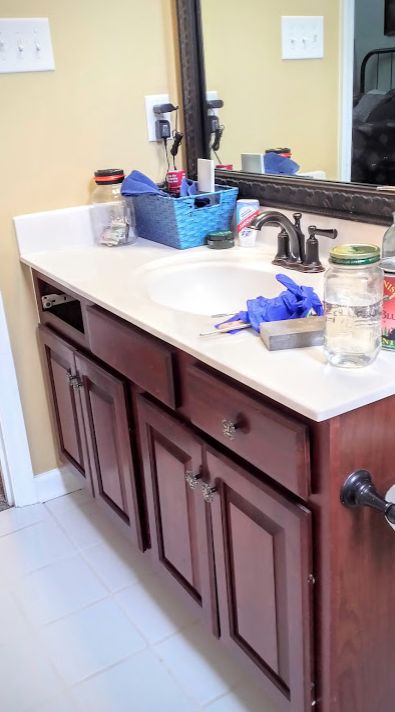
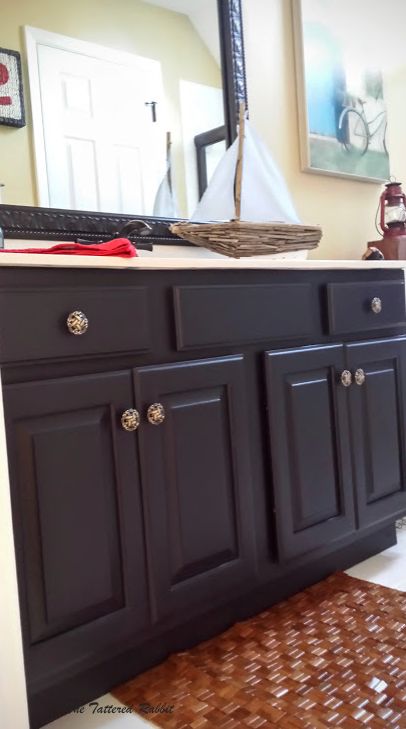
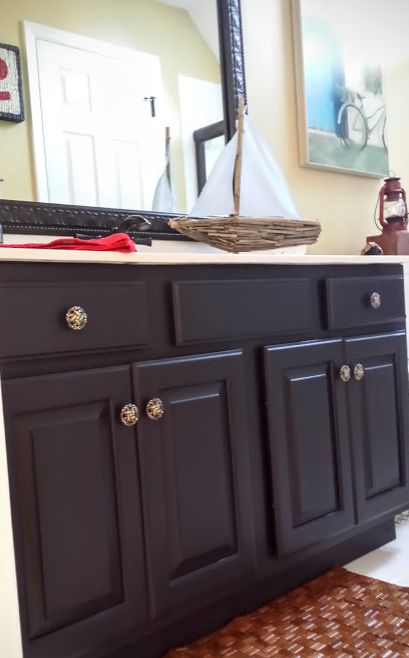
After adding the shower doors our vanity seemed to be dating the room and I didn't like how it looked. The finish was gone in places and it either need to be stripped and stained again or it needed some paint. I chose the latter.
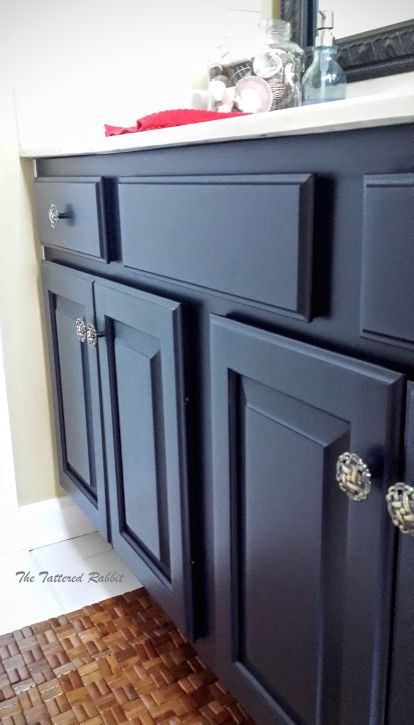
Our son's room has a surf theme going on so I decided to carry that same theme throughout the bathroom. I painted the vanity with @generalfinishes Coastal Blue to tie all the colors together. Prep work is key to a good, smooth finish by the way.
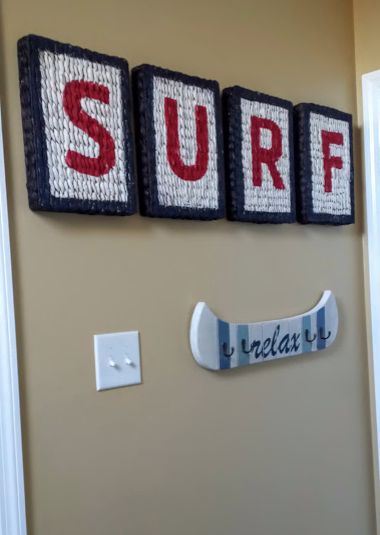
I made a hand painted, stenciled sign using letter trays I found on clearance at Target and we added a beachy towel hook rack below it for convenience.

A driftwood sailboat and some seashells finishes off the nautical theme. I know we need a bigger mat! We've been on spring break this week and I refused to go shopping to get another one, but I'll be picking one up next week.

Half the money we spent was on the shower doors and the other large ticket items were the mirror frames and sink faucets. The rest was spent on paint and decor. For the tutorials on the SURF sign, the mirror frames, and the vanity please see: http://www.thetatteredrabbit.com/boys-red-white-blue-beach-themed-bathroom-makeover/
Comments
Join the conversation
4 comments
-
Lovely! Great update!
-
Niceeee


Frequently asked questions
Have a question about this project?