


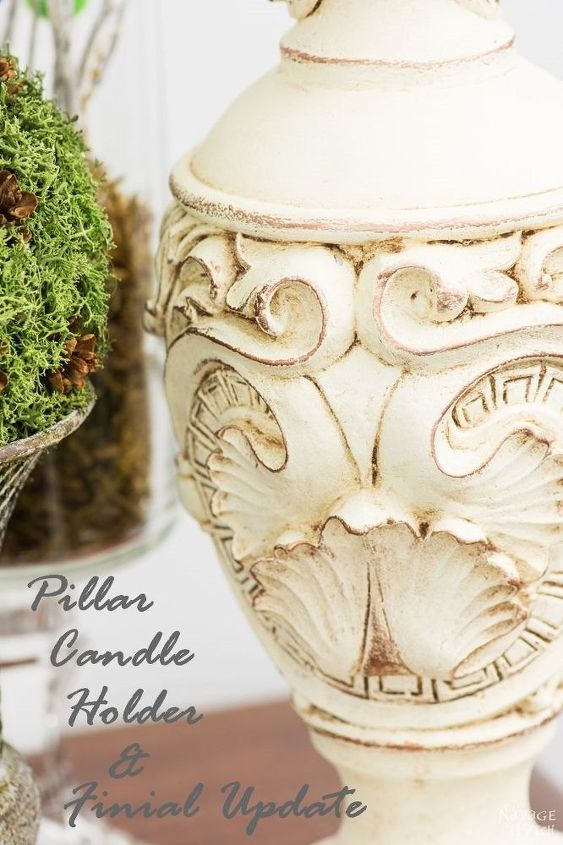
Pillar Candle Holder and Finial Update
Easy
Finally the days are getting warmer and longer! I can't help feeling all giddy inside, because "Spring is here" translates to four things in my vocabulary: more outdoors, more tag sales, more shopping and more goodies at Put&Take.
While I am all hyped up and happy, Greg's take on it is more like: driving thousands of miles between tag sales, Hobby Lobby, HomeDepot, Lowes, local nurseries and home, and as a result of her crazy shopping spree having a 'honey do' list as long as a roll of toilet paper.
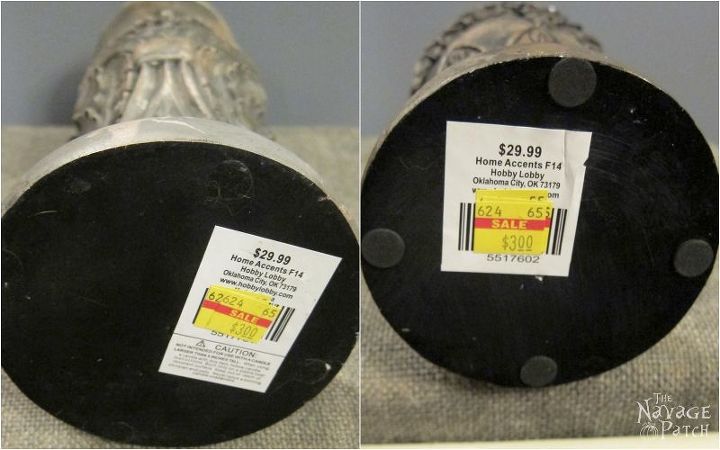
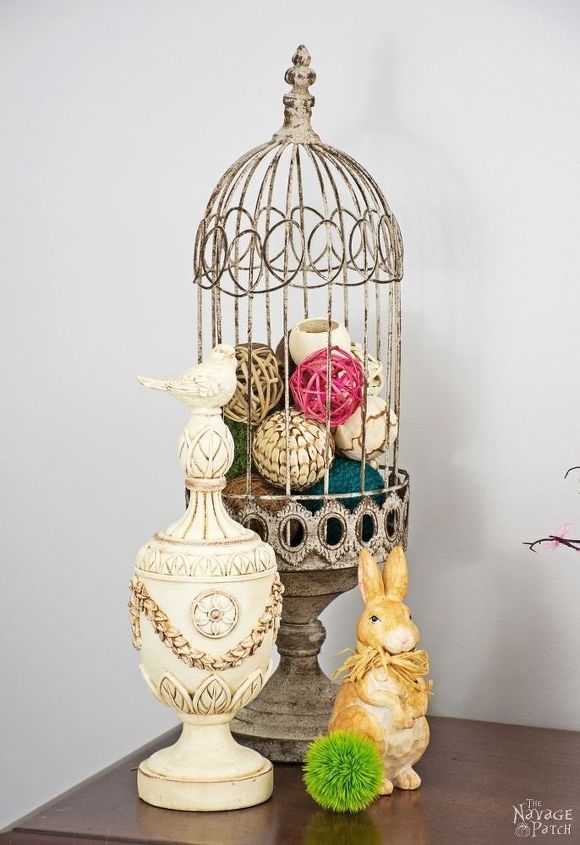
Though you would think he was getting ready for the Facial Gymnastic Olympics (raised eyebrows, rolling eyes, pouting lips, annoyed squint, etc), last weekend wasn't bad for the first shopping spree of the season. I only spent a total of $6 on this pillar candle holder and the bird finial which I found in Hobby Lobby's discounted items aisle.
Not bad, eh? With a little bit of paint and a mending of the broken part, both will look great.
As usual, I started off with the mending. I thought of filling it first but since the candle holder was made from hollow ceramic, that would require a ton of filler just to get to the level of the broken part. Besides it would make this candle holder heavier. Instead, I came up with one of my weird fixes. First I twisted some paper to make it stronger yet still pliable.
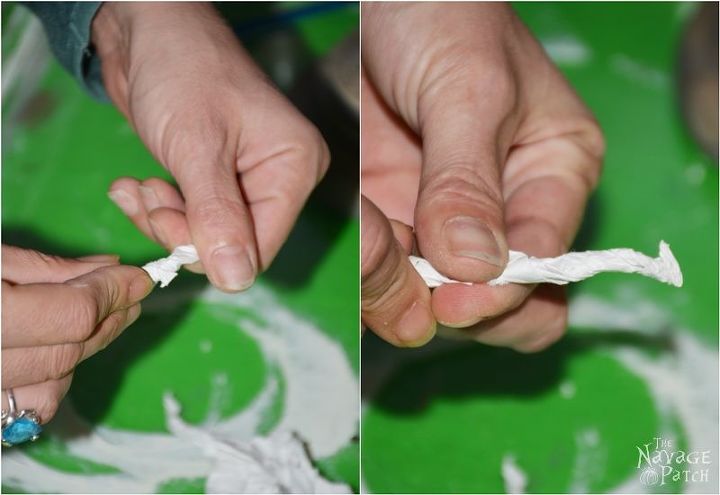
Then I poured a bit of hot glue into the hollow from the hole of the broken part. The plan was to have something sticky at the bottom of the hollow ceramic. Right after pouring the hot glue, I started pushing the twisted paper in. Once it reached the bottom, I waited a little so the hot glue would dry totally and adhere to the paper.
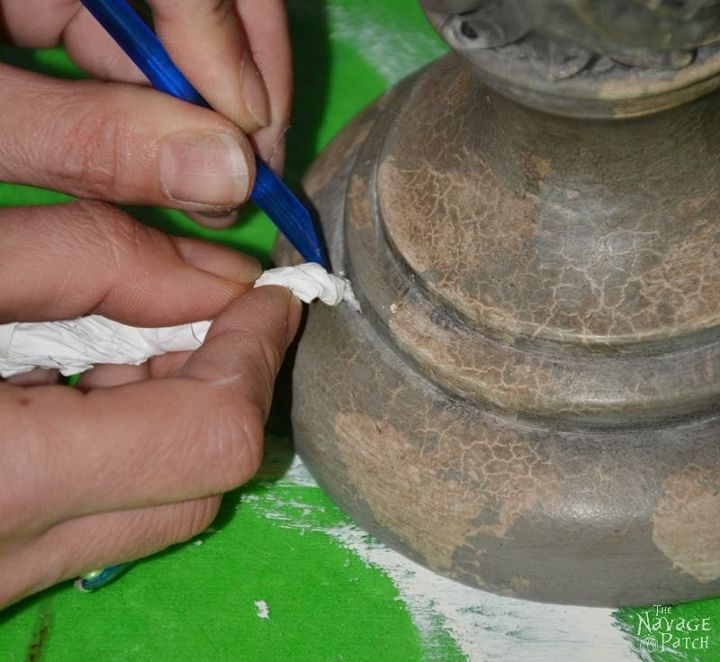
By doing so, I had only a little bit of area to fill with my "go-to" filler which I use for ceramics and frames. Besides, as I used only a bit of hot glue and paper (which are both light materials), I didn't change the center of balance of the candle holder.
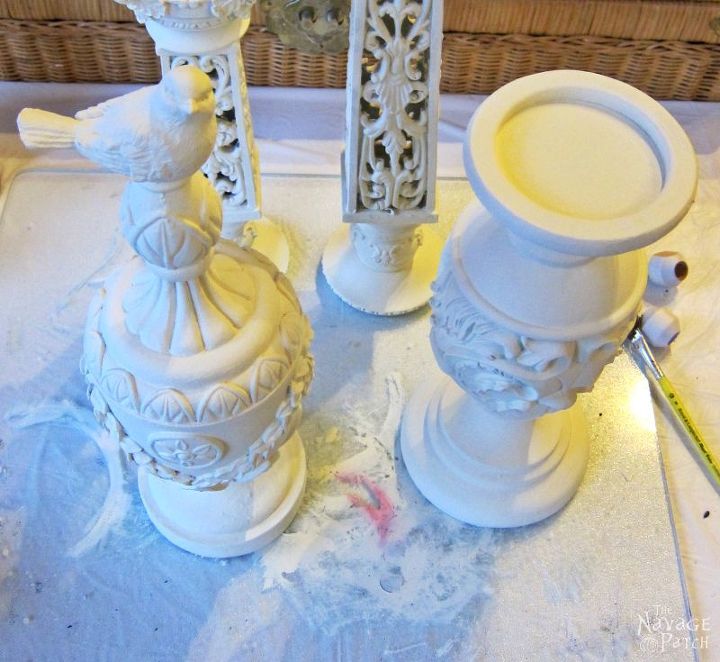
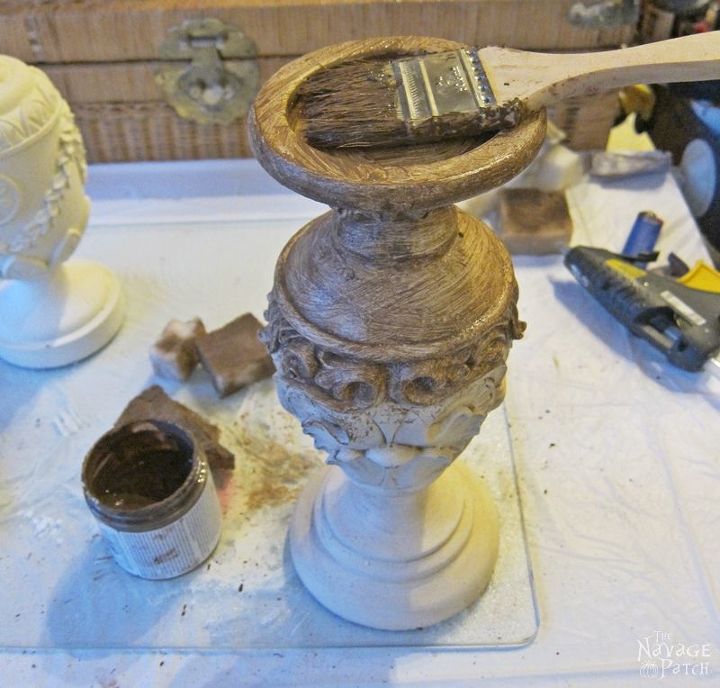
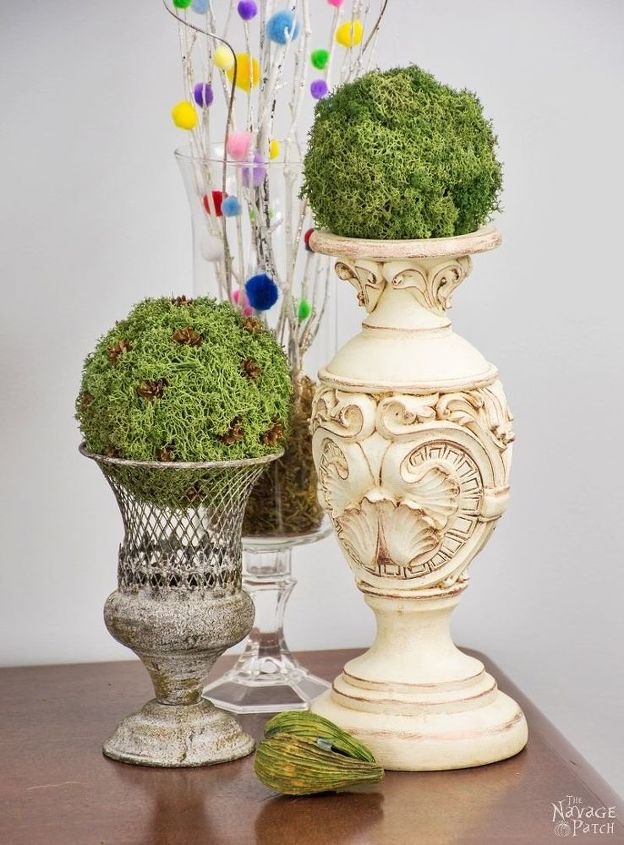
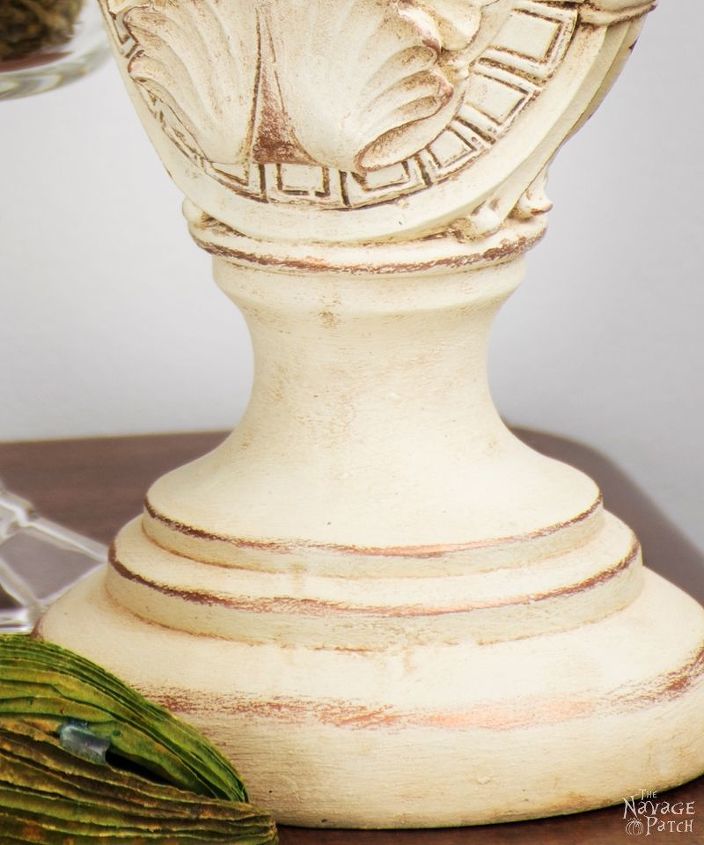
After giving enough time for the paint to dry, I started antiquing them with antiquing wax, and as the final touch I applied warm gold metallic wax to the high reliefs.
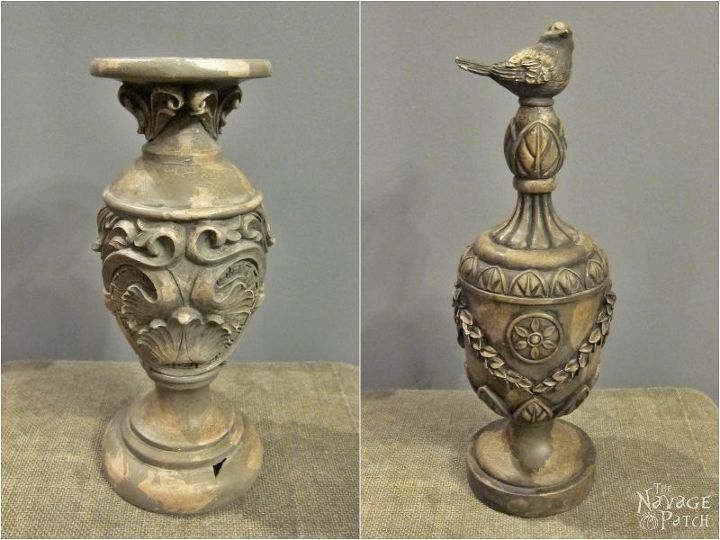
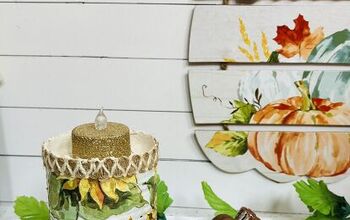
Here are my updated pillar candle holder and finial.
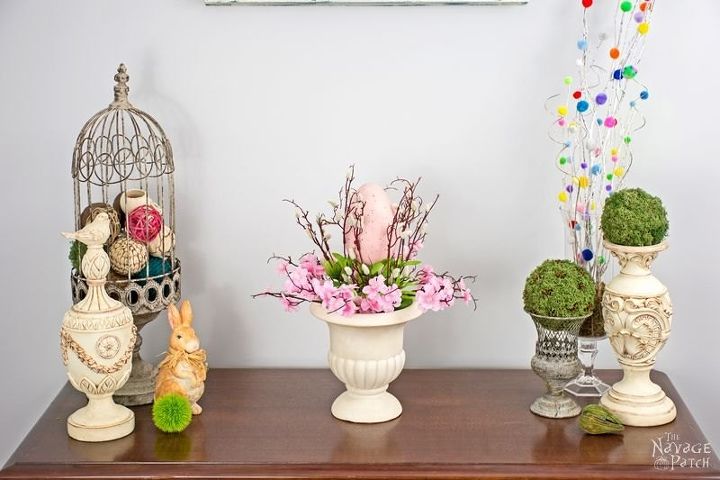
They don't look like $3 each, do they?
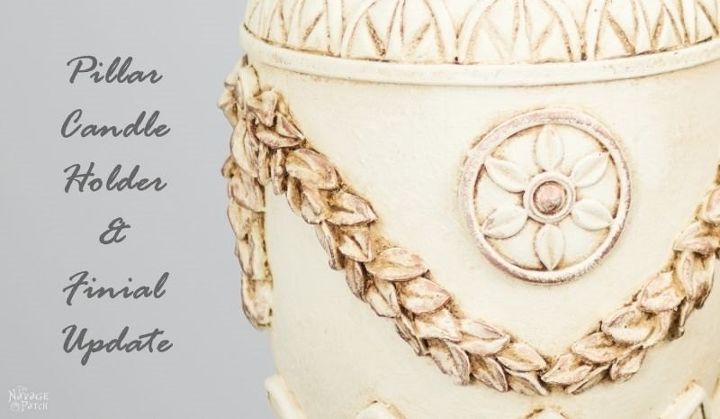
Some close-up pictures for you.
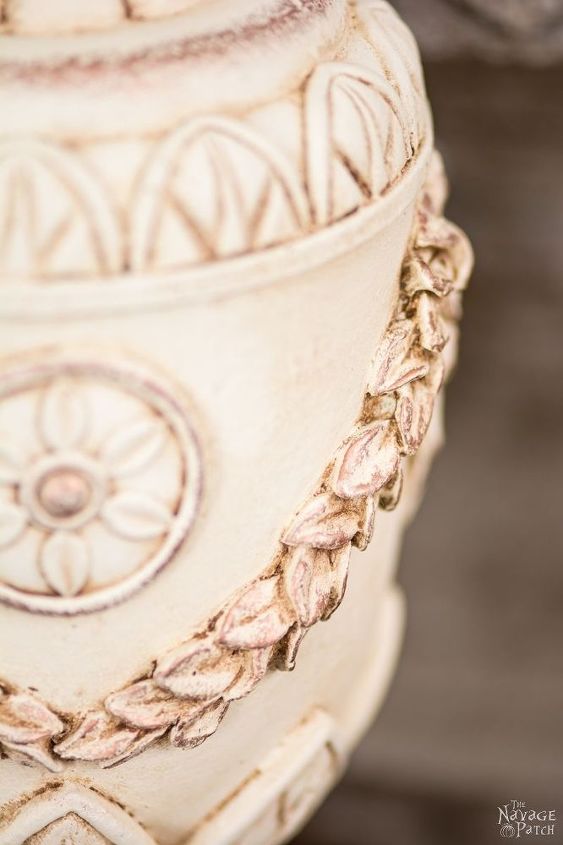
I really love how the copper-ish gold accents the antiqued off-white. I think these two colors really complement each other, especially on the reliefs.
As if it never had a broken part.
I hope you liked my fix for the candle holder and finial. You can find the full post and all the details of this project (including the filler I use to fix ceramics and frames) on our blog.

Want more details about this and other DIY projects? Check out my blog post!
Comments
Join the conversation
3 of 39 comments
-
It's really great how you can look past the broken part and make something really nice!
-
Upgrade your candle holders and oil testers with these rustic and classic ones. Each candle holder and oil tester has its own unique style and you have to choose that which relates to your lifestyle. Made from stoneware, delight in the fact that you're using a pottery uniquely handmade and crafted for class and simple elegance.


Frequently asked questions
Have a question about this project?