


DIY 80's Kitchen Update

by
SurgChick
I needed to help sell my Mom's house inexpensively and on my time constraints. A 1980's kitchen never bothered me but buyers were always saying how outdated it was. I did 3 weeks of fun internet searches and did my research so I was prepared on the day of painting/updating. (I live 5 states away, have crazy hours at work and take care of my toddler, so I needed to be efficient in a wknd.)
Sure, there are things that could use more updating in the pictures, but didn't have time. She also need to get a new fridge - but will let the buyer deal with that!
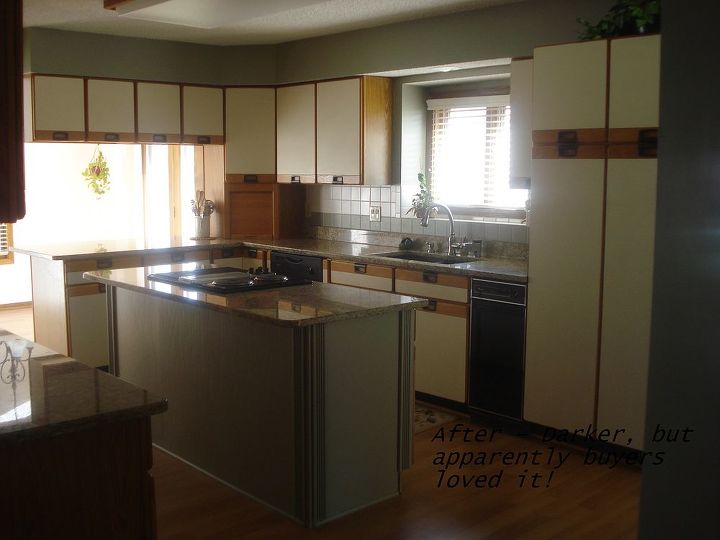
Overall: Smoky Slate (Green/Gray) paint to walls, painted over flowery tile, and island. Changed cabinetry hardware. Didn't have time or money for overhauling cabinets or changing the overhead light fixture. May have to make a few more trips.
Details: For the tile and island - used bonding primer first (2 coats for tile, 1 coat for island oak). Measured 4 fluting wood at Lowe's - painted both sides with bonding primer, then used Liquid Nails and 4 real nails for each fluting wood to put on island. Then painted island completely in the Smoky Slate.
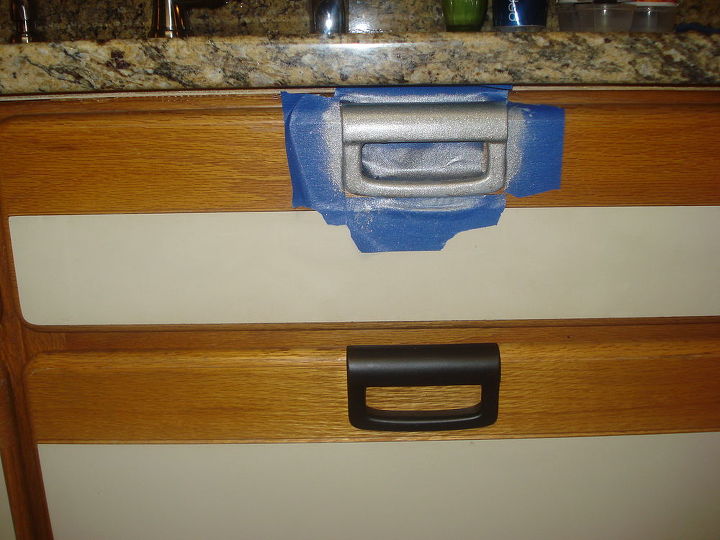
For the cabinet pulls - they were 80's brass. Sanded lightly while still on cabinets, unscrewed, laid out on flat surface outside (my youngin' helper), spray paint gray primer, spray paint brushed nickel. The brushed nickel looked gray and horrible when on the cabinets and didn't match anything! So re-did spray primer and spray paint - Black Flat - looked much better with existing black appliances. Tedious - since we had to do it twice - but a pink power screwdriver helped!
Total time- 2 people, prepped before, 6 hours. $100.00
Effect - Toned down the formica crème cabinets and all that (good) oak wood!
A quick and inexpensive DIY. More to come on other parts of the house!
Sure, there are things that could use more updating in the pictures, but didn't have time. She also need to get a new fridge - but will let the buyer deal with that!
Overall: Smoky Slate (Green/Gray) paint to walls, painted over flowery tile, and island. Changed cabinetry hardware. Didn't have time or money for overhauling cabinets or changing the overhead light fixture. May have to make a few more trips.
Details: For the tile and island - used bonding primer first (2 coats for tile, 1 coat for island oak). Measured 4 fluting wood at Lowe's - painted both sides with bonding primer, then used Liquid Nails and 4 real nails for each fluting wood to put on island. Then painted island completely in the Smoky Slate.
For the cabinet pulls - they were 80's brass. Sanded lightly while still on cabinets, unscrewed, laid out on flat surface outside (my youngin' helper), spray paint gray primer, spray paint brushed nickel. The brushed nickel looked gray and horrible when on the cabinets and didn't match anything! So re-did spray primer and spray paint - Black Flat - looked much better with existing black appliances. Tedious - since we had to do it twice - but a pink power screwdriver helped!
Total time- 2 people, prepped before, 6 hours. $100.00
Effect - Toned down the formica crème cabinets and all that (good) oak wood!
A quick and inexpensive DIY. More to come on other parts of the house!
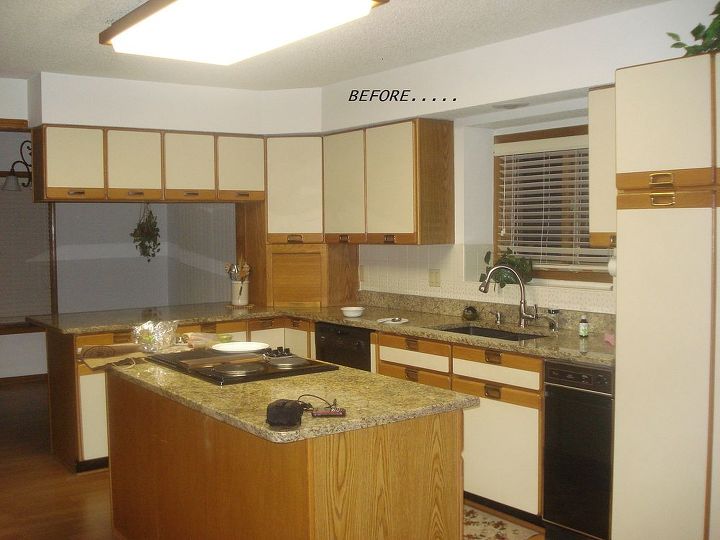
Before. Granite already existing.
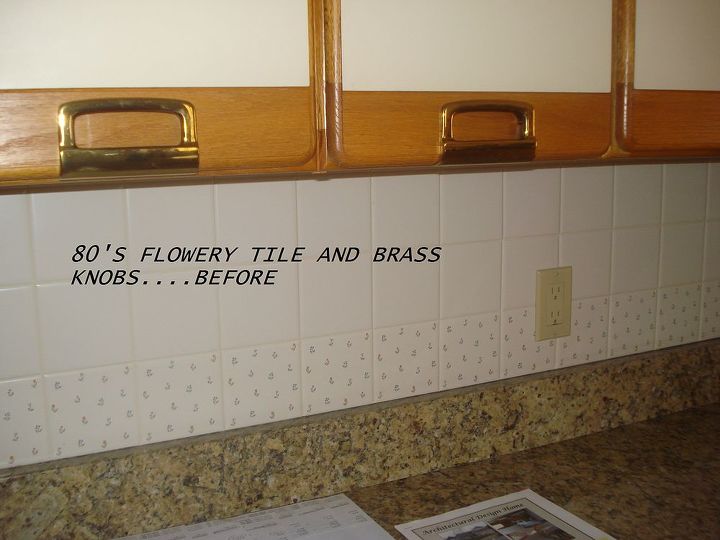
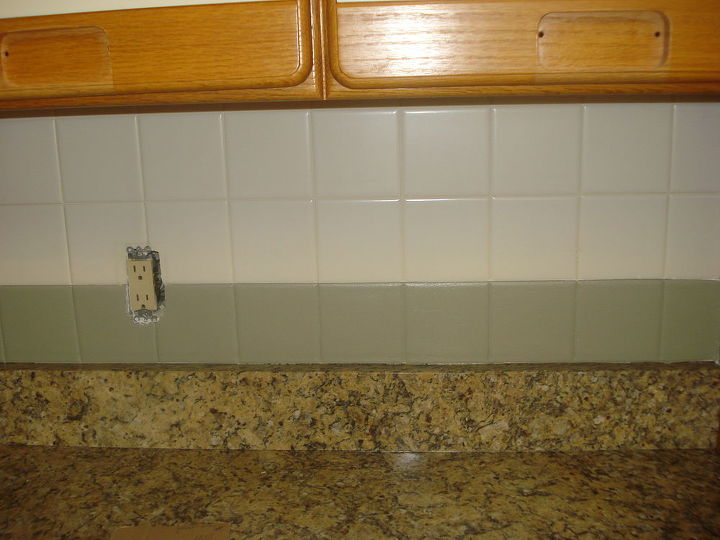
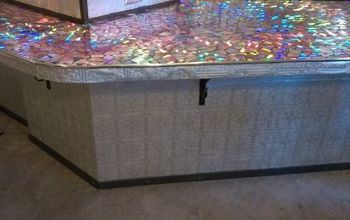
primed flowery tile twice. painted once. used painter's tape judiciously.
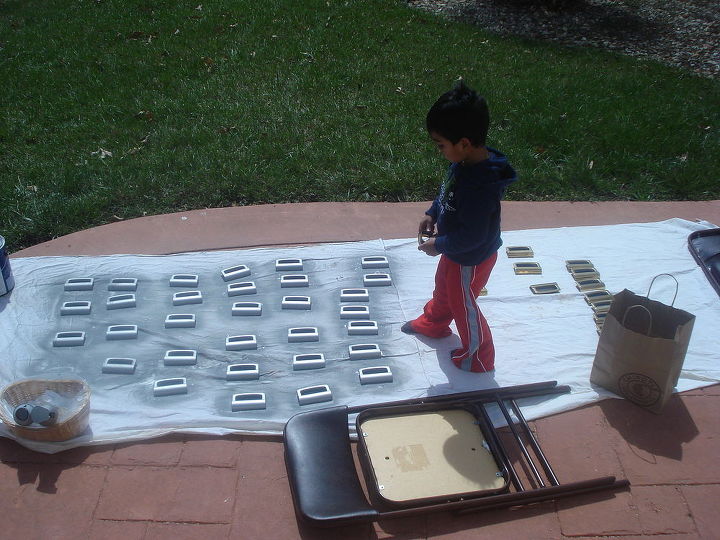
my helper....

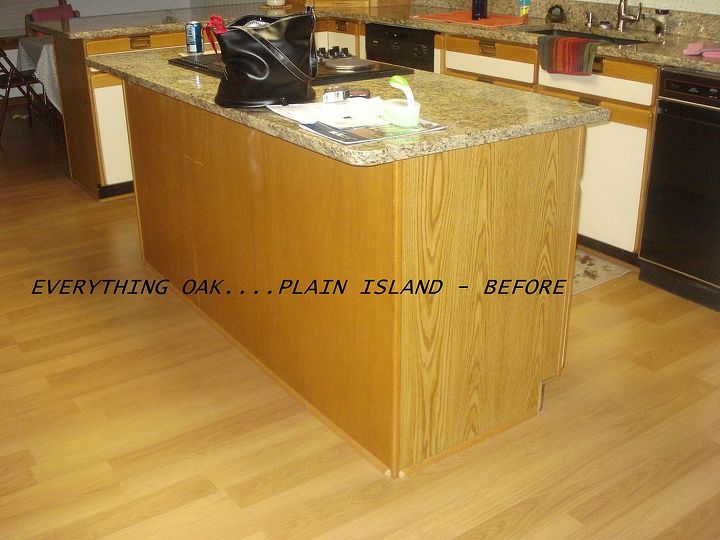
Fluting - had measurements - HD cut them for me. Primed and painted. Liquid nails and real nails.

bar area on other side. my helpers went a little crazy with the smokey slate and kept painting!
a little dark, but buyers liked it....

Finished product. How much fluting and paint can make a difference!
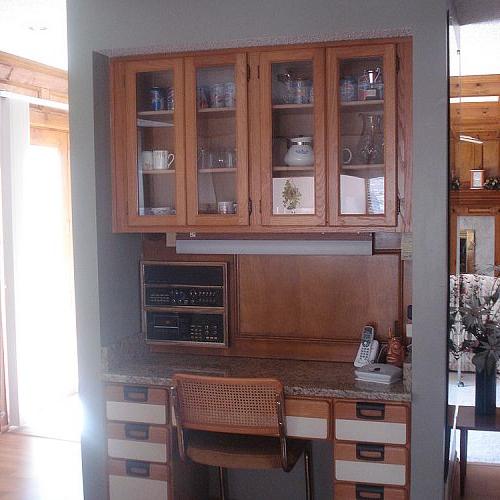
wanted to do more with this but didn't have time....
Comments
Join the conversation
4 comments
-
I like the way things turned out. The black handles look so much better.
- See 1 previous
-
You did a Great Job I loved the kitchen before and after


Frequently asked questions
Have a question about this project?