


Striped Chest Project

by
Tony Turner
$50.00
2 Hours
Medium
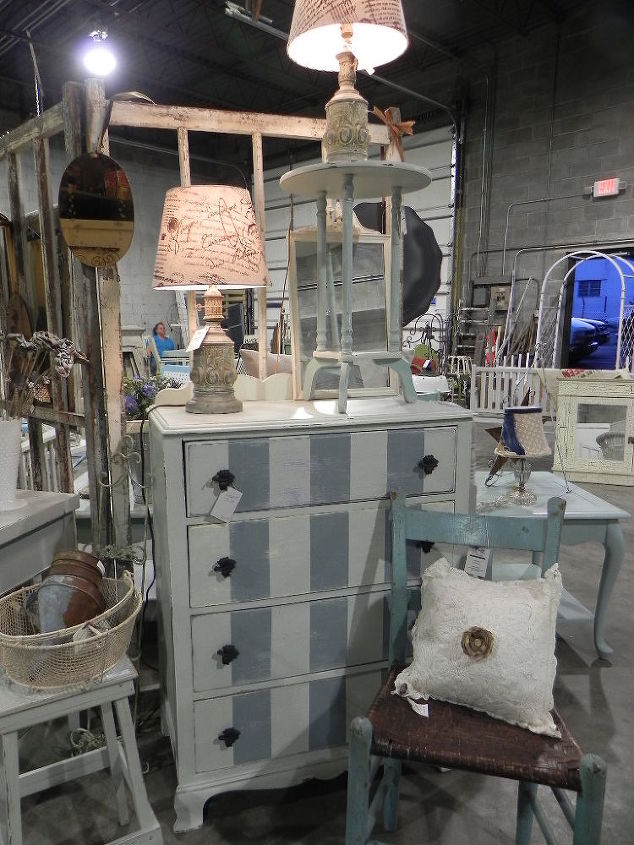
Over the years I have done many of these cute striped chest - each one turning out differently than the other. Here I had a chest whose finish was WAY past its prime. I primed it with Kilz and then painted the body of the chest a light grey. I took out the drawers and measured them putting tick marks where I wanted the stripes. Using a tee square I lightly drew in the lines with pencil and used those lines as guides for my blue painters tape. (decorators note: make sure that you take the time to carefully burnish the tape down well before painting the stripes as this will keep your edges sharp.)
Next I painted the stripes using a grayish green sage color and let it dry. I distressed the whole piece and added adorable leaf-shaped pulls that I left the natural rust color. As always I finished the whole piece with clear bowling alley wax.
This chest is the perfect botanical-themed storage solution for any room be it the mud room, enclosed porch, or garden-inspired room!
Want more details about this and other DIY projects? Check out my blog post!
Comments
Join the conversation
1 comment
-
Super cute! I really like the shape of the piece as well.. Those stripes are an awesome statement!


Frequently asked questions
Have a question about this project?