


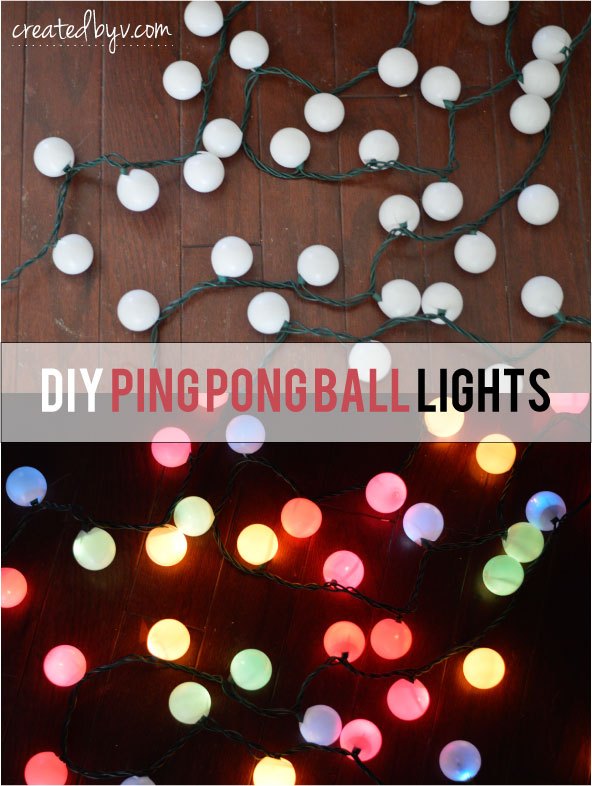
DIY Ping Pong Ball Lights
3 Materials
$7
20 Minutes
Easy
After we built a pergola over our concrete patio, I was excited to decorate with fun patio lights. Call me cheap, but I was a little surprised by the price. Since I already had strings of lights in my Christmas decoration box {I'm sure you do, too} that are approved for outdoor use, I set about finding a way to use them instead.
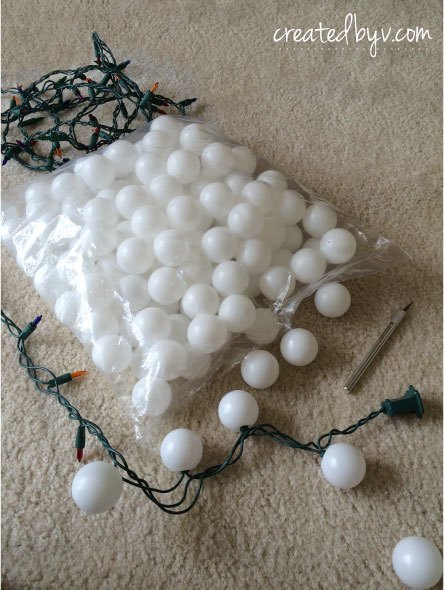
To start, I bought a bag of 144 ping pong balls from Amazon for $7.
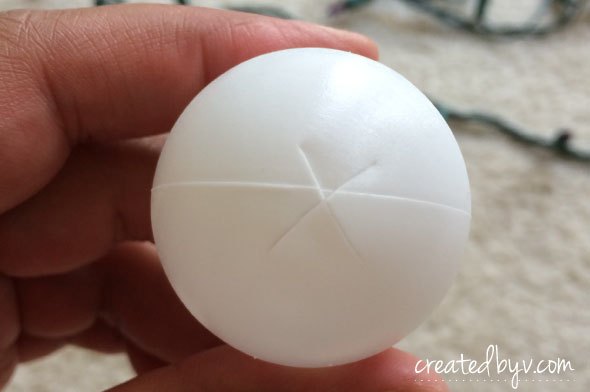
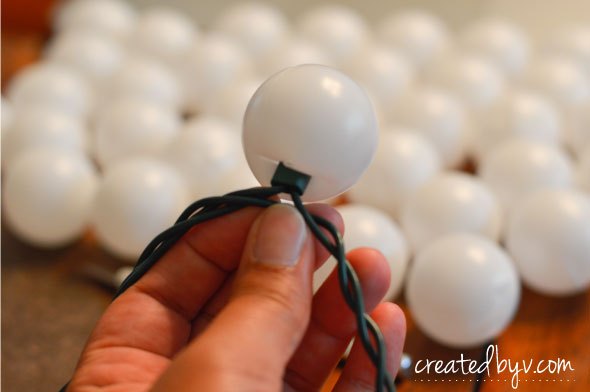
I cut an "X" in each ball with an X-ACTO knife and pushed the bulb through the hole.
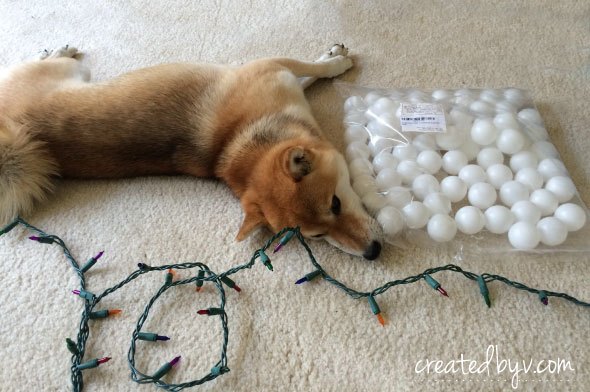
My sweet dog, Kona, "supervised." :)
The bulbs are not in contact with the ping pong ball - they are completely inside the ball.
That's it! It took me less than an episode of Paw Patrol to have my string of lights ready.
I have to admit the first day I put them up, I thought they were a little tacky. My friend confirmed my fear, too: they looked like ping pong balls during the day.
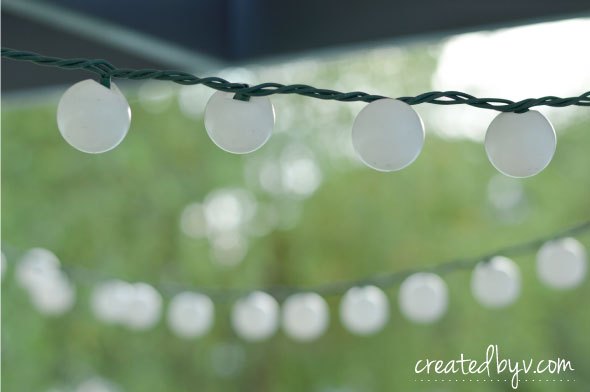
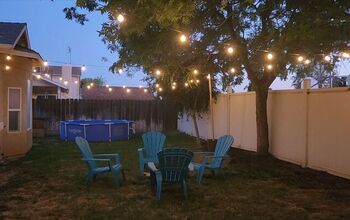
BUT I gave them a chance and that night when I turned them on, they were perfection! Bright, beautiful and fun!

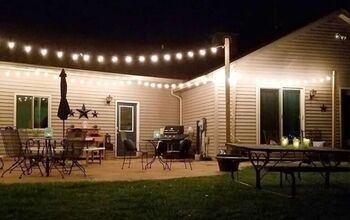
I used one string to drape 100 lights along our pergola and opted for the multi-colored ones for fun and festivity {white lights would work just as well}. I couldn't be happier if I had spent the money to get the real deal. Instead, I am satisfied to have used what I already had on hand with a small investment on ping pong balls to get the same warm glow.
So if ambience and festivity are what you want without a hefty price tag, then DIY Ping Pong Ball Lights are the way to go! -- v.
UPDATE: I’ve had my string of ping pong ball lights up for over a year and I still love the ambience they create. They’re up year-round so some of the balls blew away in storms and a few bulbs burnt out. Both were easy replacements.
The only ‘problem’ I’ve had was that rain water would get trapped inside them. It would eventually evaporate, however a fellow Hometalk reader recently provided a terrific solution that I am including as a smart improvement to this DIY project: add a pinhole to the bottom of each ball to allow rain to drain. Such an easy fix!
To ensure proper alignment, cut your X along the seam as described above, then stick a sharp needle or straight pin through the ball along the seam on the opposite side.
If you like easy DIY projects like this, please click on the link below and visit the blog. Sign up for the newsletter and don't miss another project!
{
"id": "3825046",
"alt": "",
"title": "",
"video_link": "https://www.youtube.com/embed/DoQI_0OkWP0",
"youtube_video_id": "DoQI_0OkWP0"
}
{
"width": 634,
"height": 357,
"showRelated": true
}
Resources for this project:


Any price and availability information displayed on [relevant Amazon Site(s), as applicable] at the time of purchase will apply to the purchase of this product.
Hometalk may collect a small share of sales from the links on this page.More info

Want more details about this and other DIY projects? Check out my blog post!
Comments
Join the conversation
3 of 187 comments
-
Thank you for posting this. We have this done with actual christmas lights purchased after christmas very, very cheap. However, we had issues with a couple of sets not working. Now I know how to create my own sets! I do agree that our backyard looks like ping pong haven - however, it's lovely at night. I only use clear. I do like the colour as well. May try that at some point. again thanks for posting! Perfectly creative!
-
That looks fantastic.....thanks for the great idea..


Frequently asked questions
Have a question about this project?
how did you get the different color of lights?
I wonder is you could spray balls with some kind of snow or pop corn ceiling spray and put on Christmas tree?
Great tip about the pinhole! Love these!