


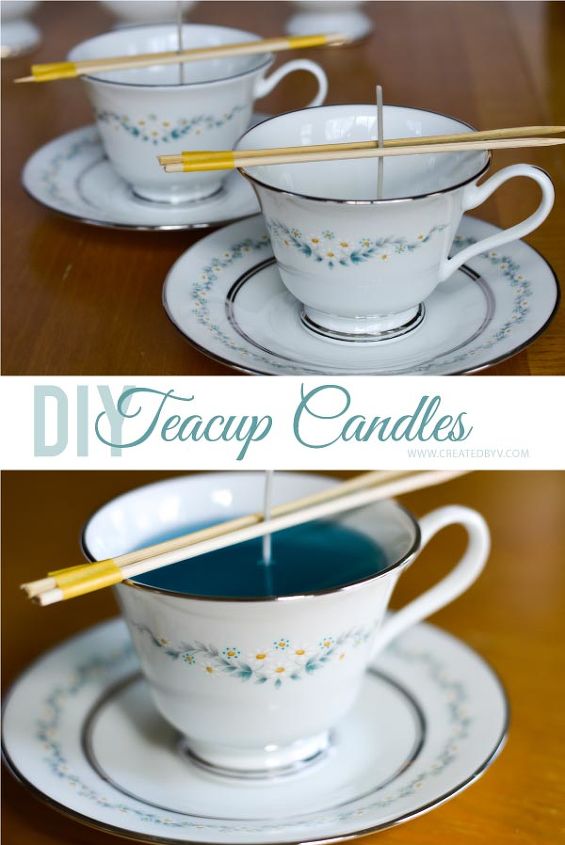
Turn Vintage Teacups Into Candles
7 Materials
I scored some lovely vintage teacups at a local thrift store for a mere $3. It's a happy pattern of white and turquoise daisies called "Holyoke" by Oxford (Lenox). {I also found a set of "Twilight Rose" mugs by Royal Domino for the same price. They aren't officially teacups, but they make cute candles nonetheless.}
Teacups tout a certain aesthetic charm that coffee cups just can't hold a candle to {pun intended}. They scream femininity with their dainty handles, pretty floral designs and accessorized saucers.
So let's spark new life into vintage teacups by turning them into handcrafted candles!
Teacups tout a certain aesthetic charm that coffee cups just can't hold a candle to {pun intended}. They scream femininity with their dainty handles, pretty floral designs and accessorized saucers.
So let's spark new life into vintage teacups by turning them into handcrafted candles!
{step 1} Place wicks into cups by centering the metal tabs on the bottom. Secure wicks with two skewers taped on each end like a vise.
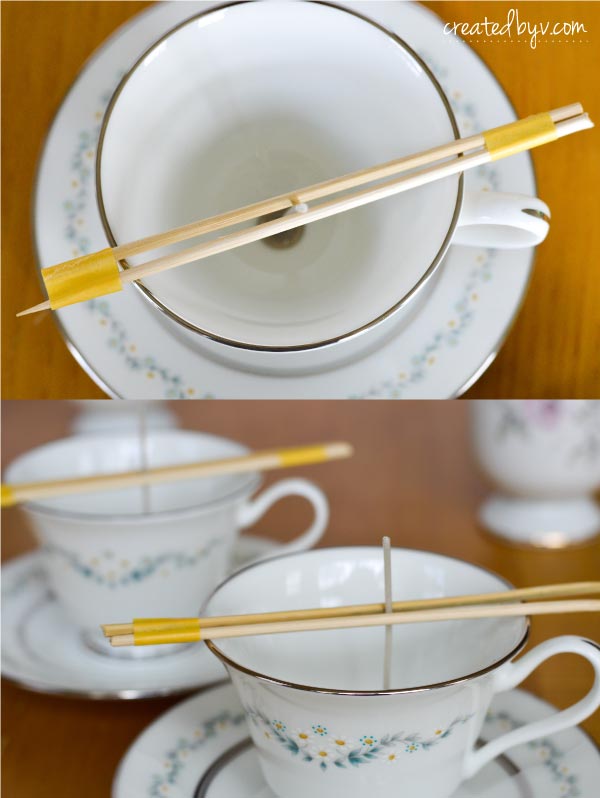
Since the mugs are deeper, I applied a glob of hot glue to the bottom of the metal tabs to ensure proper placement. I also used longer wicks, which were held in place by the same skewer method.
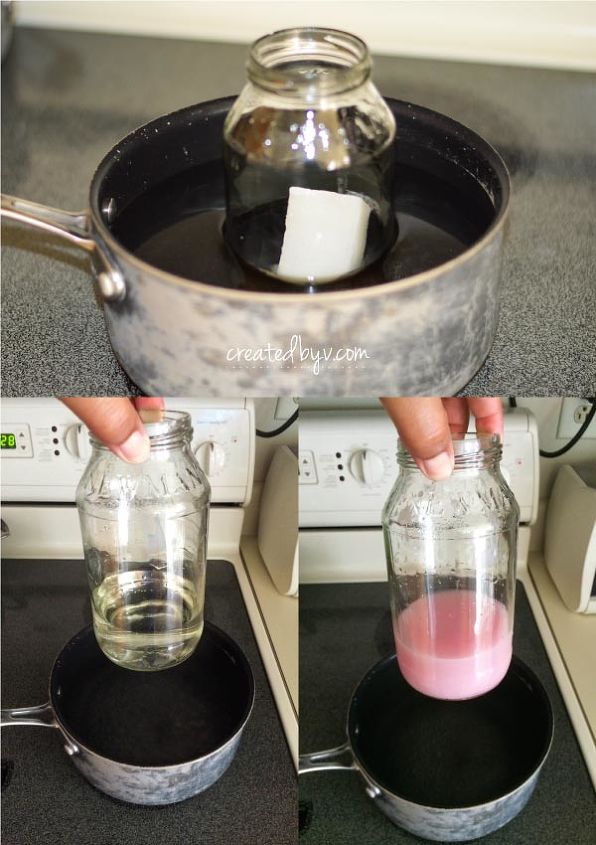
The wax will melt clear. Add fragrance and coloring at this point and stir with a wooden skewer to combine. I used pieces of crayon to color my candles - a little goes a long way and the color lightens once dry.
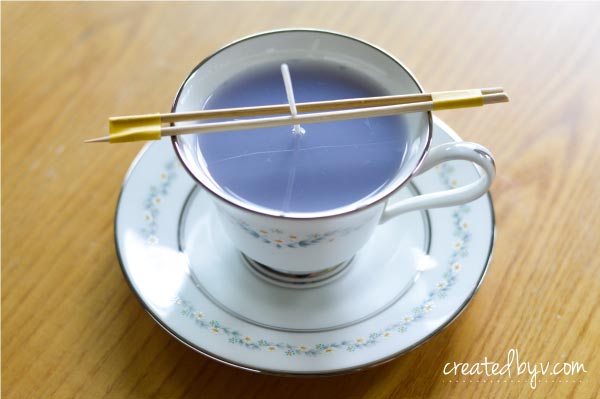
{step 4} Once the first pour is dry, remelt leftover wax using the double boiler method mentioned in step 2. Fill sink holes and level candles.
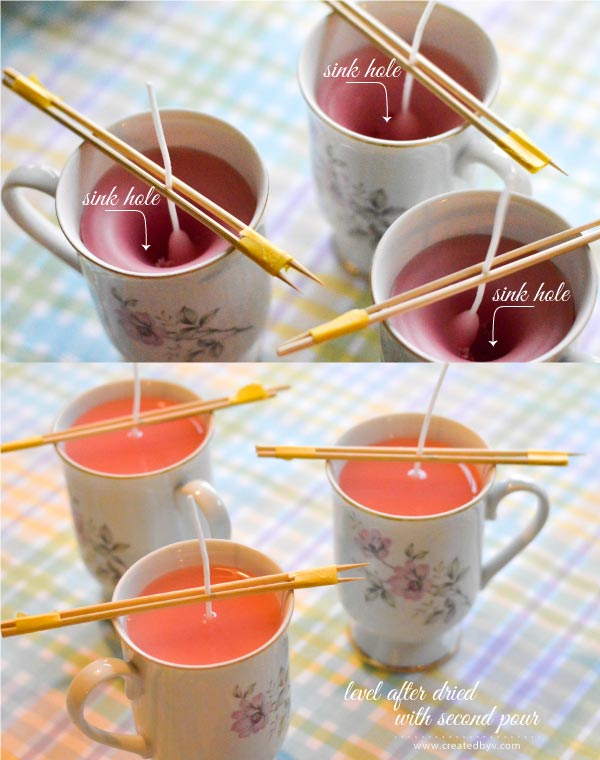
I let my first pour dry overnight and leveled them the next morning.
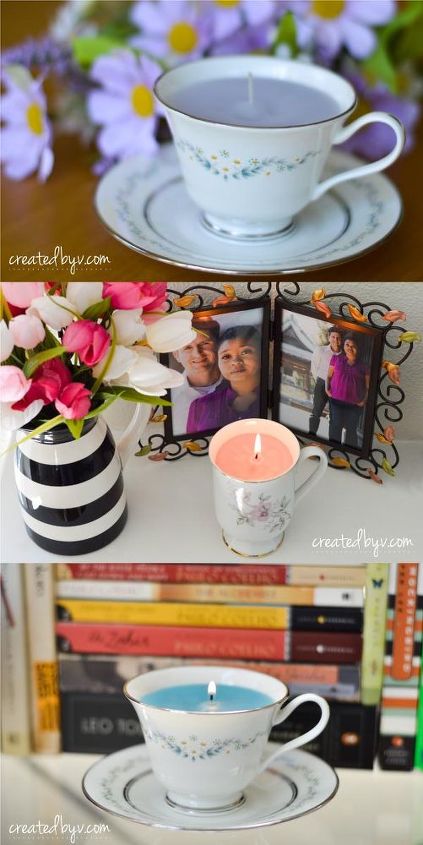
These teacup candles are beautiful on display and make delightful gifts for any occasion. I think they'd be especially lovely paired with a bright bouquet of flowers or gourmet chocolates. So try your hand at candle making and let your light shine! -- v.

Want more details about this and other DIY projects? Check out my blog post!
Comments
Join the conversation
3 of 44 comments
-
These are adorable! And I love the idea to use wax from old candles (it hurts to throw them away)
-
love those cups!!!!
 ....
....pretty candles!!!


Frequently asked questions
Have a question about this project?