


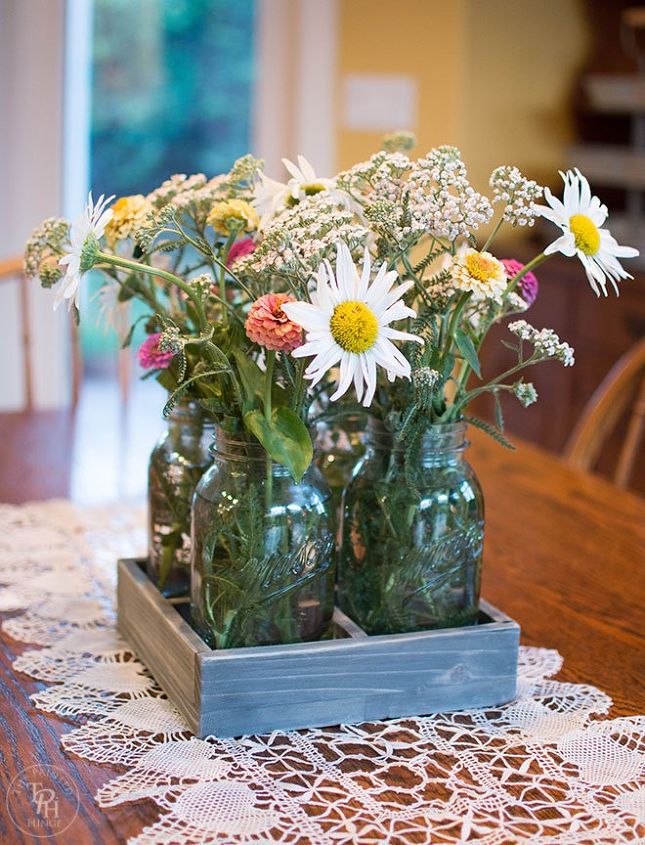
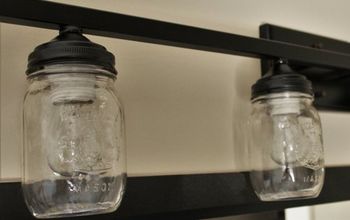
DIY Mason Jar Centerpiece Tray
I just LOVE Mason jars (who doesn’t?) and I’ve been chomping at the bit to make some kind of centerpiece with them for the longest time, so I came up with this tutorial to make this gorgeous DIY Mason Jar Centerpiece Tray!
It's super-easy to make and you can use scrap wood you already have!
Materials:
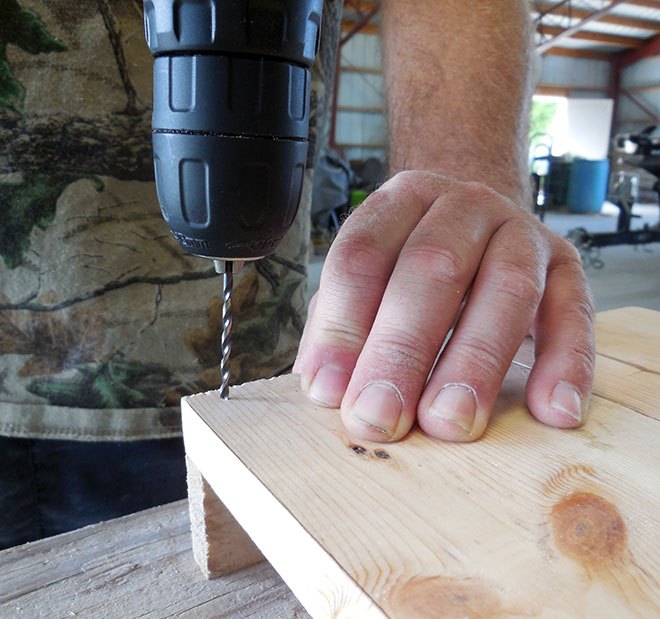
Place the 9″ x 9″ bottom piece on top of 9″ side pieces positioned at either side. Drill pilot holes for the screws with the drill bit, change to the screw bit, and screw in the drywall screws.
Repeat the above directions using the two of the 8″ side pieces on the opposite sides.
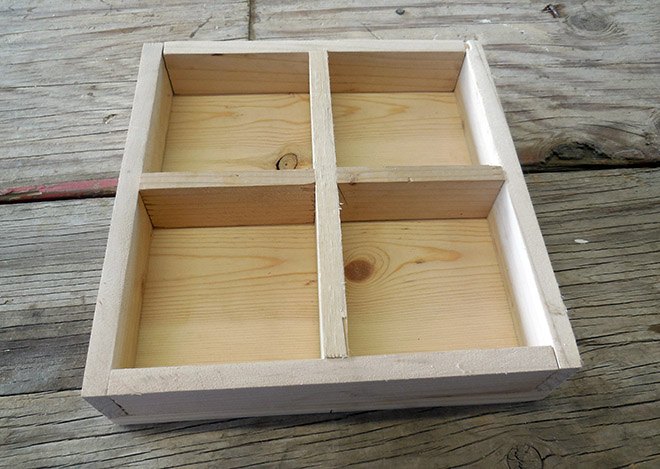
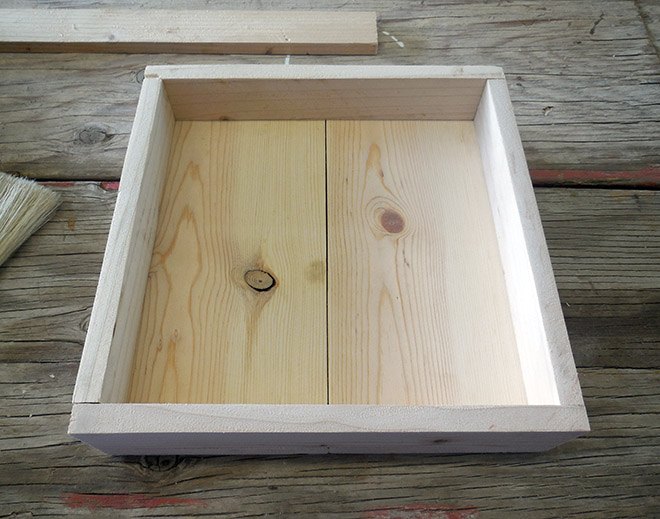
Insert the remaining 8″ side piece and the two 3 3/4″ side pieces to form 4 squares inside the tray as shown. These fit snugly for us so we didn’t feel the need to attach them to the bottom with screws, but you can if you want to or they are not snug.
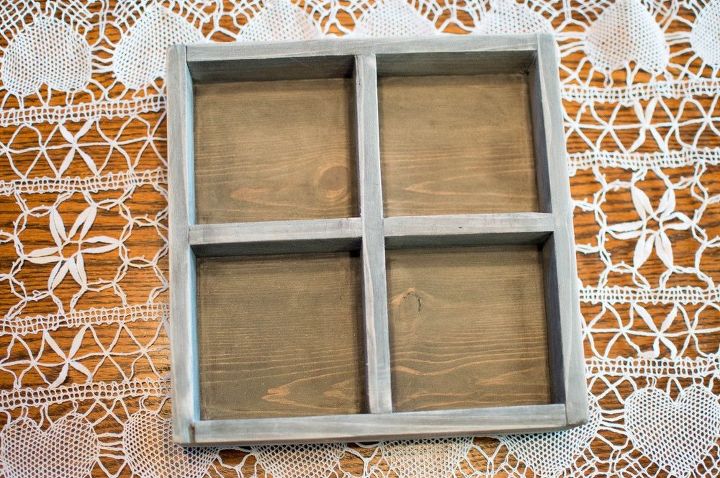
Paint on one coat of the Ebony stain while wiping off excess and allow to dry. Sand gently to re-expose some of the wood grain. Paint one coat of the Weathered Grey stain while wiping off excess and allow to dry. Mix about 1/4 cup chalk paint with a little water until it gets a thin milky consistency. Paint on while wiping off excess and allow to dry.
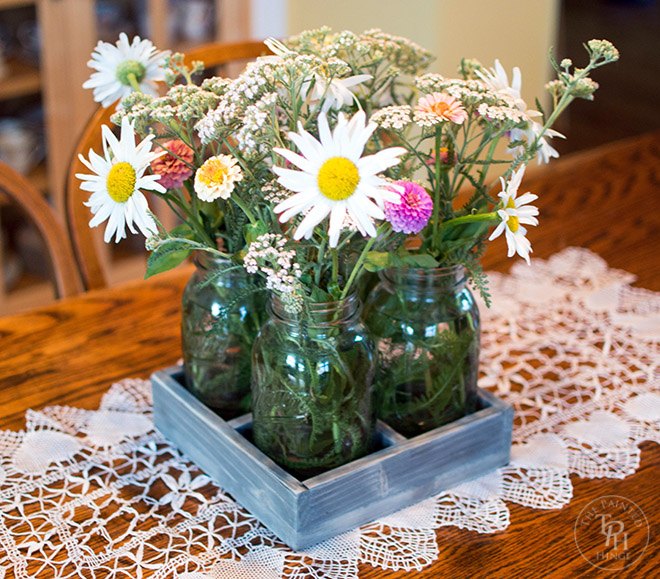
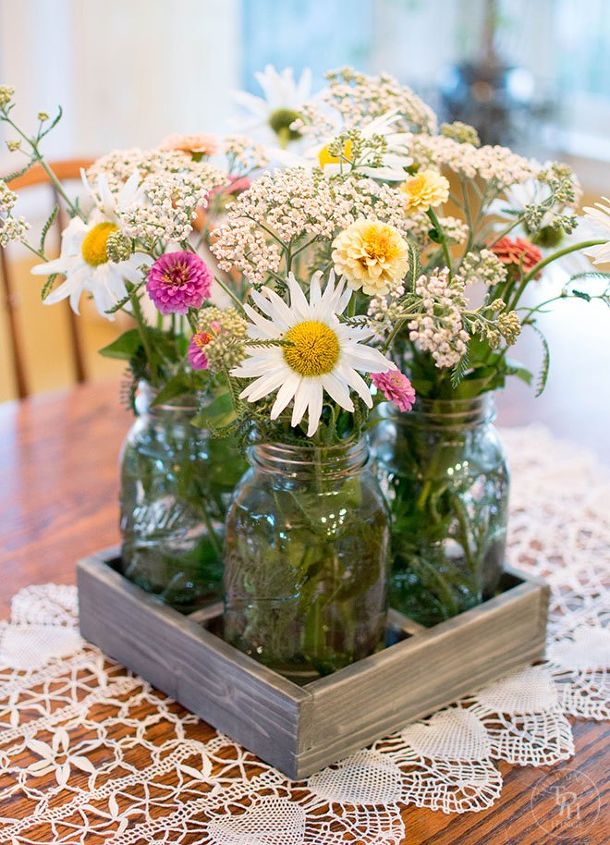
Insert Mason jars, add water and fill with flowers. Enjoy your new beautiful centerpiece!

Want more details about this and other DIY projects? Check out my blog post!
Comments
Join the conversation
2 of 14 comments
-
VERY cute idea!
-
Nicely done


Frequently asked questions
Have a question about this project?