


Craft a Secret Storage Book Box

4 Materials
$2-10
1.5 Hours
Easy
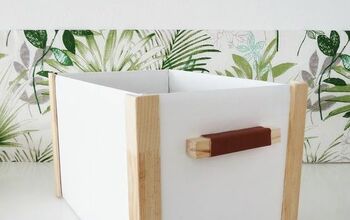
Ever need to hide something on the sly? I created this number to slide among my books incognito with the ability to conceal some treasures. I feel like this secret book compartment is straight out of a movie! This is a super quick and simple project! Just by cutting up some hardcover books and gluing them to a small box, you can have a space for your secret stash, too!
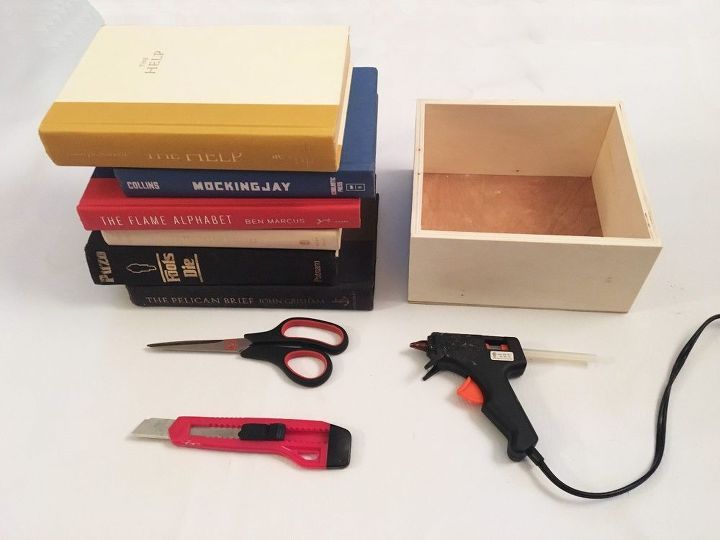
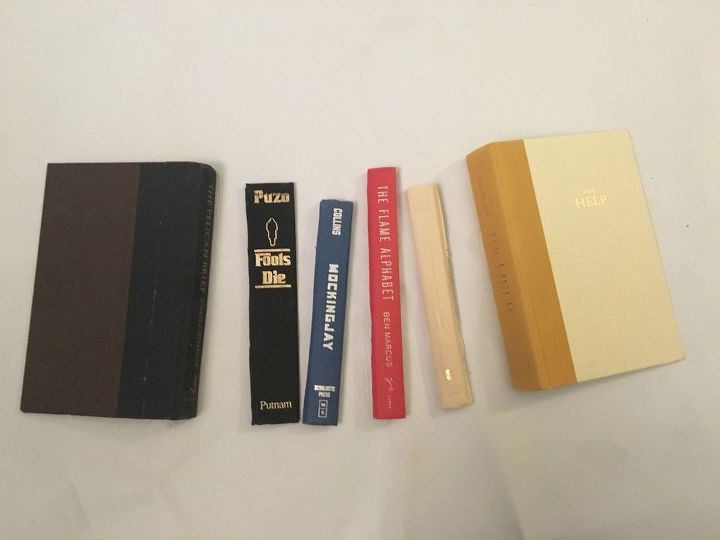
SUPPLIES: -Old Hardcover Books -Small Wooden Box / Crate -Exacto Knife -Scissors -Hot Glue
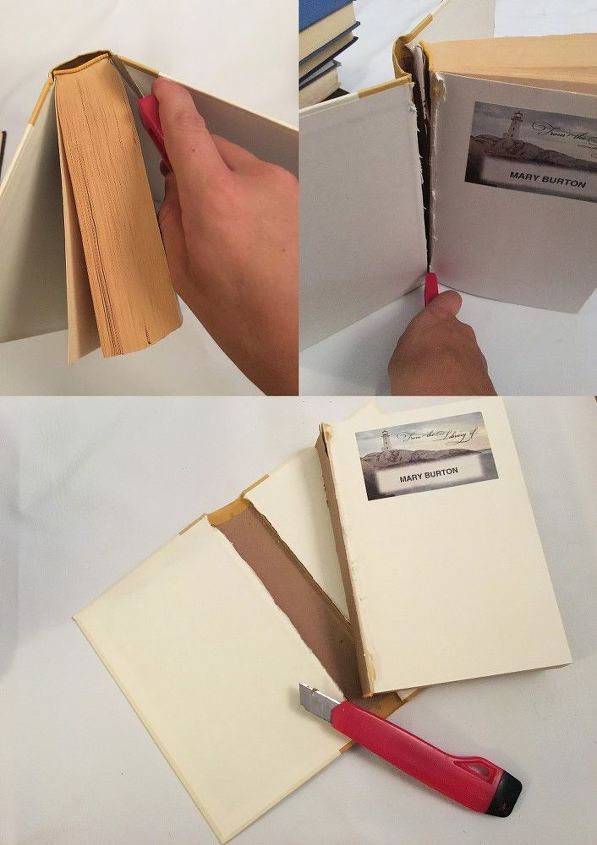
STEP 1: Cut away the book cover Grab your books and cut the pages out of their binding using your exacto knife. You will do this for all of the books you are using. (Be sure to measure your box and book bindings to make sure you have the correct amount and size of book binds to cover the side of your box. The title edges are what you will need to measure)
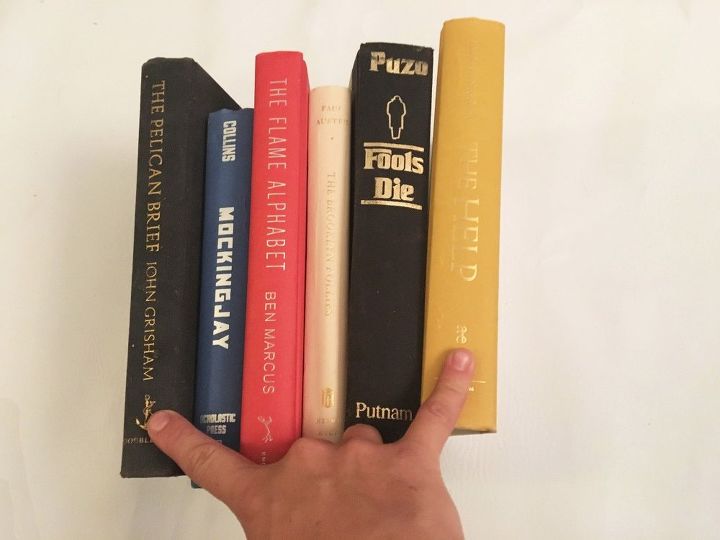
STEP 2: Arrange your covers Line up your empty book covers and decide which you would like to sit on the outer edges. Move these two book covers to the side. (They will have a bit of a different process from the books that will rest in the middle)
STEP 3: Fold middle books and mark For all of your book bindings that rest in the middle you will need to fold the book cover over and mark where the title edge of the binding meets the side cover. (Not sure if that makes sense, but check out the picture and steps below for more detail)
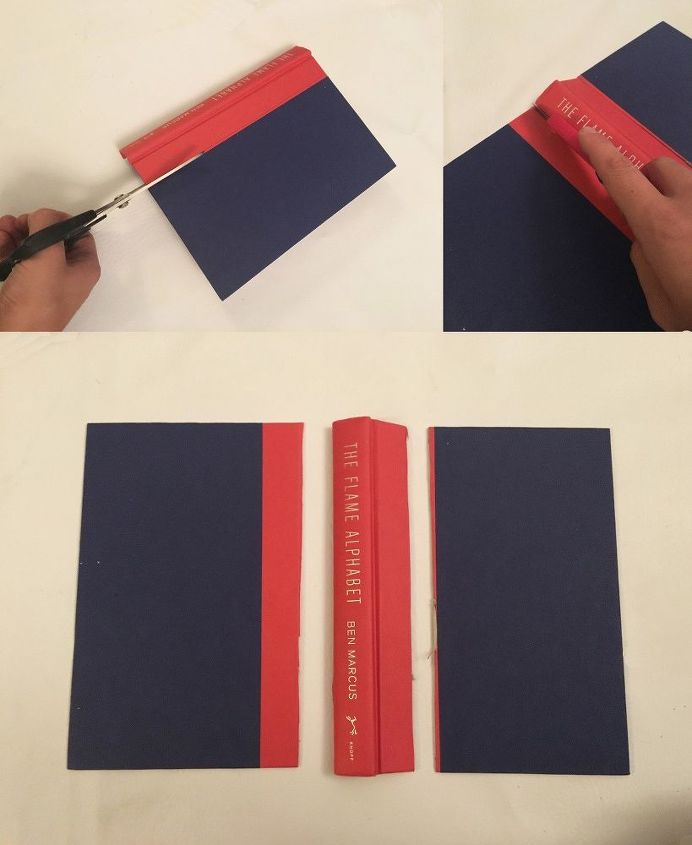
STEP 4: Cut middle books along your marks Slice or cut down the book from the mark that you just made in step 3. This extra book piece that you are leaving attached to the title edge is going to be used to fold over and will be glued down to create a flat surface you can attach to the box while still allowing the title edge to puff out naturally. Cut down on the other side of the title edge without any extra cover attached. Your book should look like the bottom image above when you are done.
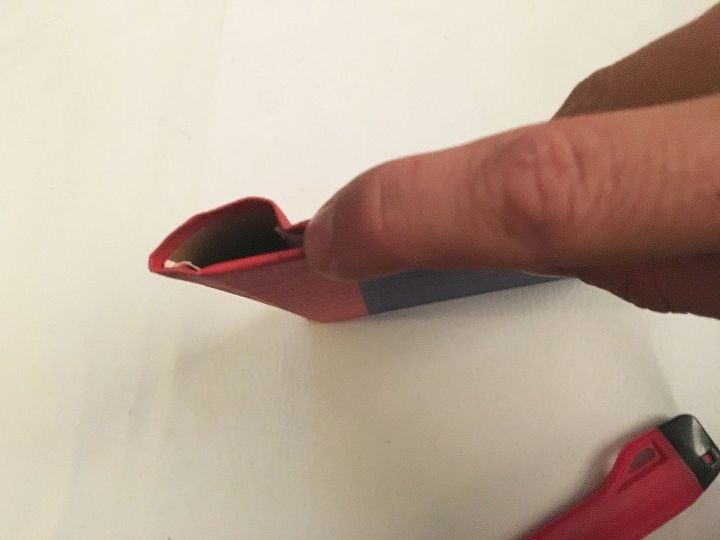
STEP 5: Glue down sides of middle books Take the title edge you just cut out and fold the blank side under the title and glue it in place. Repeat step 3-5 for all the books that will rest in the middle.
STEP 6: Fold and cut one cover side of end books It's time to work on those end books you set aside in step 2. For the books that will rest on the end you will need to leave one cover completely attached. *Be sure to leave one with the left cover and one with the right one so that you have one for each side. You will fold the book over and mark where the title edge meets the cover as you did in step 3 for the middle books and slice down leaving a piece of the cover to be tucked and glued as you did with the middle books as well. (It will look like the picture above)
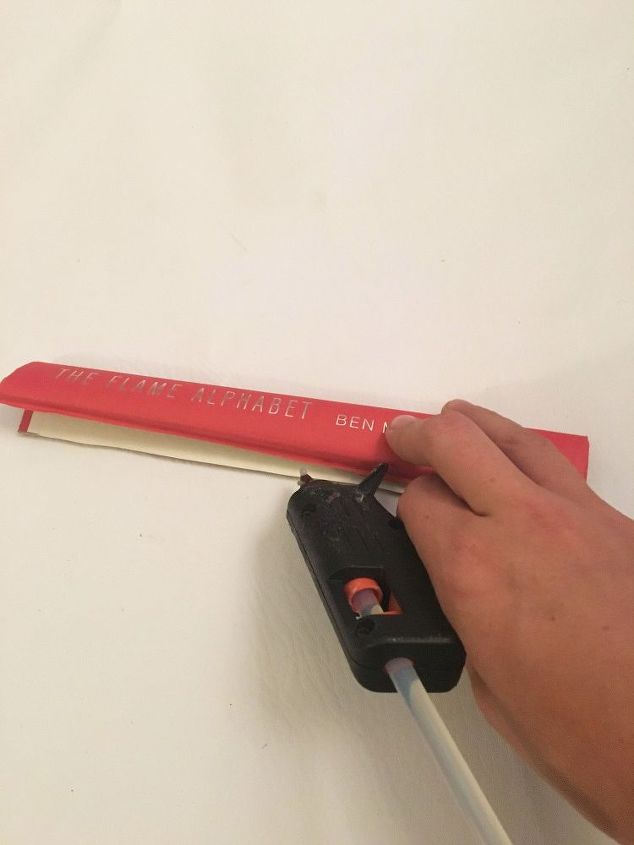
STEP 7: Glue down cut sides of end books Tuck the excess you left behind the title edge and glue it down just as you did with the middle books.
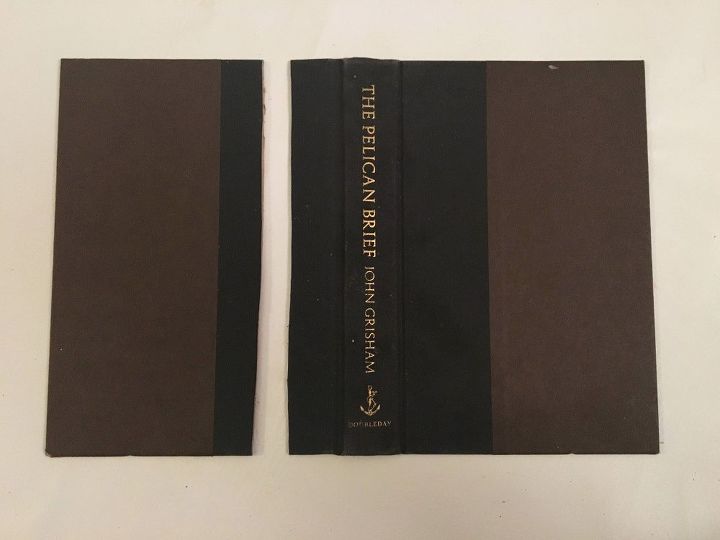
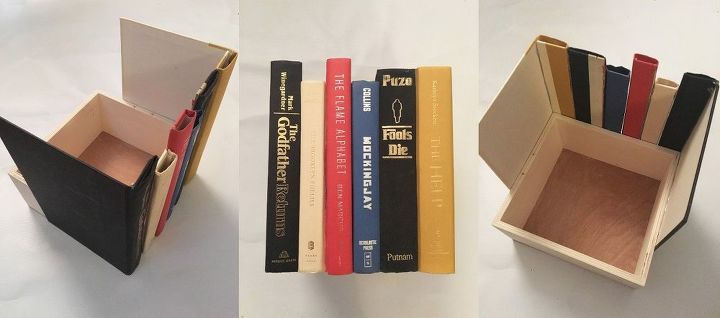
STEP 8: Arrange cut book covers At this point you should have several pieces that look like those above. Arrange the books in the order you wish them to line up.
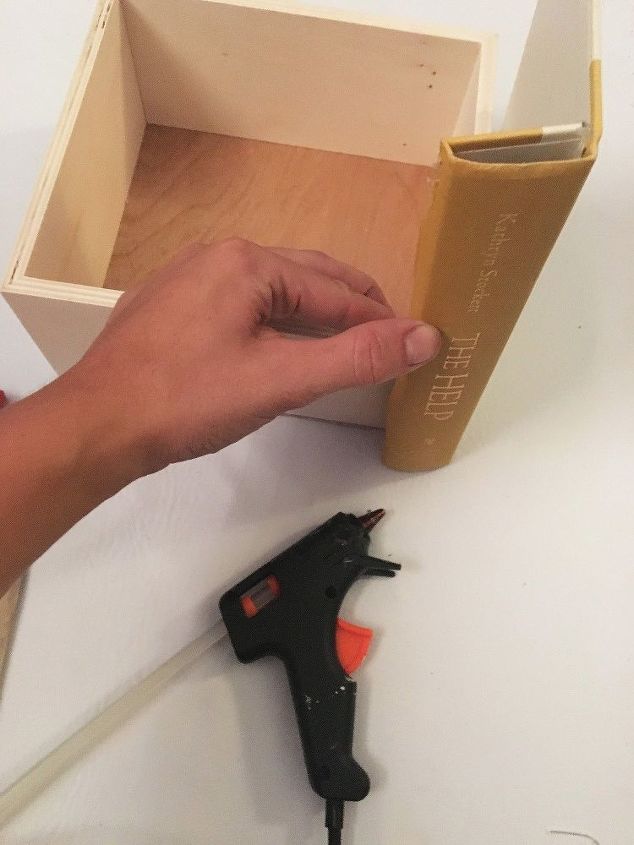
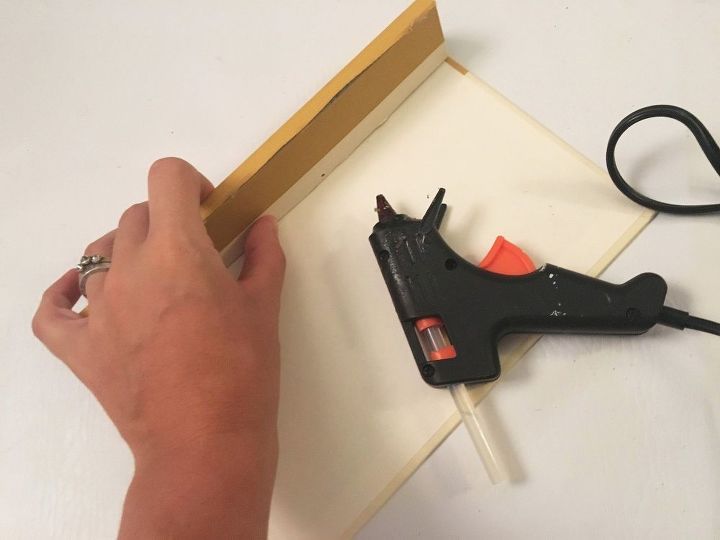
STEP 9: Secure covers to your box Now you will simply glue each of the books to the box in the order you arranged in step 8. Be sure to line the bottoms up evenly. And BAM! That's it!
Now your box is ready to keep some things concealed, be it keys, cash, or even sweets from the kids ;)... or from yourself hehe.
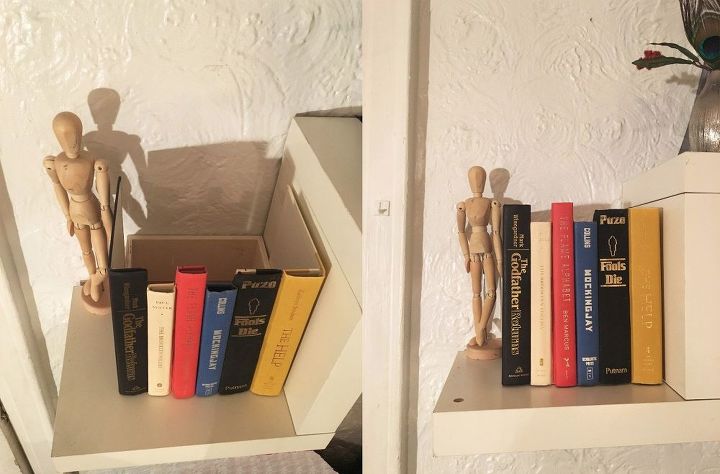
I will probably move this to be among other books, making it an even greater chameleon, but it looks like a stack of books even standing on its own!
I mean, I would certainly go to grab one of these books without a clue!
Comments
Join the conversation
2 of 88 comments
-
Check out your library. Many have damaged books to be recycled that you can use.
-
I love books! There’s so many outdated books though that this is a fitting end to them while serving a purpose. Thrift stores have old wine boxes that would work great here. They also already served their purpose 😁
Great job. It’ll be my next project!


Frequently asked questions
Have a question about this project?