


Removing Kitchen Sink Stains & Preventing Them From Coming Back

I have an old original, yellow, double-sided kitchen sink that has drove me crazy for over 10+ years because it is constantly stained by coffee and food. It recently got to the point of ugliness that makes me perform a deep cleaning on it.
The following is a case study on how I got rid of the stains in the sink and also on the adjacent tile counter top, as well as, how I made sure that this was the LAST time that I would never have to perform that tedious, frustrating deep cleaning process, again!
The first set of photos labeled "After Light Cleaning" show the state of the sink and tile after a normal soap and water wash down. Notice the terrible brown coffee stains in what supposed to be a "Yellow" sink. On top of that, I found crusty hard water deposits under the faucet cover and dishwasher machine drain cap. And, the other problem shown is mildew stains in the adjacent tile grout from have a dishwasher strainer sitting on top of it.
The second set of photos labeled "After Deep Cleaning" show the results of my detailed cleaning efforts. The procedure is listed below.
DEEP-CLEANING PROCEDURE
STEP-1: Remove the Stains
a. I took the suggestions of my friends in this forum and used Barkeeper's Best Friend powder to scrub away most of the stains (sink and on tile and grout).
b. I followed up with a bleach soak of the sinks and on the tile and grout.
STEP-2: Remove Crusty Hard Water Deposits
a. Multiple applications of Lime-Away ®, scrubbing and scraping were required to remove all of the hard water deposits on the faucet & its cover, on the dishwasher overflow valve & cap, and around the rim of the sink.
The third set of photos labeled "After Protective Coating" show the results of after applying Self-Cleen ST3 Coating. The procedure is listed below.
PROTECTIVE COATING PROCEDURE
STEP-3: Apply Protective Coating
a. I applied Self-Cleen ST3 Self-Cleaning Protective Coating to all surfaces: sink, faucet, fixtures, plastic, tile, grout, dish strainer and sink guards. It can be found at SelfCleen.com
Per product instructions:
i. I sprayed on Coating (Part-1)
ii. I sprayed Coating (Part-2) over the top of Coating (Part-1)
iii. I swirled them together with a microfiber cloth (provided)
iv. After 30 seconds, I wiped off the excess coatings with a 2nd microfiber cloth (provided)
The coating's self-cleaning properties last about 6-months, so I have upgraded to a short, easy coating procedure to be performed every 6-months - in place of the constant deep-cleaning battle and stained sink problems.
TIME FRAME
Deep-Cleaning the Sink, Fixtures, Tile and Grout: Over 1.5 hours
Applying Protective Coating: About 15 min.
RESULTS
My kitchen sink, faucet, tile and grout look better than ever. The sink actually has a finish that shines and reflects.
I don't have to worry about stains from coffee or food. The sink finish is protected from scratching from pans, etc.
Cleaning is simple - just wipe-down with a light cleaning solution from now on.
No hard water deposit build-up.
No worries about bacteria, mold or mildew growth.
Life is Good and my Project is DONE!
I look forward to any questions that you may have.
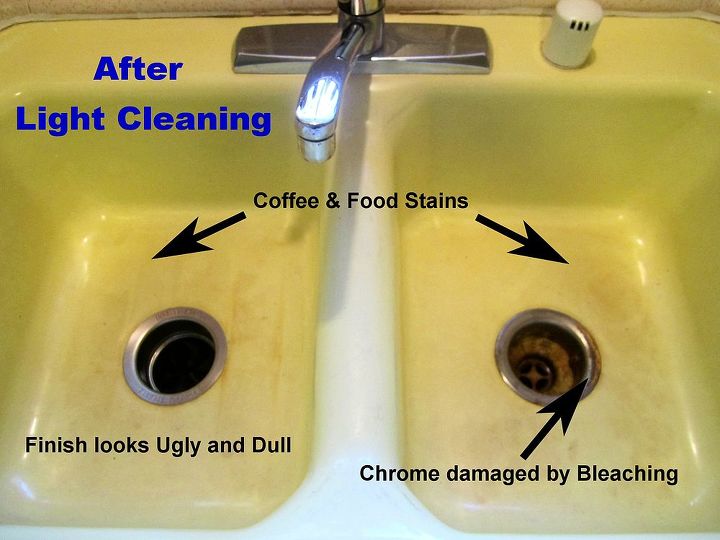
After Light Cleaning: Starting point. Terrible coffee and food stains and the sink finish is ugly and dull. The chrome in the sink has been damaged by bleach soaking the sink so many times.
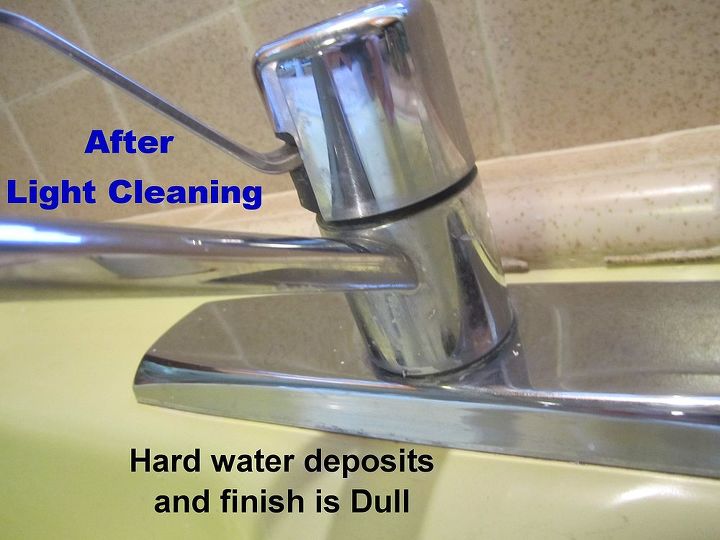
After Light Cleaning:
Faucet has hard water deposits on and around it, as well as, peeking out from under the cover.
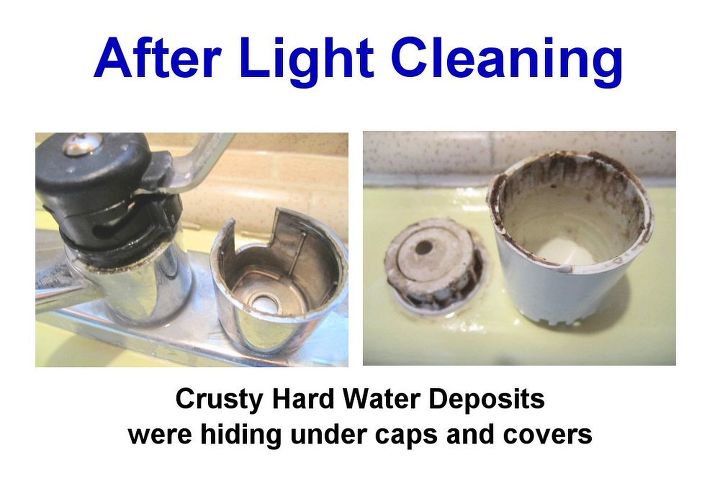
After Light Cleaning:
Yes indeed! As expected - there were crusty hard water deposits under the faucet cover, and as a bonus - I found crusties under the dishwasher machine's overflow cap.
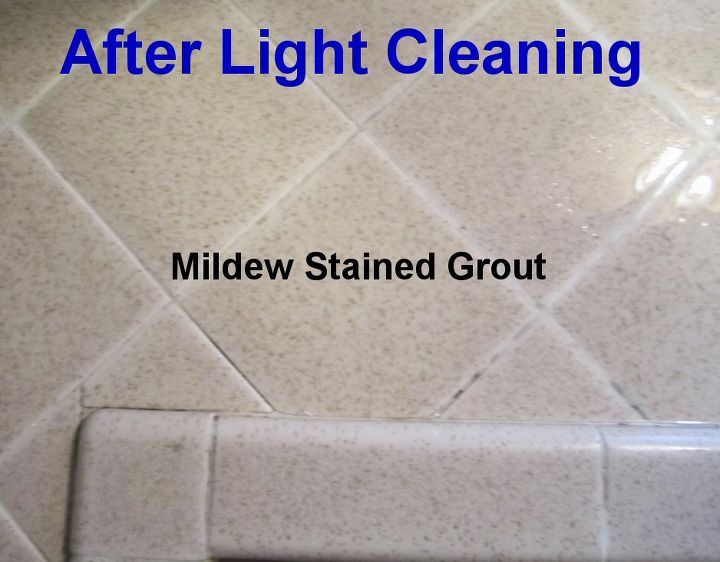
After Light Cleaning:
Mildew stains on the tile grout - adjacent to the sink.
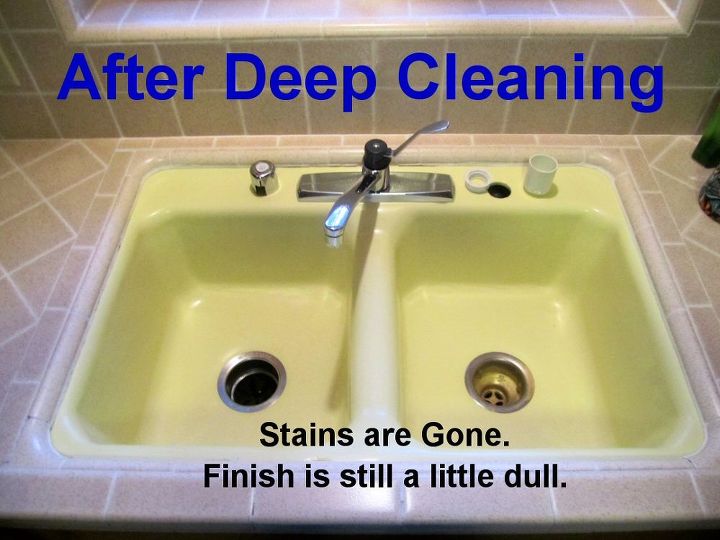
After Deep Cleaning:
1. Scrubbed stains with Barkeeper's Best Friend.
2. Performed a bleach soak on the remaining stains.
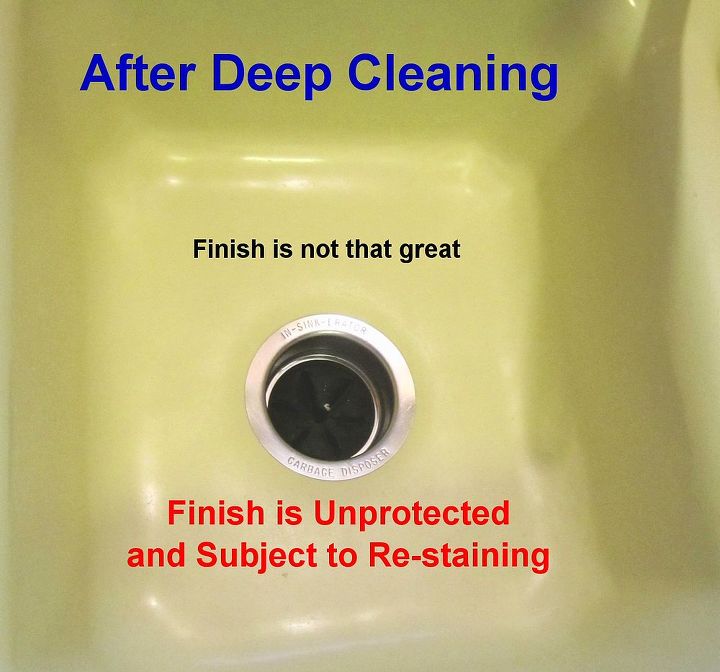
After Deep Cleaning:
The stains were removed but the sink finish has been through many years of abuse, so it doesn't look that great. Worst of all - at this moment it is unprotected and could be immediately re-stained!
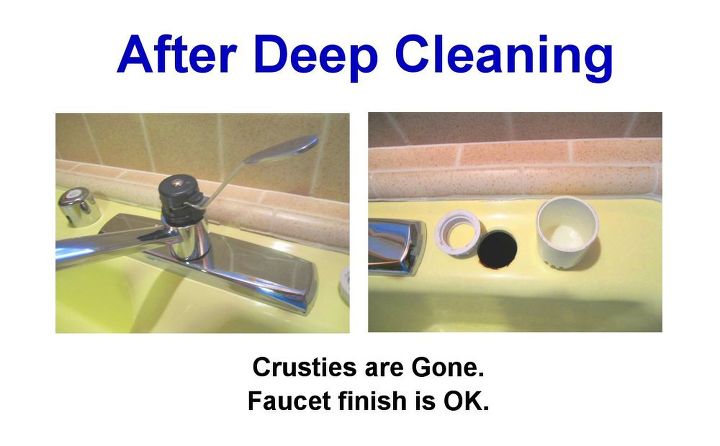
3. Multiple doses of Lime-Away (R) and scrubbing got rid of the crusty hard water deposits.
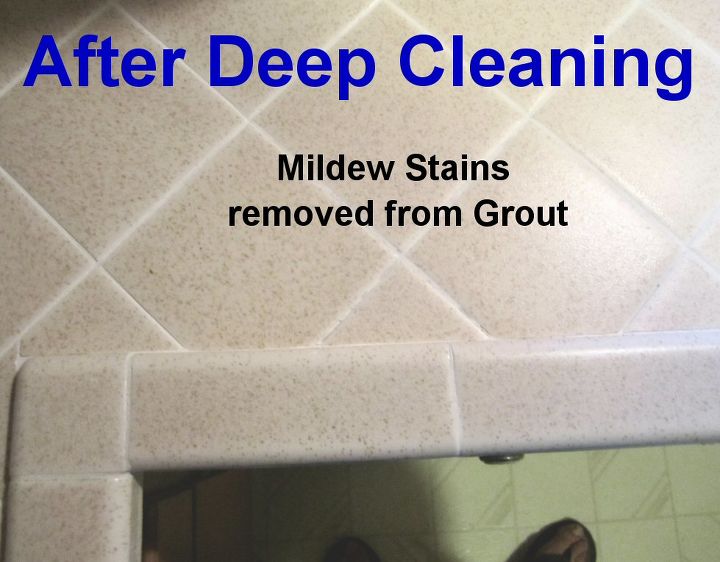
I used the same combo of Barkeeper's Best Friend and Bleach on the adjacent tile and grout to remove the mildew stains.
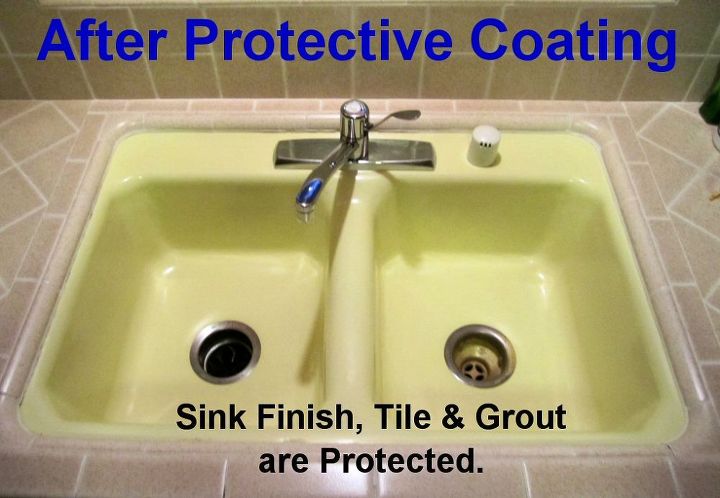
After Protective Coating:
The sink, tile & grout were spray coated with Self-Cleen ST3 Self-Cleaning Coating. They are now protected against staining; and are resistant to bacteria, mold & mildew.
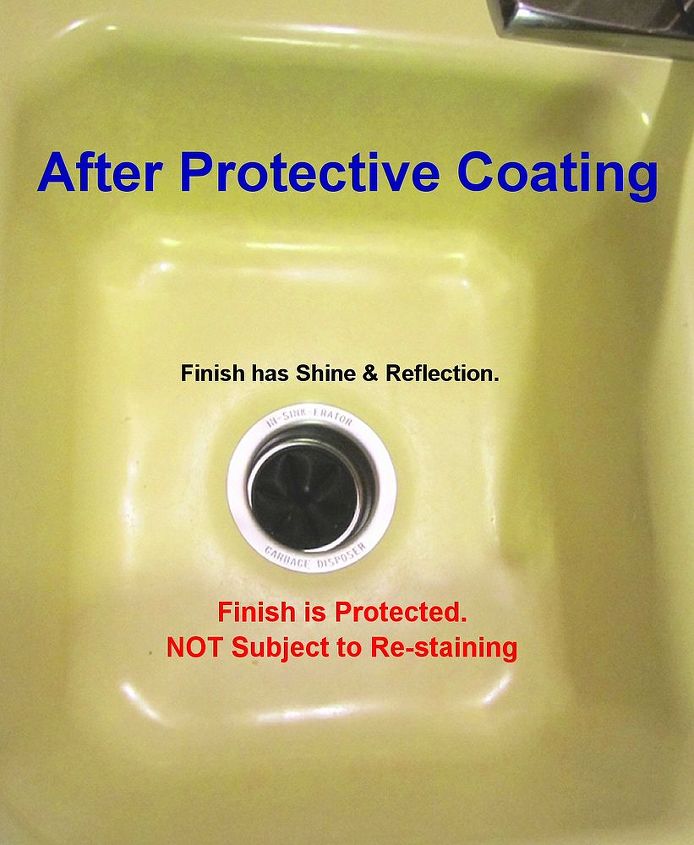
After Protective Coating:
The Self-Cleen ST3 coating gave the sink a new finish that actually shines and reflects, as well as, prevents staining. Coffee - you met your match!
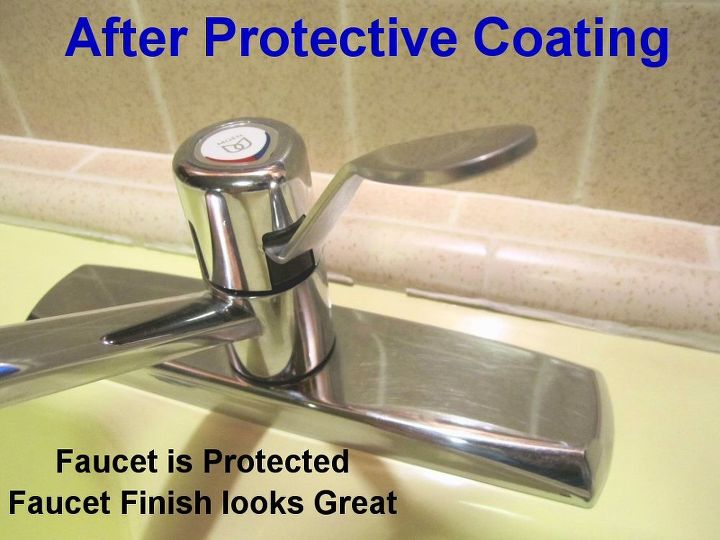
After Protective Coating:
Self-Cleen ST3 coating on the faucet added a new shine and protects it against hard water deposit build-up. It also resists the growth of bacteria, mold and mildew.
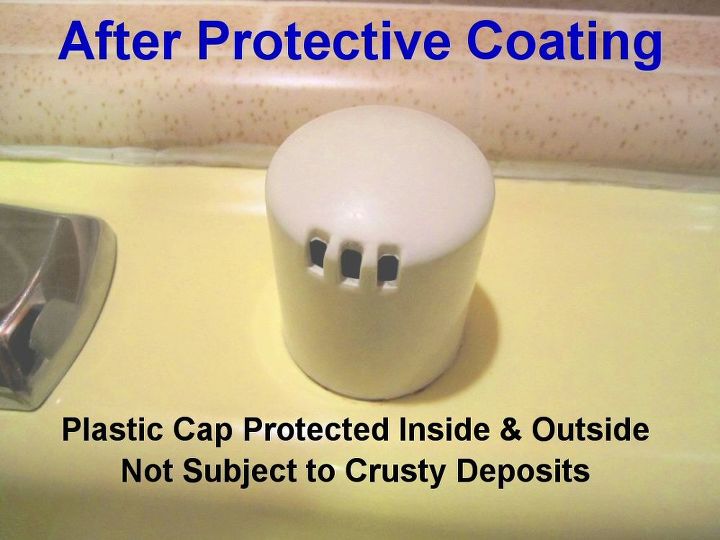
After Protective Coating:
I coated the inside and outside of the dishwasher overflow cap with Self-Cleen ST3 to protect if from hard water, mold & mildew.
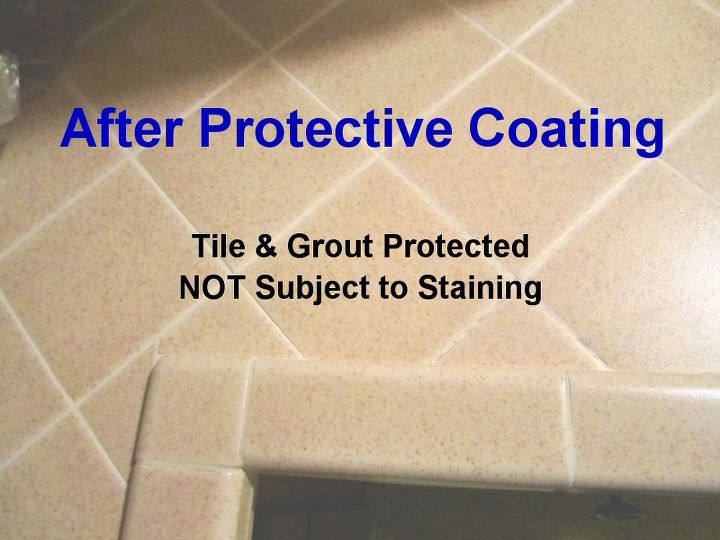
After Protective Coating:
The adjacent tile and grout were sealed and protected with Self-Cleen ST3. They are protected against mildew, staining, and bacteria growth.
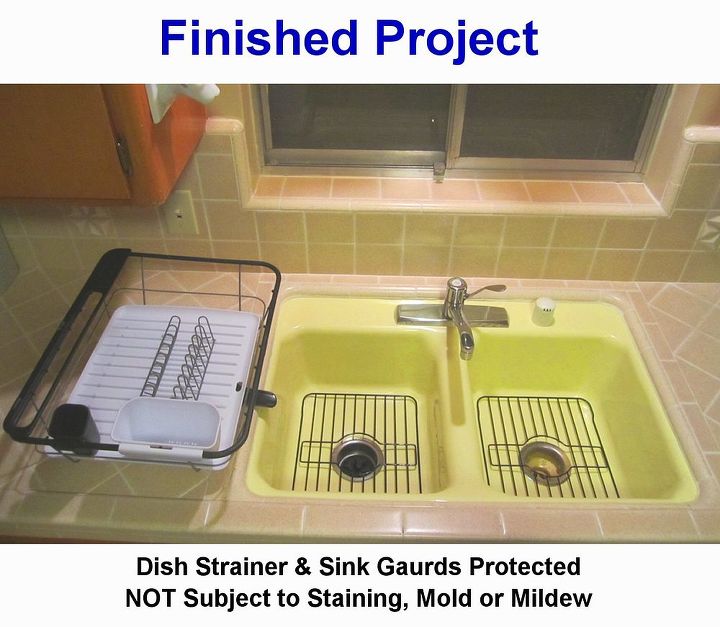
After Protective Coating:
I coated the NEW dish strainer and sink gaurds with Self-Cleen ST3 to resist bacteria, mold and mildew grow - as well as staining. I Love my kitchen sink again!
Comments
Join the conversation
2 of 12 comments
-
Why beekeepers best friend as opposed to regular scowering powder cleansers
This is an awesome share! Just moved into my house and have a white sink that I have to scrub forever to look clean
-
I had the water coming back up problem and found it very disappointing. After researching some tutorials I solved it successfully and shared my experience in this article https://sinkformula.com/water-coming-back-up-kitchen-sink/


Frequently asked questions
Have a question about this project?
Where did you purchase the dish drainer and sink racks