


Trash Can Tilt Cabinet

12 Materials
$20-30
2 Hours
Medium
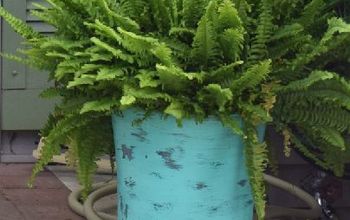
Don't you love free stuff? I know I do! What I love even more is when I get free stuff from someone else that I can turn into something unique and functional for my household. This project is just that! My mother-in-law gave me this little cabinet she had purchased from TJMaxx several years ago and no longer needed. It definitely needed a major facelift, but I never got around to it, so I threw a pile of books in it, a lamp on top and it sat in our living room for a year or better until this week when I decided it needed it's long-awaited overhaul. I absolutely love how this came out -- it's not perfect, but it now serves an everyday purpose: holding my scrap vinyl (Rob and I have a small apparel business and I have a small decor & gift business where I/we use vinyl). This little cabinet fits perfectly against my new work station, and I'm so happy with it!
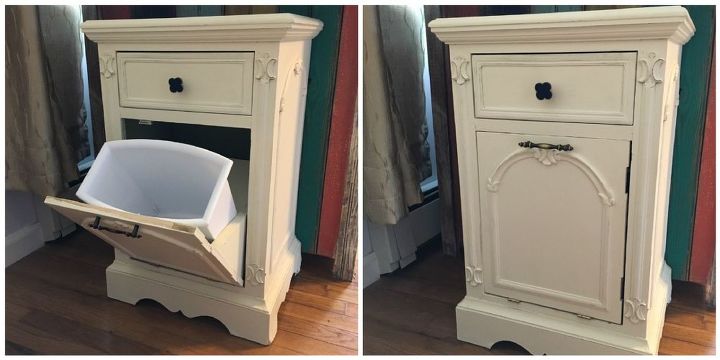
Isn't it cute?! The only thing I might add is velcro on the bottom of the trash can because it tends to fall over when it's empty and the door is closed -- this way it will stay put when it's opened or closed but can still be removed if need be.
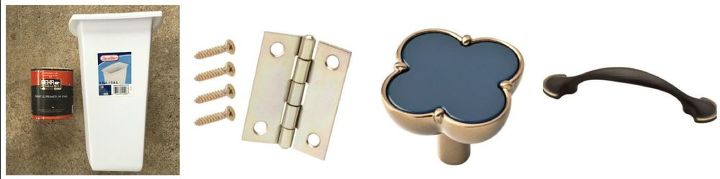
Supplies:
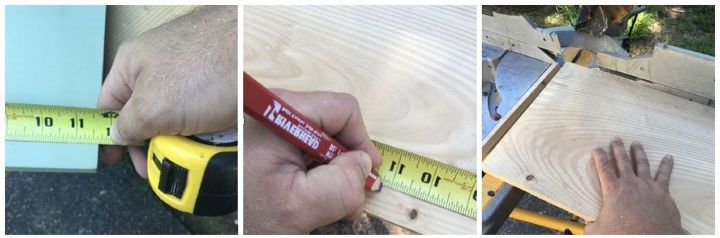
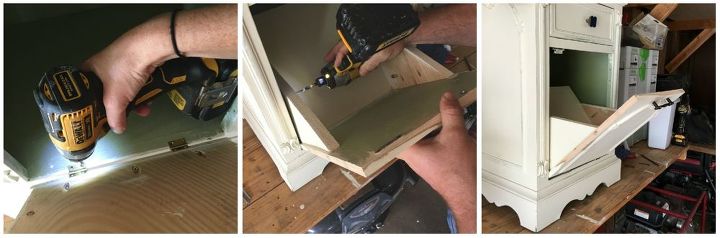
STEP 1: Make a base
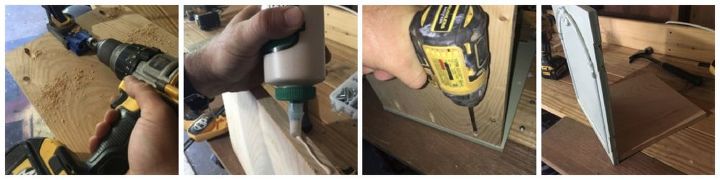
Next, he fastened the board he cut to the door to form the base that the trash can would sit on. He used wood glue and pocket hole screws to do this. He recommends buying a Kreg jig for this type of work -- it is easy to use and comes with instructions and some basic hardware to get started. You could also use trim nails if you don’t mind filling and sanding the nails holes later on.
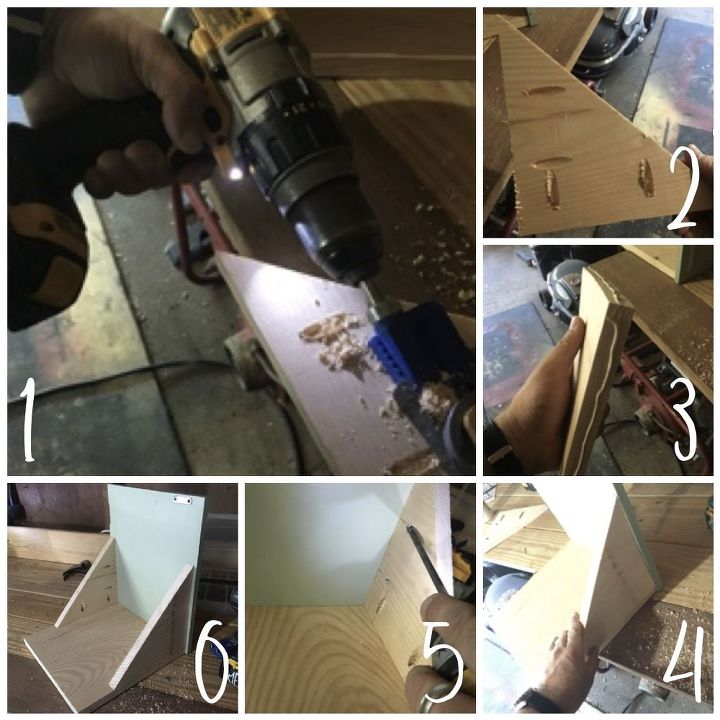
Then Rob added the triangle pieces. Once he added them, he let everything sit overnight to ensure the glue cured properly and got a good bond.
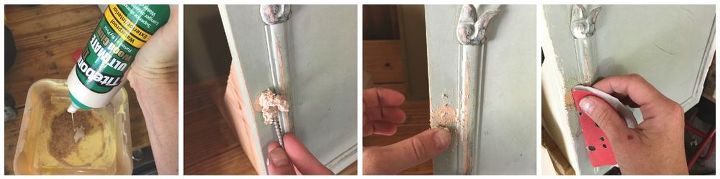
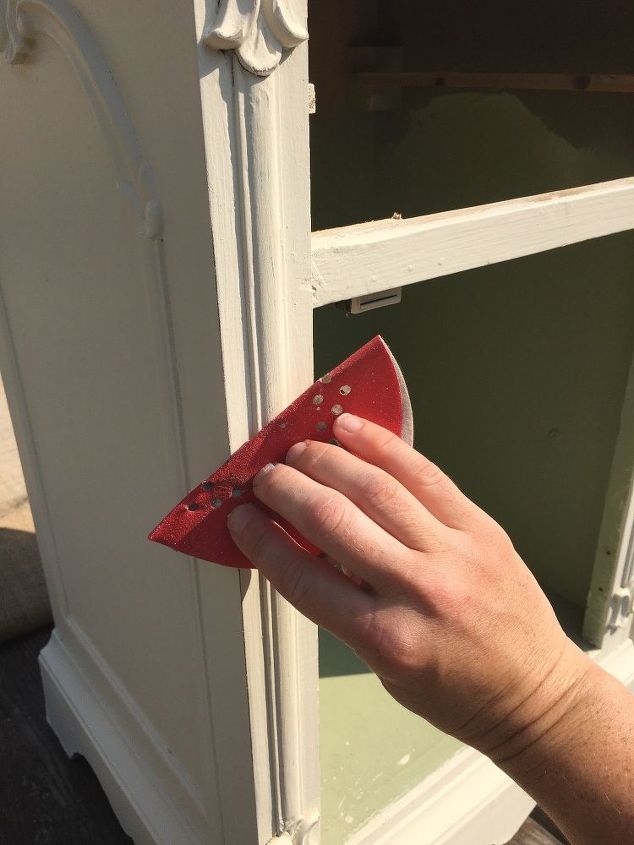
STEP 2: Fill holes
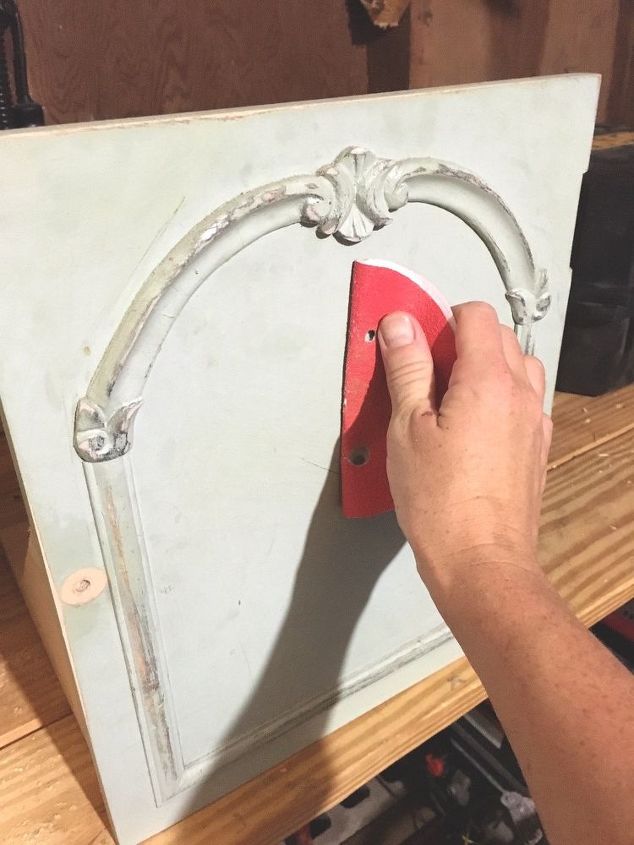
STEP 3: Prep cabinet for paint
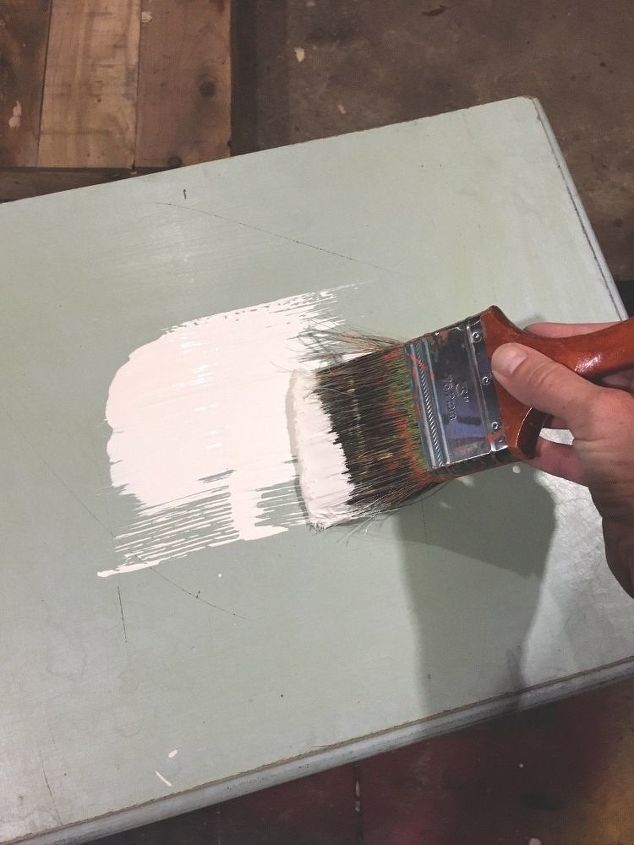
STEP 4: Paint
STEP 5: Distress
STEP 6: Attach hardware and cabinet stop
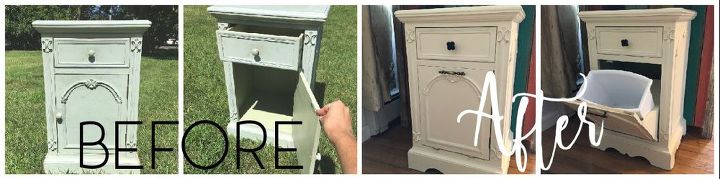
What a difference huh?! I feel like this little gem looks like a totally new cabinet. I'm excited to start using it...now to figure out how to keep Bo out of it! :)
Resources for this project:
See all materials


Any price and availability information displayed on [relevant Amazon Site(s), as applicable] at the time of purchase will apply to the purchase of this product.
Hometalk may collect a small share of sales from the links on this page.More info
Comments
Join the conversation
2 of 93 comments
-
eye bolts or cup hooks attached to the back side of the door to attach the ends of a bungee cord looped around the basket ought to keep it in place.
-
Rather than make a piece for bottom of cabinet, which it already had, I would have put on bottom hinges but would have screwed the new handle through the garbage can and it would never move. Just another idea....


Frequently asked questions
Have a question about this project?
What changes did you make other than changing out the hardware and painting it a different color.
hmmmm. Rather than adding another piece of furniture that will be in my way... I think I'll adapt an inconvenient underused cabinet that's already in my kitchen and redo the hinges on the bottom for Recycle bottles etc. I think I'll put a magnetic snap on the top, not velcro. Whatcha think?
I have an area where a built in dish washer was. I'm thinking of using it and adding a glide system for my Pots and pans and lids.it will accomplish two projects in one hole I can get cabinet doors to match my other doors. Does it sound like a good idea?