


How To Create A Dry Brush Finish
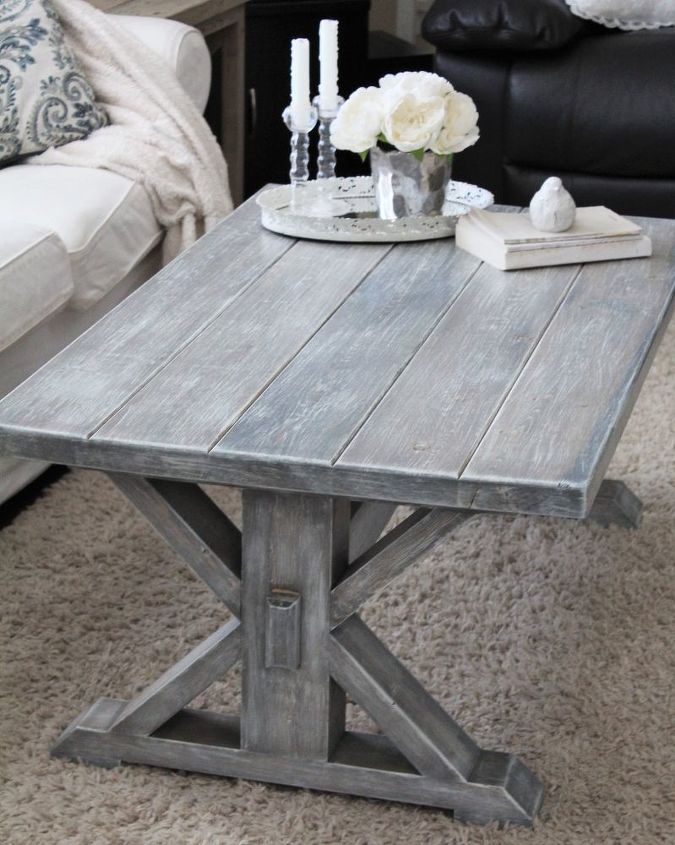
Hi there! I'm so excited to share with you how to create a dry brush finish. I absolutely love it on my coffee table, and feel like it would be perfect in a cottage by the sea. If only that's where mine was....but it never hurts to dream right?!
Now don't worry this finish is super easy to do. It just takes some patience, and maybe a little practice before you try it on your main piece. It definitely took me a few tries of doing it before I was actually happy with the result!
Now don't worry this finish is super easy to do. It just takes some patience, and maybe a little practice before you try it on your main piece. It definitely took me a few tries of doing it before I was actually happy with the result!
Your first step is going to be cleaning your piece to remove any debris or dust particles. Then you will coat your entire piece with stain.
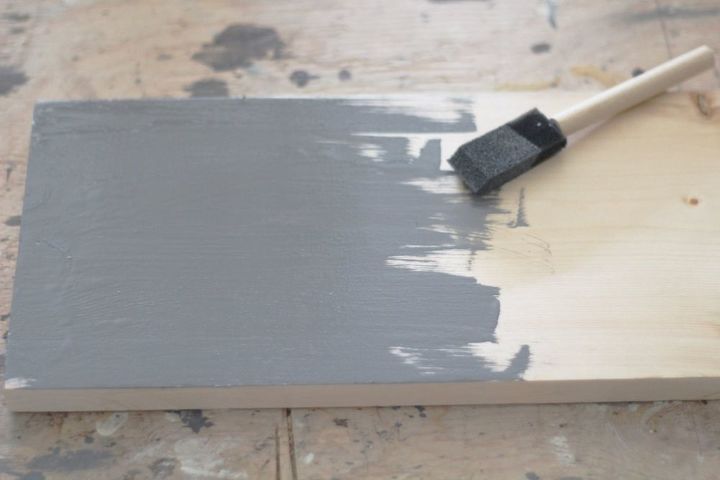
After your piece is dry you can move on to the dry brushing part! To do this you take a paintbrush, and dip it lightly into the paint. Then wipe off all the excess so it's almost dry, and lightly graze over the surface of your piece.

After a few coats of this you are done and can enjoy your beautiful new piece of furniture! For complete instructions on this process visit Elegance & Peonies.

Want more details about this and other DIY projects? Check out my blog post!


Frequently asked questions
Have a question about this project?
What kind of stain did you use?
Can I use stain to make chalk paint? Or just regular paint?