


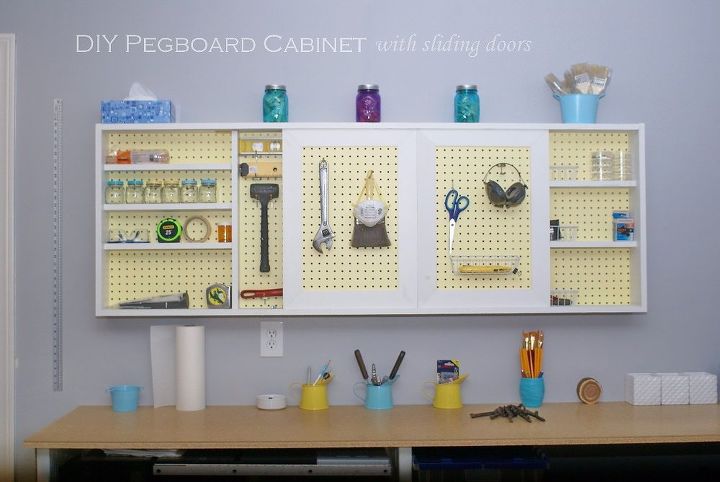
DIY Garage Wall Cabinet With Sliding Door

by
Maria
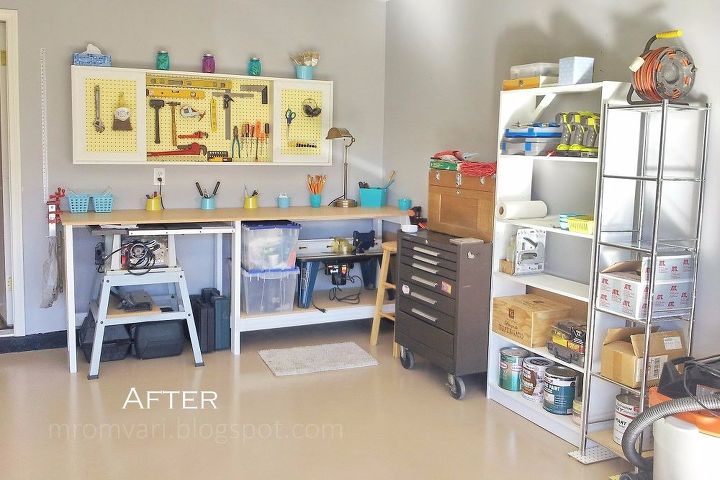
My garage needed some TLC . I wanted a bench and a wall cabinet to store "stuff". This is what me and hubby came up with.
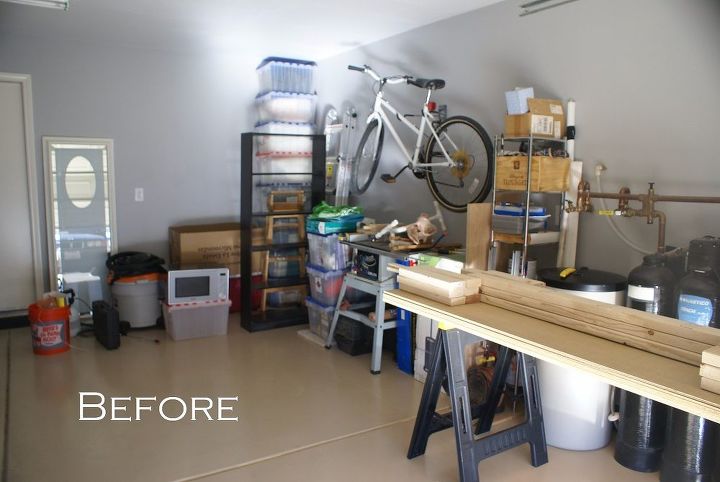
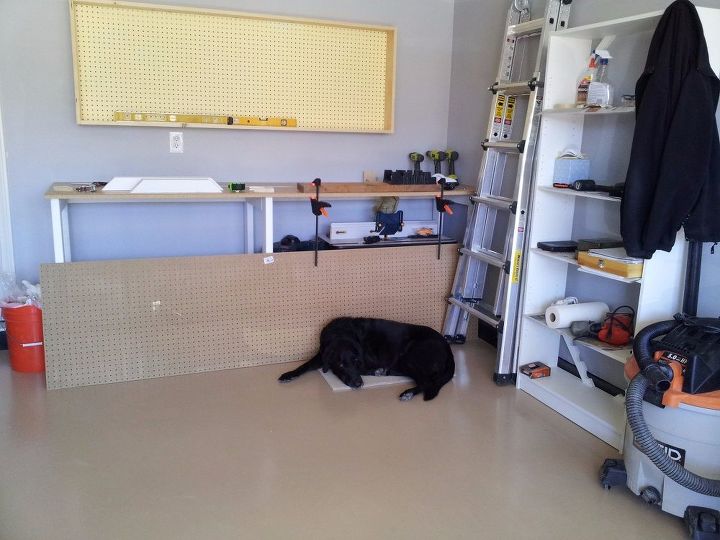
Okay, so below you can see the before picture. How could I do my projects here? Ugh... I painted the garage but I still had no bench or usable shelf for small stuff.
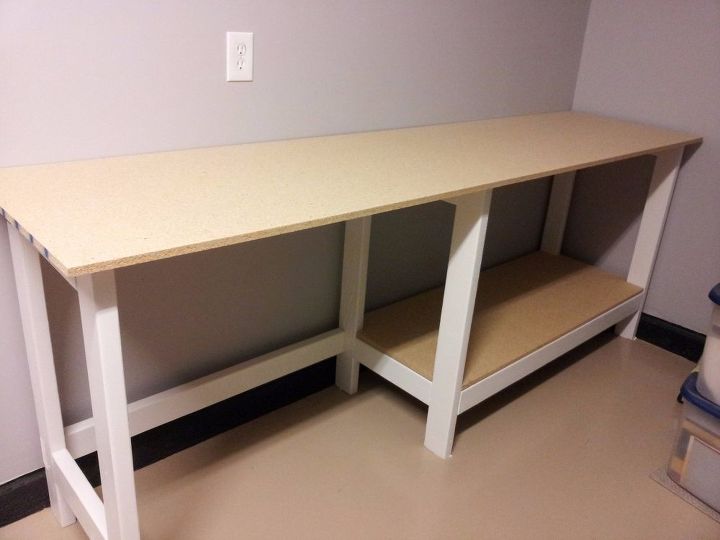
We built a workbench. The process of this is not part of the post, sorry. I am trying to show the cabinet on the wall. (This bench was built from 2x4's)
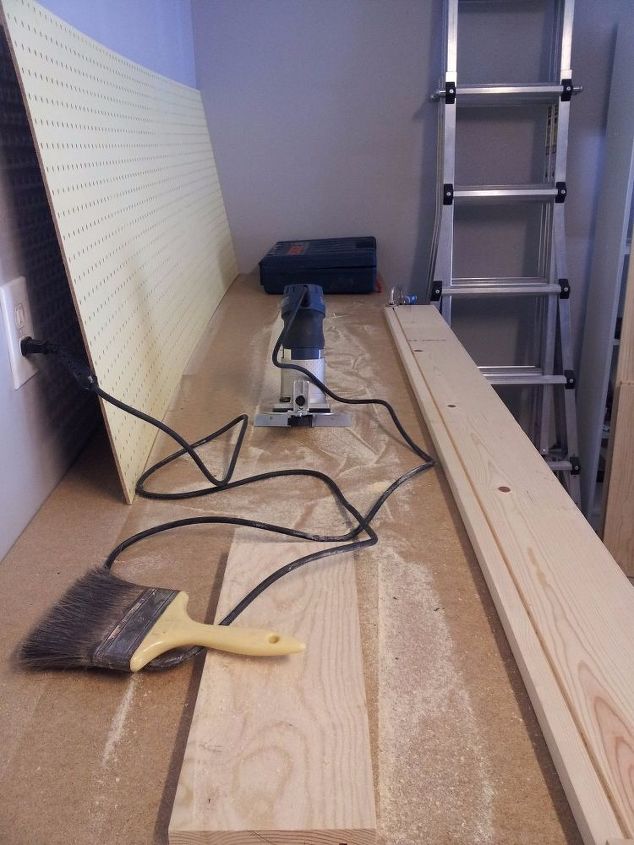
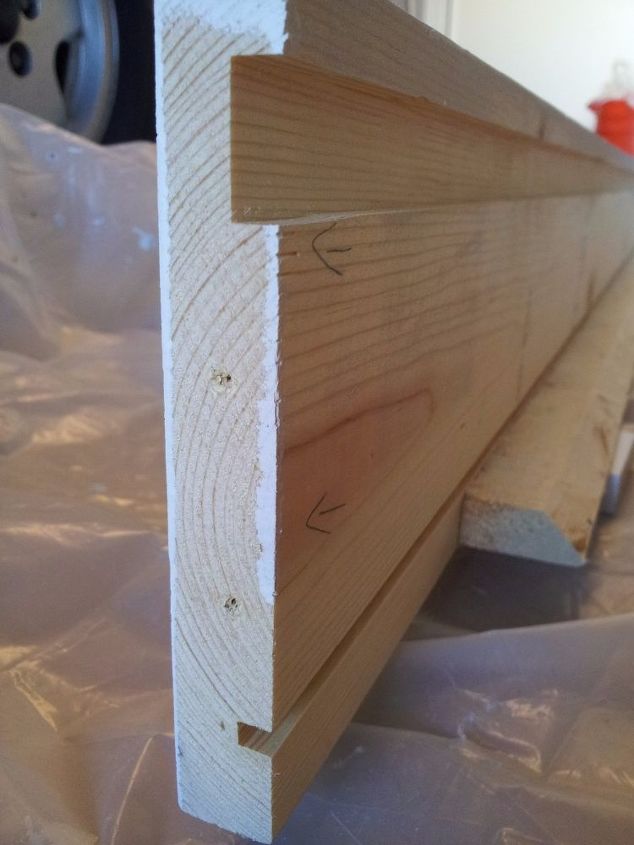
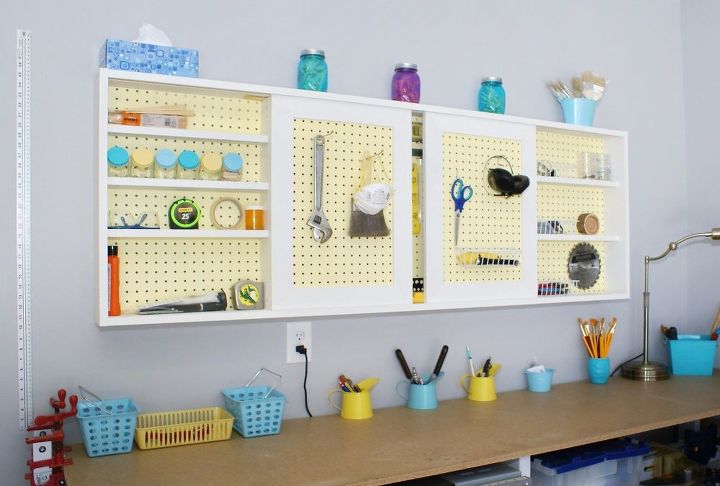
So onto the cabinet. The frame is made of 1x6 pine boards from Home Depot.
The pegboard is sitting in a 1/4" groove that I cut out using my palm router 3/4 inch into the board. I did the same on the sides, I used the Kreg jig to join the bottom to the 2 sides then slid in the painted pegboard to see if it fits. It was perfect.
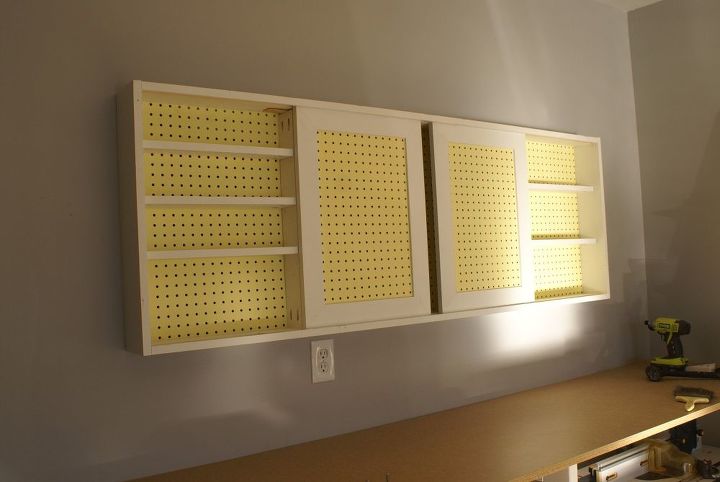
We mounted the frame to the wall using french cleat.
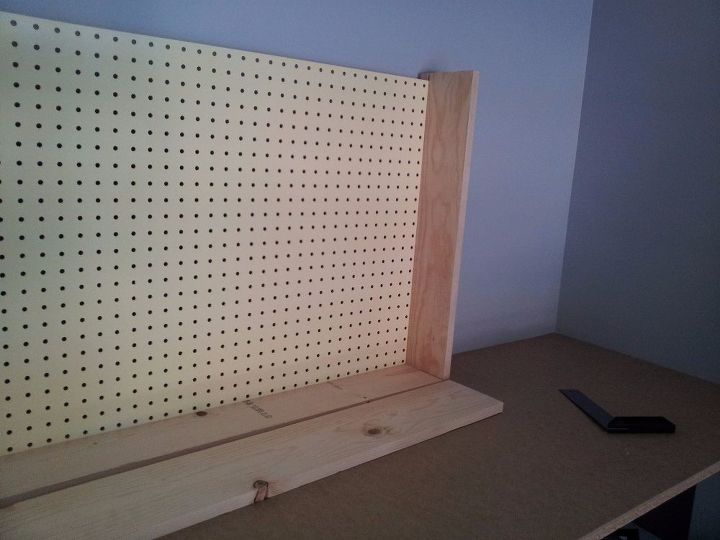
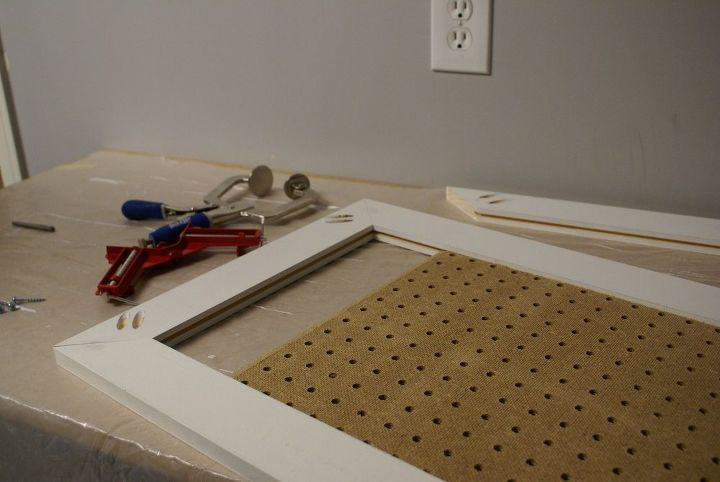
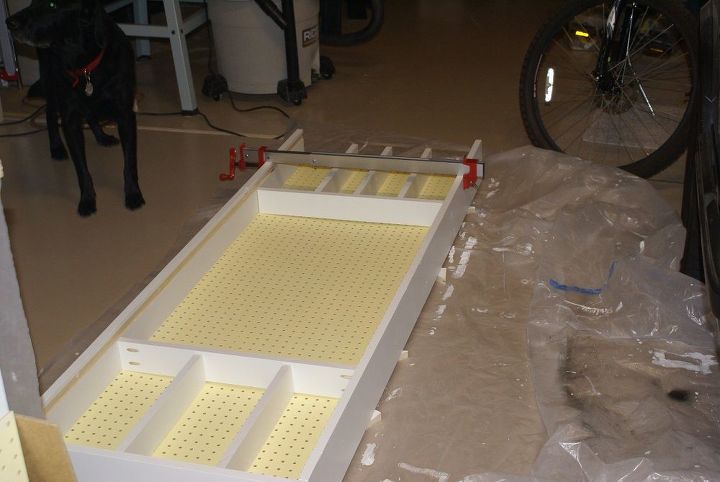
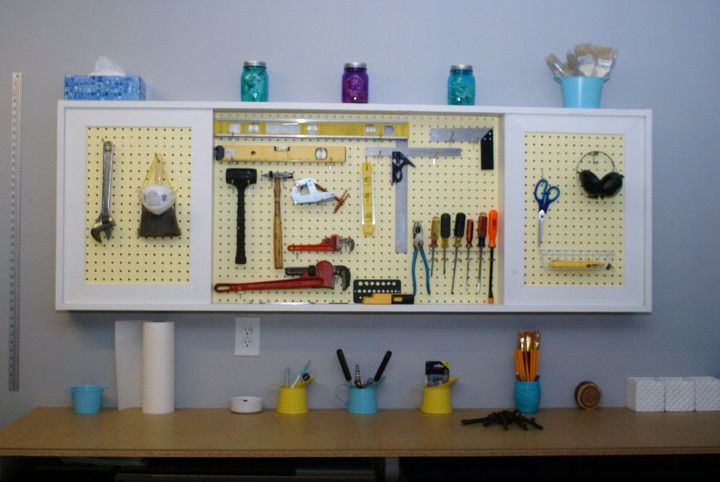
Now the doors. First of all, the doors needed a frame, so I calculated the sizes. Khm... The doors are 1/4" bigger than the inside of the cabinet frame, you will see why in a minute. We bought 1x3 primed pine for the door frames. I used the same "groove method" to hold the pegboards within the door frame. This time I cut the 1/4" using the table saw. You can see how I slid the pegboard into the frame having 3 sides assembled:
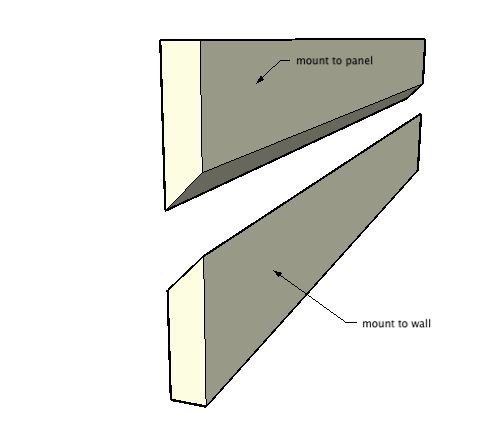
Now the doors are held in the cabinet buy the same type of groove method. Using my router I cut out a 1/8" deep "track" on the bottom board and a 1/4" track on the top board. This way installing the doors is easy-peasy. First insert the top of the door into the track, lift it up all the way (remember the frame is 1/4" bigger), insert bottom (now it fits) and let it down into the bottom groove. As the door is bigger than the frame, 1/8 inch of it is held in the bottom sliding groove and 1/8 inch is held in the top groove.
We also used 1x3 inch pine for the shelves. I disassembled the whole thing and primed + painted every piece, then when it dried, I assembled it again. Secured everything with kreg joints. I used a candle to wax the sliding grooves to make the doors glide easier.
Then hung it on the wall, inserted the doors and tadaaa, my doors are not the right size, hahahaha. When pulled to the side, they cover the shelf area perfect, but when slid into the middle... pfff... there is a 2 inch gap. Oh well :)
Then I ran to the dollar store and bought a bunch of containers, I got some cans of spray paint at Home Depot and painted the container pieces. All whats left was to place the tools and decoration to place.
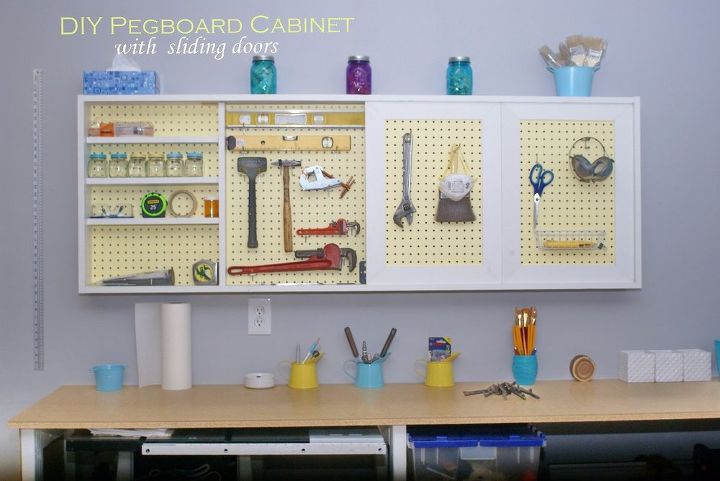
Hope you guys enjoyed this project :) I totally LOVE this cabinet :) And the garage is a much better space now :)
Comments
Join the conversation
2 of 58 comments
-
You got it girl.....this is so neat, clean and organized......it looks like a kitchen....well almost...ENJOY!!

-
Nice post, Thanks a lot.


Frequently asked questions
Have a question about this project?
What is the brand and name of the yellow paint you used on the pegboard please? My house inside and out is yellow and needs to be repainted.
Thanks! Great project!