


Kitchen Transformation for $1300
Find out how I turned an outdated 50s bungalow kitchen into this modern space for less than $1300 as part of my flip house project.
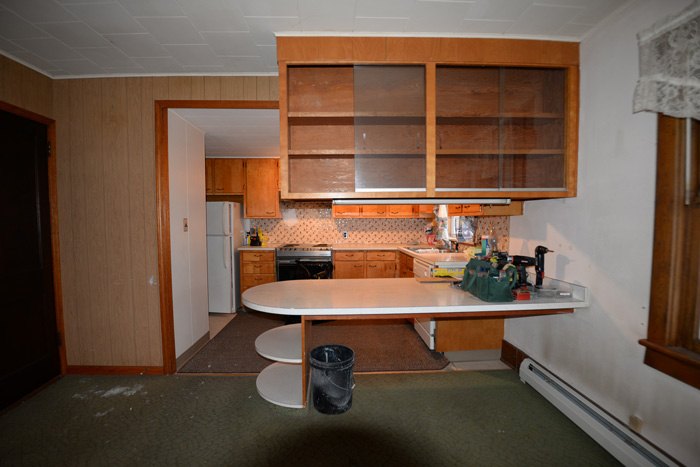
Below are some of the before pics, so you can get a sense of what I started with:
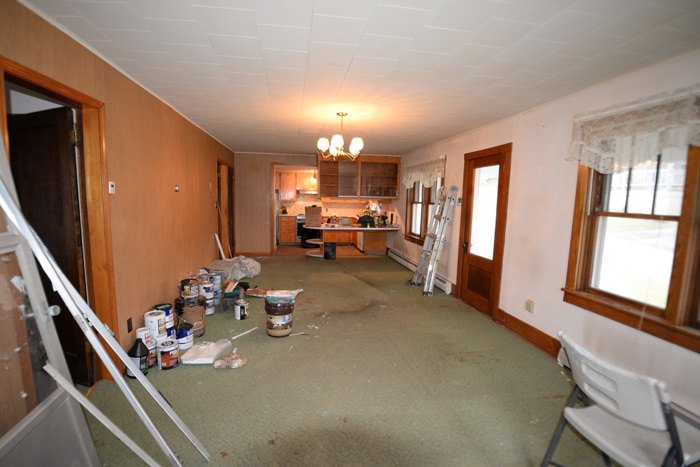
Before
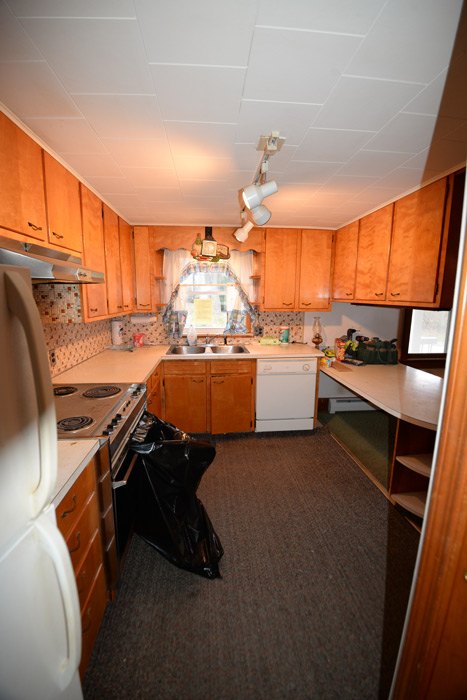
Before
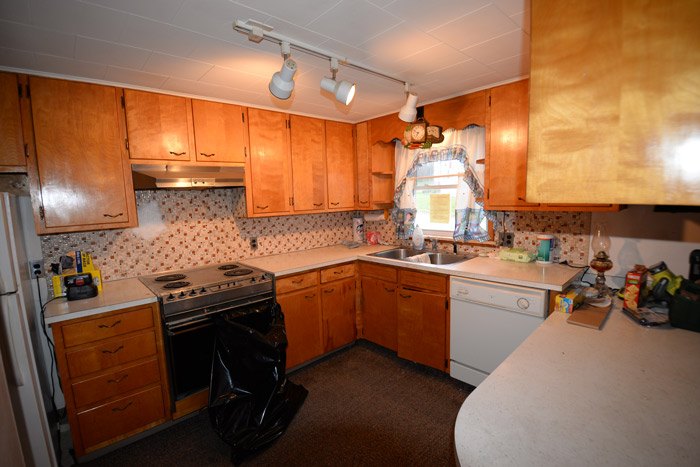
Before
During
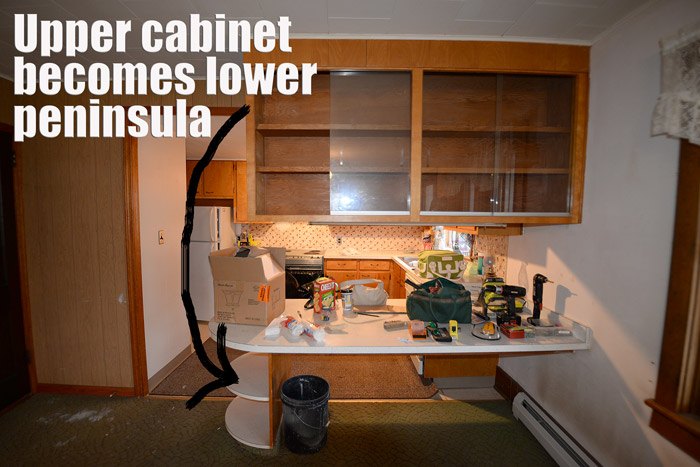
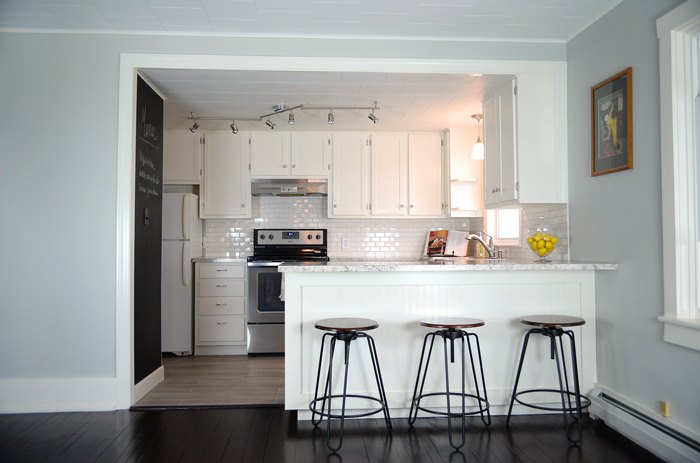
I am so proud of my “brilliant” idea to drop the upper cabinet and turn it into a peninsula. My husband and dad got to execute that “brilliance,” which I’m sure they were thrilled about. 😉 It was heavy! After the drop, we had to carefully patch the ceiling tiles where the upper cabinets were removed and add a toe kick to the “new” peninsula, raising it off the floor to proper height. What was supposed to be an easy project was maybe not so easy. But in the end it was perfection.
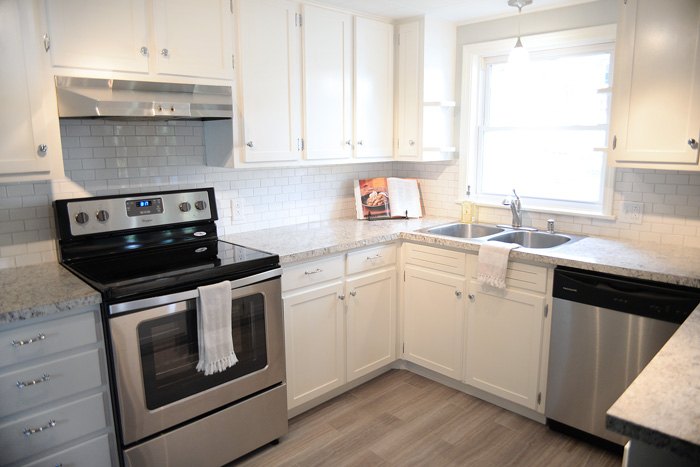
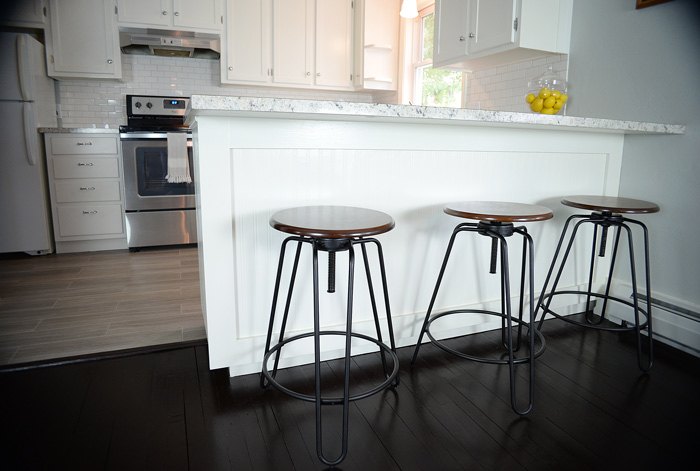
Look at the kitchen now! Here's the CliffsNotes version of what we did. I kept the original cabinets, doors and drawers, because they were in great shape. I refinished them using the Rust-Oleum® Cabinet Transformations® light kit in the Pure White (unglazed) color. I also kept the original sink, but I added a new faucet.
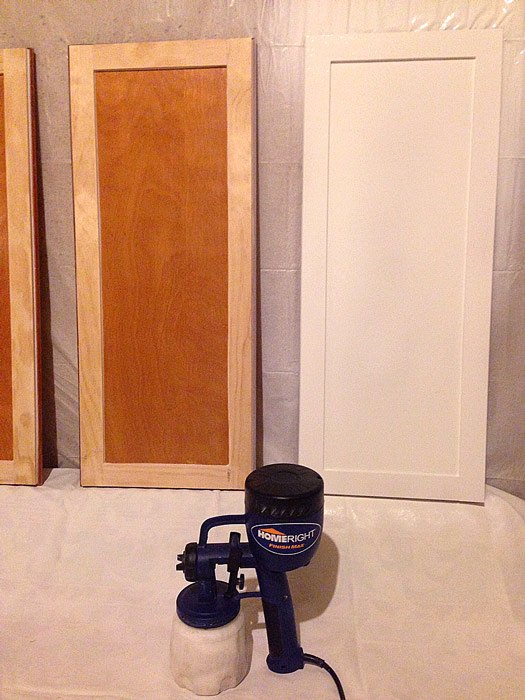
I started by scrubbing the doors and drawers with the deglosser that comes in the transformations kit. Then I added some lattice molding to the edge of the doors (not the drawers) to give the doors more of an upscale, modern feel. The lattice was attached with Liquid Nails® adhesive, then clamped until the glue dried. I used caulk around the edges of the lattice to fill any holes and cracks. After that dried, it was time to add paint.

I also replaced the cabinet hardware with shiny new chrome pieces I got at Lowe’s and online.
My dad installed new Formica brand laminate from Lowe’s to the countertops. I chose the Ouro Romano color.
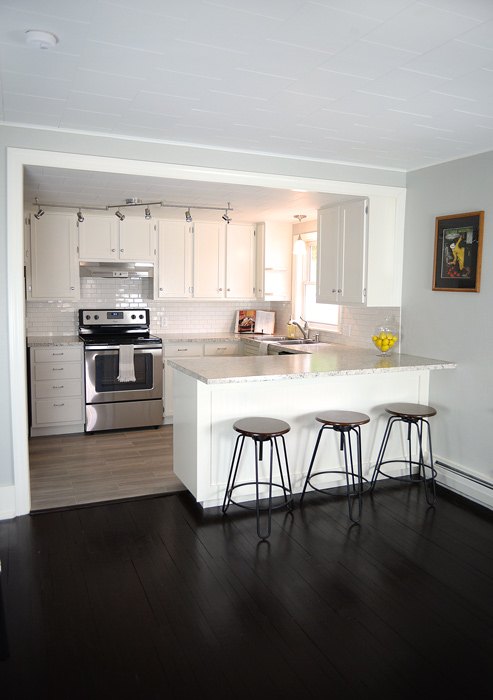
I purchased new stainless steel appliances (the white fridge came with the house) and added new, modern track lighting and a pendant light above the sink.
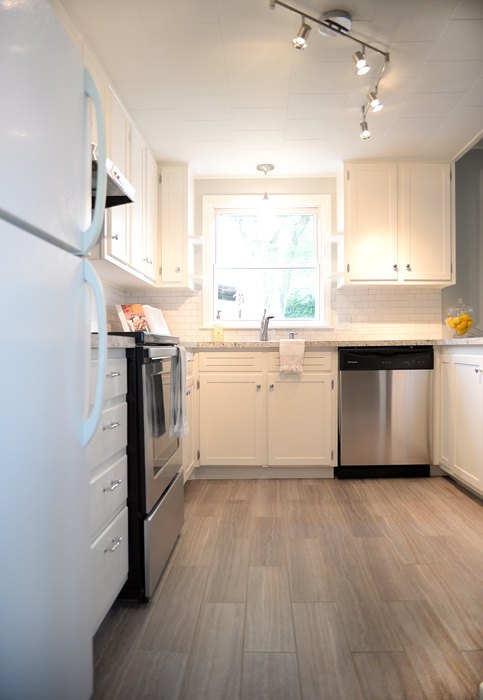
I installed groutable, luxury vinyl tile from Lowe’s in the Chateau color. I love this floor!
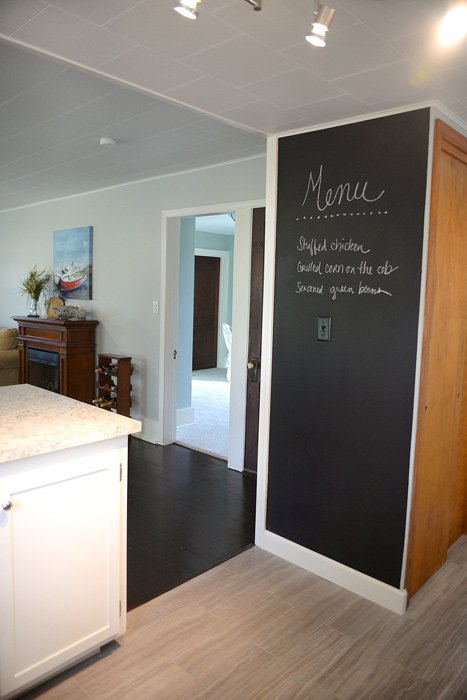
Of course, the whole room got fresh paint, including the ceiling. I added one accent wall in a chalkboard finish, which was a bit of a risk. But that chalkboard wall has been a huge hit with visitors and one of the first things they say they like about the house. So I guess it was a good choice. 🙂
What do you think of the transformation?

Want more details about this and other DIY projects? Check out my blog post!
Comments
Join the conversation
2 of 9 comments
-
Great use of funds and you're giving the buyer a beautiful new kitchen to enjoy.
-
I love the tile on the kitchen floor. Lovely work, well done!!


Frequently asked questions
Have a question about this project?
I love your kitchen transformation! HUGE difference and such an impact! I flip homes in my area and wondered how you kept it under $1300 with appliances, flooring, counters ect?? 😲 Stainless steel can cost that alone. I would love to know how you did that! Thank you 😃and Awesome job!