


Retro 1950's Garden Table Makeover

by
Carole
I bought this garden table on ebay for about $30 with the idea of making it over to match the bench I had already bought and made over some months ago. I stripped the paint from the wood slats using a heat gun and scraper only to find a nasty pink undercoat beneath the paint. So a second go with the heat gun and that is now gone. I have applied two coats of an oil based primer after sanding the wood and am finding that there is still some bleed through causing a pinkish tinge to the primer. Even after two coats. I asked in the hardware store and they said either to buy a stain blocker and try that or leave the table to 'cure' for a week and see if the pink tinge dies down a bit. Given that the stain blocker cost $40, I am going to leave it for a week and then give it another coat of primer and just paint over it. Fingers crossed! I sanded the metal base and have given that a coat of rust converter - probably did not need it but I had some rust converter left over from another project and thought it will at least catch any really rusty spots and stop them from getting any worse! Then a coat of a rust killing primer over that. The frame is now khaki green. I am going to paint it 'delicious red'. I have the red, green and yellow paint left over from the bench project, so hopefully I will have a matching bench and table by the end of it!
Update - just in case this has happened to you when you have primed something and the primer/undercoat discolours - mine went pinkish. The hardware guy was right! Leave it for a week to 'cure' before trying to paint it with your topcoat. It is looking whiter already and now ready for some topcoat paint. Phew, I thought I would have a nasty pink tinge to my colour scheme, but seems not and I did not have to throw any more cash at it to buy a stain blocker - Yay! The frame is now painted deep red and I am starting on the slats topcoat, starting with the red to every third slat. Once that is all dried and cured, I will be able to mask that off using tape and start on the yellow slats. Starting to take shape nicely!
All finished! Ta - daaaah!
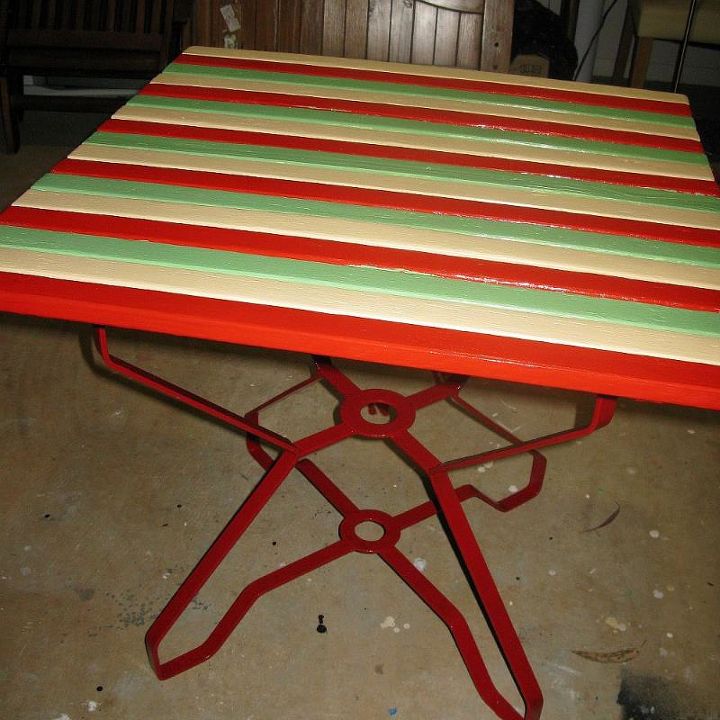
Finally finished - colours may be a little strong in this shot due to the flash - it now matches the bench in last photo
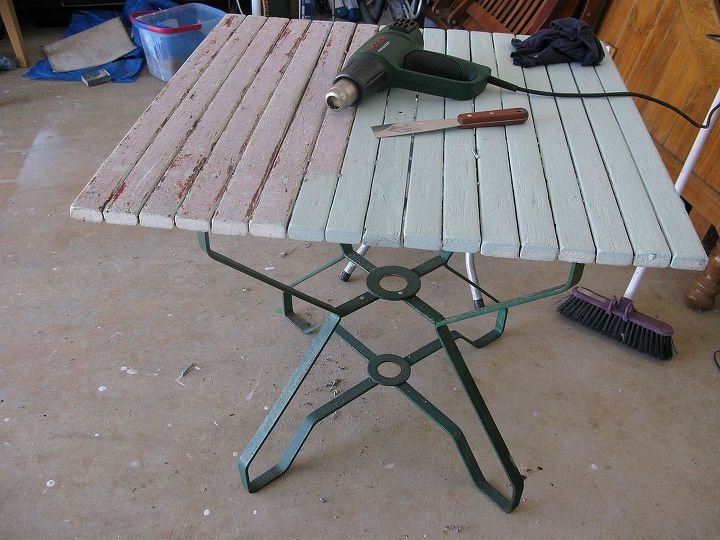
Removing the old paint using a heat gun. The undercoat seems to have turned pink -some sort of bleed through
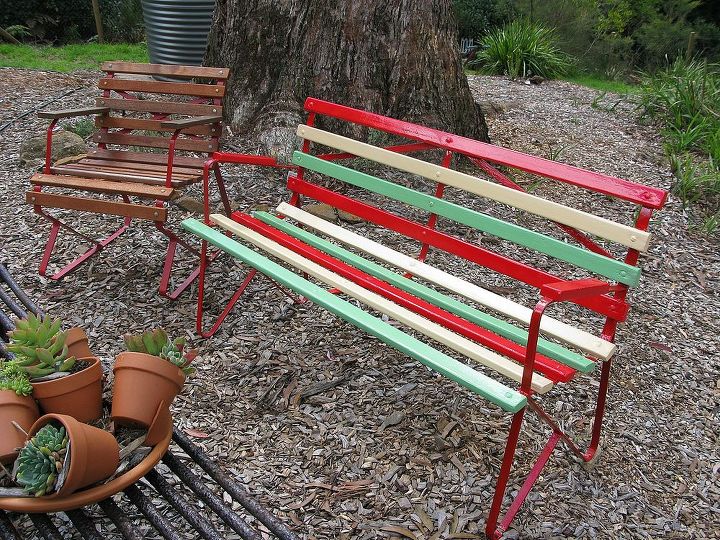
The bench that I wanted to paint the table to match
Comments
Join the conversation
7 comments
-
Hi fellow Aussie - I love renovating furniture too .. and repurposing all sorts of things for my garden (love your succulent pot arrangement by the way!) Looking forward to seeing your table when finished. You might like the DIY Pallet Planter project I made - just SO many uses for them. http://themicrogardener.com/diy-pallet-planter/
- See 3 previous
-
Wow, this is totally awesome!


Frequently asked questions
Have a question about this project?