


Dollar Store Inspired Halloween Framed Art

by
Lollypaper
One of my favorite pins on Pinterest are the ones titled “10 great Dollar Store finds”, or “Dollar Store DIY”. I love jumping in to see what clever ideas the crafty people out in blog-land have come up with. Well today, I have one of my own to share with you.
I love the frames from the dollar store. They are so versatile…all you have to do is add a little creativity and the sky’s the limit. I didn’t do much to these frames. They were already black, and a little rough, so they were perfect for some cut-outs I wanted to glitter and frame for Halloween. The only thing I did to these frames was add a bit of Annie Sloan Dark Wax to give them a little sheen. Then I removed the glass, and they were ready to go.
Everything I used I had in my “stash”, so I didn’t spend a dime. Except of course the Halloween cuts, which I downloaded from the Silhouette on-line store. But they were on sale for .75 cents each, so that doesn’t count, right?
I wanted the glitter art to match the paper pumpkins I made last week, so I used the same colored card stock as my background. You can see the full post about my paper pumpkins here.
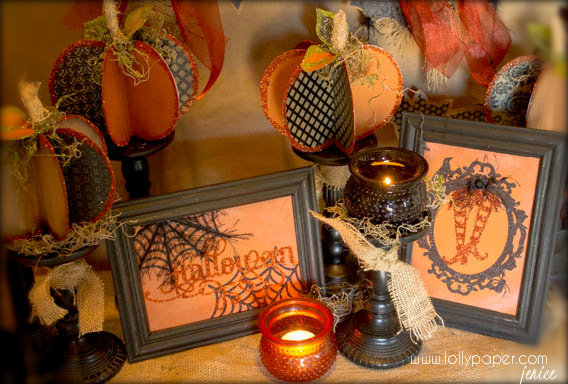
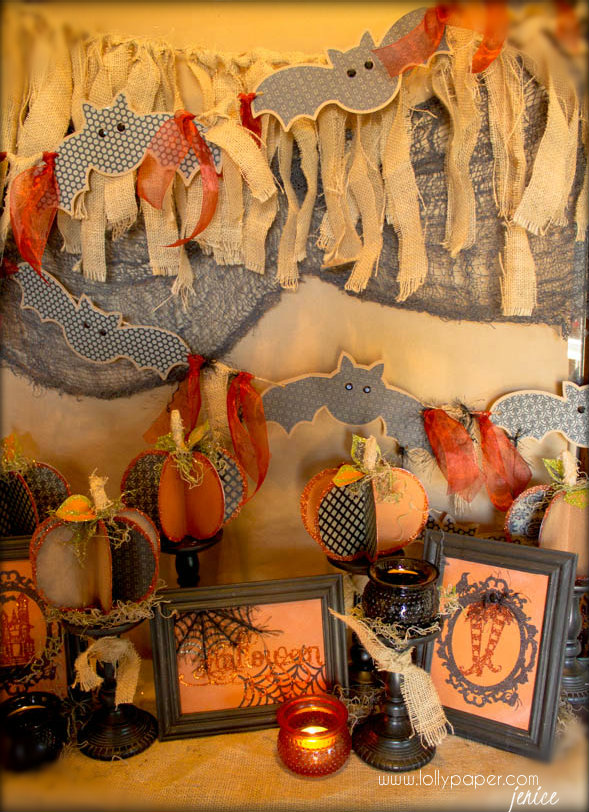
Since I wanted to create a Halloween “story” on my front entry table, I combined the framed art with the paper pumpkins, a burlap flag tied banner that I threw together in no time, and this cute bat bunting that I also cut out on my Silhouette Cameo. After a little time to arrange everything so it was just “right”, this is what it looks like. Love!
Here are a few pictures I took along the way. I started with this dollar store frame. Ugh..bad photo, but it’s not much to look at anyway, right?
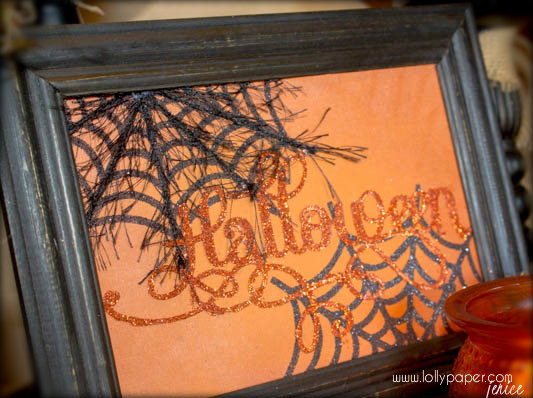
I cut out more of the rust/orange-colored card stock that I used on the paper pumpkins to fit the 5×7 frame. I decided to go without glass as to not interfere with all the glittery wonderful-ness. Is that a word? I also inked the paper with some bronze colored ink I had lying around. It’s very subtle, but adds a nice dimension.
I cut out the “image” on Silhouette America double-sided adhesive. If you haven’t tried this stuff, do yourself a favor, and DO! It’s so easy to work with and makes glittering a breeze.
Glittering in progress…
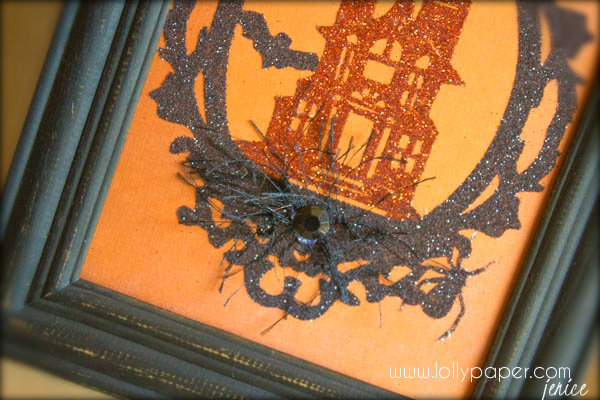
After it was glittered, I added a little bit of “spider yarn”…I’m not sure what it’s really called, but I love this stuff! It comes in all different colors at the craft store, usually located in the yarn department. It’s especially fun to use the black at Halloween time, like I did here.
And there you have it. My Dollar Store inspiration for you today.
Now, this post wouldn’t be complete without some pictures of my favorite “photo-bomber”. And I must say, I think he’s the cutest photo-bomber ever!
Finally, I wanted to share with you a new board I’ve started on Pinterest. I thought it would be fun to start a collaborative board so we can all share our love (okay, obsession) with all things paper. If you would like to pin your ideas, projects, party decorations, etc. to this board, just follow me on Pinterest (requirement by Pinterest) at http://www.pinterest.com/lollypaper and then send me an e-mail to lollypaper@gmail.com, and I will add you to the board so you can pin your awesome projects too!
Happy Hump Day! Now go to the Dollar Store and get creative! :)
Jenice
I love the frames from the dollar store. They are so versatile…all you have to do is add a little creativity and the sky’s the limit. I didn’t do much to these frames. They were already black, and a little rough, so they were perfect for some cut-outs I wanted to glitter and frame for Halloween. The only thing I did to these frames was add a bit of Annie Sloan Dark Wax to give them a little sheen. Then I removed the glass, and they were ready to go.
Everything I used I had in my “stash”, so I didn’t spend a dime. Except of course the Halloween cuts, which I downloaded from the Silhouette on-line store. But they were on sale for .75 cents each, so that doesn’t count, right?
I wanted the glitter art to match the paper pumpkins I made last week, so I used the same colored card stock as my background. You can see the full post about my paper pumpkins here.
Since I wanted to create a Halloween “story” on my front entry table, I combined the framed art with the paper pumpkins, a burlap flag tied banner that I threw together in no time, and this cute bat bunting that I also cut out on my Silhouette Cameo. After a little time to arrange everything so it was just “right”, this is what it looks like. Love!
Here are a few pictures I took along the way. I started with this dollar store frame. Ugh..bad photo, but it’s not much to look at anyway, right?
I cut out more of the rust/orange-colored card stock that I used on the paper pumpkins to fit the 5×7 frame. I decided to go without glass as to not interfere with all the glittery wonderful-ness. Is that a word? I also inked the paper with some bronze colored ink I had lying around. It’s very subtle, but adds a nice dimension.
I cut out the “image” on Silhouette America double-sided adhesive. If you haven’t tried this stuff, do yourself a favor, and DO! It’s so easy to work with and makes glittering a breeze.
Glittering in progress…
After it was glittered, I added a little bit of “spider yarn”…I’m not sure what it’s really called, but I love this stuff! It comes in all different colors at the craft store, usually located in the yarn department. It’s especially fun to use the black at Halloween time, like I did here.
And there you have it. My Dollar Store inspiration for you today.
Now, this post wouldn’t be complete without some pictures of my favorite “photo-bomber”. And I must say, I think he’s the cutest photo-bomber ever!
Finally, I wanted to share with you a new board I’ve started on Pinterest. I thought it would be fun to start a collaborative board so we can all share our love (okay, obsession) with all things paper. If you would like to pin your ideas, projects, party decorations, etc. to this board, just follow me on Pinterest (requirement by Pinterest) at http://www.pinterest.com/lollypaper and then send me an e-mail to lollypaper@gmail.com, and I will add you to the board so you can pin your awesome projects too!
Happy Hump Day! Now go to the Dollar Store and get creative! :)
Jenice
Full post at www.lollypaper.com
Full post at www.lollypaper.com
Full post at www.lollypaper.com
Full post at www.lollypaper.com

Full post at www.lollypaper.com
Want more details about this and other DIY projects? Check out my blog post!
Comments
Join the conversation
2 comments
-
Spooktacular framed art!
-
Wow! You have a great eye for Dollar Tree goodies.


Frequently asked questions
Have a question about this project?