


Holiday Ornament Display
The area above our fireplace is large and isn't always easy to decorate for the holidays. I usually make a giant wreath for that spot but this year made a holiday ornament display. The base for this project is an easy DIY and the decorations on it are simply added with hot glue. A stencil in each corner of the project is the final touch.

This is my 2016 mantel. Our home is decorated in traditional colors so for my Holiday Ornament Display, I chose to use traditional colors: red, green, gold, and silver.
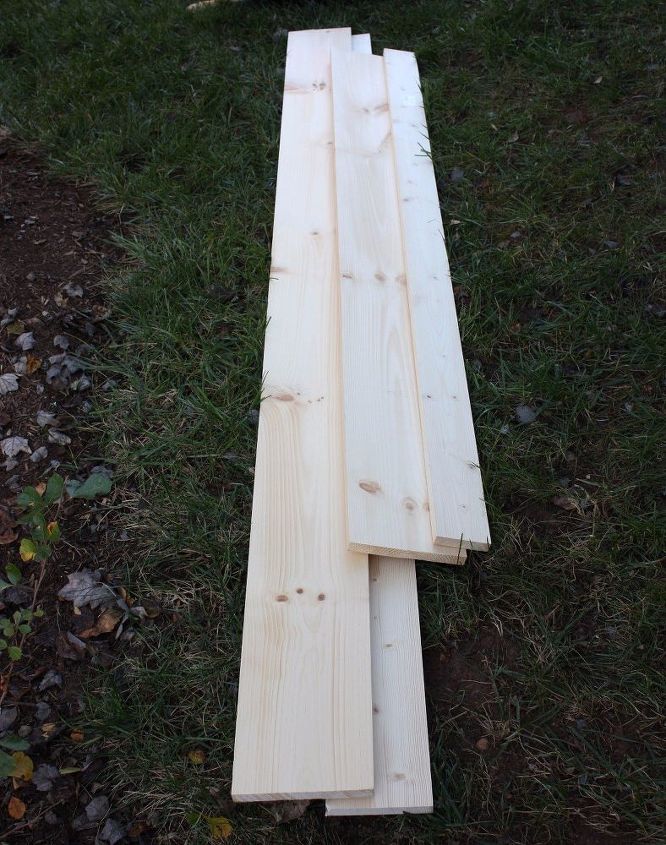
You will need these materials for this project:
Cut three 48” sections from the 1’x8”x12’ common board, two 48” sections from the 1”x6”x8’ common board, and two 30” sections fro the 1”x4”x6’ common board. Use a sanding block or orbital sander to sand the boards smooth.
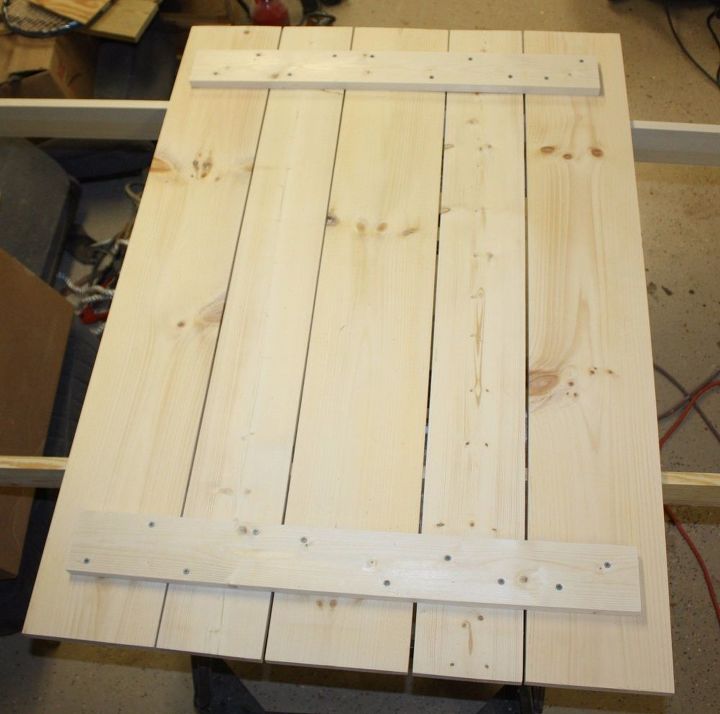
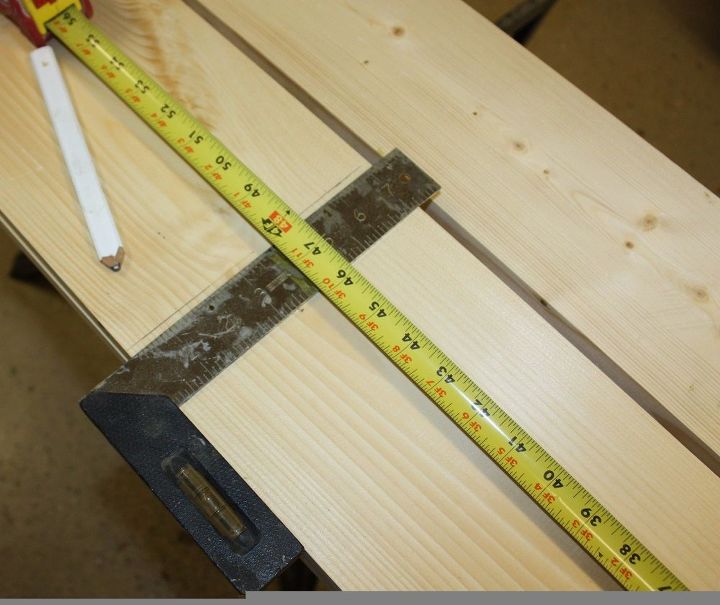
Lay all five of the 48” boards flat on a table interchanging between the 8” wide boards and the 6” wide boards. Leave a 1/4” gap between all of the boards. Center one 30” board horizontally across the five boards about 3 1/2” down from the top. Use a carpenters square to make sure that the 48” boards and the 30” board are square before screwing into place. Secure the 30” board into place using two wood screws in each board.
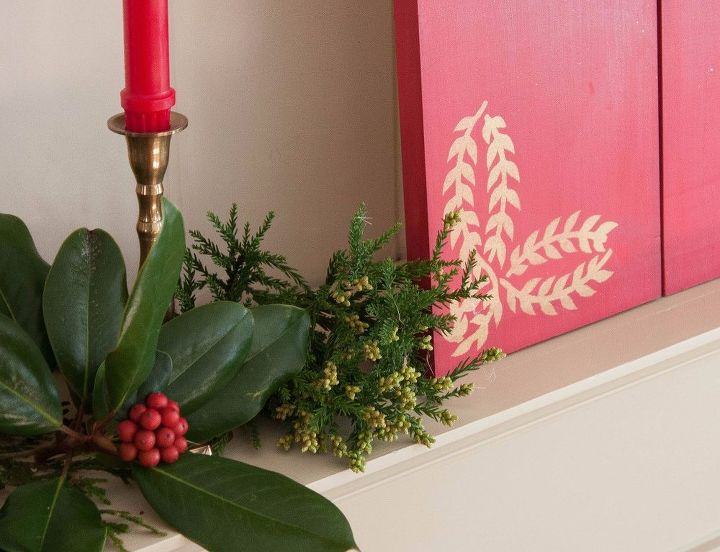
After construction of the DIY Holiday Ornament Display was complete, I painted the project and added a stencil to each corner with gold craft paint.
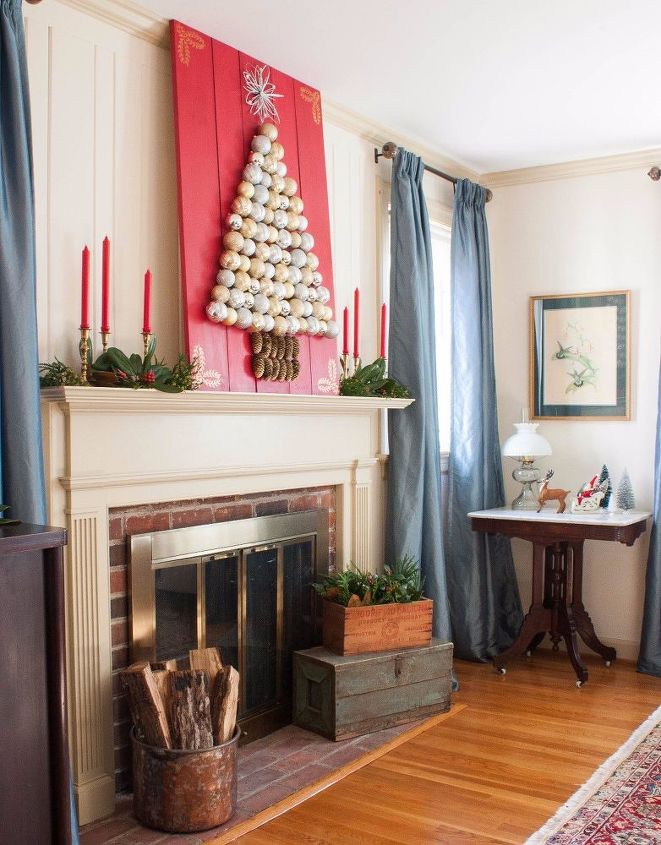
This is the final product in my living room and I couldn't be more please with it. Wood is ready for a fire and I can't wait to enjoy this space between now and Christmas.

Want more details about this and other DIY projects? Check out my blog post!
Comments
Join the conversation
2 of 7 comments
-
Your mantel looks great with you ornament tree!! Very nice!
-
beautiful!!! that is a great idea


Frequently asked questions
Have a question about this project?