


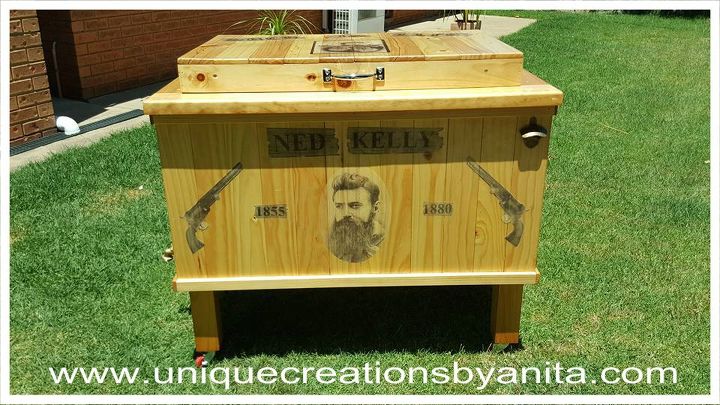
Ned Kelly Themed Patio Cooler
3 Materials
$100
2 Weeks
Medium
With the holidays coming up I wanted to make an outdoor cooler box that would hold all the drinks and leave my fridge free for all the food. I wanted to go for a themed box and chose Ned Kelly because he seems to be an Australian hero/villian.
Outdoor Cooler
So I advertised for a free broken freezer to build my cooler. I chose a freezer because the door would be flat and not have the bottle holders taking up all the space.
I started by removing the compressor and all the elements from inside the freezer. The baskets and shelves were removed and I used the clips off the shelves to try and tidy up the inside to give it a better look. Silicon sealer was used to seal any holes in the freezer.
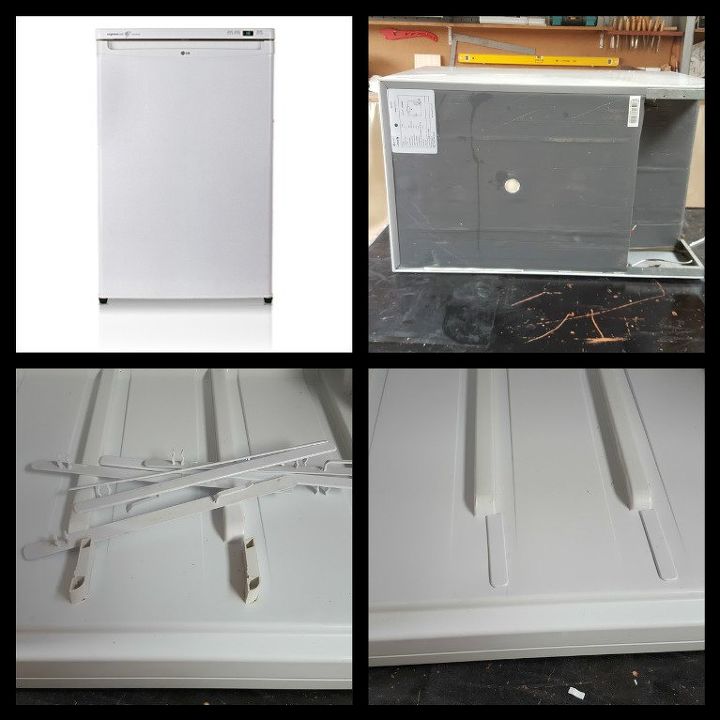
Old freezer
I built a platform the outward dimensions of the freezer and used a kreg jig to join them all together. I attached the legs to the platform. The legs are attached to the outside of the sides and not the front. Fit freezer to make sure it fits before you move on to the next step. The legs do not go all the way to the top. My top apron was 3cm so my legs are 3cm from the top.
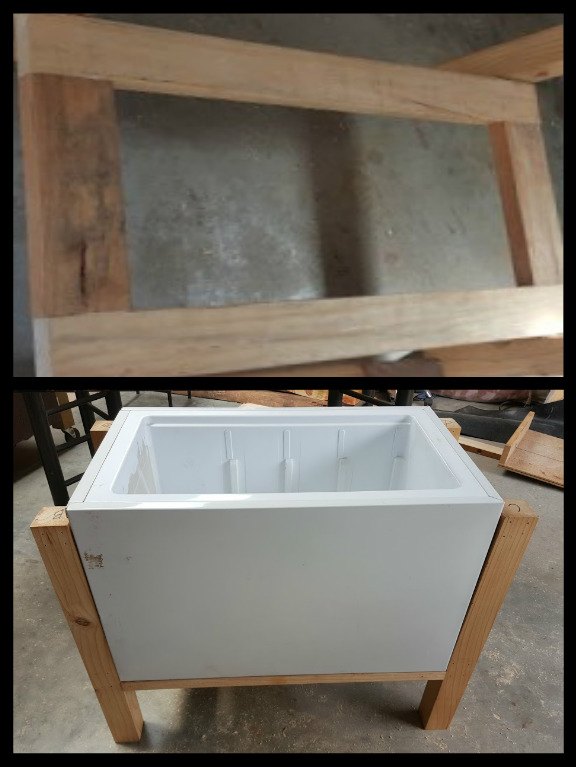
Platform
Add supports between the legs in the front and the back.
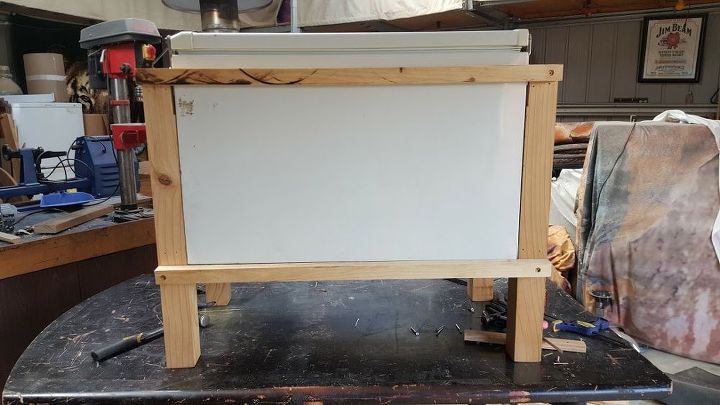
The side supports were added on the inside of the legs to keep the box in proportion as per picture. I used all scrap wood for this step because it is all hidden and it was a good way to use up scrap I had lying around.
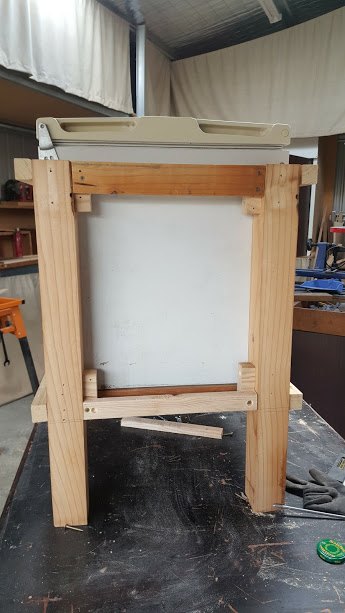
Side Supports
I cut all my wood slats to fit between the two supports and used a nail gun to attach them. In the front I started on the sides making sure they overlap on the ends enough to match up with the sides, so that the front looks tidy.
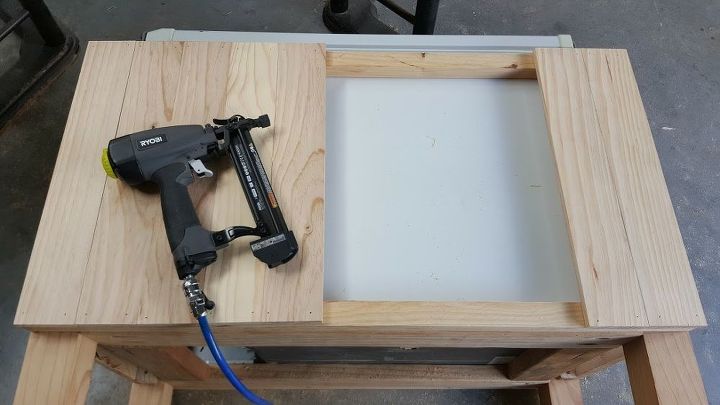
Attatch slats
I cut the top to size and used a pocket hole jig to join them together and this was then screwed into the top. Remove all the door hinges from the lid and line it up with the base so the top can be made.

Top apron/bar
Frame the top and add the slats using the nail gun. I added 4 screws to the front of the wood lid to secure it to the freezer lid. I added 2 large hinges to secure the lid to the base.
I used a hole saw to cut a hole in the base and added my plumbing to drain off the water once the ice has melted, and used silicon sealer to seal the hole to prevent any leaks.
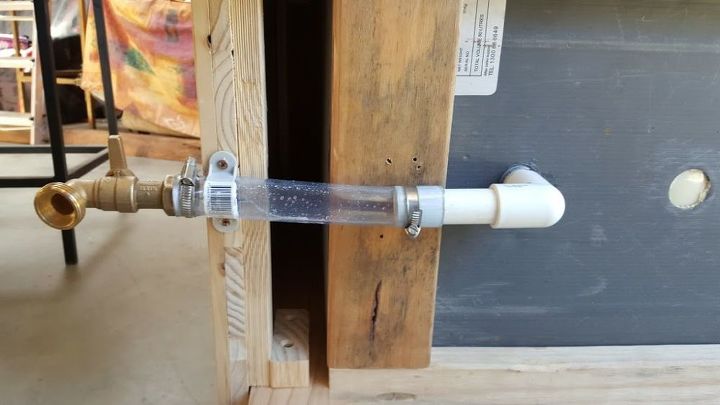
Plumbing
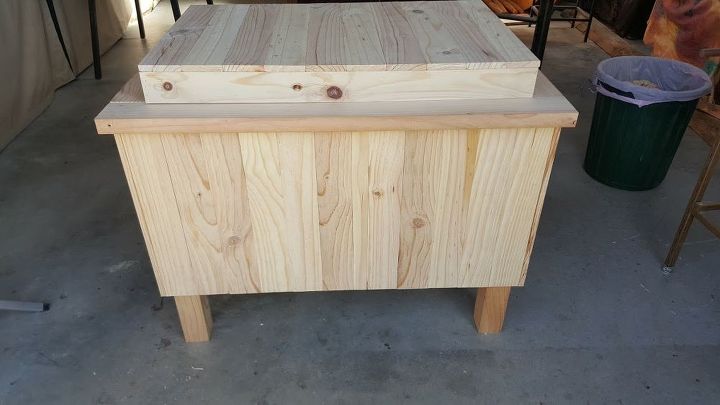
Make sure you test the plumbing for any leaks before you fit it all. I added decorative edges to give the box a better look and routered all the edges.
I added my Ned Kelly graphics to have a theme to my cooler. I had so much trouble doing the graphics, all tutorials I found were only for graphics on solid pieces of wood, that I will be adding a tutorial soon on all the things I learned. You can learn from my many mistakes. Graphics tutorial can be found on my website www.uniquecreationsbyanita.com
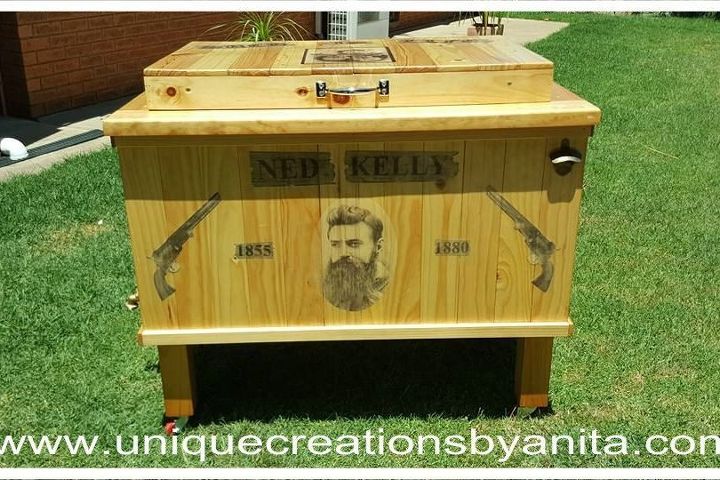
I varnished the box and added wheels so that the cooler can be moved around and a bottle opener. Then it was ready for the next family get together. to see more of my creations please go to www.uniquecreationsbyanita.com

Want more details about this and other DIY projects? Check out my blog post!
Comments
Join the conversation
4 of 61 comments
-
Looks great 😊
-
What an amazing piece capturing an Australian icon.


Frequently asked questions
Have a question about this project?