


Dollar Store Napkin Rings, 6 Different Ways

by
Lollypaper
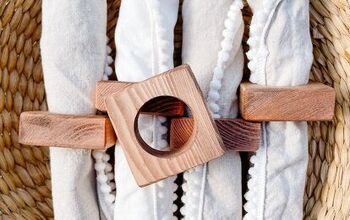
Last week I posted a tutorial on how I made napkin rings from craft paper I purchased at the dollar store. I love this project because the napkin rings were super easy to make, but even more, I love the cost. They cost pennies to make, really!This is how the napkin rings look when finished…simple and serves it’s purpose. But wait…I’m not done yet. It’s time to kick it up a notch.Once you have the base of your napkin ring, you can literally do a million things with them. Well, a million is a bit much, but you get the idea.1. Here is the first one I made by cutting out the design on my Silhouette Cameo.Now I know not everyone has a die cutting machine, but that is no reason to stop you from making your own napkin rings. I actually went through my craft room, as well as my back yard (yep!) and came up with 6 different ideas without having to make a trip to the craft store. I’m sure you could come up with some great ideas too!2. With this napkin ring, I started by wrapping the ring with a piece of burlap to give it some extra texture. Then I added some ribbon and a few artificial leaves I already had in my fall decorations box. If you don’t have any silk/artificial leaves you could go to your local craft store and purchase a bundle of leaves for very inexpensive. Just use a wire cutter to snip off the leaves and hot glue onto your napkin ring.3. Here, I took red twine, and wrapped the napkin ring several times. Then added a paper flowers I had in my “stash”. I picked up these paper flowers at a recent scrapbook expo for around 2 dollars for a pack of 20 or so. They have just been sitting there waiting for their “purpose” in life. I added a some artificial leaves and a few other embellishments and…holy cuteness.4. This napkin ring was also made with my Cameo. First, I cut some different sizes and colored leaves. Then “sanded” the paper with a distressing tool, and finished them off with distress ink. Then I glued the leaves on, in layers, directly onto the napkin ring. I added a twine bow for a finishing touch. I love the colors and the dimension of this napkin ring.5. Can you say FREE? These next two didn’t cost me a dime! I went to my yard, picked up a few acorns (we are fortunate enough to have an oak tree in our yard…or unfortunate, depending on how you look at it), as well as a few yellowing leaves from the plum-tree. Then I glued them right onto the napkin ring. Literally didn’t cost me a penny!6. And finally, this last one was made with materials for the great outdoors as well. I took some little sticks that fell from a tree or bush, who knows. I glued them to the napkin ring and tied a knot with a sheer ribbon. Super quick and easy. Then I added some glitter glue for a touch of sparkle. Organtic, pretty, and simple.It was really fun to come up with a bunch of different ideas to decorate these napkin rings. What would you do to decorate your napkin rings? Share your ideas with me…I would love to see what you come up with.

Thrifty napkin rings - 6 different ways. www.lollypaper.com

Thrifty napkin rings - 6 different ways. www.lollypaper.com

Thrifty napkin rings - 6 different ways. www.lollypaper.com

Thrifty napkin rings - 6 different ways. www.lollypaper.com
Want more details about this and other DIY projects? Check out my blog post!
Comments
Join the conversation
1 comment
-
Very creative! Thank you!


Frequently asked questions
Have a question about this project?