Asked on Jan 01, 2017
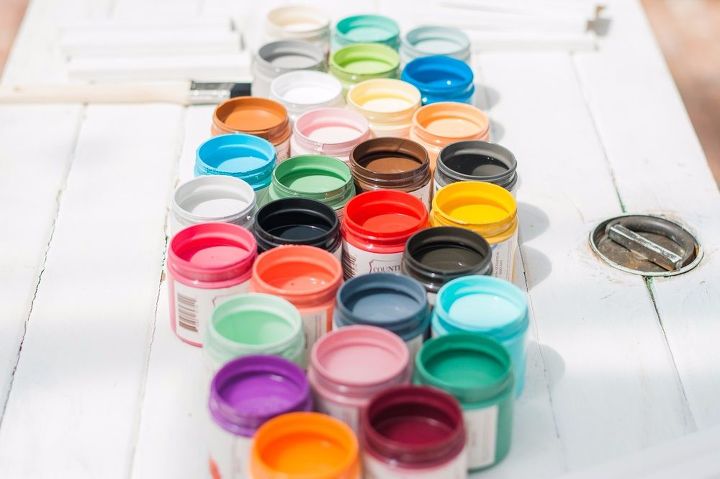
DIY GIVEAWAY: Country Chic Paint is giving away free samples of paint!

+252
Hi everyone!
I'm Sarah from the team over at Country Chic Paint. Our beautiful, chalk and clay based furniture paint is specifically designed for DIYers with a love for refinishing furniture and home decor. Best of all, it's very eco-friendly and contains little to no harmful solvents.
For a limited time we're offering free, 4 oz jars of Country Chic Paint to anyone who follows the two easy steps below. That's enough paint to easily do a small project, such as a chair or a side table. We want you to experience Country Chic Paint for yourself because we know that you'll fall in love with it! Here's how to claim your free sample:
- Comment on this post and share with the Hometalk community: What was the best/most interesting painting advice you've ever received or given, AND
- Head on over to the Country Chic Paint website to fill out a quick form and redeem your unique coupon at any of our participating retailers! http://www.countrychicpaint.com/free-samples
Enjoy, and happy New Year!
{
"id": "3664819",
"alt": "",
"title": "",
"video_link": "https://www.youtube.com/embed/eLg5zGfZqJo",
"youtube_video_id": "eLg5zGfZqJo"
}
{
"width": 634,
"height": 357,
"showRelated": true
}


The best advice is the type of sand paper to use when it is required.!
The best sand paper to use on a paint job that requires sanding.
The best advice I've gotten AND given, is there is no such thing as "no prep" painting! :)
Type of sandpape to use
When painting with a brush - the brush matters!
However, when the link you provided is clicked it says:
We're sorry, but the page you requested does not exist.
I like to use foam rollers and foam brushes most of the time. Get a better smooth finish, no brush marks, and no brushes to clean! LINK DOES NOT WORK!
Using the correct brush can make a huge difference in the outcome!
I've gotten so much advice from a lot of people. I'd have to say the best advice is applying top coat with a sponge. Not a handled sponge, but like a car sponge. It works fantastic
I painted a set of nesting tables with this paint,
It's working again! :)
Best advice I've had is from just doing it and learning as I go. Being creative and experimenting with techniques and materials.
The best advice I was given: good paint really does make a difference.
My best advice I ever got was never pick paint late at night , always use a good brush and prep well .
I love chalk paint because it is so forgiving! The brush does not really matter with chalk paint (I use cheap brushes that can be thrown out), no real prepping or priming and it if you don't like something, you sand it or paint over it! So easy - definitely my "go to" paint for my numerous furniture projects!
Do the prep work. It WILL show in the end.
Use a good brush and don't be afraid .. it's only paint!
New to chalk painted I have used it once on an ore and loved it, I have a few small pieces I'm excited to paint!
I think the best advice is to use a good quality paint and prep the area good before starting.
I actually buy an artist stiff brush for painting and edging around walls. I buy them at the hobby store!
Be sure you have everything on hand before you start and do the prep work it make a big differance
The best advice I've ever received about DIY projects - go with your first instinct and do it the way you want. Don't compare quality with someone else's work. Most of all...enjoy what you are doing.
use good materials, take your time, don,t sweat the small stuff
I am on a very very limited budget so I can't afford to buy gallons of paint for the projects I do, so every couple of weeks I go hunting my local hardware store and the 3 big box stores near me for their OOPS paint!! I LOVE PAINT lol and have around 50 gallons and like 20 or so quarts. There's not always "good" colors , but a lot of the time there is! I mix my own colors from these various paints , and I also buy all sheens, whether it's flat, satin,semi gloss etc, . The gallons cost 5 to 7 dollars and quarts are 3! What a steal!! I also use the cheap brushes, and wrap them up in foil and store them in the fridge between uses. Thanks for the chance! HAPPYNEW YEAR
Prep! Quality paint !
If you need to take a break or have only small amounts of time to paint, put your brushes or even roller in a zippy bag and put them in in the refrigerator. Cover the paint left in any pans with plastic wrap. Everything will be ready to work again when you are. And take chances - you can start over and repaint if you don't like it.
Best advice given to me is; 'just paint'. If you don't like the end result, keeping painting until you do! It's only paint and it's more fun if you can shake off the fear of messing up.
I've never used a paint product like Country Chic Paints and I'm super excited to try it!
I too like to buy the OOPS paint at the stores its like opening up a box of Chocolates you never know what you are gonna get ...I love PAINT !!!!! and I love painting anything and everything that I can with PAINT !!!!!! My go too to update something old into something new !!!!! Can't miss with a nice color of Paint !!!
Advise drilled into me by artist who gave classes...Prep all surfaces carefully. This will determine the quality and look of your finished project. Use best quality paint you can afford. While this applied to art projects (canvas, furniture, etc.) I find this is excellent advise for ANY PROJECT.
The best advice I received was make sure you have everything you need before you start.
Paint a piece like you're doing it for your best friend. Be proud of every piece you do. Keep working on it until you are.
prep and keep piece clean
I painted a lamp from black to sky blue and it came out very nice
Use the right paint for the perfect Job. I painted my kitchen cupboards white from a dark red because I heeded that advise.
Paint with sample paint first. I've had some close calls with paint I thought was perfect until I got it on the wall where it was to go. Wow! Huge mistake averted.
ADVICE: when stencil, use those little triangle makeup sponges you find at the dollar store instead the stencil sponge brush!
Don't be afraid to try something out of the ordinary and just have fun...it's easier to create something wonderful when your not stressed.
Prep all surfaces before painting and have everything you need before starting!
Prep prep prep, for the best result. And take your time!
Make sure the piece is clean before you paint, wipe it down completely with a moistened towel to get dust off the crevices. Work in an area you have prepared and protected to avoid accidental splatters. Have fun!
Paint in well ventilated area.
I agree with everyone about how important it is to have a dust-free, clean piece before painting it, and using the right paint for the right surface. My favourite thing I learned in the past 2 1/2 years that I've been painting and upcycling projects, is that a little paint usually goes a long way and you don't have to buy large quantities. I've been buying smaller sized jars and cans of chalk paint and having more fun with different colours and textures. Love that!
The best advice I was given is really simple, but I have to remind myself not to get in a big hurry. Sand it down, wipe it down, and use several thin coats rather than one thick coat.
Use TAPE! I always tape off every painting project. It is very time consuming but worth it when you see the finished project. No messy overpaint and looks so much more professional. I love painting and no one else is allowed to paint any of my projects. LOL
Always, always do a practice board when you are trying new products or new techniques! Even though it takes a little more time, better safe than sorry.
I always use an air compressor with hose attachment or can of air to clean out the small details
Don't hurry, line your paint tray with foil or a plastic bag for easy clean up. Keep wipes handy in case you happen to bump or touch something ( a dresser, your arm,, etc.) - you can wipe the wet paint off easily
It's only paint. If you aren't happy with it, paint it again. Don't sweat the small stuff.
Everything everyone has posted plus I love to experiment. Sad to say I have never used chalk paint before. I have a new project I'd love to try the chalk paint on. I don't even know where to buy it except online.
I always use rubber gloves when I paint (save a lot of aggravation when finished).
Wet brushes can be stored in the freezer in plastic between painting sessions to eliminate extra cleaning times.
When mixing paint be sure to mix enough for the entire canvas so you don't have to go back and remember the recipe when trying to duplicate the color.
Use an artist brush when doing detail work like carved wood that has detail.
Don't skimp on the prep - it will make or break your project. Always clean up the project first before you even touch it,
Did you ever have the paint dry around the lid of the can and have trouble prying the lid off the next time you need that color? Use a nail to punch holes in the groove around the edge of the paint can so paint in the groove will run back into the can. Keeps the lid able to be removed easily every time.
Paint is the easiest way to spruce up a room
I tend to paint in a hurry and I've learned two things-Tape off and cover things you don't want paint on and, when painting over your head, slit a paper plate and slip it under the bristles part of the brush to keep paint splatter off of you. Can't wait to try this new paint.
Found out the hard way that prep is the most important part of any paint project.
You can't screw it up............if you think you did, repaint!
So many objects to paint and so many wonderful ideas on hometalk. I go through every idea, reading and trying to remember the ideas they have. Now to just get enough energy to get up and do it. The prep is what gets me. I last painted a metal door with rustoleum paint and love it. I an 72 and still doing the DIY thing.
Painted finish can change dramatically with different type brushes. Foam brushes are smoother finish, even the highest quality brush will leave brush strokes, and chalk paint brushes leave a lot of strokes/lines.
Paint in well ventilated area. Always prep what you are painting.
I've done a lot of painting in my home and learned that taking the time to prep before you paint is the only way to go. It may take time but in the end it is worth it.
Clean brushes and paint trays immediately after using. Also, as mentioned previously above, prep work takes more time, but the finished product is well worth it! Also, keep a damp, clean rag handy during the painting - you can wipe up a drip quickly before it dries.
Let paint dry before seeing if you like it or not, wet paint looks streaky and then you just end up putting more coats on than you need
I NEVER THROW ANYTHING OUT WITH OUT PAINTING IT FIRST .
I learn when I paint from dark to lighter color the best is to prime first, even if the paint says you do not need to prime, it looks more even and better .
I have never used chalk paint, but an intrigued by it. I love the look.
painting matts to put in frames saves alot of money and gets just the right color you want. Once you find the size matt you want, then you can't find the color.
First tip, do not let my ex-husband paint (int or ext), or caulk. After that, I'm looking forward to trying this oh-so complimented chalk paint. I have a few ideas in mind- Thank you!
Spray painting has saved me a lot of money...furnished my daughters college apartment with thrift store finds and paint. Recently started using chalk paint because it involves a lot less prep...no prep. Now that I have another daughter in college, I'm going to hit the thrift store. Can't wait to try your paint!
Instead of cleaning your paint brush, you can put your paint brush in a baggie and sit it in the freezer. The next day, sit it out to defrost and continue with your project.
Prep work always pays off with better results.
ANYTHING can be refreshed, restored, upcycled with a quick coat of paint.
the best advise I gave was when you need to paint something make sure you sand the item really good always primer the item first. This way you can see anything like a little crumb Then you can remove it and sand over the area again. Then paint your project.
when in doubt, prime it
my best painting advice was to wear gloves and store my brush in a securely closed plastic bag...I'm always being pulled away from fun projects by my business, so I need to start and stop multiple times!
The very best painting advice I was given was to invest in one of those tops for a spray paint can which converts the can from a "finger" sprayer to a "trigger" sprayer. This clip on top totally saves me from finger fatigue and enables me to be much more careful with coverage so I don't accidentally get drips.
This is Great! Thank you! Advice that was given to me:buy more paint than you think you need. I usually under estimate.
To keep my brushes and rollers ready to paint with the next day, I wrap them in Press and Seal. I don't put them in freezer or fridge, just leave them ready to go. If I can't get back to the painting the next day, no worry, they stay fresh for days.
Most important piece of painting advice? Prep, prep, prep! Clean the surface to be painted. mask anything you DON'T want paint on and most importantly--wear OLD clothes!
I was shown had to paint a 3 shelf wire stand in my bathroom so it would match my dressing table. Worked great!
Best advice I've gotten was to smooth drywall patches with a damp sponge as a final finish before priming.
Spray paint can make almost everything look brand new! I love Krylon anitque bronze. Instead of buyin new light fixtures to replace the old outdated brass ones, I just spray painted them and they look high end.
My best advice was to watch the temperature. Even for little projects the heat in southern California summers can make a big difference in the results.
Being an artist, the best advice I received was to spend the time needed on prepping your piece/walls. I didn't because I was too excited for the painting to begin, but always seemed to regret it. Now I prep like crazy, and it pays off!
My best advice I have received was always keep brushes in a zip top baggie. Always prep as much as possible, wear old clothes and experiment. Try new things.
The best advice I received was to dampen your paint brush before you start to paint and to take a damp rag and wipe your roller pad prior to rolling as it will remove any "fuzzies".
Best painting advice...patience! Taking your time makes for a much prettier finished project.
Find old pieces to turn into new treasures with great products like yours! Color is good! Anything can become awesome .
The best advice I was given was to use good quality paint brushes when painting walls. Best advice ever. No streaks in your painting and no little pieces of the brush left in your project.
My favorite tip is to put a rubber band around the can to swipe excess paint from the brush.
Best advice. When painting walls or baseboards close to the carpet, use an old metal venetian blind as the edge so no paint goes on the carpet. Just tuck it into the carpet and baseboards.
The worst part about painting is cleaning a paint brush that you will need to finish the project, walls etc, in a couple of days.
I wrap the brush in foil and put it in the freezer.
When I'm ready I take it out, let in thaw( doesn't take long) and you're ready to go.
Base coat your project first so the paint adheres to your project. Let dry 7 days before use.
I also put my paint brushes & rollers in baggies and put in the refrigerator. I do not use blue tape as I find the paint leaks thru anyway so using a slanted brush to cut in is much less prep work and works better. I also put clear cling wrap between my paint can and lid, it keeps the painter fresher longer.
Wow, you guys covered just about everything I was ever told about painting! One other thing that I have always been told when I go to paint is cover every thing you don't want paint on, flooring, furniture and of course me....put your old clothes on, you know the ones, ( praying no one knocks on the door outfit) and slap an old Walmart plastic bag over your hair. Cause it never fails the first gallon goes on me!!!! Happy New Year y'all
My favorite tip is to be patient. Hurry and I always have problems.
Keep paimt brushes tied up in a plastic bag during breaks.
Do your prep work thoroughly. Don't take shortcuts
mohair roller brushes!!!
Use drop cloths and painter's tape!!
I let my husband do the clean up, he does a better job at it.
These people have pretty much said all there is about painting. I don't mind painting or cleaning up, it the afterwards when the project is done...and it looks great. We did the dining room ceiling white, 3 walls the same light color, and the other wall a Spiced Cinnamon... looks awesome.
When using painters tape, first apply a thin coat of the paint you are protecting along the tape edge. Then proceed with your other paint when dry. Bleed thru will be the same paint you are protecting.
the best tip I ever got was to use a good brush u get what u pay for and a good brush will make the painting and end result that much more easier n nicer
a good brush is worth the investment and if cleaned and or kept well when the job is done will last a long time
I see where someone else said that you should paint a sample area on the wall. The light changes in the room throughout the day and the paint can take on different hues.
Hi- Happy New Year. The best advise I ever recieved was get plenty of rest before you paint because you know it's going to take longer than you expected.
Thanks for listening.
My favorite advice - and lesson learned - is not to be afraid to paint. If you don't like it paint over it!!
It took me three weeks to paint my livingroom, ceiling to baseboards, working totally alone. And I was 66! BE PATIENT, don't rush! And crank up those Oldies. Have fun.
When painting crafts paint it the way you see it, not so much the way the world would see it, you don't have to stick to the traditional way something looks.
Good brushes make all the differance .
Never paint your walls or ceiling at night! Even using good lights you'll see a lot of missed spots.
The best advise I got was to buy the brush that is right for the project. Pay attention to the width, the stiffness and the material the brush is made from for the perfect project.
Prep properly. Don't take shortcuts! It saves time in the long run and yields better results.
I've been wanting to try this paint for a while now so getting a free sample would be great. I've only heard good things about this product from friends who have used it so I am super excited to be able to start a project using it!
Have a damp cloth handy. I'd you make a mistake it's easy to wipe off while the paint is still wet!
I had spent too much money trying to save on brushes, only to really find out that if I bought the right one the first time I could save myself a lot of extra money. So from now on, I will buy the right kind for the job!
For a natural texture on a wall, I mixed plain yogurt and powdered spice. I especially liked using tumeric for yellow and chili powder for a ruddish red. Let it dry for a couple of days. When u paint over it, it leaves a nice texture - rough but not bulky. Note that it's not good to leave the yogurt spice paint as is, since the color fades pretty quickly. Best to use it for texture, then use a nice paint over it for a lasting result.
Prep is everything! AND, don't hurry.
If you're going to paint another coat wrap the wet paint brush in a plastic bag or plastic wrap. It will still be wet for the next coat.
Buy the best brushes you can get and take care of them! Clean them as soon as you're finished using them with the appropriate cleaner for the paint. A good brush, with proper care, will last a long time and save you money in the long run.
Never take the time to tape a window before you paint it. Instead, buy a sash tool (paintbrush) and use it to paint around panes in the window. Not messy and it takes less time. Told to me by my late father-in-law when my husband and I started painting our first house.
As many others have already commented, spend a little extra money on good brushes. They make all the difference in the world!
Don't skip the proper prepping process. It will give you the best results and in the long run you'll save time not having to redo what you just did. Do it once, do it right!
I have a couple of dressers, and a bed, I would like to use chalk paint on. getting a free sample would be great for me. if I like the look I will buy more to finish the projects.
My favorite paint tip: When painting a room or large project that you cannot finish in one day, wrap your brushes (most any type) and rollers in aluminum foil and place in the freezer until you can complete your project. It may take a few minutes for the paint to "thaw" before you are ready to resume painting but this trick saves a lot of paint usually left in tools and also saves the water usually required for cleanup. I have left these in freezer for several days with no problems. WORKS BEST ON LATEX BASED PAINTS.
As many others have already commented, when you are finished painting for a while but intend to come back to in, wrap your brushes in plastic wrap and put them in the freezer.
Hi everyone, I love DIY started out sewing for my children then got into crafts and now i repurpose, recycle, knit, crochet..the best thing i have found is Pinterest..i get to keep all the ideas and see what others are doing and making...
If unsure, always primer before painting!
I am teaching my 7 year old granddaughter .... Never dip your brush all the way into the can. It's best to just dip it in 1/4 of the brush...then use smooth stokes till your brush is empty.
If you're going to paint with children, let them start the job by doodling drawings with small foam brushes and that way they get to contribute to the job on their level ! Of course if you want their artwork to stay, that is an idea too !
if your job isn't finished, wrap brushes and rollers in Saran Wrap And line your paint pan with aluminum foil. When finished for the day, just remove the foil. No mess, no fuss.
prime! Prime! PRIME!!!
Roll the roller in the paint tray till it starts to get a little tacky then you won't have drips from the roller.
I put on a heavy hand lotion before I paint so the paint won't stick to me it just washes right off. I don't like gloves.
I saw on this site to put a fee drops of vanilla flavoring into your paint so that the paint fumes are not so strong. I also used the clear vanilla extract. It's a great idea!
My daughter painted an old farm table top with shades of blue for each piece of wood. Then she sanded it a little and scuffed it a bit. Added poly top coat. It came out gorgeous. rustic with a little elegance.
I learned how to make a textured wall finish using tissue paper between layers of paint First paint a section of the wall. Then place crumpled sheets of tissue on the wet paint. let it dry a bit then apply a second coat.
I've learned to use a primer as well as a good quality paint
Something I've learned that I never knew was about using Vaseline to help you distress things to a certain level. I thought this is really cool. I'm always looking for good quality paint, especially chalk paint since there's little or no prep involved.
Patience is a challenge for me but if you can manage that well, The end result is always worth it. Of course this applies to more in life than just DIY projects or painting in general.
When I complete a large project like a dresser or nightstand, have available a few smaller projects to finish using the paint on the brush or painttray. A frame, mirror, wine glass, and/or cup etc. They look nice alongside or resting on top of the dresser or nightstand for color coordination.
I have learnt a few techniques in painting ,but I must say as a beginner using a sponge and layering I like most
Instead of taping each window pane before painting the wooden frame around the glass, use a thin smear of petroleum jelly where you would normally tape. Saves money and time and aggravation of using so much tape, and the jelly simply wipes off. After painting, take paint off hands by rubbing oil over hands, then using soap to clean off oil...and by oil, vegetable oil, or bath oil, etc.
Take the time for a thorough prep before starting. My impatience to get to the painting without proper prep has caused a few disasters!
When I heard about using a different color paint for the inside of bookcase shelves I loved the idea so much. Now my black and purple bookcases in my purple bedroom have teal interiors which is so pretty!
I learned that to achieve the best results in painting use quality paint and brushes. It's true!
I have learned not to be in a hurry and do the prep work,it pays off in the end..
You MUST BE PATIENT!!! That wasn't always easy for me. I get sooo excited about the " finished" project that I've messed up so many time and time again. Also have ALL supplies within arms reach BEFORE YOU. START..
Best advice given me concerning chalk paint to (1)wash with TS, rinse good and allo your project time to completely dry (2)don't overload your brush or rollers. The chalk paint I used was really thick and I used a really stiff brush giving me the look I wanted.
After sanding make sure the piece is wiped down really well before next step of using a sealer or wax. I also learned more about using wax as a finish on painted items.
Snip the bristles of an old used paint brushes that you would normally get rid of with a scissors so that it looks like it has spikes. (The paint old brushes must be slightly hard and tattered). Dip the tips in different colors of wood stain and paint. This would create beautiful grain lines on ordinary and uninteresting wood.
You can get paint rollers at the dollar store-no mess cleaning up, just throw away.
This is for pain in cans: Put a thick rubber band across the opening to scrape your brush rather than using the rim. To keep more paint away from the rim,
poke a few small nail holes into it so that the paint drains back into the can. Also coat the lid with Vaseline or Crisco so that it doesn't seal itself to the can.
The best paint tip I ever received was to be patient. Wait for each coat to dry completely or you will just take your paint off again.
My best paint tip was for paint projects that were longer than a day. Put your wet paint coated brushes and rollers in plastic bags and then put them in the freezer. Works for both alkyd and latex paints.
That works to, Debbie. TY
The best paint advice -- it doesn't have to be perfect! Once I relaxed my perfectionism, my results were far more pleasing and a bit artistic. Now I love to paint furniture.
If you don't have the time and skill to paint your walls correctly, hire a professional. I'm not kidding: been there, done that. If I want to paint something smaller than my walls, I'm good to go after spending time properly priming the surface as necessary, using thin layers, and usual 2 light coats.
I learned more about waxing after painting. I never knew those techinque were out there.
Use a good paint brush.
Use only Behr paint for inside walls and outdoor house painting. The Behr paint is amazing, makes such a difference. Only a happy customer.
can't wait for my countrychic paint samples
Best paint idea for me was a paint exchange party. Right before the holidays most of my friends were buying new furniture, and I really couldn't afford to. So my mom suggested a paint/exchange party. So, I got together with my friends that also couldn't afford to buy new and had them bring over stuff that they couldn't wait to get rid of plus I asked for a dish of food to pass. All of us brought left over paint and a couple of our husbands agreed to paint for us. At the party some of us traded items, others at our party just decided to repaint what they already had. I had wanted a new couch. Ours, the fabric had become faded in a couple areas...my neighbor whom had only brought fabric paint wanted to fix my couch in exchange for my coffee tables. I gave in, she rubbed fabric paint into my couch/sectional and gave it a wonderful expensive two tone look. I love it, she also saved me $1250-the price of the new sectional i wanted. Before the party was over she painted my coffee cup mats to match. ( My husband's family whom came at Christmas thought i bought new furniture.)
Best advice was zip lock bags to save brushes and rollers from drying out when taking a break,and allow dry time in between coats.
My best painting tip: If you're having trouble choosing a color, look in your closet. First clean out your clothes closet and keep only the things you love. Then organize these favorite clothes by color. Choose a paint color in the color family of your clothes. If you have mostly Fall color clothes, paint with warm colors (tans, browns, warm reds, olive greens). If you have Winter colors choose bright reds, black, bright white, light gray. If you have cool Spring colors choose grassy greens, navy or cornflower blue, or lavender. If you have light Summer colors paint with bright yellows, creamy whites, or turquoise.
Take your time and prep you piece, enjoy it and have fun with it.
Thanks in advance for the paint sample!
I recently painted the kitchen, used frog brand tape for edging, the tape worked great at keeping a straight edge...my problem is I left it up while I primed (2 coats) and painted (2coats)..when I removed it, it peeled the paint and primer with it...My advice is to remove the tape after each coat..I know it seems like a pain but you won't have peeling paint in the end...good luck...
I'm sad did everything they asked and when I looked at the list of stores to get paint sample...they don't have any stores in the northeast part of the country where I live...figures
I would like to un-follow this but every time I press un-follow it just pops back to follow. Please take me off this list.
Best advice I ever received - always spring for a sample of the color you think you want. It may not look the same on the piece you're painting. Better to waste four or five dollars than fifty or sixty!
My favorite painting tip - put a rubber band around Your gallon container so you can remove excess paint off your brush. it works great and is less messy.
My best painting tip was... "it's only paint, you can paint right over it if youre not feeling the color". (I have major commitment issues when it comes to choosing paint colors)
My best painting tip was....take a hammer and flat-head medium screwdriver and make 3 holes in the rim so when you pour the paint out it drips back in to the can with very little drip on the side and easy clean up (this is a 1 gallon can of course)
the best tip Igot is to clean dried paint brushes in white vinegar soak for a while!
Always save a small jar of left over paint from your project to touch up nicks and scratches when they happen.
Advice: Always start painting at the highest point.
When painting a room, write the paint color on a piece of tape and put
it on the back of the light switch before putting it back on the wall. You will never
question the color you painted!
Mix a small amount of your wall color with wall spackle. When you want to move items hung on the wall, just fill in the hole with the paint and spackle mix. Quick fix!
The best advice I've received is to be brave with color.
Best advice? When you have to leave your project for a short time, place your brush inside a zip top plastic bag instead of cleaning it - it will be soft and ready after your break!
My best tip: Line your paint pan with aluminum foil for easy cleanup.
Tip 1 : line your paint tray with a freezer bag Tip 2 : Place your paint brush / roller into a freezer bag then put Tip 1 & Tip 2 into the fridge until your next coat.
The best tip I ever got but did not do was hire some one to do It! I think I will take that advice next time. Painting is hard work,!
Don't be afraid to try it......
I wash out my paint rollers with hot soapy water and then let them soak in soapy water overnight! After that I rinse them well and let them air dry! Good as new!
A little goes a long way....
Use vaseline, in between paint coats, in high use areas on a piece when you want to speed up the distressing technique.
If you break for lunch etc, wrap your brushes in clingfilm. Ensure your paint tin is closed tightly and store upside down.
The best advice I ever received was from my grandmother: Make use, redo, or do without. Amazing how redoing seemed like I was not doing without!
Heavy duty, wide shelf paper is the best and easiest drop cloth to use I have found. It is 24 inches wide. Re-usable, which makes it economic and very easy to clean up. It doesn't move when you re-position ladders or step-stools. It lays very close to wall edges and covers floors to the woodwork easily without repetitive taping. If you are not a messy painter, it can be used without any taping whatsoever! I just wish I had happened on it sooner, about four houses ago!!
I use an old cookie sheet under my paint can to catch any drips. There's also room for my paint brush if I take a quick break. Easy to clean, tidy up, and keeps me from stepping into any drips. I like having a place for everything to keep it together until the next day.
When painting stripes on a wall paint the base coat then mark and tape off the area for the stripes.Use the base coat to paint along the edge of the tape,this seals the edge.Now paint with the contrast color and there won't be any bleeding.
well to wipe down used furn... dry ,spray paint ..then brush paint....if you choose to sand edges you can do 2 tone...gold spray then flat turquoise etc. pretty!
My husband and I built and furnished a small cabin on the lake using mostly recycled materials that we purchased from Habitat from Humanity, yard sales and Kijiji classified ads. We did splurge when purchasing pine tongue and groove for our walls. We wanted a whitewash look - my painting tip is simply to dilute the paint with water to use less paint and save $'s. The mixture I used was 1/3 water and 2/3 paint mixture. I applied it horizontally on the boards before the walls were installed. The second tip I read about on Pinterest somewhere. The posting was "How to Age" wood with vinegar. I painted 2 coats of white paint on this headboard. Let dry. It can be messy. Best to do it outside or to use a tarp. Then, I poured about 1 cup of vinegar into an old container. I used steel wool and gently distressed the headboard. You need to wear gloves and follow the grain of the wood. Good luck!
the best advice that I have received is if you need to stop during your painting just wrap brush up and put in freezer it will be fine when you start again
When starting your project make sure you have all your supplies and brushes gathered in a box for easy access. Always brush off or vacuum then wipe down the surface of your project item after all prep work with a tacky cloth or a damp cloth to assure a clean surface to begin your work. Above all, take your time. If you're working with more than one color, think it through before you start. Have fun.
Two tips - 1) wrap wet brush in plastic bag and stays wet for at least a few days (for those of us that never seem to finish a project promptly and 2) poke nail holes around the edge of you paint can - in the lid ring - and the paint drips back in rather than staying in that channel to forever seal your can, Thx Dad for those long ago but oft used tips!
I am sad. FREE is always for me - when it works. I did everything as required. On the final step I found out that I can't get the paint anywhere close to where I live in Massachusetts. DARN!
same for me here in Texas
When you're getting ready to paint, put a strip of tape over center of can to draw off some of the paint on your brush. Try gorilla tape for best results. Don't use bail side of can tho
didn't realize there was a dead line so I didn't get samples. really disappointed as I wanted to do my back kitchen door as a reminder board as my door is hollow and hard to hang things on
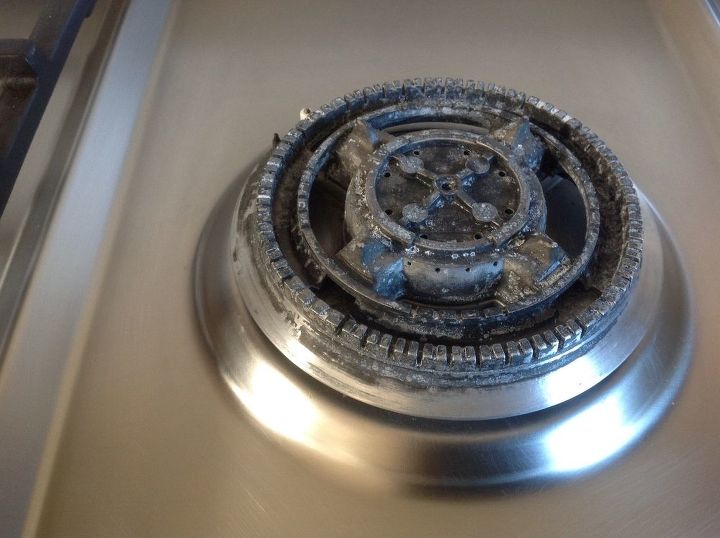
Best painting information was how to paint appliances to make them look brand new-posted on hometalk! Since I found this site, I can't wait for my next email with more ideas!
While it may not have been actual advice, I did learn from watching my mother's mistakes! Take your time and cover areas you don't want paint on.
The hardest part will be the prep. Prep? What prep? Yes well I learned a lot from that first project. The painting was the best and most enjoyable part.
Love this!
Do the prep work (including cleaning when necessary). Have everything you need before you start. And *read the directions* before you start! (The last one is good advice for many activities, not just painting. )
)
Two VERY helpful and equally important bits of advice for me have been:
1. Before picking a color for a large project, be sure to look at samples at all times of day and in different light to make sure you like it in all those situations.
2. Don't be afraid to paint outside the lines!
,love this ...stipeling
withouUsing candle wax before painting to get a distressed look without sanding.
using a heat gun to strip paint instead of chemicals its much easier
Got my answe on this page...now i know the correct. Way to sand my vanity.(Always. Go w the grain of wood)
Love this site..cant wait to start my project..now i no how to paint😀
You need clean surfaces between coats. Vacuum well!
The best advise about paint is don't be afraid to try something new and "but it's antique furniture" projects...you only live once but you can repaint things again!
I loved being taught how to use fresco powder to create texture. I applied that knowledge to making raised embellishments on some of my pieces and it's so much fun and unique!
Great Advice and tips I'm ready to start new projects and Get into some paint!
Painting a piece gives it a second chance. A new purpose. If only repurposing our own lives were that cheap and easy yet so rewarding and empowering! Just do it.
Not the place for advertising. This is a public forum for DIY questions. No spam please.