


DIY Wood Tray - Moroccan Inspired
16 Materials
Medium
Have you ever seen the wooden circles at the home improvement store? After stumbling across one, I decided to make something gorgeous with it! If you don't want a tray, slap on some legs and it can be a unique and gorgeous table! The possibilities for this DIY is endless!!
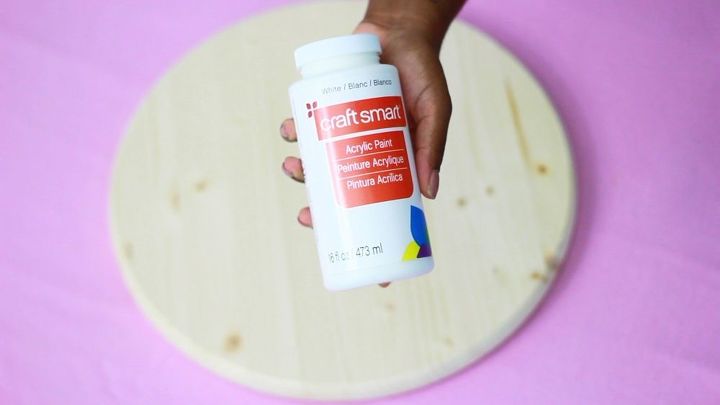
For this project you’ll need a circular piece of wood. When I opened the package, i felt to see if it needed to be sanded and it didn’t!
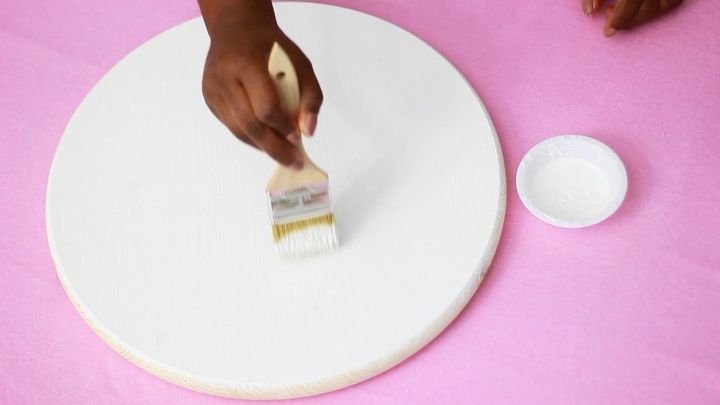
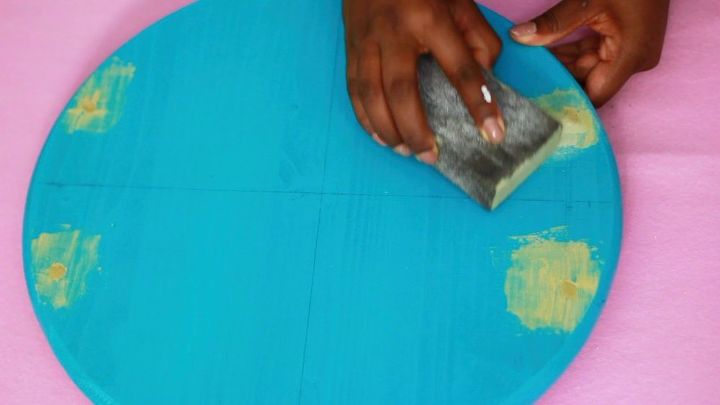
Take some white acrylic paint and paint 2 coats on the surface of the wood - I painted in the same direction as the grain of the wood. Bear in mind whatever color you use as your base will show in the final product.
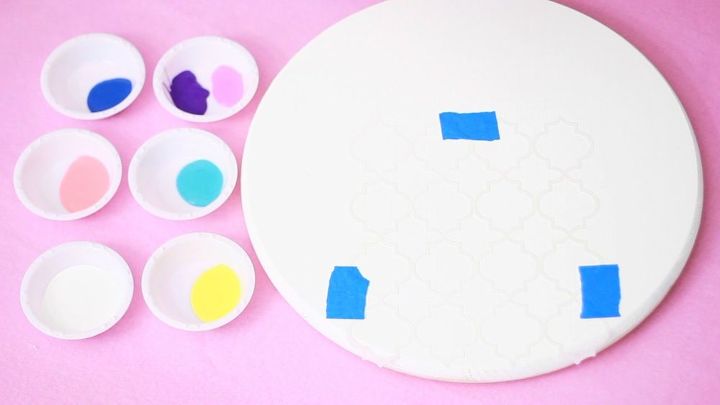
Once the paint is dry, place a stencil of your choice on top and made sure the edges went over the wood slightly. This will help me have clean lines. With painter’s tape, add some tape to the stencil to keep it in place.
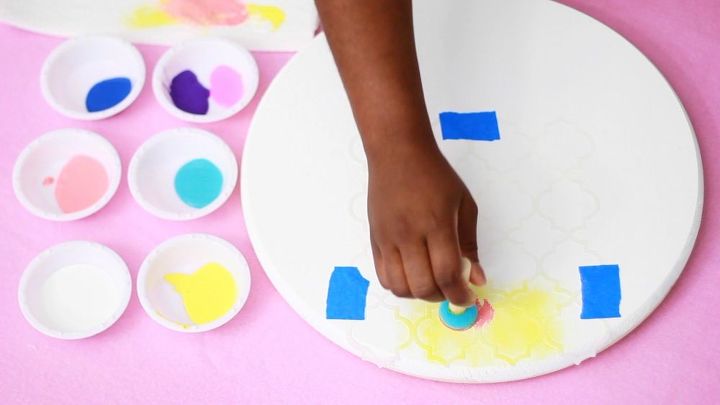
Pour the paint into individual trays and keep some paper towels handy. With a stippling brush, dip it into your colors of choice and dab it onto the paper towel to create a dry brush. When adding color onto the wood, try to use a stippling motion and avoid gliding it across the stencil - gliding may create bleed marks.
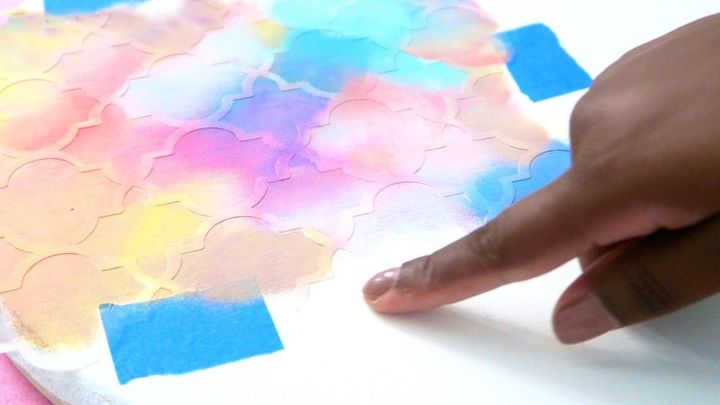
Also keep in mind that you should dab paint a little past the stencil so it will be easy to align.
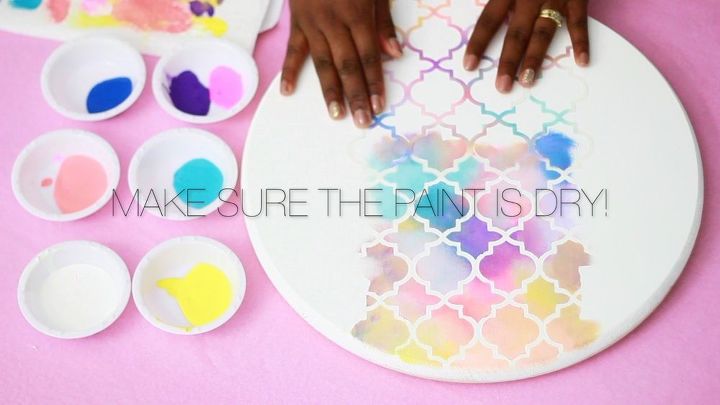
Once the paint is dry, remove the stencil, align the patterns, tape, and keep on painting!
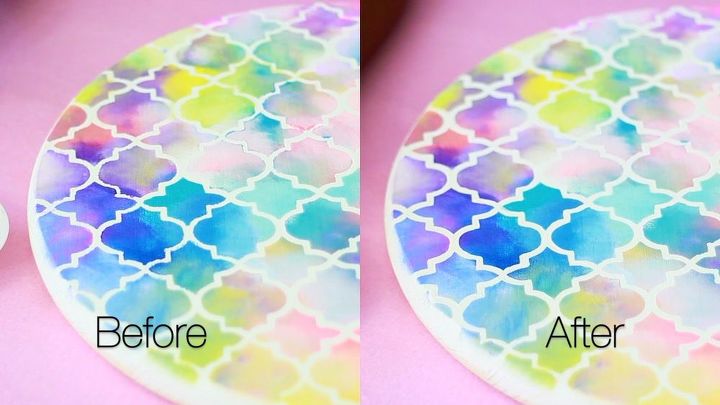
When you’ve painted the entire surface, some paint may have bled through the stencil. To fix this, take a thin paint brush with the same white paint i used for the base and clean up the edges. You may be able to use a paint pen if you’re not good with the paint brush.
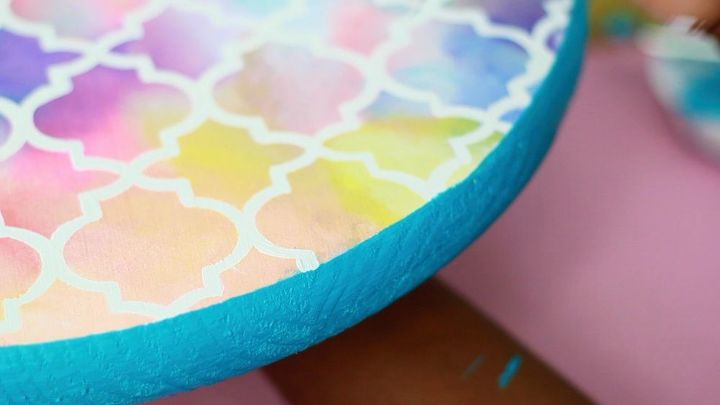
When the top is dry, paint the side of the tray and paint the bottom as well. Once the wood is completely dry, spray with clear acrylic spray paint in a well ventilated area. This will protect it from any food, and water and will also protect it from fading.
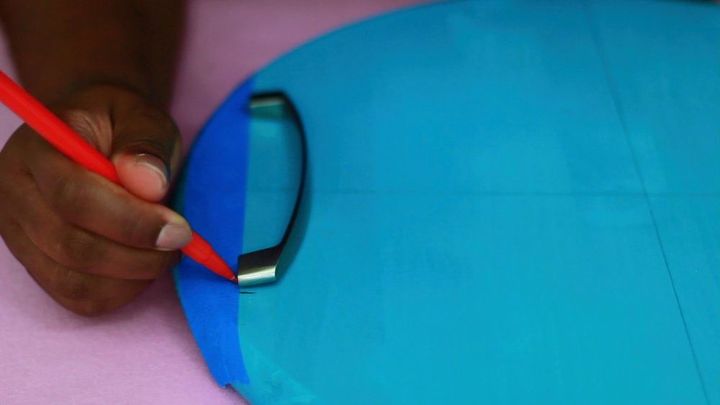
Find the center of the tray and draw lines both vertical and horizontal. Take painter’s tape and align it along the edge of the board.
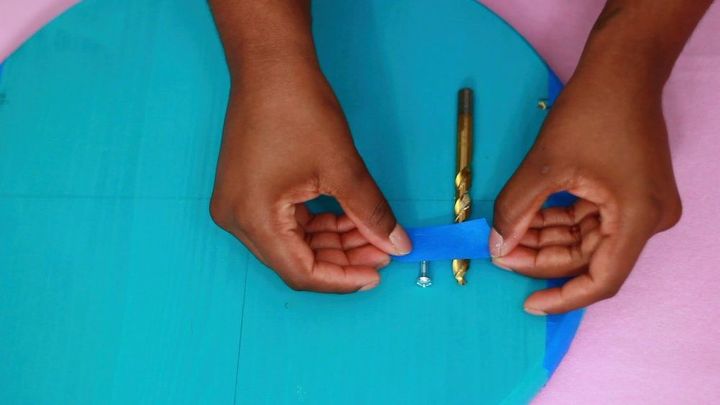
Next, find a drill bit the same size as the body of the screw. I also measured the length of the screw and added painter’s tape to the drill bit to let me know when to stop drilling. Repeat that on all four sides.
Next, screw the screw into the hole and let it peak through the other side just a little. Repeat on the other side for the same handle and once both sides are peaking through, attach the handle. Repeat on the other side.
Once you’re happy with the placement of the handle, flip over the tray and add wood filler to the holes you created with a spatula.
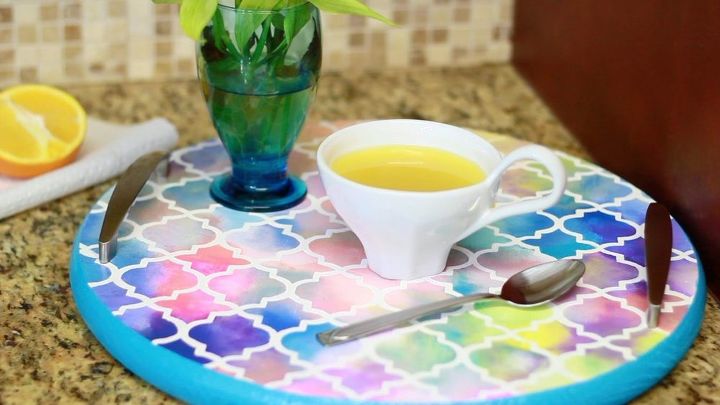
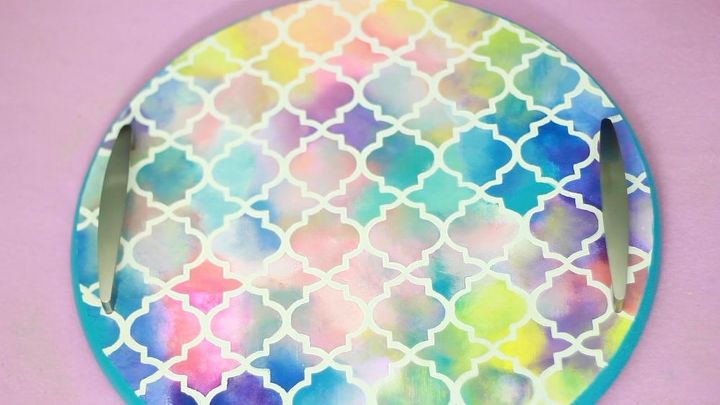
Voila, you're done! Isn't this GORGEOUS?! Don't forget to check out the video tutorial and subscribe to my YouTube channel for more videos!
{
"id": "3722965",
"alt": "",
"title": "",
"video_link": "https://www.youtube.com/embed/h8x61qxvwzc",
"youtube_video_id": "h8x61qxvwzc"
}
{
"width": 634,
"height": 357,
"showRelated": true
}
Click to watch the video tutorial!

Want more details about this and other DIY projects? Check out my blog post!
Comments
Join the conversation
2 of 74 comments
-
Your choice of colors and blending are beautiful.
-
Real pretty......I like your color code......I think it is real clever!!


Frequently asked questions
Have a question about this project?
Did you countersink the screw on the backside of the tray? If not, it would scratch surfaces it's placed on.