


My Rustic Barn Wood Mirror
10 Materials
Be sure to check out my blog for more detailed instructions on this fun DIY!
http://wp.me/p8otsq-3Q
Inspiration struck while shopping around at a local antique store. I fell in love with this neat mirror surrounded by thick barn wood. This particular mirror was a little too pricey for my budget bathroom remodel project so I decided to start a little DIY side project.
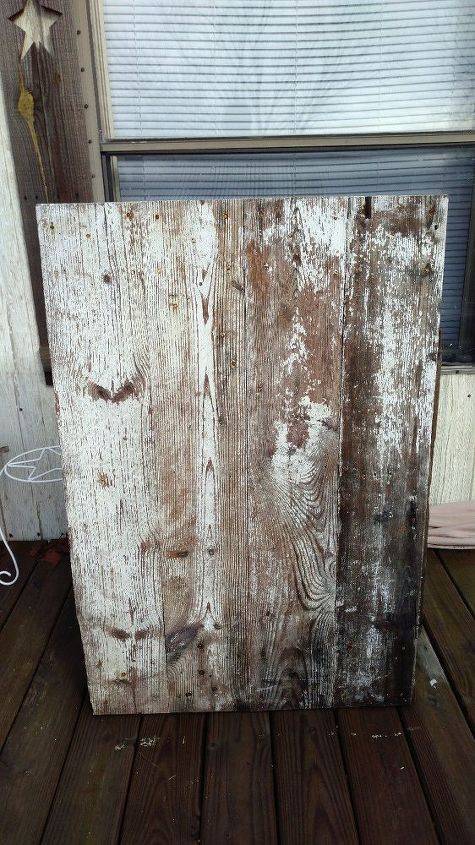
This little barn door had been sitting around for quite some time just waiting to be repurposed. It turned out to be the perfect size and I loved the chippy white paint. I'm a sucker for white barn wood!
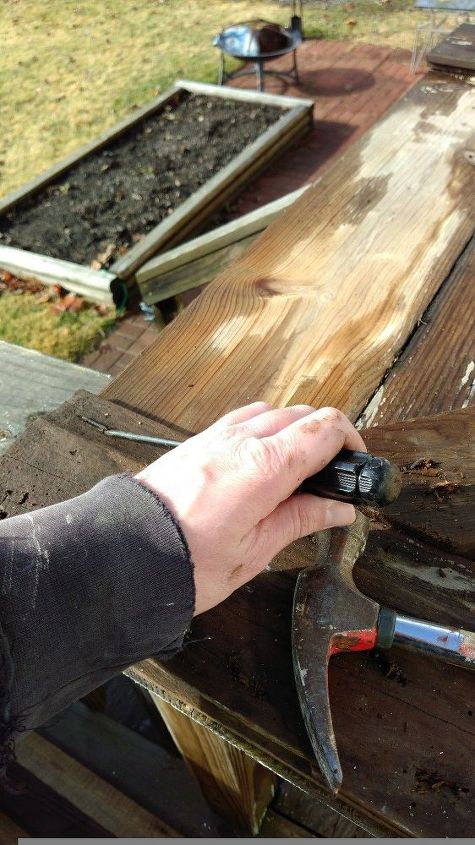
I used a flat head screwdriver and a hammer to disassemble the old barn door.
After the nails were removed, the door came apart with a few whacks of a hammer.
I chose to leave some of the nails. I think the rusty nails give the wood a little more character. The nails were pretty long so I cut off the excess with a bolt cutter, then hammered the rest flat into the wood to keep the nails in place.
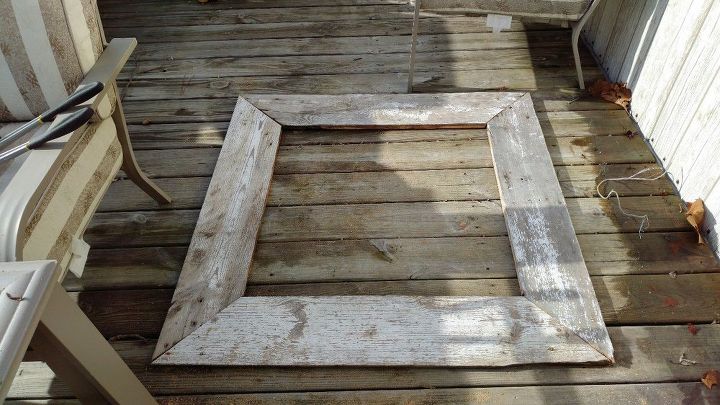
Next, I cut each corner with a circular saw at a 45 degree angle. I laid them out on the deck to make sure everything lined up. I made a few more small cuts and arranged and rearranged the pieces until I was satisfied with the result.
I gave each board a good scrubbing with some mild dish detergent and water and set them out to dry.
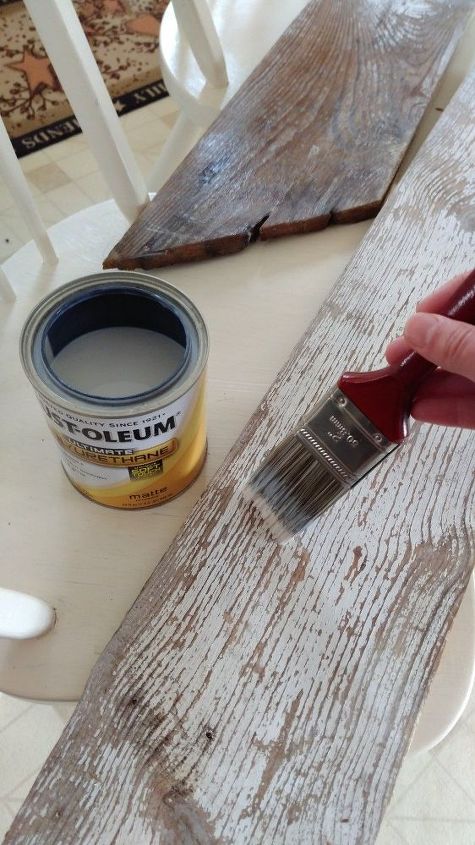
The wood would be in a bathroom so I wanted to make sure it was protected from moisture. I used two coats of matte polyurethane to seal the wood. This would also prevent the old paint from chipping and flaking all over the bathroom.
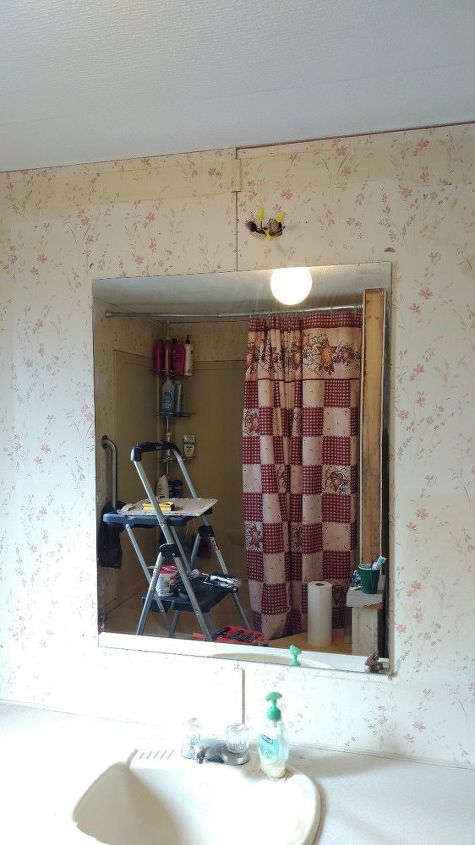
I had originally planned to install the vanity light above the mirror frame but discovered this "beautiful" hole that was knocked in the wall that the old vanity hid. I would just cover up this hole with the new frame and attach the vanity light directly to the frame.
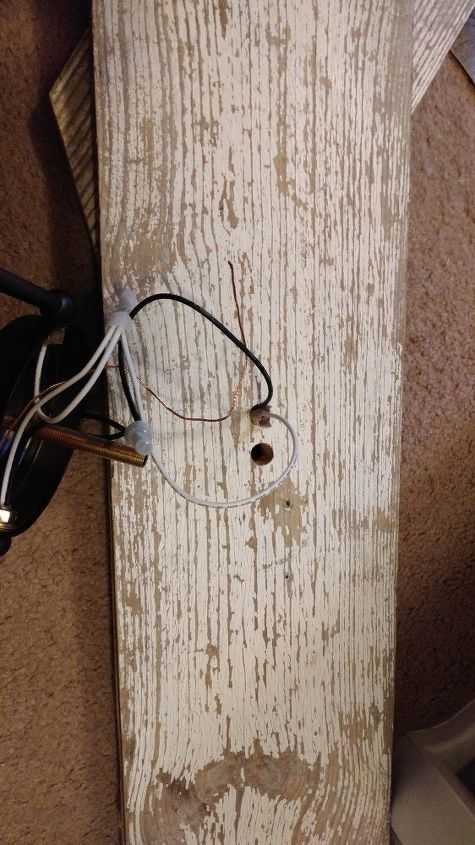
I started off by finding the center of the barn board that would be the top of the frame. I drilled one hole in the center of the board and one about an inch to the left.
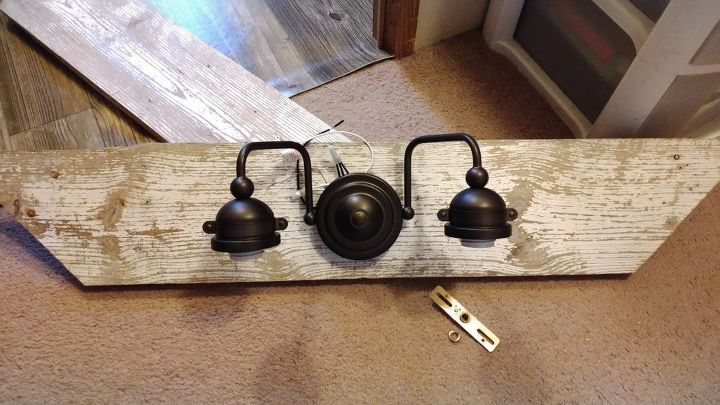
I ran the wiring through the left hole and bolted the light fixture down through the center hole.
I turned off the electricity at the breaker box and wired the vanity light. I then used two screws to attach the barn board to the wall. I popped in two Edison bulbs and turned the electricity back on to make sure everything worked properly.
I was unsure if or where a stud was on the left and right sides of the mirror so the two side boards were attached to the wall with liquid nails. Lastly, the bottom board was attached with a screw on each end.
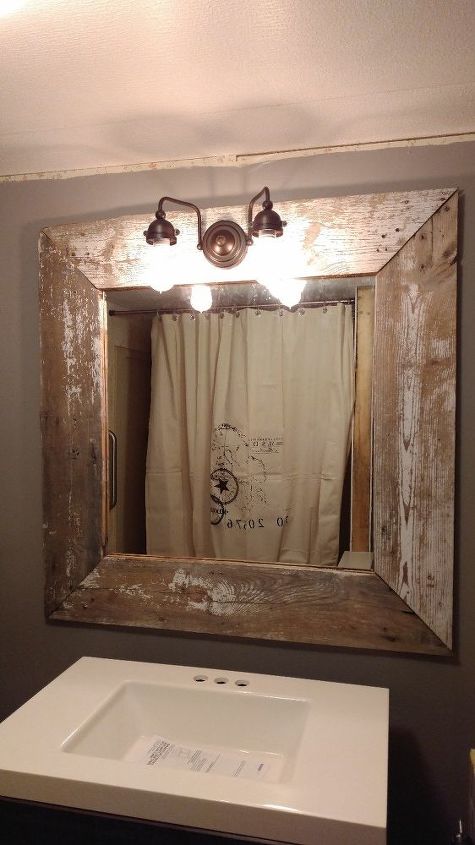
Voila! Now my bathroom mirror makes a statement!
Check out my blog for more detailed instructions!
http://wp.me/p8otsq-3Q

Want more details about this and other DIY projects? Check out my blog post!
Comments
Join the conversation
2 of 25 comments
-
Love the natural look. You can take it to either the seaside or mountainside decor and it will just pop. Great job. Thanks for sharing.
-
One of the best mirror frame ideas I’ve seen, I love it and am definitely saving this idea! Thanks for sharing!


Frequently asked questions
Have a question about this project?